- Joined
- Oct 9, 2020
- Messages
- 2,242
- Points
- 488

Well done!A flawless update
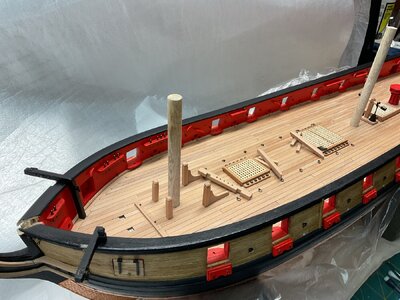
I was telling my wife how taking close-ups of our builds really shows the slightest flaws. So she came up with a solution for my latest update.
View attachment 453999
 |
As a way to introduce our brass coins to the community, we will raffle off a free coin during the month of August. Follow link ABOVE for instructions for entering. |
 |
 |
The beloved Ships in Scale Magazine is back and charting a new course for 2026! Discover new skills, new techniques, and new inspirations in every issue. NOTE THAT OUR FIRST ISSUE WILL BE JAN/FEB 2026 |
 |

Well done!A flawless update
I was telling my wife how taking close-ups of our builds really shows the slightest flaws. So she came up with a solution for my latest update.
View attachment 453999

Thanks for the advice Jack but I am not using the word “older” in this householdI believe the use of an older model phone and poor lighting would yield the same special effect.lol
 .
.did she use the drone while taking the photo?A flawless update
I was telling my wife how taking close-ups of our builds really shows the slightest flaws. So she came up with a solution for my latest update.
View attachment 453999
She is younger than me but the word “drone” will also not be used in this householddid she use the drone while taking the photo?
 .
.BrilliantA flawless update
I was telling my wife how taking close-ups of our builds really shows the slightest flaws. So she came up with a solution for my latest update.
View attachment 453999
Roger on that!Everything is so clean and 'just so' Roger. I love the way you work!
Everything is so clean and 'just so' Roger. I love the way you work!
She is looking wonderful !!!
Roger on that!
Thanks Uwe. (I took the camera off my wifedefinitely the model is worth to make closeup photos
 ).
). .
.
Thanks Paul, I am not telling my wife you said thatClever!

very nice !Starting the carronades
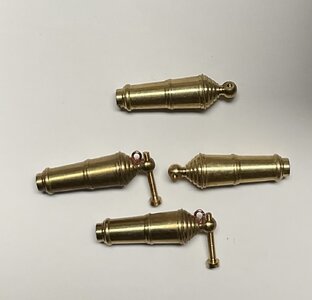
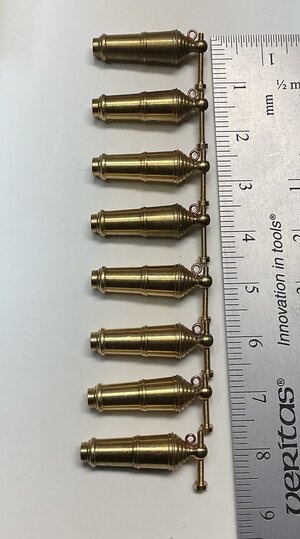
A small update but once again, for me, a fiddly time consuming part of this build. I mentioned some while ago I changed out the kit supplied, out of scale, 24 pounder carronades for brass 18 pounders from Caldercraft. I’d seen other notable Syren builds where the modeller had done this but then needed to add tiny components to increase modelling realism on the carronade, such as the breech line ring. So I challenged myself and started with those breech rings, which are non-existent on the Caldercraft carronades.
Firstly, I researched the size of a breech line ring but found quite a variation from different sources. Rather than try and bend, then solder, scaled brass rod I decided to drill into the ass end of the carronade and use an eyebolt. My intention is to then build up tiny slivers of solder at the base of the ring to give a weld effect. Not sure how that will go but it will be fun trying. I also have to think about how I’m going to do the lug and brackets. I seem awfully slow compared to some of your excellent builds but I enjoy the challenge of reading, learning and then trying different techniques and approaches.
So, early days as I work away on the carronade additions but a photo or two to show what I am trying to do.
Thanks for following along as I learn these new skills. The good news is you don’t have to listen to the cursing.
View attachment 456412
View attachment 456413
Thanks Jeff. I’ve been messing with the carronade lugs and brackets all morning. I was trying to do them with brass but I’m having a heck of a time trying to cut and size them. I reckon a rethink is in order.very nice !
 .
.
Roger, I am following the build and your work on the model is amazing! I have just purchased this kit from Model Shipways and it will be my next build after I complete the Vanguard kit of HM Sherbourne.When grown men cry…
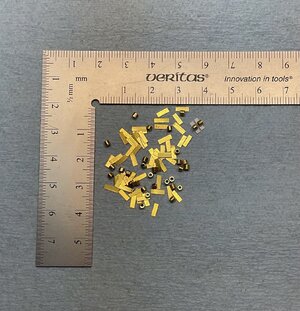
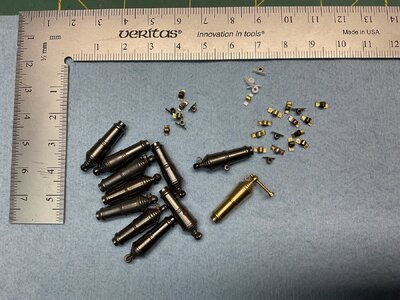
Work progresses slowly on fitting out the 16 brass replacement carronades. I initially cut 32 scaled brass strips (plus spares) for the bracket plates. I progressed to enough tiny brass tubing pieces for the bracket end swivels and also the lugs underneath the carronades. I have been using a scale drawing of a 64 pounder carronade with mountings and then reducing to size for my 18 pounders. It has sort of worked but I’ve had to revise my processes, techniques and type of materials multiple times.
View attachment 461137
I laid out all the little pieces I made a couple of weeks ago then took a photo. Brushed my arm across the workbench and most of those brass pieces flew across my work space and disappeared into the workshop bilges. You think grown men don’t cry! A call for help to my wife resulted in a modest recovery of parts. I think she enjoyed the quality time as we crawled around the floor and under the bench, but many pieces went missing.
So I started cutting brass again. A few weeks have gone by since my last post but I thought a messy update was better than none. The parts are obviously not cleaned up yet. Thanks for following along, comments, critiques and sympathetic tears are very welcome.
View attachment 461138
