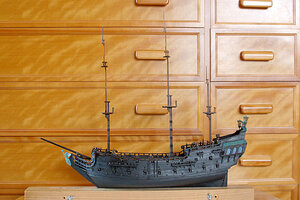
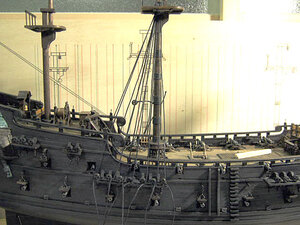
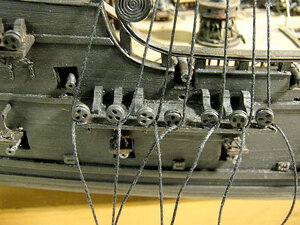
The Black Pearl

PART 26


BP1-72-26-001.jpg
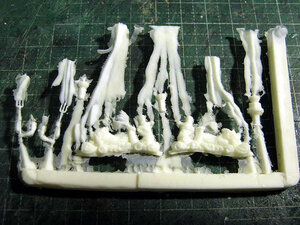
The resin was cast on a mold of Poseidon and the fish monster on the upper part of the stern,
which was molded with silicon.
The silicon type also has a lantern base.
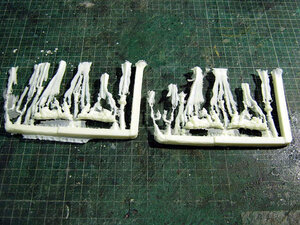

BP1-72-26-002.jpg
I only need one copy, but I'm a crappy one, and I'm just going to duplicate the backup.
For now, it's safe to have two.

BP1-72-26-003.jpg
This is a duplicate image. The burr and the air bleeding are always amazing... (sweat!)
Remove burr and air vents cleanly, assemble Poseidon & monster fish, paint & stain.
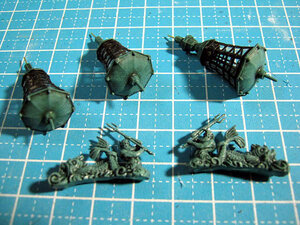
The lantern base was also painted and stained by adhering to the lantern I made last time.

BP1-72-26-004.jpg
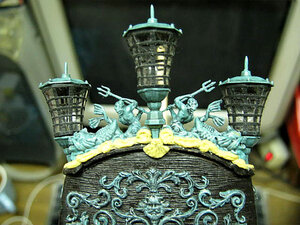
A painted lantern and statue.
A 0.5mm brass wire was placed under the lantern base to make it easier to install on the top of the stern.
Even so, the reproduction of the Zvezda Poseidon statue is wonderful! !!

BP1-72-26-005.jpg
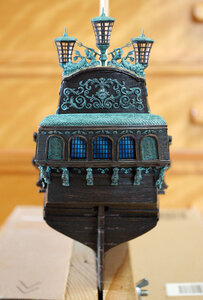
I immediately installed it on the top of the stern.
Lanterns are punched and inserted, and Poseidon & monster fish have gaps,
so I glued Tamiya epoxy molding putty. The part that looks ocher is Tamiya epoxy molding putty.
It's not completely dry yet, so it's only after the paint has dried, but the relief part of the
waves is a bit miserable, so I'm thinking of trying with epoxy molding putty.

BP1-72-26-006.jpg
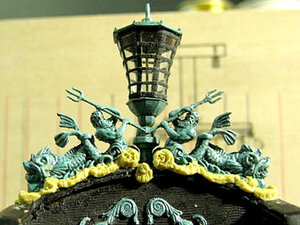
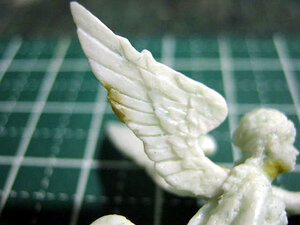
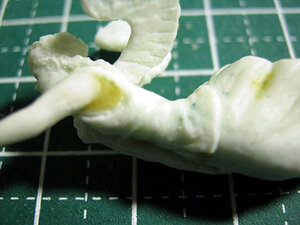
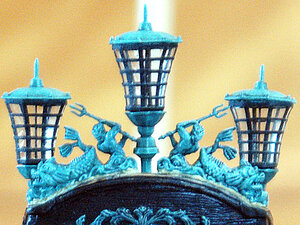
I couldn't do anything because the epoxy putty wasn't dry, so I took a close-up photo.
When I raised the ASA sensitivity and shot, the image got rough. Tohoho...
I like the mold on the back side.
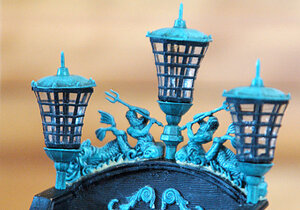

BP1-72-26-007.jpg
This is a close-up image from the front left side.
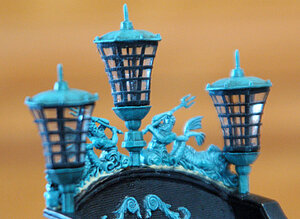

BP1-72-26-008.jpg
This is a close-up image from the front right side.
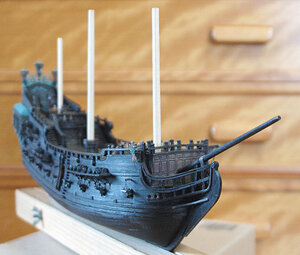

BP1-72-26-009.jpg
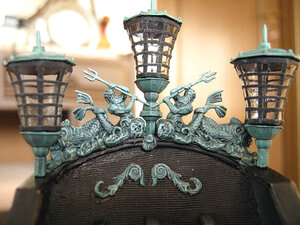
For the time being, it's the whole picture from the bow side.
The back is out of focus.
Recently, there are many things that are "toho-ho".


BP1-72-26-010.jpg
It is a picture from directly above after a long time.
The stern part is gradually completed, but it will continue. When the stern part is completed,
we will start making figure heads.
 
PART 27
BP1-72-27-001.jpg
I made a relief of waves on the balustrade on the upper part of the stern and a
relief like a scallop at the center with epoxy putty.
I don't really understand because the details are white.
For the time being, it's wavy... but I can't say anything unless I paint it...
If it looks like that, it's OK.


BP1-72-27-002.jpg
Here, the relief of the wave on the front side and the relief that the center part is not
clear are added with epoxy putty.
For the time being, it looks like a wave, but I can't say anything unless I paint it...
Here too, it's okay if it looks like that.


BP1-72-27-003.jpg
It is a relief coating of waves. It will be OK if it looks like that.
Apply the blended lacquer light green with a brush, dry it, apply a thin black ink
with enamel black, wipe it lightly and dry.
After that, mix light gray with light green, dry brush and finish painting.


BP1-72-27-004.jpg
The relief of the wave on the front side was also painted at the same time.


BP1-72-27-005.jpg
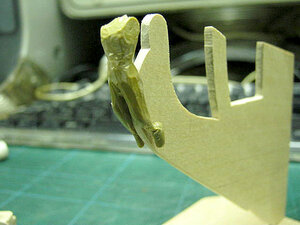
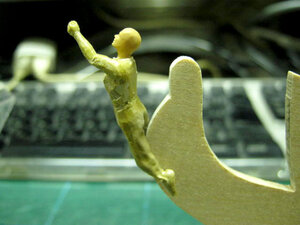
Make a figure head.
I made a worktable for the figure head so that it is easy to add and pull the figure head with putty.
When I made the 1/60 BP figure head, I found it convenient to have a workbench, so I made it again.


BP1-72-27-006.jpg
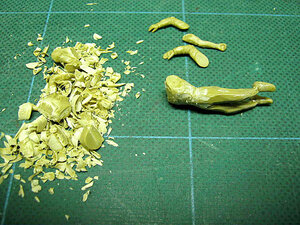
I will make the body of the figure head of 1/72BP using the arm and body of this 1/48 soldier.


BP1-72-27-007.jpg
I used the standing person from the waist down and the crouching person's torso from the waist up.
The legs are heated and bent.
I will wear clothes with epoxy putty, so if I can make a line of the body with plastic,
I will further scrape it and make it nude.


BP1-72-27-008.jpg
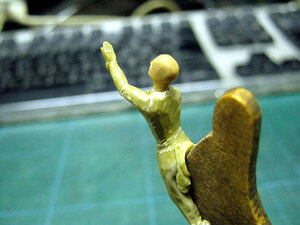
Is it like this? It's pretty good, so I'll attach the head and left arm.


BP1-72-27-009.jpg
Oh! It feels good. I painted the head with Sandy Brown after I made it last time.


BP1-72-27-010.jpg
It is an overnight play until the Tamiya cement to which the body is adhered hardens.
I will still sharpen the body!


BP1-72-27-011.jpg
After playing overnight, I scraped and glued my right arm to fit the body.
The workbench was painted with woodworking oil.


BP1-72-27-012.jpg
I changed my left hand from Goo to Par.


BP1-72-27-013.jpg
Also, it is an overnight play until the adhesive cures.
The stern part is almost completed, and this time it is the work of the figure head.
It takes time to cure the adhesive and putty.
 
PART 28


BP1-72-28-001.jpg
Crafting a figure head
I removed the ears from the heads of the other figures and glued them to the head of this goddess.
Use Cemedine's epoxy putty to easily add volume to your outfit.
Cemedine's epoxy putty cures quickly and in about 3 to 4 hours.
For me, it is an epoxy putty that is just right for making a groundwork.


BP1-72-28-002.jpg
I attached the volume of the waist costume.
Take a photo until it cures.


BP1-72-28-004.jpg
This is taken from the left


BP1-72-28-003.jpg
This is taken from the right side


BP1-72-28-005.jpg
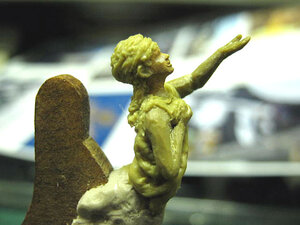
I used Tamiya Epoxy Putty to put on my hair, but it's quite about because I don't know what to do.
It looks like I'm wearing a hair band... It looks like my braids are coming out from behind my ears...
The costume looks like a long cloth wrapped around the body, and is held together with your right
hand and held down by your chest...
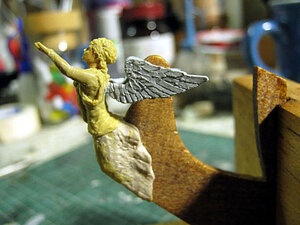
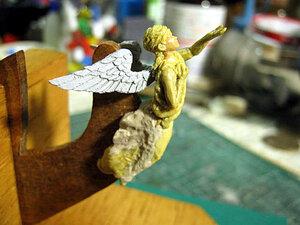
The wings will be made with plastic boards after the costume and hair have hardened.


BP1-72-28-006.jpgBP1-72-28-007.jpgBP1-72-28-008.jpgBP1-72-28-009.jpg
The figure head workbench was broken, so I remade it. I made it while thinking that the front
stand was a little big, but it was big. I hooked it on my arm, dropped it from the desk and
broke the bottom of the table. Well, it was a plate with a thickness of 3 mm, so it can not be helped.


BP1-72-28-010.jpgBP1-72-28-011.jpg
With such a thickness, it will not break even if dropped.


tenshi-hane-jpg.jpg
It is a work of the wings of the back. I made a wing pattern with paper that fits the actual
thing, cut it several times, made it a good size, read the pattern with a scanner, took it in
as a rough sketch with the illustrator, and drew a drawing of the wing and the feather.


BP1-72-28-012.jpg
Attach it to a 1 mm thick plastic plate...


BP1-72-28-013.jpg
It was cut out with a nipper and a design knife.
It was so small that it was hard to cut.


BP1-72-28-014.jpg
Peel off the paper, put the back of the wing over the back of the wing, and sandpaper to make it thin.


BP1-72-28-015.jpg
Copy and print many wings on A-4 size, and stick the wings one by one.
How many copies did you make...
I got a lot...


BP1-72-28-016.jpg
I managed to finish pasting. This is the front side of the wing.
This is the back side.


BP1-72-28-017.jpg
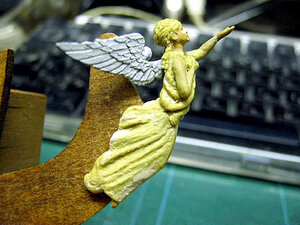
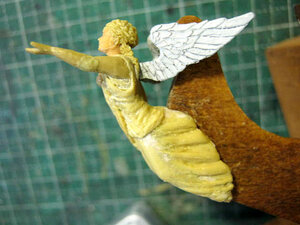
I set it on the back of the goddess who was made halfway and brush-painted Prasaf.
This is taken from the left side


BP1-72-28-018.jpg
Taken from the right


BP1-72-28-019.jpg
This is taken from the front
Both the wings and the goddess are rough, so the surface is uneven.
Prasaf is not dry yet...
Wrinkles and surface finish of clothes are next.
I'm tired of making wings.
I also have to make a little bird to hold...
 
I found Mellpapa's work in creating figures and carvings interesting. I have used the same technique of purchasing model railroad figures, figures for miniature fairy gardens and figures for doll houses. I used the figures and heated them to bend them, cut off heads and glued them on other bodies, switched arms and legs to create figures. I have also taken figures and using a Dremel sanded them flat on one side for relief carvings or recarved them. Once I have the figure I will use Latex rubber and make a mold for resin casting.
 
Last edited:
PART 29


BP1-72-29-001.jpg
The wrinkles on the left skirt were properly covered with Tamiya epoxy putty.


BP1-72-29-002.jpg
It looks like this when enlarged.


BP1-72-29-003.jpg
Wrinkles were also appropriately placed on the right skirt.


BP1-72-29-004.jpg
If you expand it, it looks like this.
It is an overnight play to cure both left and right. a


BP1-72-29-005.jpg
I put the putty on the front hem. This is also waiting for curing.
When hardened, scrape. This kind of work will continue for a while.


BP1-72-29-006.jpgBP1-72-29-007.jpg
Shaving the wrinkled part of the skirt, applying sandpaper, putting up the putty again,
filling in the dented part... It takes time. It looks like it hasn't changed at all...
Somehow (sweat), and some wrinkles are different...


BP1-72-29-008.jpg
The wrinkles on the skirt make me feel a little uncomfortable...
Looking at the actual photo, the wrinkle shape was different... Gabyon. (Tears)
After all, I wore the wrinkle on the right side. Once it cures, reattach the left side as well.


BP1-72-29-009.jpg
Since the wrinkle on the right side has hardened, the wrinkle on the left side was also scraped
off with a design knife and a new wrinkle was added.
From the beginning, it's a matter of carefully looking at the actual picture and putting the putty on it..
.

BP1-72-29-010 (1).jpg
I started to put up putty while looking at the actual picture, but I am not experienced in figure
molding, and to be clear, it is an amateur, so it does not look like...
Well, it's crap.
I'm not good at this kind of work... (Tears)


BP1-72-29-011.jpg
The left arm that I stretched out seems to be very short, so I cut it with my elbow,
put a brass wire to make it about 1 mm long, and filled the gap with putty to clean it, but
it is difficult to balance.
If you don't stop at the right place, it won't finish forever...
You have to set a goal line! !
When this hardens, pour sandpaper.


BP1-72-29-012.jpg
Bird's work
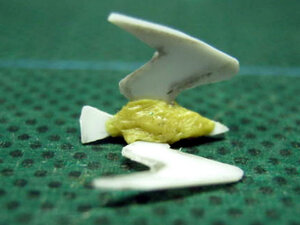
Cut out a bird shape from a plastic plate 0.3 mm, bend the wings and put putty on the body, waiting for curing.
Once hardened, cut out and serve with putty. Take a photo until it cures.


BP1-72-29-013.jpg
BP1-72-29-014.jpg
Well, that's all for today. I'm tired of wrinkling and reattaching. Tohoho...
 
PART 30

BP1-72-30-001.jpg

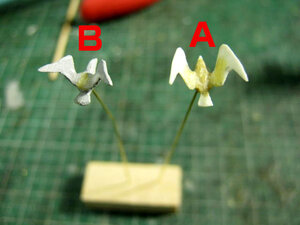
A is a bird I made last time, but it is a little big, so I made a little smaller bird B.
Still, I think it was a little big.
But it's just too small to make smaller ones, so I'll go with this.


BP1-72-30-002.jpg
The goddess added a few wrinkles and applied the lacquer thinning solution to the brush
and stroked it. It seems that Epopate was familiar.
“If you apply the lacquer thinning solution to the brush and stroke the wrinkle of
Epopate, it will become familiar. , "Minisukeya" taught me. I am very grateful.
Even the goddess cannot be messed with anymore, so I will complete the prototype.
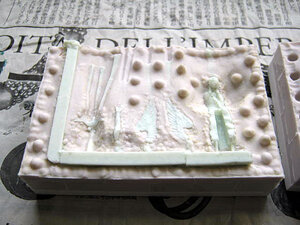
I will make a mold with silicone and duplicate with resin.


BP1-72-30-003.jpg
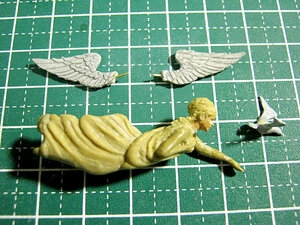
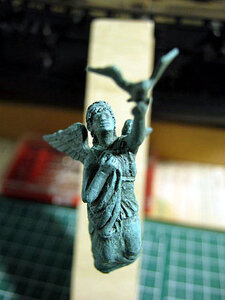
The left arm extended by the goddess was cut at the shoulder, making it easier to mold,
filling the clay goddess's parts, waxing the clay and pouring silicone.
I did this all at once, so I completely forgot to take a picture.
The picture shows a state in which the silicon has already been flushed, and this is left
overnight play. Tomorrow morning, we will wash plaster for lining.


BP1-72-30-004.jpg
Next day
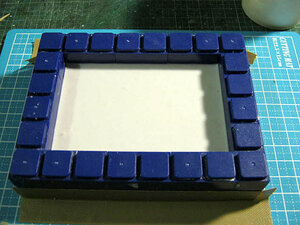
Drain plaster and lining is complete. Then, the plaster has set, so remove the frame
(Lego block), turn it over, and peel off the clay.


BP1-72-30-005.jpg
If you take the clay all at once, the parts may come off from the silicon, so slowly and carefully remove the clay.


BP1-72-30-006.jpg
When the clay is cleanly removed, apply wax (release agent) to the silicon part and harden the frame (LEGO block).


BP1-72-30-007.jpg
With the frames (Lego blocks) solidified, I just piled up the Lego blocks!
Pour silicon here and let it stand for about 8 hours, and when it hardens, pour plaster and finish lining.


BP1-72-30-008.jpg
I made a silicon mold, so it's a test shot.
It is in a state where the resin is poured and solidified, and one of the silicone molds is removed.
It looks like the resin has flowed neatly.


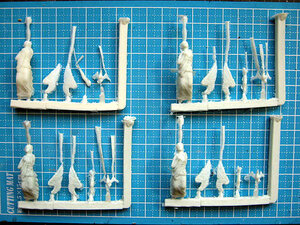
BP1-72-30-009.jpg
It seems to be good because the resin is spotted where bubbles are likely to accumulate first.
I made four copies of it in good condition.
Is it a spare spare?
I only use one...


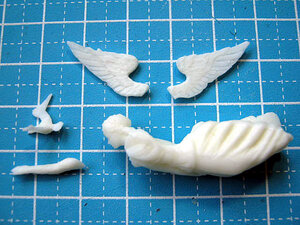
BP1-72-30-010.jpg
I removed it from the runner and removed the air and burr cleanly.
The resin is solid, but still soft.
Let's leave it like this for a while.


BP1-72-30-011.jpg
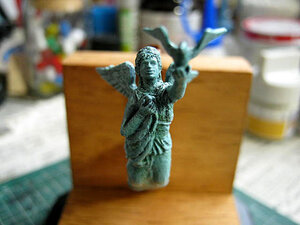
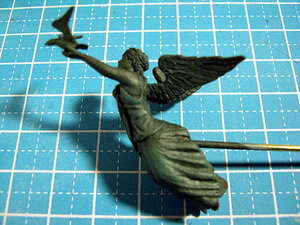
Since the duplicate is left until the resin completely hardens, I assembled
the disassembled prototype and painted it with a brush.
Bird, it was a little big. But why not emphasize it?


BP1-72-30-012.jpg
Shooting from the front...Well, it's a rough finish!


BP1-72-30-013.jpg
Well, since I'm tough, I've done my best so far, so llet's say it's good.
I'm kind to myself.
Wehhhhh! ! …(^▽^)b


BP1-72-30-014.jpg
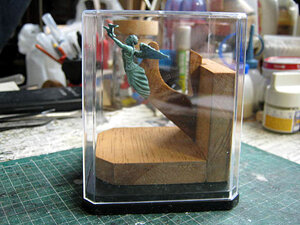
Let's put the prototype in the collection box sold at the 100 yen shop and decorate it.
eh? Should I attach it to the bow of BP?
No, I will decorate the prototype as it is in memory.
Now, we will assemble and paint the figure head resin replica in the next round.
I'm so tired... my blood pressure is rising... (laughs)
 
model builders seem to be limited in imagination when it comes to creating figureheads and stern carvings. We believe you have to start with a little block of wood and carve a figure. Mellpapa show us with a little reshaping, a bit of putty and some resin we can create anything from anything.

well done


what started out as an army figure


BP1-72-25-006.jpg

ended up as this

BP1-72-30-014.jpg
 
PART 31

Reproduction of the figure head reproduced with resin

BP1-72-31-007.jpgBP1-72-31-008.jpgBP1-72-31-009.jpg
Fill the perforated part with bubbles with putty. There were air bubbles in various places.
Also, since there was a step on the bonded part of the arm, I fixed it with putty.


BP1-72-31-010.jpgBP1-72-31-011.jpg
Paint the surface with an air brush.
further, Check for bubbles.


BP1-72-31-012.jpgBP1-72-31-013.jpg
Paint the original light green (lacquer type) with an air brush.


BP1-72-31-014.jpgBP1-72-31-015.jpg
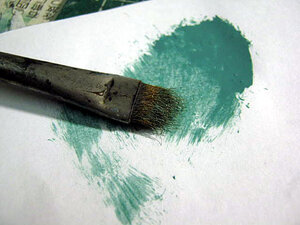
When the light green is dry, mix the frosted black enamel with the khaki drab,
thin it with enamel thinner, and apply it evenly in the same way as the slush.


BP1-72-31-016.jpg
Dry with a dry brush while mixing light gray with the original lacquer light green.


BP1-72-31-019.jpgBP1-72-31-020.jpg
It is an ordinary flat brush used for dry brushes.


BP1-72-31-021.jpg
When I used it only for dry brush, it looked like this.
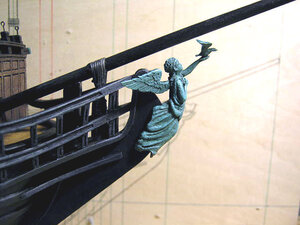
It is attached to the bow.
It fits perfectly without the use of adhesive.


BP1-72-31-022.jpg
Compared to the real one... It doesn't look like that~ ww The body line is also good, but the one I made...


BP1-72-31-001.jpg
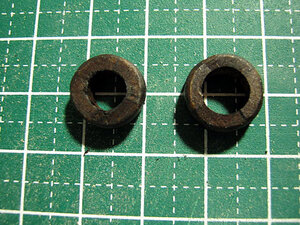
Well, did you say the name of this part? …Sure… Was it a mast coat ?
For the time being, I will make a parquet. Put in a compass...
It was called "mast wedge" instead of "mast coat" .
I'm sorry I made a mistake!
The bokeh has already begun...


BP1-72-31-002.jpg
Drill 6 mm and 7 mm diameters with a drilling machine... Cut all sides with a circular saw.


BP1-72-31-003.jpg
Then cut it into circles with a design knife and sprinkle with sandpaper...


BP1-72-31-004.jpg
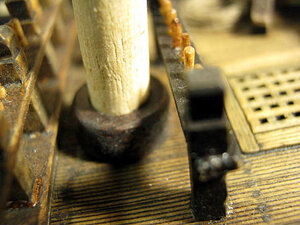
Paint with oil stain walnut, and after drying, adhere to the root of the foreground or mist must.


BP1-72-31-005.jpg
This is the root of the Mizun Must.


BP1-72-31-006.jpg
This is the fore mast.
I don't need it because the main mast has a capstan.


BP1-72-31-023.jpg
With the figure head attached, you managed to make a hull.
Next time, I will start working on the mast, but here is a picture of the whole thing.
This is the starboard side.


BP1-72-31-024.jpg
This is the port side.
It's actually difficult to say that it's made right and left.
Not the same.
There is a part with an error of about 1 mm when I measure it, and I do not notice it.
If you don't measure it, there are some places you will never notice. (Lol)


BP1-72-31-025.jpg
Here's a bit about painting the Black Pearl.
The outer panel is mainly painted with Campe Papio's oil-based oil stain, which is a walnut.
Furthermore, Mr. COLOR's German gray is thinned with thinner and painted on the whole outer plate,
and after drying, Tamiya enamel flat black is thinned and the whole outer plate is smeared and dried.
I left it for about two weeks until it was completely dry.
Finally the hull is completed. After that, the mast, the yard, the rigging, the sail, etc. are still tenco. (Lol)
 
Last edited:
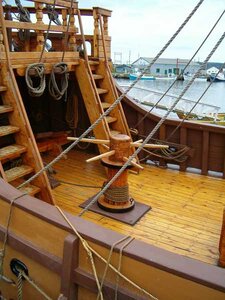
OK, first I'll admit that I haven't searched through every comment in this thread but it would be very time consuming. So, if my comments have been covered already please excuse me. I bought the Revell 1/72 kit of the "Black Pearl" over a year ago and was very impressed by the level of detail but not so highly impressed by the way the sails were attached to the yards, a throwback to old Pyro kits. I am also mystified at the location of the capstan wrapped around the base of the mainmast. I did a lot of online and book research and couldn't find an example of any sailing ship from any period with such a configuration.

The sails I can live with or detach them. I haven't decided which way to go. I guess, if I am content to build the model as the ship from the movies, leaving the capstan as is will be appropriate but I am also considering modifying the main deck and lower mainmast and relocating the capstan to a lower deck. Has anyone seriously considered this option? Comments are welcome.
 
View attachment 162536View attachment 162537View attachment 162538View attachment 162539
Now, this is the glass part of the lantern.
I made a hole in the 2mm thick veneer that was slightly larger than the glass part of the lantern.
It's a hole through which the original shape of the glass part can easily pass.
It is a heat press using this plate.
I searched for blister packs made of PVC in the trash and cut them into appropriate sizes.
Stop it on the plywood board with a thumbtack.


View attachment 162540
Go to the kitchen and use a gas stove to smoke the PVC attached to the plywood.
The size of the fire is the smallest.


View attachment 162541
When the PVC rubbed in the gas stove turns into tarn tarn, press the original shape of the glass.
Munch!


View attachment 162542
Then, a glass part of a lantern is formed.


View attachment 162543
Remove the vinyl chloride from the plywood board and cut it off.
After this, I tried to heat press about 3 times.
One is spare.


View attachment 162544
Insert one of the cut glass parts into the original shape.
It's a preparation for putting in the frame.


View attachment 162545
Whiteboard wire drawing tape, which will be used to attach the glass frame of the lantern.


View attachment 162546
The width of the vertical frame and the top and bottom are 1 mm width without changing the width of the tape.


View attachment 162547
The four frames inside were cut a little thin, but they didn't have the same thickness.


View attachment 162548
Lantern parts are available. The horn on the ceiling was replaced with a brass wire 0.8mm.
The lower part of the lantern is equipped with 0.5mm brass wire for ceiling support.
As a spare for the lantern glass part, I heat-pressed four, but I never used it.


View attachment 162549
I assembled it because I had all the parts. The adhesive was a quick-drying type and I used "Bond G17".
that? ...There are some horns that are skewed.


View attachment 162550
I painted the basic light green with a brush.
Dirt painting is done when adhering to the stern part. For now, it's dry as it is.
I fixed the horn that was tilted.


View attachment 162551
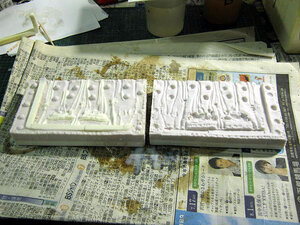
The mold that I was molding with silicon was made. The gypsum lining is also hardened,
but it's still moist, so wrap it in newspaper and let it dry.
This time, I was preparing for the stern part and the figure head, but for the time being
I got a lantern. I have more things to do, but I'll do it next time.
This is a very good technique - a very good tutorial
 
. I am also mystified at the location of the capstan wrapped around the base of the mainmast. I did a lot of online and book research and couldn't find an example of any sailing ship from any period with such a configuration.

I do not understand your comment about wrapping a capstan around the base of the main mast. Here is a capstan I do not see how you can wrap that round the base of the main mast


I did a lot of online and book research and couldn't find an example of any sailing ship from any period with such a configuration.

i can see why you have not found any examples because a capstan is a stand alone thing and it is built to rotate, wrapped around a mast would not rotate


The%20Matthew%20041.jpg
 
Part 32


BP1-72-32-001.jpgBP1-72-32-002.jpg
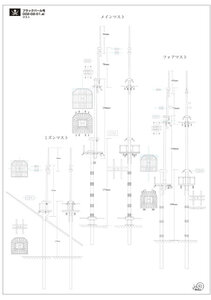
It is a drawing of the mast. I changed the BP No. 1/60 drawing to 1/72, but there were
some new points and I revised the data. This is also troublesome, and when I fix it in
one place, I'm here because it's all related here and there. Especially for top parts.
Then, I make it according to the drawing, but it does not always follow the drawing.
I can't keep up with the drawings because of the craftsmanship... There are various things
such as the thickness does not match ...
The drawing is "Meisei", and we will make it according to the actual item.
I wonder why I drew the drawing.


BP1-72-32-003.jpg
I make it from the main mast.
The main lower mast and the main top mast are manufactured, and the main lower mast is
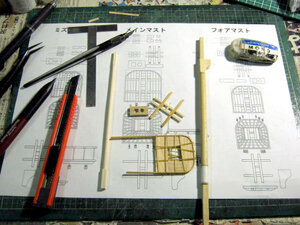
machined from Ramin bar. The main top mast is machined from cypress. The top platform
is combining 0.5 x 3 mm cypress and bending the outer frame material 1 x 2 mm.
The platform of the girder on which the platform rides was also built with thin cypress.
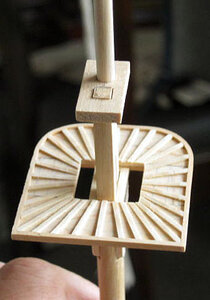
A plate with square holes and round holes is a mast cap.


BP1-72-32-004.jpg
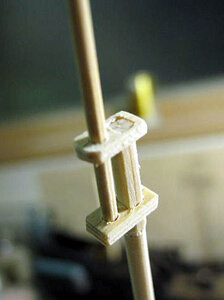
It is a cap and a double girder.
In the cross girder, the timber in the front-rear direction is a trestle tree and the
material in the lateral direction is a cross tree.
The lower cross section of the lower mast is in the back of the hole of the assembled girder,
and the bottom cross section of the top mast is in the front hole.
The cap has a square hole with a lower mast cross section, and the top hole has a top mast
cross section, so it is difficult to match the cap unless you proceed with the girder at the same time.


BP1-72-32-005.jpg
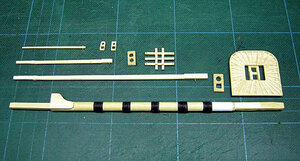
Main lower mast and main top mast.
The main lower mast was made by cutting a 8 mm diameter Ramin rod with a taper.
The main top mast was out of stock when I tried to use a 4mm square cypress,
so I combined 4 pieces of 2mm square cypress and glued them to make a 4mm square.


BP1-72-32-006.jpg
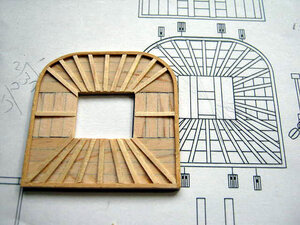
Platform here


BP1-72-32-007.jpg
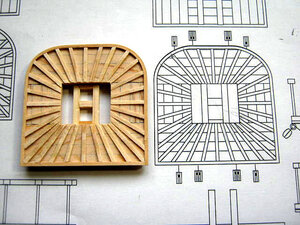
Platform Here is the bottom. I will continue to make additional works.


BP1-72-32-008.jpg
Stick the reinforcement material on the platform. The red arrow remains the timber. Cut this thinly
toward the hole.


BP1-72-32-009.jpg
I used to cut four pieces each after attaching the timber, but with a normal design knife
the blades are small and difficult to cut... but they are cut well.


BP1-72-32-010.jpg
I used an NT cutter M-500 replaceable blade exchangeable machining knife for shaving.
It's a knife that cuts plastic boards, but comes with a sharp blade and a plastic board cutter blade.
The knife blade of this is quite sharp, and it has the best sharpness. It is smaller than the blade of
the craft knife sold normally, and larger than the blade of the design knife and the art knife.


BP1-72-32-011.jpg
So it was just the right size to scrape the reinforcement.


BP1-72-32-012.jpg
It is a photograph compared to the drawing. This is the top surface, it was done like that.


BP1-72-32-013.jpg
This is the back side, it looks like this.
There is a different part from the one that I have, but I don't care (laughs)


BP1-72-32-014.jpgBP1-72-32-015.jpgBP1-72-32-016.jpg
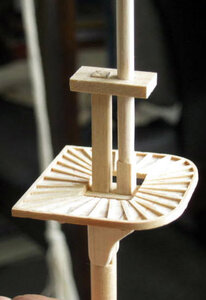
The part that connects the main lower mast and the main top mast together looks like this.
The cap is a little big, so I will cut it later.


BP1-72-32-018.jpgBP1-72-32-015.jpgBP1-72-32-020.jpg
This is the part that connects the main top mast and the main top galant mast. It's getting
finer and finer, so it's tearing eyes! The cap is too sharp. I will sandpaper later.


BP1-72-32-021.jpgBP1-72-32-022.jpgBP1-72-32-023.jpg
It is the part that connects the main top galant mast and the main royal mast
(mast that holds the skull flag!). Well, it's a cap that I managed to do the second time
after failing twice.


BP1-72-32-024.jpg
It is a panoramic view of the main mast. It is a drawing that I used to say "easy",
but it would be convenient to have it. Instead of measuring with a ruler, I decided the
length of each mast according to the drawing! (Laughs)
I managed to make the main mast.
Looking at the completed main mast, I feel like I've won, but I'm a little wondering if I can maintain this quality and have two more masts...
I'm tired of my eyes.
I have no choice but to proceed with two masts.
 
Last edited:
PART 33


BP1-72-33-001.jpg
Each mast (main foreground)
Foremost Last time, I made the fore mast in the same process that made the main mast.
It is a complete set of fore mast parts.
Each part is combined to form a single fore mast, but the combined parts are very subtle.


BP1-72-33-002.jpg
Main mast
The main mast I made last time. It was disassembled from what was temporarily assembled.
It is a set of parts for the main mast.


BP1-72-33-003.jpg
Mizun Must
This was also made in the same process as the main mast.
It is a set of parts for Mizun Mast.


BP1-72-33-004.jpg
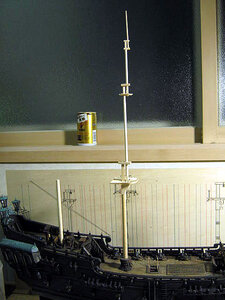
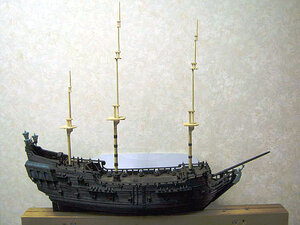
I tentatively assembled three masts and set them up on the hull. Each top platform will have
a handrail so we'll make it later.
I was finally able to make this far. I am excited when the mast stands!
I still have a yard, a sail, and rigging... Oops, I forgot. I will also make an anchor.

This time it was the shortest work description. But what I was doing was a very deep and delicate work.
(Lol)
Next is painting the mast and rigging the static rope. Oh yes! I'm going to make a pulley.
It's the most difficult part
 
That's a troubling capstan.
There is no capstan like it in the history of sailing ships.
It's the design of the Black Pearl as a movie prop.
A capstan that is not wrapped around the main mast is not the Black Pearl of the movie.
I didn't care about the history of sailing ships, I chose the Black Pearl from the movie.
:):)Thumbsup
 
I went back and checked, now I see what you are talking about. I have never seen a capstan around a mast I do not even think that would work.

as Mellpapa points out he is creating the Black Pearl as seen in the movie and not a "working version" of a sailing ship.

actually whoever created the prop would know that won't work, or they needed the deck space for the actors and a free standing capstan would be in the way.

I do not see any reason to not to move the capstan as free standing to make it more realistic. But by doing so as Mellpapa said it is no longer the black Pearl from the movies.


1594044095718.png
 
Last edited:
PART 34


BP1-72-34-007.jpg

I was thinking of making it a diorama for the scene of the dune in the movie "World End",
but then I had to hang a sail, and people who didn't see the movie "World End" said "What's this?"
Will be...
So, let's make it a BP, which grabs the wind with a sail and sprints over the sea.
It's the same as the 1/60 BP issue.
After all the sailing boat is the sea! !!


BP1-72-34-001.jpgBP1-72-34-002.jpg
Each mast (main foreground)
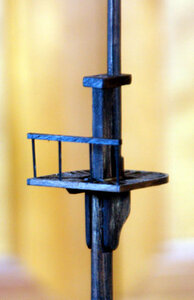
It is a handrail for the Mizun Must Top platform. The horizontal bar is a 1.5m x 1.5m cypress, and
the four columns are 0.8mm brass wires. This is the handrail for the main mast top platform. Fore-mast top platform balustrade.
Each of the 0.8mm brass wires is dyed with gun black and then painted with Mr. color matte black.


BP1-72-34-003.jpgBP1-72-34-004.jpgBP1-72-34-005.jpgBP1-72-34-006.jpg
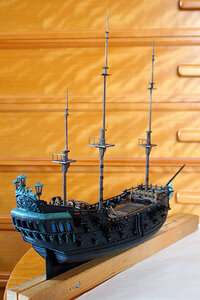
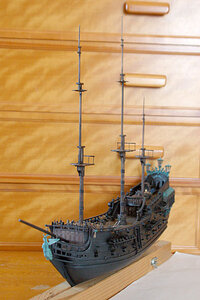
The mast is also painted, and the static cord is
always OK.
To commemorate, it is the whole picture before rigging.
It feels good.
I made it once with 1/60 size, so the second 1/72 size is the one who has progressed crispy.
Is it that much familiar to you?
I have to make a diorama stand for the exhibition.


BP1-72-34-008.jpg
It is the beginning of rigging, but it is still in the stage of preparation.
For the time being, there are rules about how to pass the rope on the top of the main mast.
Double shroud, single shroud. Two on each side (double shroud), and if the number of shrouds is odd,
one at the end (single shroud).
For more information, please study by learning books such as Kazuro Kusano's "Sailboat Model-Making Techniques"
or Kazunobu Shirai's "Sailboat Model Making Techniques."
Then, the shroud of the main mast is installed.


BP1-72-34-009.jpg
The shrouds alternate right and left.


BP1-72-34-010.jpg
Do not attach the dead eyes to the shroud yet,
but make it temporarily difficult to attach the dead eyes to the channel plate.


BP1-72-34-011.jpg
For the rope, dissolve the woodworking bond in water and rub it with a drip, then squeeze
it to prevent fluffing and dry it.


BP1-72-34-012.jpg
Build a dead eye on the middle of the bow sprit during the rope drying.


BP1-72-34-013.jpg
I also use thin threads.


BP1-72-34-014.jpg
Then attach it to the bow. Don't you understand because it's too up?


BP1-72-34-015.jpg
It looks like this. This is for Foresty.


BP1-72-34-016.jpg
Attach a dead eye to the shroud and assemble with a lanyard on the dead eye of the channel.
Should I say that I should tighten the mast? But the lanyard is only tied up.
After that, the main stay is temporarily assembled, and the lanyards in the vertical (stee)
and the horizontal (shroud) are tightened while watching each other.
This is a repeat of both the fore mast and the Mizun mast.
There is no special tool for rigging, so it's probably a 0.5mm brass wire assembled in an X shape.
This is a jig that adjusts the height of dead eyes. After that, Tamiya model's temple tweezers, nippers,
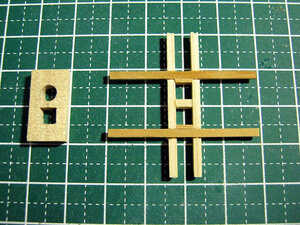
design knife... It is a tool that is usually used for model making.
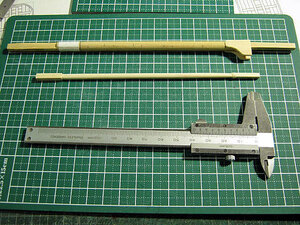
What else is "motivation" that will not let you down?


BP1-72-34-017.jpg
I have temporarily assembled the main stay. It is the red arrow part.
After the temporary assembly, tighten and tie Shroud-Stay's lanyard.
That's it for this time. Rigging will continue for a while.
I'm a bit worried if I can finish rigging without frustration... (laughs)
 
Back
Top