Take it easy and have a fast recovery! Get well soon!!
-

Win a Free Custom Engraved Brass Coin!!!
As a way to introduce our brass coins to the community, we will raffle off a free coin during the month of August. Follow link ABOVE for instructions for entering.
-

PRE-ORDER SHIPS IN SCALE TODAY!
The beloved Ships in Scale Magazine is back and charting a new course for 2026!
Discover new skills, new techniques, and new inspirations in every issue.
NOTE THAT OUR FIRST ISSUE WILL BE JAN/FEB 2026
You are using an out of date browser. It may not display this or other websites correctly.
You should upgrade or use an alternative browser.
You should upgrade or use an alternative browser.
the Colonial Schooner Hannah in 1/48 [COMPLETED BUILD]
- Joined
- Apr 20, 2020
- Messages
- 6,242
- Points
- 738

Hello dear friends
Today I back to business, after the condition of the relative is slowly improving. I focused on adjusting the thickness of the Frame's boards using the Proxxon Thicknesser DH 40.
The work continued for about two hours at about 50 boards at a temperature of 40 degrees.
At first I moved each board individually,
View attachment 20200904_132155.mp4
but later I came up with an idea to streamline the process of running 2 lays together and it worked well.
View attachment 20200904_134049.mp4
Attaches the picture of the result.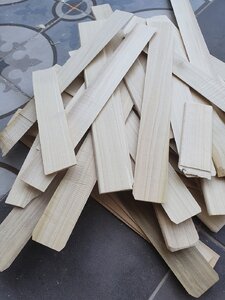
It's just fun to get back to work on the ship even if it's just in the preparatory work for building the Frame's
I wish to all of us lovely weekend
Today I back to business, after the condition of the relative is slowly improving. I focused on adjusting the thickness of the Frame's boards using the Proxxon Thicknesser DH 40.
The work continued for about two hours at about 50 boards at a temperature of 40 degrees.
At first I moved each board individually,
View attachment 20200904_132155.mp4
but later I came up with an idea to streamline the process of running 2 lays together and it worked well.
View attachment 20200904_134049.mp4
Attaches the picture of the result.

It's just fun to get back to work on the ship even if it's just in the preparatory work for building the Frame's
I wish to all of us lovely weekend
Lovely work, Shota!! It is nice to see tools in action, I can even see you are really enjoying using it! Would love to have one for me, but has no room... Oh well...
- Joined
- Apr 20, 2020
- Messages
- 6,242
- Points
- 738

I have returned to you my dear friends For the last two hours I have continued sawing the boards to create the parts of the Frame's A, U, V, W. Tomorrow I will continue gluing the parts and hoping to finish this Frame's group as well as a remake of Frame c that I initially created in cherry wood and the color is a bit noticeable next to the others.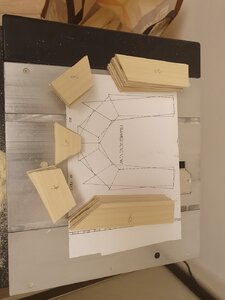
The reason I detail a little out of the ordinary and accepted is so that those who arrive at the site and are at the beginning of the journey will have as detailed documentation as possible.
we will meet in the next update

The reason I detail a little out of the ordinary and accepted is so that those who arrive at the site and are at the beginning of the journey will have as detailed documentation as possible.
we will meet in the next update
- Joined
- Jan 9, 2020
- Messages
- 10,566
- Points
- 938

Dear Shota. The detail that you provide is what makes your log special - so please do not change this. You are using your tools to great effect in your build - like Jimsky said. And on the subject of the tools - the more I look at them, the prettier those Proxxons are looking (not discounting the Byrnes though!)
Very nice progress and work Shota!
- Joined
- Apr 20, 2020
- Messages
- 6,242
- Points
- 738

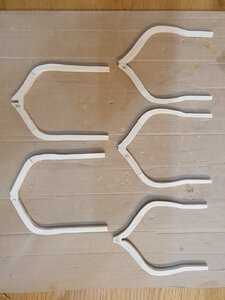
As I promised friends, there are updates from the process
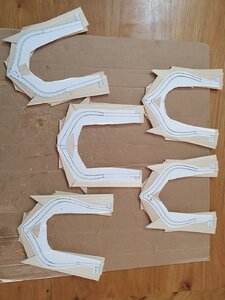
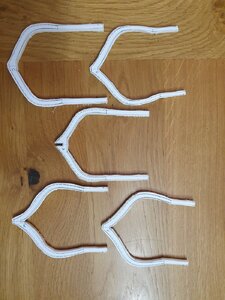
I managed with hard work to finish the preparation of Frame's A, U, V, W. and also Frame c.
I actually finished all the whole Frame's and now I move on to the split ones. There was no simple effort and concentration , but in the end of the process it was a great fun to see the result. Attaching a photos
wishes to all of us good & successful week


- Joined
- Apr 20, 2020
- Messages
- 6,242
- Points
- 738

Hello dear friends
After I finished making the whole Frames, in the last few days I focused on making the Cant frames.
The process began yesterday and hopes to be completed over the coming weekend.
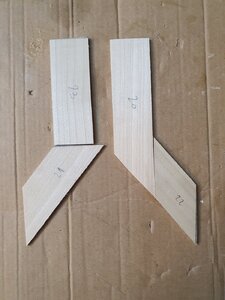
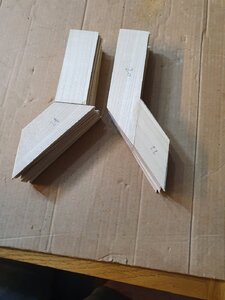
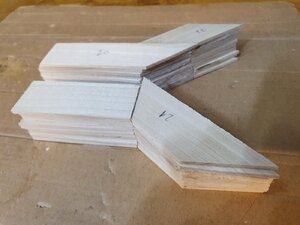
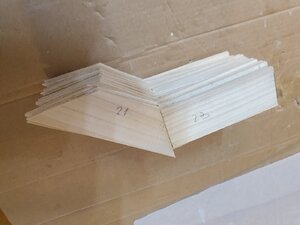
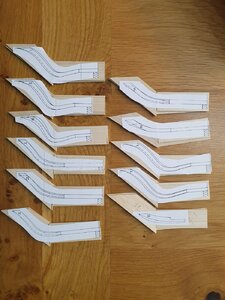
Here are the main points of the process: I Cut two copies of the frame blank pattern for half frames out so that I will have one each dotted and solid patterns. later I Make one each frame blank pattern, & cut totally 44 pieces of each pattern piece.
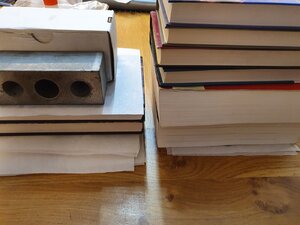
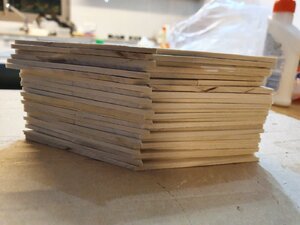
I glued the solid and dotted line patterns to the frames as I did with the whole frames. Then I glue the two layers up. After the glue dried I applied a Rubber cement the frame patterns to the frame blanks.During the weekend I sawed off the unnecessary areas according to the drawing and sanded according to the drawing in order to get the right shape and angles of the Cant frames.
I will let the pictures speak for themselves.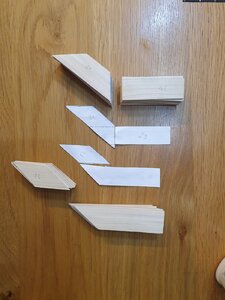


- Joined
- Jan 9, 2020
- Messages
- 10,566
- Points
- 938

This is a lot of preparatory work my friend - but at the same time it must be very satisfying to think that you made everything yourself. You can really look at the finished model one day and say: "It is MY ship". You have my respect!
- Joined
- Apr 20, 2020
- Messages
- 6,242
- Points
- 738

I'm get back to you guys with up update
Over the weekend I noticed that I did not create the required amount of Cant frames.
I first created 11, then it turned out that they are only of one side and there is a need to produce another 11 to the corresponding other side.
Of course their construction process was extended, and in the end I produced 11 pairs of Cant frames, meaning 22 Cant frames.
Please note that they are not yet completely ready because I have left to do the sandings at different angles along the continuous or dashed lines. Attaches a picture how Documenting the stage I have reached.
The process requires multiple time and patience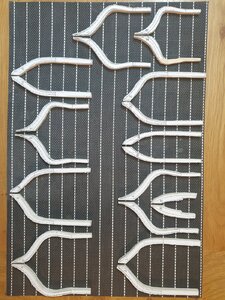

- Joined
- Apr 20, 2020
- Messages
- 6,242
- Points
- 738

Hello friends
Today I don't have update on the ship, I do have on a slight improvement I made in my Table saw made by prooxon.
The truth is I should have done this years ago, as most of you probably did near the time you purchased the saw.
I created an a new aluminum panel to develop from which rises the disc of the saw.
The picture will explain this better than my distorted English. The new board is the one attached to the saw and the old one on the drawing page.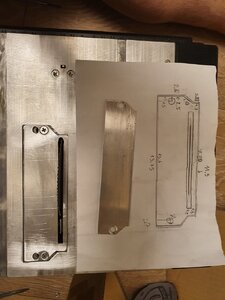
At least it's related and will help with the work for the the ship


Today I don't have update on the ship, I do have on a slight improvement I made in my Table saw made by prooxon.
The truth is I should have done this years ago, as most of you probably did near the time you purchased the saw.
I created an a new aluminum panel to develop from which rises the disc of the saw.
The picture will explain this better than my distorted English. The new board is the one attached to the saw and the old one on the drawing page.

At least it's related and will help with the work for the the ship
- Joined
- Apr 20, 2020
- Messages
- 6,242
- Points
- 738

Happy New Year my friends,
I have now completed the 114 episodes of Andrei KUDIN on the construction of the LE FLEURON.
I must point out that its construction and videos constitute a school at the highest levels that exist in the field of ship model building.
Besides, I continued to make the Cant frames of the Hannah. Mainly polishing and sanding works To achieve the complex angles in these special Frame's.
In addition, I created sanding cylinders that can be installed on top of a drill. This is a simple but effective replacement for the excellent sanding machine that can be used to sand rounded corners.
And of course I attended holiday meals full of all the goodies we cooked for new year meals.
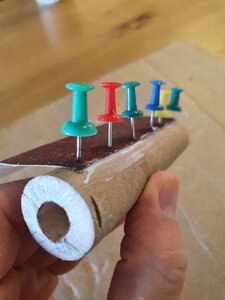

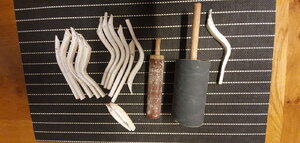
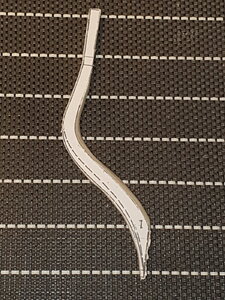
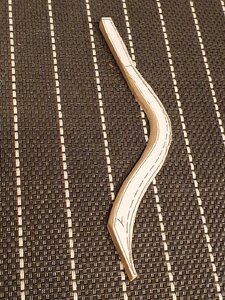
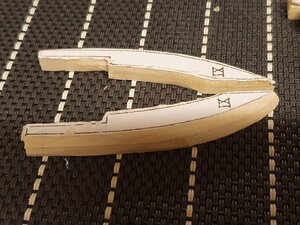
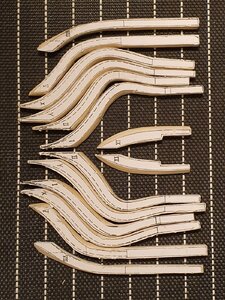
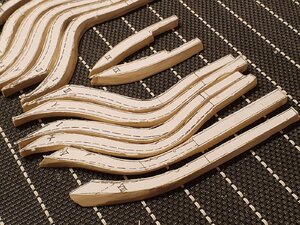 I want to say that I did not finish all the frames of this type and that I had more sanding and smoothing work left. Also drilling of the holes into which will be inserted the toothpicks that resembled the wooden nails that connected the boards in the ship parts.
I have now completed the 114 episodes of Andrei KUDIN on the construction of the LE FLEURON.
I must point out that its construction and videos constitute a school at the highest levels that exist in the field of ship model building.
Besides, I continued to make the Cant frames of the Hannah. Mainly polishing and sanding works To achieve the complex angles in these special Frame's.
In addition, I created sanding cylinders that can be installed on top of a drill. This is a simple but effective replacement for the excellent sanding machine that can be used to sand rounded corners.
And of course I attended holiday meals full of all the goodies we cooked for new year meals.


 I want to say that I did not finish all the frames of this type and that I had more sanding and smoothing work left. Also drilling of the holes into which will be inserted the toothpicks that resembled the wooden nails that connected the boards in the ship parts.
Last edited:
This is really good, Shota!!!! 

Can you slow down the feed speed to reduce the planer cutting head marks. Slower feed with the same cutting rotation will give you a more smooth surface reducing follow-up sanding. Same thing as rough cut lumber and S-4-S. Just wondering. PT-2Hello dear friends
Today I back to business, after the condition of the relative is slowly improving. I focused on adjusting the thickness of the Frame's boards using the Proxxon Thicknesser DH 40.
The work continued for about two hours at about 50 boards at a temperature of 40 degrees.
At first I moved each board individually,
View attachment 177064
but later I came up with an idea to streamline the process of running 2 lays together and it worked well.
View attachment 177065
Attaches the picture of the result.View attachment 177066
It's just fun to get back to work on the ship even if it's just in the preparatory work for building the Frame's
I wish to all of us lovely weekend
- Joined
- Apr 20, 2020
- Messages
- 6,242
- Points
- 738

I take your advice to my attention and apply it in the work process.Can you slow down the feed speed to reduce the planer cutting head marks. Slower feed with the same cutting rotation will give you a more smooth surface reducing follow-up sanding. Same thing as rough cut lumber and S-4-S. Just wondering. PT-2
thanks


