The Mary Rose

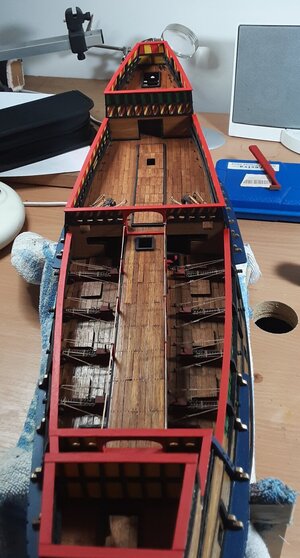
On with the rails which are pre-painted 1mm x 4mm strip. First the straight bits -
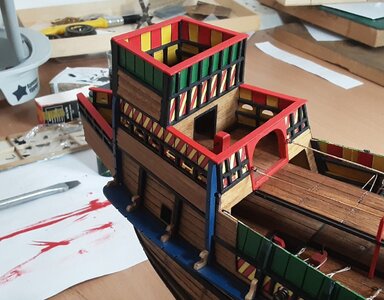
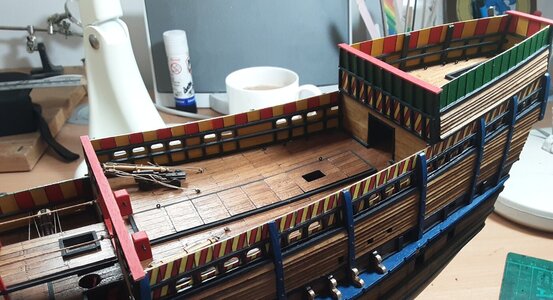
20201121_152537.jpg

20201121_152439.jpg

Now we need to bend some wood. I measured the deflection of the curve at the widest point and clamped to that. Wood soaked in very hot water for a couple of minutes.
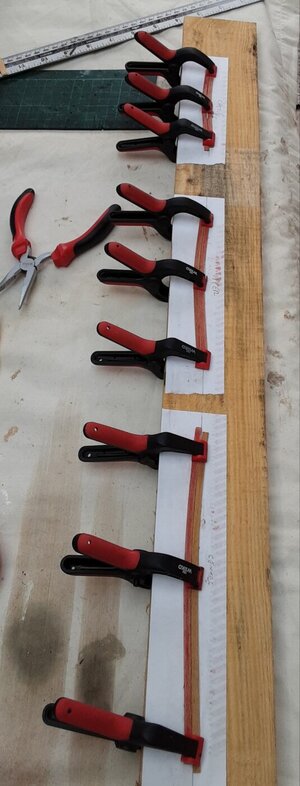
20201124_155625.jpg

All finished -

20201124_155559.jpg

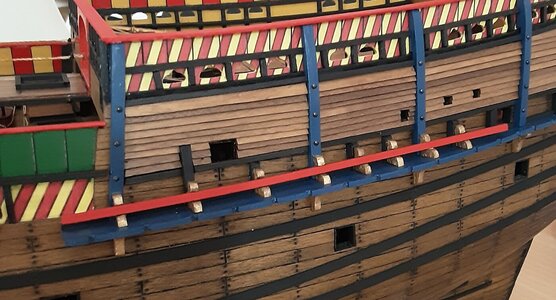
Outboard belaying rails fixed in place -
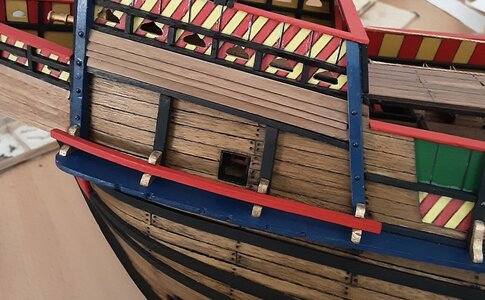
20201124_155447.jpg

20201124_155512.jpg

Next are the anti-boarding netting supports. I am now out of CA glue and my local model shop is closed due to the lockdown in my area. Seems it is not an essential business, but at the moment it's pretty bloody essential to me and my sanity! However, I am sure Amazon will come good by the time I have shaped the supports. We live in strange times, eh?
 
Thanks, Andy. Your plan for the decks sounds like a good one. For the frame tops which snap off, lightly saw them through on either side and they will snap off a lot more easily and cleanly when you get to it.
Thanks Graham--I do not remember where I read it, but before planking the part of the hull which includes the frame sections to be removed, this guy would put masking tape on that part of the frame. Thus, the strakes are glued to the tape rather than the frame. It appearantly makes it a lot easier to remove the frame section after cutting. I owe you another thanks. I was impressed how your deck looked with the charcoal "cauking"--so I ordered some artist's charcoal from Amazon for less that $6. Tonight I laid in the king plank on the deck and will begin planking on each side of it tomorrow--"cauking" included.
Andy
Hi Andy. I rubbed those frame tops with candle wax - saves maybe having to get the tape off which may have stuck to the planks. That might not be a problem if you are using wood glue, but I only use CA (superglue) and it certainly would be. Regards.
 
Last edited:
Hi Andy. I rubbed those frame tops with candle wax - saves maybe having to get the tape off which may have stuck to the planks. That might not be a problem if you are using wood glue, but I only use CA (superglue) and it certainly would be. Regards.
Hi Graham--I wanted to drop you a line on how my charcoal "caulking" is coming along. It's going to take a while I think for me to develop enough "finesse" to both caulk and glue at the same time without making a "charcoal-mess". The black seams look good--but unfortunately some of that "blackness" has gotton onto the surface of the planks as well. I hope it will be removed when I sand the deck. I am satisfied though with the visible caulked seams, and, as I continue I'm confident that I will eventually develop "the right touch" and do a cleaner job. So thanks again.

Andy from Kenosha
 
Great stuff. Don't worry about the black smudges, they do sand off. Do you plan to stain the deck, or go with it as is?
 
I'll probably go with--I think it's called "minwax". I want to avoid using stain because I'm not what you can refer to as "sure-handed"--I would probably botch it up. So I want it to have a clean clear sealed finish. And you're right about the sanding--the smudges came right out. First I used a medium/course sand-paper, then a fine one to finish it off.
 
We would all like to see some photos and it is very easy to open a build log - get the kids to help you out. Regarding wax I have never used it, but many of the builders on here do use it with very good results and I know they will be pleased to answer any questions you may have. It sounds like you are enjoying your build and that is what it is all about.
 
We would all like to see some photos and it is very easy to open a build log - get the kids to help you out. Regarding wax I have never used it, but many of the builders on here do use it with very good results and I know they will be pleased to answer any questions you may have. It sounds like you are enjoying your build and that is what it is all about.
Thanks for the encouragement Graham. Later I'll get my son-in-law to tutor me regarding taking pictures with my phone and getting them into the computor. I'm so "old-school" that I'll need his help. I look forward to the interaction regarding the Mary Rose.

Andy
 
An update on the Mary Rose (no pictures until later when my son-in-law is available). I have found that if I apply glue to the false deck rather than the plank, and then, apply the charcoal to the plank edge, that after I lay the plank that there is less than a charcoal smudge on the plank than before. Also, I have been trying to simulate trunnels by drilling extremely small holes into the planks. So far it looks pretty bad, due to how cumbersome it is to drill the holes. I have found that by simply using an awl it is not only easier and less time-consuming, it looks a lot better as well.

Andy
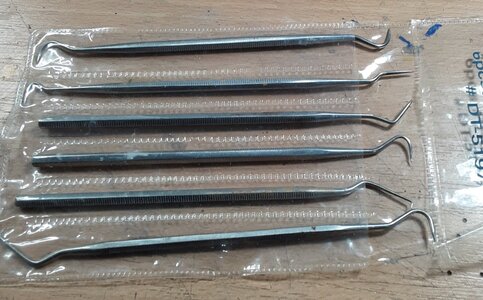
Excellent, we all learn new things on every build we do. See the photo below which is my set of dental picks. I use the one second from the top for making holes. The other ones have all come in handy for various jobs and are particularly useful when you get to the rigging stage. A useful stocking filler to put on your note to Santa?

20201126_161611.jpg
 
I have a general question on ship modeling in which I could use some direction. If there is one area of ship modeling which is the most difficult for me, and, of which I produce horrible looking work, it is the proper tapering/shaping/drilling of masts and yard arms. I would appreciate any feedback on this issue. I have seriously considered producing admiralty-type models with the hull only, in order to avoid the masting/yardarms issue. But I would rather try to sharpen those skills which I greatly lack. In the words of Charlie Chan, "Thank you so much" in advance for your help.

Andy from Kenosha
Great job with the photos, Andy! Regarding tapering some of the guys use a lathe, some a small plane, some just sanding. I even once tried the method of putting the dowel in an electric drill, but that didn't end too well.
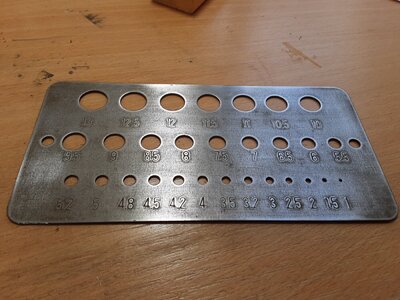
Me, I go with sanding. Put the end to be sanded flat on the work bench and continually roll it as you sand (use a sanding block) and finish with a fine grade - I use wet&dry as the final paper. To check my progress I use a drill gauge I have had for years -

20201127_124819.jpg

Slow and steady is the key; you can take it off, but you can't put it back on. So, my process is this - put on some good music, roll, sand, check, repeat. Practice on a piece of scrap first and you'll soon get there.
Maybe add a drill gauge on to your letter to Santa as well? I must say my shipbuilding over the years has been a Godsend to my family at Christmas and Birthdays when it comes to giving them ideas what with clamps, tweezers, forceps, files, cutting mats etc.
Keep well.
 
Last edited:
Last bit of work on the exterior hull for now is to tone down the clinker planking. You can see in the photo on the previous post that it looks quite bright and has been ticking me off for some time, so several washes later -


View attachment 189554


Now on to the cannon. In 1545 armaments on board were -

15 muzzle loading bronze guns
76 iron guns, a mixture of carriage mounted and ship mounted
50 handguns
250 longbows with 9,600 arrows
300 staff weapons
40 dozen darts to be thrown from the fighting tops
Ten dozen pots of lime

Lime pots would be thrown in order to blind the enemy - the chemical weapons of 1545.

Cannon provided with the kit are white metal. The castings were pretty good and joined together well, so minimal clean up

View attachment 189555

Below are the bronze cannon. They are muzzle loaders and one of those on the left was found in situ (castle deck) and has been identified as a demi-culverin, being a long range gun firing an iron shot of 4 - 5 kg.

View attachment 189556


The iron guns (below) were made of iron strips bound by hoops and sat on a carriage made from a single piece of elm, hollowed out like the stock of a rifle. They fired stone shot of 4.5 - 10kg (depending on calibre) and also an anti-personnel munition of cannisters of sharp stone flakes termed 'lantern shot'.


View attachment 189565


The iron guns were breech loaders. The process would be to drop in a loaded breech section, slide it forward, wedge it in place, fire, then repeat. The breeches were lifted out by grasping iron rings and heaving them out. To replicate this I have fixed on some 2.5mm rings. Analysis of skeletons recovered in the area of the guns show numerous back injuries (compressed discs, fused vertebrae), quite possibly caused by continually lugging these incredibly heavy breeches around.On

Last bit of work on the exterior hull for now is to tone down the clinker planking. You can see in the photo on the previous post that it looks quite bright and has been ticking me off for some time, so several washes later -


View attachment 189554


Now on to the cannon. In 1545 armaments on board were -

15 muzzle loading bronze guns
76 iron guns, a mixture of carriage mounted and ship mounted
50 handguns
250 longbows with 9,600 arrows
300 staff weapons
40 dozen darts to be thrown from the fighting tops
Ten dozen pots of lime

Lime pots would be thrown in order to blind the enemy - the chemical weapons of 1545.

Cannon provided with the kit are white metal. The castings were pretty good and joined together well, so minimal clean up

View attachment 189555

Below are the bronze cannon. They are muzzle loaders and one of those on the left was found in situ (castle deck) and has been identified as a demi-culverin, being a long range gun firing an iron shot of 4 - 5 kg.

View attachment 189556


The iron guns (below) were made of iron strips bound by hoops and sat on a carriage made from a single piece of elm, hollowed out like the stock of a rifle. They fired stone shot of 4.5 - 10kg (depending on calibre) and also an anti-personnel munition of cannisters of sharp stone flakes termed 'lantern shot'.


View attachment 189565


The iron guns were breech loaders. The process would be to drop in a loaded breech section, slide it forward, wedge it in place, fire, then repeat. The breeches were lifted out by grasping iron rings and heaving them out. To replicate this I have fixed on some 2.5mm rings. Analysis of skeletons recovered in the area of the guns show numerous back injuries (compressed discs, fused vertebrae), quite possibly caused by continually lugging these incredibly heavy breeches around.
One of my favorite things about reading about the Mary Rose is how it's really an example of how a society was stuck between two totally different styles of fighting wars. Some of those guns look like they could have been old favorites found on the Victory a couple of hundred years later, while the longbows and pots o' lime are definitely from an earlier era. I am loving this build and can't wait to see the finished product.
Great job with the photos, Andy! Regarding tapering some of the guys use a lathe, some a small plane, some just sanding. I even once tried the method of putting the dowel in an electric drill, but that didn't end too well.
Me, I go with sanding. Put the end to be sanded flat on the work bench and continually roll it as you sand (use a sanding block) and finish with a fine grade - I use wet&dry as the final paper. To check my progress I use a drill gauge I have had for years -

View attachment 195586

Slow and steady is the key; you can take it off, but you can't put it back on. So, my process is this - put on some good music, roll, sand, check, repeat. Practice on a piece of scrap first and you'll soon get there.
Maybe add a drill gauge on to your letter to Santa as well? I must say my shipbuilding over the years has been a Godsend to my family at Christmas and Birthdays when it comes to giving them ideas, what with clamps, tweezers, forceps, files, cutting mats etc.
Keep well.
I've done the electric-drill method with mixed results - the dowel does get a nice taper, but I've had a few split on me as I was sanding them. As with other methods, slow and steady is the key (and make sure you wear good protective eyewear.)
 
I posted an item on sept 20th titled "spar tapering"
It described a bodge using an electric drill, a small plane and a block of wood drilled to control the free end of the spar.
 
My own build has remporarily run aground. She-who-must-be-obeyed wants the internal doors replacing.
(Exit ancient 1970s flush doors; enter even more ancient victorian panelled!)
Almost a welcome deviation from the current tying of mary Rose ratlines.
Why did the main mast need 10 shrouds each side? Couldn't they find some thicker rope and rig fewer?
 
I am not yet at the point of ratline tying, but already I can feel the pain.
 
Last edited:
Back
Top