Thanks Grant, every step of this build presents a challenge for me as I battle in my mind which parts will look like BN 1 and which will look like BN II.Whew….
Good morning Daniel. Awesome deck! The gloss looks good and considering the look you want to achieve it is the way to go - IMHO.Cheers Grant
-

Win a Free Custom Engraved Brass Coin!!!
As a way to introduce our brass coins to the community, we will raffle off a free coin during the month of August. Follow link ABOVE for instructions for entering.
-

PRE-ORDER SHIPS IN SCALE TODAY!
The beloved Ships in Scale Magazine is back and charting a new course for 2026!
Discover new skills, new techniques, and new inspirations in every issue.
NOTE THAT OUR FIRST ISSUE WILL BE JAN/FEB 2026
- Home
- Forums
- Ships of Scale Group Builds and Projects
- Bluenose PoF Group Build
- Bluenose Group Build Logs
You are using an out of date browser. It may not display this or other websites correctly.
You should upgrade or use an alternative browser.
You should upgrade or use an alternative browser.
The Schooner Bluenose 1921, POF Yuanqing Models 1:72 [COMPLETED BUILD]
Excuse me...it's not the BN - it's an ambassadorial ship. Whatever that meansThanks Grant, every step of this build presents a challenge for me as I battle in my mind which parts will look like BN 1 and which will look like BN II.
 .
.Excuse me...it's not the BN - it's an ambassadorial ship.
 Paul, spell check didn't have a problem with the word
 . It's my understanding that the BN 2 is used like an ambassador for Canada and Lunenburg to race and give tourist rides. "To maintain and ensure Bluenose II will serve as a sailing ambassador for Lunenburg, the Province of Nova Scotia and Canada." Quote from their website.
Thanks Mark.Nice deck work Daniel
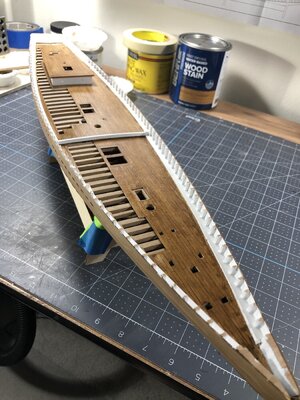
Good afternoon, here is a little more progress and method to show on my deck work. I have finished the lower fore deck with its stain then coats of clear poly.
The captains cabin with new roof is just dry fit for now.
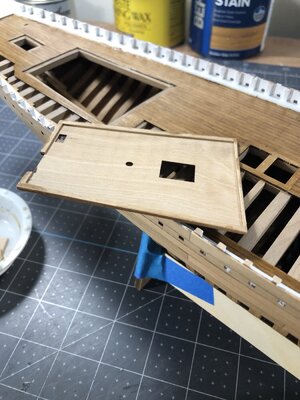
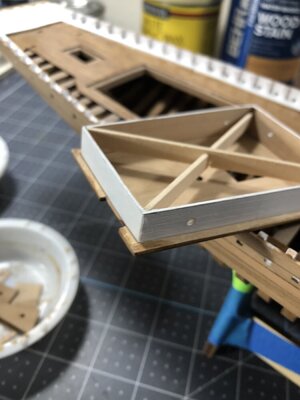
Next, I made a boarder on the cabins roof bottom side so as to make it fit over the cabin walls tightly (I may keep this as a removable feature) then shaped the top edges in a quarter round fashion. The cross bracing is just temporary.
And last for now the fiddly bits sitting in their que.
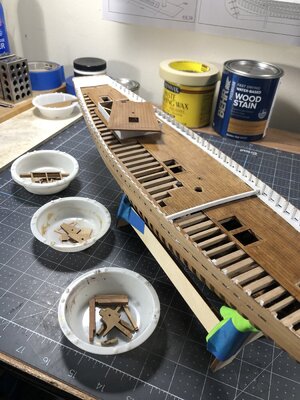
I have to tell you I am getting nervous about painting the exterior top three boards on the hull exterior. It's going to take every ounce of my talent and then some to make it come out to my satisfaction. Drips, brush marks, bleed out under the masking tape just cannot be allowed to happen.
Thanks for taking a look with me and happy modeling to you all.
The captains cabin with new roof is just dry fit for now.

Next, I made a boarder on the cabins roof bottom side so as to make it fit over the cabin walls tightly (I may keep this as a removable feature) then shaped the top edges in a quarter round fashion. The cross bracing is just temporary.


And last for now the fiddly bits sitting in their que.

I have to tell you I am getting nervous about painting the exterior top three boards on the hull exterior. It's going to take every ounce of my talent and then some to make it come out to my satisfaction. Drips, brush marks, bleed out under the masking tape just cannot be allowed to happen.
Thanks for taking a look with me and happy modeling to you all.
Good morning Daniel. All looking mighty fine. Your deck look suits your goal for the “ambassadorial “ look and feel you are going for. I would definitely keep the cabin top removable if possible. It will be a good feature to view those frames in side (as per your pic). The painting consternation…I share your worriesGood afternoon, here is a little more progress and method to show on my deck work. I have finished the lower fore deck with its stain then coats of clear poly.
The captains cabin with new roof is just dry fit for now.
View attachment 383230
Next, I made a boarder on the cabins roof bottom side so as to make it fit over the cabin walls tightly (I may keep this as a removable feature) then shaped the top edges in a quarter round fashion. The cross bracing is just temporary.
View attachment 383231View attachment 383232
And last for now the fiddly bits sitting in their que.
View attachment 383233
I have to tell you I am getting nervous about painting the exterior top three boards on the hull exterior. It's going to take every ounce of my talent and then some to make it come out to my satisfaction. Drips, brush marks, bleed out under the masking tape just cannot be allowed to happen.
Thanks for taking a look with me and happy modeling to you all.
- Joined
- Sep 3, 2021
- Messages
- 5,198
- Points
- 738

I like the idea to keep the roof of the aft cabin detachable, mind the main boom though...
As far a painting goes, I'm probably even worse with a paintbrush than you are; I had to remove my first try entirely, back to bare wood. In the end perseverance will prevail!
I'm also confident that in the next couple of updates, you'll astound us with a brilliant paintjob.
As far a painting goes, I'm probably even worse with a paintbrush than you are; I had to remove my first try entirely, back to bare wood. In the end perseverance will prevail!
I'm also confident that in the next couple of updates, you'll astound us with a brilliant paintjob.
Thank you, Grant.Good morning Daniel. All looking mighty fine. Your deck look suits your goal for the “ambassadorial “ look and feel you are going for. I would definitely keep the cabin top removable if possible. It will be a good feature to view those frames in side (as per your pic). The painting consternation…I share your worries. Cheers Grant
Thanks Mark.Looks great Daniel, and good luck with the paint job, I'm sure you'll nail it
Thanks Johan, good point about the main boom.I like the idea to keep the roof of the aft cabin detachable, mind the main boom though...
Thank you shota.Dear Daniel
the Deck Looks great, good luck with the paint job

My recommendation on painting, is that if you are leaving the wood below it unpainted, then clear coat the unpainted wood first. And also clear coat the upper area that will be painted. This does two things, it protects the unpainted wood (should paint get on it, you can scrape it off with blade later if dried, or wipe off immediately with a damp paper towel prior to drying) and it keeps your tape line sharp.
The additional benefit is that the painted wood will need less coats because the wood is already sealed with the clear. However, the down side is the clear coated wood will make brush marks more of an issue. But with thinned painted and multiple coats, you should be fine. And you can always sand your paint with 2000 grit sandpaper and seal afterwards.
And finally you can use graphics tape for your separation line, which can be clear coated to ensure it stays on.
Ps - keep a damp paper towel handy for any potential drips or unwanted paint on the unpainted wood. Once clear coated it can be simply wiped off immediately with a damp paper towel.
Last edited:
Excellent advice Dean, check out my next post.My recommendation on painting, is that if you are leaving the wood below it unpainted, then clear coat the unpainted wood first. And also clear coat the upper area that will be painted. This does two things, it protects the unpainted wood (should paint get on it, you can scrape it off with blade later if dried, or wipe off immediately with a damp paper towel prior to drying) and it keeps your tape line sharp.
The additional benefit is that the painted wood will need less coats because the wood is already sealed with the clear. However, the down side is the clear coated wood will make brush marks more of an issue. But with thinned painted and multiple coats, you should be fine. And you can always sand your paint with 2000 grit sandpaper and seal afterwards.
And finally you can use graphics tape for your separation line, which can be clear coated to ensure it stays on.
Ps - keep a damp paper towel handy for any potential drips or unwanted paint on the unpainted wood. Once clear coated it can be simply wiped off immediately with a damp paper towel.
Well its Friday and I am excited to post success with the midnight blue accent hull painting Whew!!
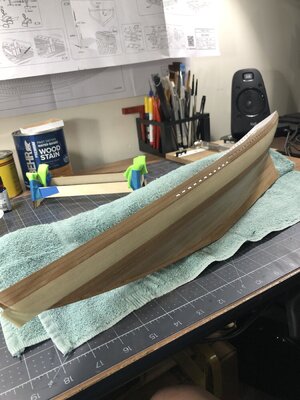
I started with the masking proceedure and remembered something Dean @Dean62 told me a long time ago to seal off your masking tape to prevent underruns. So I mixed a small batch of 50% water, 50% clear poly and painted a thin line along the masking line which acts as a seal, it worked perfectly!
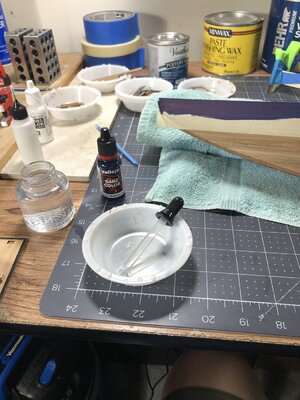
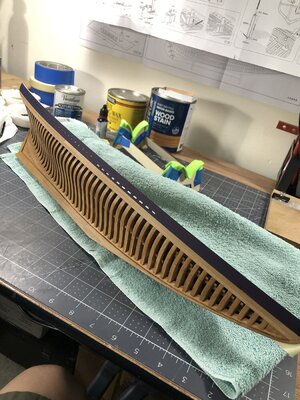
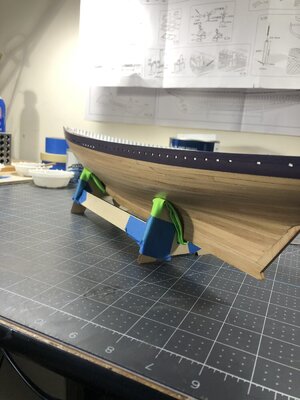
Being concerned with brush marks I mixed the paint at 11:1, 11 drops of paint and 1 drop of water. I hit it just right the first time and after two coats with very little or no brush marks here are the results.
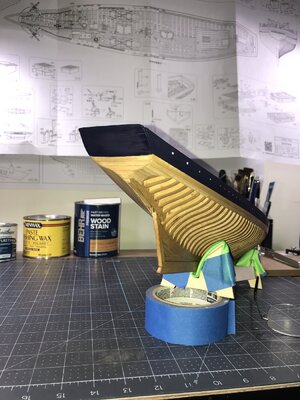
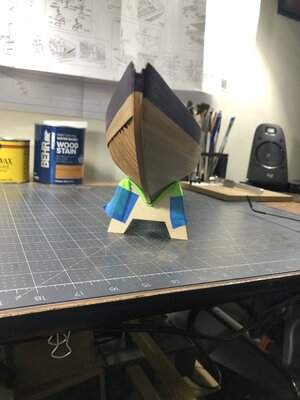
A major concern put to rest so now just need to place the 1/16" pin stripe tape I bought which I think will be a little more forgiving since I should be able to manipulate it into place.
Hope you enjoy and have a great weekend.
I started with the masking proceedure and remembered something Dean @Dean62 told me a long time ago to seal off your masking tape to prevent underruns. So I mixed a small batch of 50% water, 50% clear poly and painted a thin line along the masking line which acts as a seal, it worked perfectly!


Being concerned with brush marks I mixed the paint at 11:1, 11 drops of paint and 1 drop of water. I hit it just right the first time and after two coats with very little or no brush marks here are the results.


A major concern put to rest so now just need to place the 1/16" pin stripe tape I bought which I think will be a little more forgiving since I should be able to manipulate it into place.
Hope you enjoy and have a great weekend.
Success!
That is looking very beautiful, Daniel. A nice deep blue paint.Well its Friday and I am excited to post success with the midnight blue accent hull painting Whew!!
I started with the masking proceedure and remembered something Dean @Dean62 told me a long time ago to seal off your masking tape to prevent underruns. So I mixed a small batch of 50% water, 50% clear poly and painted a thin line along the masking line which acts as a seal, it worked perfectly!
View attachment 383454View attachment 383455
Being concerned with brush marks I mixed the paint at 11:1, 11 drops of paint and 1 drop of water. I hit it just right the first time and after two coats with very little or no brush marks here are the results.
View attachment 383456View attachment 383457View attachment 383458View attachment 383459
A major concern put to rest so now just need to place the 1/16" pin stripe tape I bought which I think will be a little more forgiving since I should be able to manipulate it into place.
Hope you enjoy and have a great weekend.
Regards, Peter


