Will do Johan.take your time to ensure everything sits "right" before applying any adhesive.
-

Win a Free Custom Engraved Brass Coin!!!
As a way to introduce our brass coins to the community, we will raffle off a free coin during the month of August. Follow link ABOVE for instructions for entering.
-

PRE-ORDER SHIPS IN SCALE TODAY!
The beloved Ships in Scale Magazine is back and charting a new course for 2026!
Discover new skills, new techniques, and new inspirations in every issue.
NOTE THAT OUR FIRST ISSUE WILL BE JAN/FEB 2026
- Home
- Forums
- Ships of Scale Group Builds and Projects
- Bluenose PoF Group Build
- Bluenose Group Build Logs
You are using an out of date browser. It may not display this or other websites correctly.
You should upgrade or use an alternative browser.
You should upgrade or use an alternative browser.
The Schooner Bluenose 1921, POF Yuanqing Models 1:72 [COMPLETED BUILD]
Very nice and crisp indeed Daniel, well done!Well its Friday and I am excited to post success with the midnight blue accent hull painting Whew!!
Now that worked a treat, greying the inside gives the hawseholes a lot more character. Nice artistic touch Daniel.Also, for better contrast I made a gray paint by mixing black and white and painted the inside of the pipes which I think presents fairly well.
Thank you, Mark, creating the hawseholes were a new learning experience for me.Now that worked a treat, greying the inside gives the hawseholes a lot more character. Nice artistic touch Daniel.
Good evening Daniel. Brilliant. You owned this my friend. Cheers GrantWell its Friday and I am excited to post success with the midnight blue accent hull painting Whew!!
I started with the masking proceedure and remembered something Dean @Dean62 told me a long time ago to seal off your masking tape to prevent underruns. So I mixed a small batch of 50% water, 50% clear poly and painted a thin line along the masking line which acts as a seal, it worked perfectly!
View attachment 383454View attachment 383455
Being concerned with brush marks I mixed the paint at 11:1, 11 drops of paint and 1 drop of water. I hit it just right the first time and after two coats with very little or no brush marks here are the results.
View attachment 383456View attachment 383457View attachment 383458View attachment 383459
A major concern put to rest so now just need to place the 1/16" pin stripe tape I bought which I think will be a little more forgiving since I should be able to manipulate it into place.
Hope you enjoy and have a great weekend.
The artist Dean has plenty of sound ideas to help us all. Thanks Dean for this tip.Hawse holes look fine Daniel, especially after paint. The only improvement would be to use a rat tail file and as you spin it in the hole, start to angle it towards the long side of the ellipse on both sides so you end up with an equal width surround on all sides. Hope that makes sense.
Good evening Daniel. I love it. The pear wood and dark/midnight blue contrast is beautiful. This is such a cool looking model/kit where the port side is planked and SB frame and you got the finish so good. The hawse hole is great but I do like Deans idea. Curious….why is your hull slightly longer than your rail cap boards. Is this intentional? Cheers GrantHere is a quick hawsehole update. Using @Dean62, Deans suggestions with the rat tail file, I modified the hawseholes as shown. Also, for better contrast I made a gray paint by mixing black and white and painted the inside of the pipes which I think presents fairly well. The port side photo is a bit closer in than the starbord. They both look better from a standard viewing distance.
View attachment 383856View attachment 383854
I noticed how easily the dark blue paint would peel off from the poly undercoating so I overcoated it with matte finish poly and now it is quite durable.
Till next time.
Hi Grant, thanks for your compliments, I would love to say my hull is longer by my design but that is not the case. Long story short it's the result of builder error propagation. Fortunately, I have worked around this as you will see in my next post. I added 5mm to the aft end cap rail each side and problem solved.Good evening Daniel. I love it. The pear wood and dark/midnight blue contrast is beautiful. This is such a cool looking model/kit where the port side is planked and SB frame and you got the finish so good. The hawse hole is great but I do like Deans idea. Curious….why is your hull slightly longer than your rail cap boards. Is this intentional? Cheers Grant
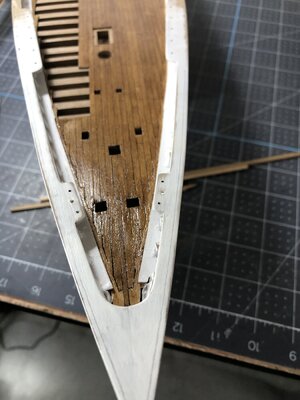
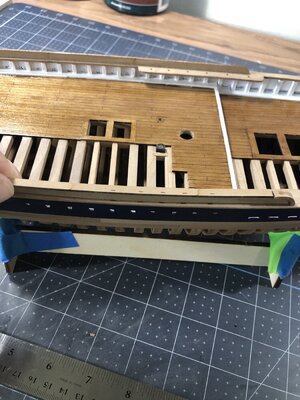
Hello everyone, I have an update on the BN's railing system. This portion of the build is actually proceeding quite well. Following the advice of those who have gone before me has been my key to success. I needed to add 5mm of length at the stern then sand it in. Take a look.
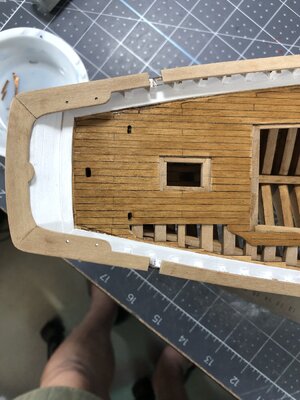
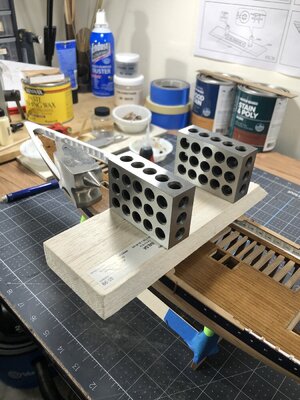
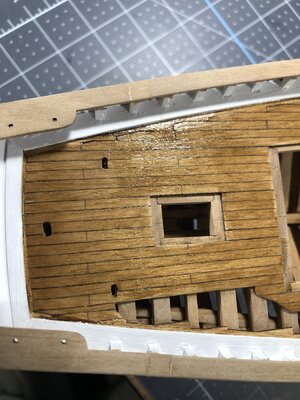
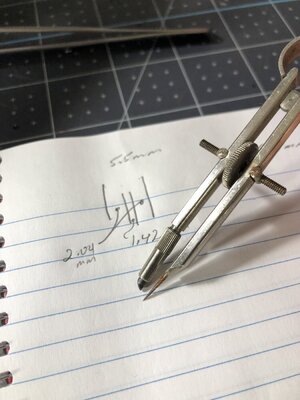
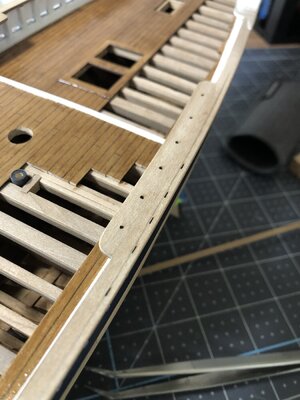
After completing the cap rail or first flat boards glued directly to the bulwarks, I needed to layout a line on it which represented the exterior face of the vertical portion of this rail. This is the same line that defines the face of the hull. You will notice I have the fore section painted white, well after considering how the PVA glue would bond to it I decided the rest of it will be natural wood for maximin bonding. Then will paint after complete installation. A couple photos showing how I applied the wall line. notice how well it lines up with the thru slots for the shroud straps.
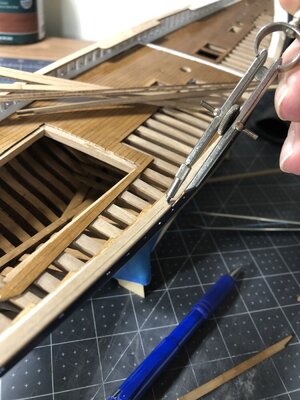
Next is the vertical portion of this rail. After measuring several times then moistening, heating with my trusty curling iron, and hand forming the slight bends, I began the glue down. The stern radiuses are so tight it precluded the wet bending method, so I studied Johan's method @RDN1954, and fabricated the required pieces at an OD of 3/8", ID of 5/16" then hand sanded on down to fit. The result is quite satisfactory.
I also had to hand make a nose piece filler at the bow.
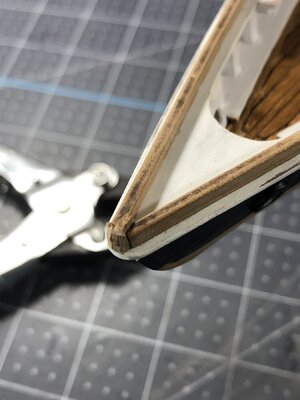
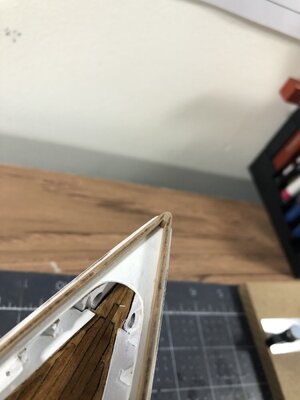
Everything sanded out very well. Lastly a few parting shots.
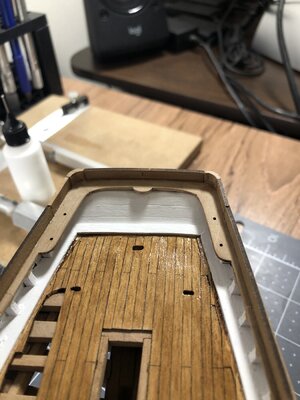
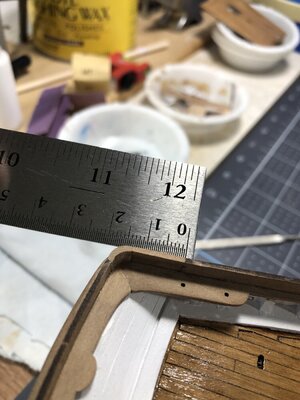
Hope you enjoy, until next time Happy Modeling!


After completing the cap rail or first flat boards glued directly to the bulwarks, I needed to layout a line on it which represented the exterior face of the vertical portion of this rail. This is the same line that defines the face of the hull. You will notice I have the fore section painted white, well after considering how the PVA glue would bond to it I decided the rest of it will be natural wood for maximin bonding. Then will paint after complete installation. A couple photos showing how I applied the wall line. notice how well it lines up with the thru slots for the shroud straps.


Next is the vertical portion of this rail. After measuring several times then moistening, heating with my trusty curling iron, and hand forming the slight bends, I began the glue down. The stern radiuses are so tight it precluded the wet bending method, so I studied Johan's method @RDN1954, and fabricated the required pieces at an OD of 3/8", ID of 5/16" then hand sanded on down to fit. The result is quite satisfactory.

I also had to hand make a nose piece filler at the bow.


Everything sanded out very well. Lastly a few parting shots.


Hope you enjoy, until next time Happy Modeling!
This is very nice work Daniel! Wise use of the experiences of our colleagues.
Thanks Paul, this hobby would be nowhere near as enjoyable without the help, comradery, and knowledge of this forum.This is very nice work Daniel! Wise use of the experiences of our colleagues.
What I can say ……… I enjoyed how you managed the installing of the railing. It’s a bit complex and you had to scratch it to fit on your BN. Well Done, Daniel.Hello everyone, I have an update on the BN's railing system. This portion of the build is actually proceeding quite well. Following the advice of those who have gone before me has been my key to success. I needed to add 5mm of length at the stern then sand it in. Take a look.
View attachment 384581View attachment 384582View attachment 384583
After completing the cap rail or first flat boards glued directly to the bulwarks, I needed to layout a line on it which represented the exterior face of the vertical portion of this rail. This is the same line that defines the face of the hull. You will notice I have the fore section painted white, well after considering how the PVA glue would bond to it I decided the rest of it will be natural wood for maximin bonding. Then will paint after complete installation. A couple photos showing how I applied the wall line. notice how well it lines up with the thru slots for the shroud straps.
View attachment 384584View attachment 384585View attachment 384586View attachment 384587
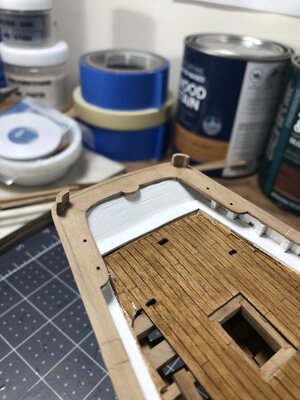
Next is the vertical portion of this rail. After measuring several times then moistening, heating with my trusty curling iron, and hand forming the slight bends, I began the glue down. The stern radiuses are so tight it precluded the wet bending method, so I studied Johan's method @RDN1954, and fabricated the required pieces at an OD of 3/8", ID of 5/16" then hand sanded on down to fit. The result is quite satisfactory.
View attachment 384610
I also had to hand make a nose piece filler at the bow.
View attachment 384611View attachment 384612
Everything sanded out very well. Lastly a few parting shots.
View attachment 384613View attachment 384615View attachment 384616
Hope you enjoy, until next time Happy Modeling!
Regard, Peter
Thank you, Peter!What I can say ……… I enjoyed how you managed the installing of the railing. It’s a bit complex and you had to scratch it to fit on your BN. Well Done, Daniel.
Regard, Peter
- Joined
- Sep 3, 2021
- Messages
- 5,185
- Points
- 738

Wow, Dan, that's quite an impressive and ingenious solution for your slightly longer than nominal hull.
Also quite evident is that there is an awful lot to learn from fora like this, assisting one with one's build.
It helped me all too frequently at various stages of my build.
Looking forward to your next updates!
Also quite evident is that there is an awful lot to learn from fora like this, assisting one with one's build.
It helped me all too frequently at various stages of my build.
Looking forward to your next updates!
True storyThanks Paul, this hobby would be nowhere near as enjoyable without the help, comradery, and knowledge of this forum.
Good morning Daniel. You owned this. I am in admiration of you guys who get all those tiny measurements and symmetry spot on. Reading your process here shows this was no easy task. Cheers GrantHello everyone, I have an update on the BN's railing system. This portion of the build is actually proceeding quite well. Following the advice of those who have gone before me has been my key to success. I needed to add 5mm of length at the stern then sand it in. Take a look.
View attachment 384581View attachment 384582View attachment 384583
After completing the cap rail or first flat boards glued directly to the bulwarks, I needed to layout a line on it which represented the exterior face of the vertical portion of this rail. This is the same line that defines the face of the hull. You will notice I have the fore section painted white, well after considering how the PVA glue would bond to it I decided the rest of it will be natural wood for maximin bonding. Then will paint after complete installation. A couple photos showing how I applied the wall line. notice how well it lines up with the thru slots for the shroud straps.
View attachment 384584View attachment 384585View attachment 384586View attachment 384587
Next is the vertical portion of this rail. After measuring several times then moistening, heating with my trusty curling iron, and hand forming the slight bends, I began the glue down. The stern radiuses are so tight it precluded the wet bending method, so I studied Johan's method @RDN1954, and fabricated the required pieces at an OD of 3/8", ID of 5/16" then hand sanded on down to fit. The result is quite satisfactory.
View attachment 384610
I also had to hand make a nose piece filler at the bow.
View attachment 384611View attachment 384612
Everything sanded out very well. Lastly a few parting shots.
View attachment 384613View attachment 384615View attachment 384616
Hope you enjoy, until next time Happy Modeling!
Thank you, Johan the reason for the large 13mm gap in the vertical section at the stern was because I attempted to wet, heat and bend that single long piece furnished in the kit. The piece split at both corners and I lost quite a bit of material when I cut the bad corners out.Wow, Dan, that's quite an impressive and ingenious solution for your slightly longer than nominal hull.
Also quite evident is that there is an awful lot to learn from fora like this, assisting one with one's build.
It helped me all too frequently at various stages of my build.
Looking forward to your next updates!
Thank you for your kid words, Grant. I just wish I could get those tiny measurements right the first time around and save myself all this recovery and do-over time.True story
Good morning Daniel. You owned this. I am in admiration of you guys who get all those tiny measurements and symmetry spot on. Reading your process here shows this was no easy task. Cheers Grant
Kurt Konrath
Kurt Konrath
What was the famous saying by Client Eastwood in his movie about Granada Invasion where he is training young Marines, "Improvise, Adapt and Overcome!"Thank you, Johan the reason for the large 13mm gap in the vertical section at the stern was because I attempted to wet, heat and bend that single long piece furnished in the kit. The piece split at both corners and I lost quite a bit of material when I cut the bad corners out.
Yes Kurt, for me it's standard procedure when building a model."Improvise, Adapt and Overcome!"
- Joined
- Sep 3, 2021
- Messages
- 5,185
- Points
- 738

Hey Dan, I guess I was referring to the 5/6mm gap you showed in the horizontal rail.Thank you, Johan the reason for the large 13mm gap in the vertical section at the stern was because I attempted to wet, heat and bend that single long piece furnished in the kit. The piece split at both corners and I lost quite a bit of material when I cut the bad corners out.
I memory serves me well, I think I had to shorten this rail by about 6mm.
That corner piece is a bitch, there was no way I could shape it to match the drawings. Once you applied some finish, no one will be any the wiser.


