Great work on the masts they look fantastic really like the colour. Wishing you and your family a very merry Christmas and a happy new year.
-

Win a Free Custom Engraved Brass Coin!!!
As a way to introduce our brass coins to the community, we will raffle off a free coin during the month of August. Follow link ABOVE for instructions for entering.
-

PRE-ORDER SHIPS IN SCALE TODAY!
The beloved Ships in Scale Magazine is back and charting a new course for 2026!
Discover new skills, new techniques, and new inspirations in every issue.
NOTE THAT OUR FIRST ISSUE WILL BE JAN/FEB 2026
You are using an out of date browser. It may not display this or other websites correctly.
You should upgrade or use an alternative browser.
You should upgrade or use an alternative browser.
VASA 490 Build Log - Billing Boats, 1:75 [COMPLETED BUILD]
Thank you, Tony, Wishing merry Christmas to you and your family as well.Great work on the masts they look fantastic really like the colour. Wishing you and your family a very merry Christmas and a happy new year.
Good Monday morning everyone.
I just have a few odds and ends to show at this time.
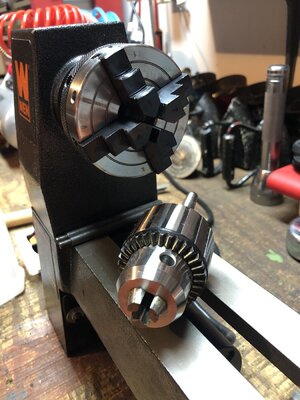
I finally received my 3.5" 4 jaw lathe chuck which enabled me to finish up all the masting from square stock.
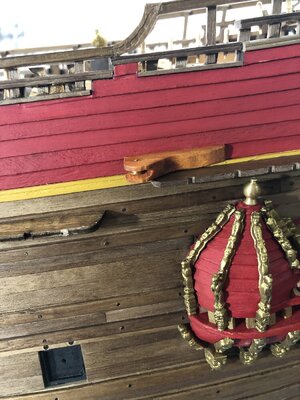
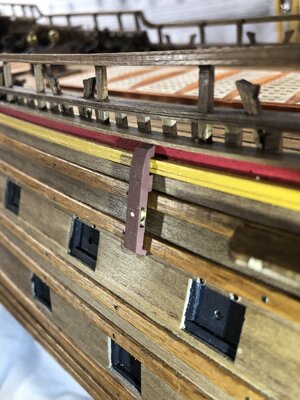
Next I installed the chain plate boards along with four of the exterior pully assemblies. Once I set the actual dead eyes and their stropping,
I will add the cover strip onto the boards. There is a carving that goes onto the face of the verticle pully at midship, not sure yet if I will use it.
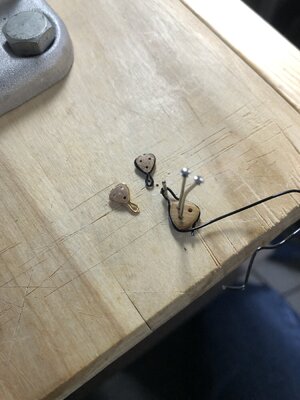
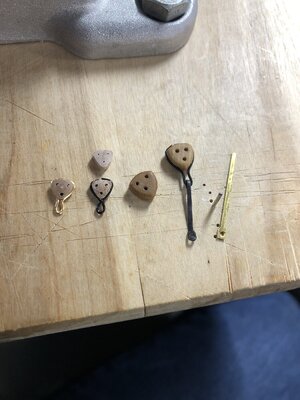
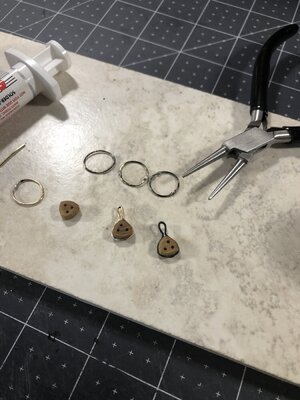
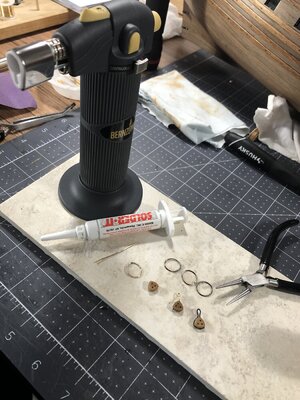
I have spent some time experimenting with different methods of attaching the metal (0.65mm brass) stropping to the dead eyes. At first made a little nail jig, bent the wire around and ended with an open but joint. I decided with the soft brass wire with an open but joint could produce unwanted problems at rigging time.
I tried soldering the butt joint with an iron but could not get enough heat, so I bought a micro butane torch and after some practice found my solution. I can either paint or brass black (if it works on silver solder) to color the wire. Still a work in progress.
Then comes setting the rake on the main and mizzen mast, I did a little math and made a jig for it.
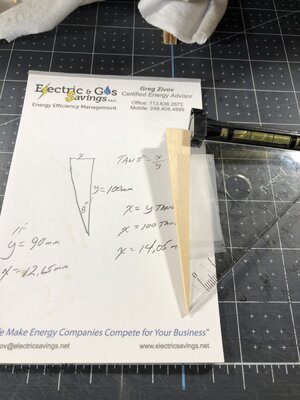
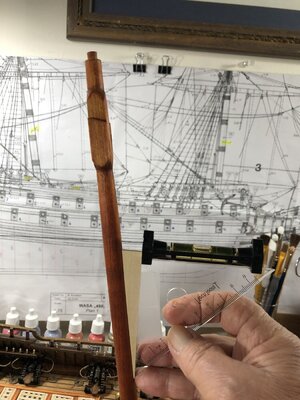
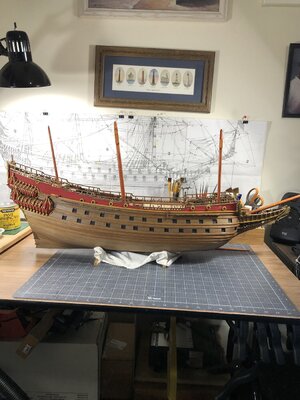
Note that I have not glued anything in or down yet concerning the mast.
I finally figured out how to construct the various tops by closely studying @PeterG 's effort, thank you sir. There are parts size issues with Billings in this area that one has to deal with.
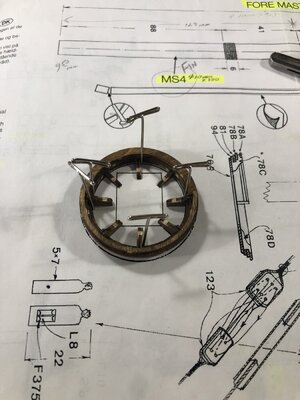
I thank you all for checking in on my build. I sure hope everyone had a safe and merry Christmas.
Until next update Happy modeling!!
I just have a few odds and ends to show at this time.
I finally received my 3.5" 4 jaw lathe chuck which enabled me to finish up all the masting from square stock.

Next I installed the chain plate boards along with four of the exterior pully assemblies. Once I set the actual dead eyes and their stropping,
I will add the cover strip onto the boards. There is a carving that goes onto the face of the verticle pully at midship, not sure yet if I will use it.


I have spent some time experimenting with different methods of attaching the metal (0.65mm brass) stropping to the dead eyes. At first made a little nail jig, bent the wire around and ended with an open but joint. I decided with the soft brass wire with an open but joint could produce unwanted problems at rigging time.
I tried soldering the butt joint with an iron but could not get enough heat, so I bought a micro butane torch and after some practice found my solution. I can either paint or brass black (if it works on silver solder) to color the wire. Still a work in progress.


Then comes setting the rake on the main and mizzen mast, I did a little math and made a jig for it.


Note that I have not glued anything in or down yet concerning the mast.
I finally figured out how to construct the various tops by closely studying @PeterG 's effort, thank you sir. There are parts size issues with Billings in this area that one has to deal with.

I thank you all for checking in on my build. I sure hope everyone had a safe and merry Christmas.
Until next update Happy modeling!!
- Joined
- Jan 9, 2020
- Messages
- 10,566
- Points
- 938

Wow Daniel. That is a huge amount of detailed and very time consuming work you have accomplished these last few days! Did you have time for Christmas dinner - I hope? That profile pic of your Vasa looks absolutely wonderful!
Hello Heinrich. Oh, I had a wonderful Christmas dinner and day with my family. Actually, I have not posted an update since Dec 16th. so I've been at it for over 10 days. Thank you for looking in!Wow Daniel. That is a huge amount of detailed and very time consuming work you have accomplished these last few days! Did you have time for Christmas dinner - I hope? That profile pic of your Vasa looks absolutely wonderful!
Nice progress Daniel. I think the strops turned out great! I have managed to deftly avoid soldering anything yet but I'm not sure how long that can continue.
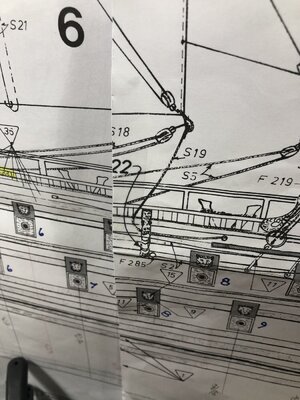
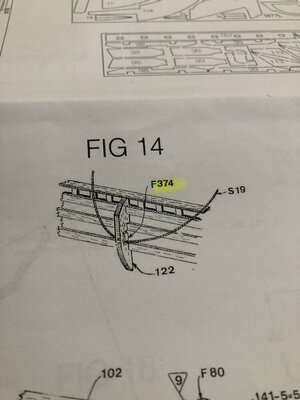
BTW - are you sure that midships fitting has a sheave in it? Is that what your instructions show?
BTW - are you sure that midships fitting has a sheave in it? Is that what your instructions show?
Hello Paul.
Thanks for the complements. I know one of my future builds will probably contain a lot of brass or copper which will require welding/brazing skills so I'm just testing it out. It's bound to be an asset skill.
Anyway, the two pictures are of the same thing even though they don't look the same except for the rope designation of 'S19', and #122. Fitting 'F374" is a 4mm pully.
Billings plans and narratives just make me want to pull my hair out.
Looking at the Vasa Museum pics though, I cannot tell if there was a pully.


Hi Daniel. Those strops came out super well. I could not get mine right (maybe the brass too thick).I am impressed what you achieved here. Nice tools you are acquiring. I Am am going to have to get before I start my next build.
Cheers
Grant
Cheers
Grant
Hi Peter, Thank you for the complement. After further research on the chesstree (did not know it was called that), I have decided to come up with a workaround, I do see where it should be just a hole in the side of a carving. Another challenge the Vasa has thrown at me. Thank you and @dockattner (Paul) for bringing this to my attention.Hi Daniel,
Model looks great!
Paul is correct regarding the pulley though. Billing has this one wrong.
While the sheets go through pulleys, the tacks do not. The chesstree is more like a fairlead and the line just goes through a hole.
Peter
Thanks Grant! Ha, I need all the help I can get so tool collecting has become a part of my hobby budget. Now if I can just keep skill level improving???Hi Daniel. Those strops came out super well. I could not get mine right (maybe the brass too thick).I am impressed what you achieved here. Nice tools you are acquiring. I Am am going to have to get before I start my next build.
Cheers
Grant
Daniel, my friend, excellent work with the corpus. Perhaps this is the best Vasa, the rack of which I have seen. 


Thank you, Sasha, for your very generous complement. Your opinion means a lot to me.Daniel, my friend, excellent work with the corpus. Perhaps this is the best Vasa, the rack of which I have seen.


Well Happy New Year everyone!
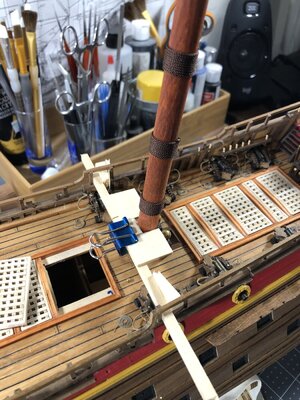
The pulleys for the fore and main mast came in which allowed me to finally glue down all the primary mast sections. I wrapped the required woolding then mapped with a string line, the strop and chain angles to the appropriate whale board. I thought I would show my jig system for holding placement of the mast while the glue was setting. The mast tops that I was concerned about came out satisfactory. I have a few more interior bulwark pulley blocks to set plus a redo on the two exterior 'chesstrees' which should finish up the deck fittings.
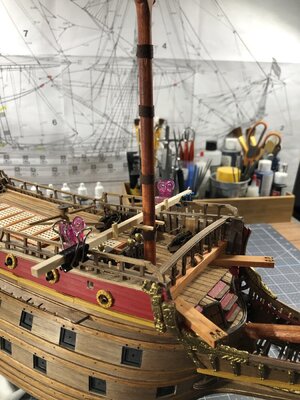
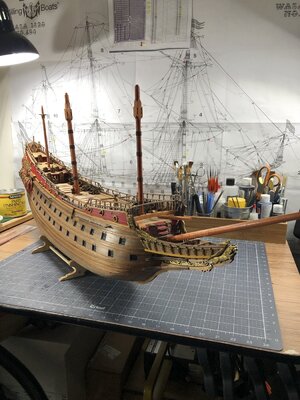
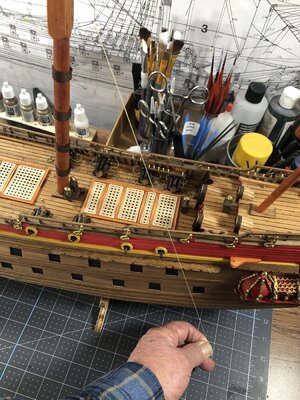
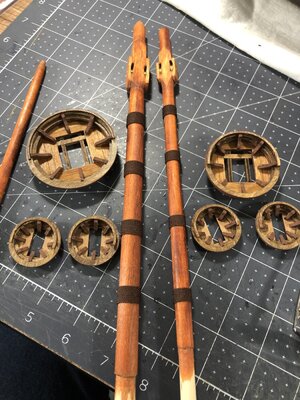
I have over 50 dead eyes to get stropped and a long way to go on the rigging. My next big, troubling item will be deciding which size rigging blocks go where??? Billings shows only a few examples of this, apparently, you're on your own for the rest!
Hope you all enjoy this and Happy Modeling.
The pulleys for the fore and main mast came in which allowed me to finally glue down all the primary mast sections. I wrapped the required woolding then mapped with a string line, the strop and chain angles to the appropriate whale board. I thought I would show my jig system for holding placement of the mast while the glue was setting. The mast tops that I was concerned about came out satisfactory. I have a few more interior bulwark pulley blocks to set plus a redo on the two exterior 'chesstrees' which should finish up the deck fittings.


I have over 50 dead eyes to get stropped and a long way to go on the rigging. My next big, troubling item will be deciding which size rigging blocks go where??? Billings shows only a few examples of this, apparently, you're on your own for the rest!
Hope you all enjoy this and Happy Modeling.
Wow! That’s a ton of progress! Nicely done as well.
- Joined
- Apr 20, 2020
- Messages
- 6,245
- Points
- 738

Dear Daniel, it's looks wonderful progress and so accurateWell Happy New Year everyone!
The pulleys for the fore and main mast came in which allowed me to finally glue down all the primary mast sections. I wrapped the required woolding then mapped with a string line, the strop and chain angles to the appropriate whale board. I thought I would show my jig system for holding placement of the mast while the glue was setting. The mast tops that I was concerned about came out satisfactory. I have a few more interior bulwark pulley blocks to set plus a redo on the two exterior 'chesstrees' which should finish up the deck fittings.
View attachment 280104View attachment 280105View attachment 280106View attachment 280107View attachment 280108
I have over 50 dead eyes to get stropped and a long way to go on the rigging. My next big, troubling item will be deciding which size rigging blocks go where??? Billings shows only a few examples of this, apparently, you're on your own for the rest!
Hope you all enjoy this and Happy Modeling.
Looking good Daniel. I like your creative jigs! 
Hi all!
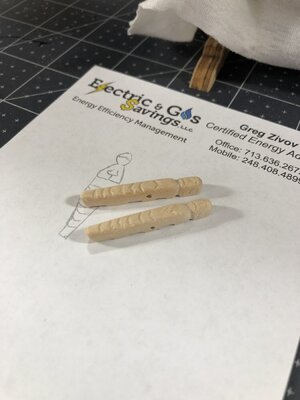
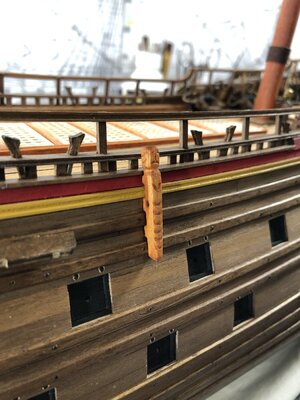
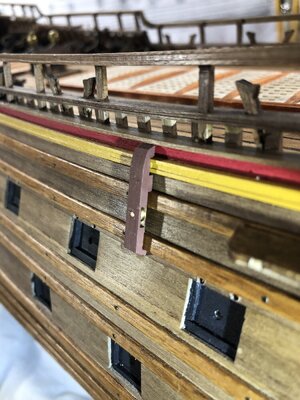
I have a short update that involves my first attempt at carving. The two so called chesstrees needed replacing without the pulleys but just a hole for the rigging to go thru. I welcome all thumbs up as well as thumbs down, I have not glued them in yet.
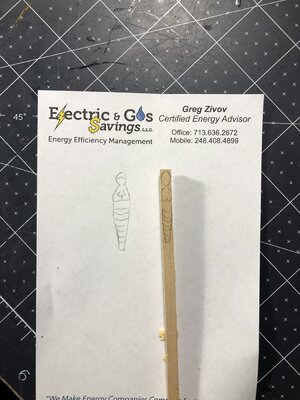
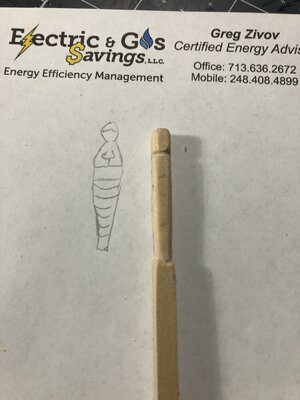
The original for comparison
Thank you for your opinions, comments, or suggestions.
I have a short update that involves my first attempt at carving. The two so called chesstrees needed replacing without the pulleys but just a hole for the rigging to go thru. I welcome all thumbs up as well as thumbs down, I have not glued them in yet.


The original for comparison

Thank you for your opinions, comments, or suggestions.
I think it adds a bit of personality to the build. I like it.Hi all!
I have a short update that involves my first attempt at carving. The two so called chesstrees needed replacing without the pulleys but just a hole for the rigging to go thru. I welcome all thumbs up as well as thumbs down, I have not glued them in yet.
View attachment 280366View attachment 280367View attachment 280368View attachment 280369
The original for comparison
View attachment 280370
Thank you for your opinions, comments, or suggestions.
Glenn


