Thank you, Heinrich, @GAStan, and everyone else who commented. Carving defiantly not my forte. Simplicity was my goal because my talent would carry me no further. Ha!Definitely the carved ones Daniel - they look super!and so do the masts!

-

Win a Free Custom Engraved Brass Coin!!!
As a way to introduce our brass coins to the community, we will raffle off a free coin during the month of August. Follow link ABOVE for instructions for entering.
-

PRE-ORDER SHIPS IN SCALE TODAY!
The beloved Ships in Scale Magazine is back and charting a new course for 2026!
Discover new skills, new techniques, and new inspirations in every issue.
NOTE THAT OUR FIRST ISSUE WILL BE JAN/FEB 2026
You are using an out of date browser. It may not display this or other websites correctly.
You should upgrade or use an alternative browser.
You should upgrade or use an alternative browser.
VASA 490 Build Log - Billing Boats, 1:75 [COMPLETED BUILD]
you never know...All it requires - constant practice.Carving defiantly not my forte.
- Joined
- Dec 16, 2016
- Messages
- 1,181
- Points
- 493

Hi Daniel, I’ve just dropped in for a look and I must say that I’m very impressed indeed, a terrific and comprehensive job, nicely done, a pleasure to see.Hi all!
I have a short update that involves my first attempt at carving. The two so called chesstrees needed replacing without the pulleys but just a hole for the rigging to go thru. I welcome all thumbs up as well as thumbs down, I have not glued them in yet.
View attachment 280366View attachment 280367View attachment 280368View attachment 280369
The original for comparison
View attachment 280370
Thank you for your opinions, comments, or suggestions.
Hello Ken, Good to hear from you. Thank you for the kind words. The Vasa has challenged me on many different levels but having the people on this forum such as yourself, has made it a fantastic experience. Thanks for dropping by Ken!Hi Daniel, I’ve just dropped in for a look and I must say that I’m very impressed indeed, a terrific and comprehensive job, nicely done, a pleasure to see.
Wow Daniel - That's some great progress. The soldered strops around the deadeyes is what I used too for my Vasa and although it was a bit fiddly, it was effective. One word of caution was that I found when I applied tension with the lanyard rigging, a couple parted ways (with dry joints), and this meant I had to re-solder the joints. Hopefully you will have good joints and then they should hold.
Your photos however are outstanding with great resolution. What camera are you using for your photos?
Regards,
PeterG
Your photos however are outstanding with great resolution. What camera are you using for your photos?
Regards,
PeterG
Hi Daniel you've been busy, lot of progress since I last stopped by. I like the way your doing the dead eyes I'll keep this in mind for a future build. BTY in my opinion the carved fittings look better on the ship.
- Joined
- Sep 3, 2021
- Messages
- 5,198
- Points
- 738

With the rebuild of my Bluenose model I had the same issue. I tried an electric soldering iron, which worked great. Unfortunately no pictures of the results.I have spent some time experimenting with different methods of attaching the metal (0.65mm brass) stropping to the dead eyes. At first made a little nail jig, bent the wire around and ended with an open but joint. I decided with the soft brass wire with an open but joint could produce unwanted problems at rigging time.
I tried soldering the butt joint with an iron but could not get enough heat, so I bought a micro butane torch and after some practice found my solution.
Hi Peter, thanks for your input and support. I have had a few of the welds come apart during insertion and forming around the dead eye so I know what you mean.Wow Daniel - That's some great progress. The soldered strops around the deadeyes is what I used too for my Vasa and although it was a bit fiddly, it was effective. One word of caution was that I found when I applied tension with the lanyard rigging, a couple parted ways (with dry joints), and this meant I had to re-solder the joints. Hopefully you will have good joints and then they should hold.
Your photos however are outstanding with great resolution. What camera are you using for your photos?
Regards,
PeterG
I'm having a tough time with painting and or using brass black on the strops. The coloring of both methods comes off way to easy and just creates a mess. For now, I have wire brushed the strops back down to brass and may just leave them that way unless anybody has other suggestions for making them black.
I'm just using my iPhone 8 camera which really does take incredible photos. I own two older 35mm SLR's which do well but it's a clumsy routine to get them into my computer.
Thanks Tony I appreciate your opinion.Hi Daniel you've been busy, lot of progress since I last stopped by. I like the way your doing the dead eyes I'll keep this in mind for a future build. BTY in my opinion the carved fittings look better on the ship.
Thank you for opinion Johan. As far as the strops go, the soldering paste I use makes it easy, even though at first took some getting used to.The carved ones add a personal touch, so go or it!
Hi Daniel good to catch up with your progress with your VaSa. You have been busy and she is looking fabulous. I enjoy your carvings, although it is what you feel when you view your ship. It was great to see those photos of the whole ship - just beautiful. Good luck with those strops.
Hello Grant, thanks for stopping by and your kind words. I'm looking forward to following your progress this year as well.Hi Daniel good to catch up with your progress with your VaSa. You have been busy and she is looking fabulous. I enjoy your carvings, although it is what you feel when you view your ship. It was great to see those photos of the whole ship - just beautiful. Good luck with those strops.
- Joined
- Jan 9, 2020
- Messages
- 10,566
- Points
- 938

I feel your frustration about the blackening agent coming off on the brass parts and then creating a mess. I have had the same experience but I thought it was maybe down to using an inferior product, because I cant get the well-known names here. In any case, on the WB I have just made a policy decision not to blacken anything.
- Joined
- May 27, 2021
- Messages
- 222
- Points
- 88

IN reference to the blackening agent, I too have stayed away from them because of what I have read. I see no sense in using something that just comes "off" on your hands. If any one know of a good one, please let me know. I am working on a ZHL Soleil Royale and almost to the point of needing to either paint or blacken the cannon and other items. I did buy a good quality paint.I feel your frustration about the blackening agent coming off on the brass parts and then creating a mess. I have had the same experience but I thought it was maybe down to using an inferior product, because I cant get the well-known names here. In any case, on the WB I have just made a policy decision not to blacken anything.
I too am pretty much finished with using it. I know some people will paint a clear coat over it to seal it off which is fine if that is practical. I am having some success with black coated craft wire. I only have to touch up paint the silver solder joint. I'm in a steep learning curve here but it will be worth it in the end.I feel your frustration about the blackening agent coming off on the brass parts and then creating a mess. I have had the same experience but I thought it was maybe down to using an inferior product, because I cant get the well-known names here. In any case, on the WB I have just made a policy decision not to blacken anything.

- Joined
- Oct 11, 2021
- Messages
- 740
- Points
- 403

I feel your frustration about the blackening agent coming off on the brass parts and then creating a mess. I have had the same experience but I thought it was maybe down to using an inferior product, because I cant get the well-known names here. In any case, on the WB I have just made a policy decision not to blacken anything.
IN reference to the blackening agent, I too have stayed away from them because of what I have read. I see no sense in using something that just comes "off" on your hands. If any one know of a good one, please let me know. I am working on a ZHL Soleil Royale and almost to the point of needing to either paint or blacken the cannon and other items. I did buy a good quality paint.
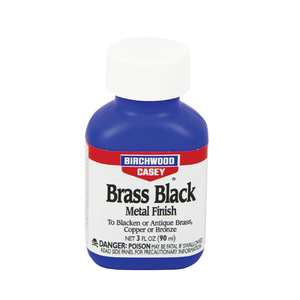
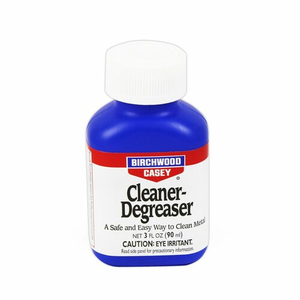
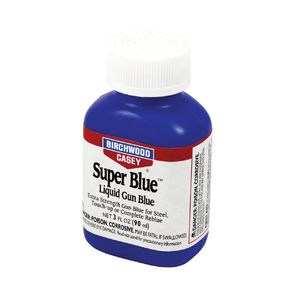
The one I have very good results with is the one from Birchwood Casey Brass Black and Super Gun blue. This is cold blueing. For a good hold on the brass of metal, you need to degrease the surface of all parts. When using rodds to be blued, I use fine sandpaper to make the surface a bit rougher.


- Joined
- May 27, 2021
- Messages
- 222
- Points
- 88

I've seen that and almost bought it...... I just might now.The one I have very good results with is the one from Birchwood Casey Brass Black and Super Gun blue. This is cold blueing. For a good hold on the brass of metal, you need to degrease the surface of all parts. When using rodds to be blued, I use fine sandpaper to make the surface a bit rougher.
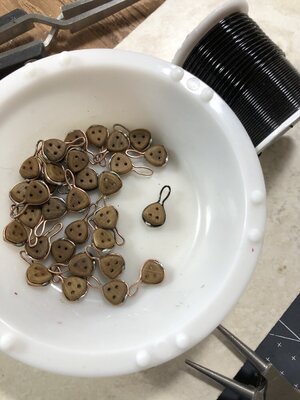
View attachment 280705
View attachment 280708
View attachment 280710
- Joined
- May 27, 2021
- Messages
- 222
- Points
- 88

another question..... how does it work on the "alloy" metals? Like these cheap castings they send., Usually mostly zinc.I've seen that and almost bought it...... I just might now.
- Joined
- Oct 11, 2021
- Messages
- 740
- Points
- 403

For the white "alloy" metals, also known as "pewter", it's a zinc & tin alloy, I use the Super Gun Blue and not the Brass Black.another question..... how does it work on the "alloy" metals? Like these cheap castings they send., Usually mostly zinc.
It works very very well.... Again, degrease the items.
- Poor some blueing into a small container / cup;
- put some of the items into the cup with the blueing agency inside it
- let it turn black and take it out; (just a few seconds to 1 minute)
- put the item into another cup with clean water and cleanse it
- dry the item and use a clean cloth or brush to whipe the item, you'll see you get a bit of a egg gloss shine.
When finished, throw away the residue of the blueing stuff, don't put it back into the bottle or it will contaminate the rest in the bottle and it will losen it's strength!
Sorry Daniël, for getting off topic into your buildlog. I hope you don't mind...


