Thanks for the complement Tony. The wire stropping was just figuring out the length I wanted, then cut wire the same length for all the rest before fabrication into the strop shape. Check out my post # 443 and you can see what I mean. And yes, handmade rope the only way to go.Hi Daniel great looking sheaving on the blocks how do you get them all the same. I can really see the benefits of hand made ropes.
-

Win a Free Custom Engraved Brass Coin!!!
As a way to introduce our brass coins to the community, we will raffle off a free coin during the month of August. Follow link ABOVE for instructions for entering.
-

PRE-ORDER SHIPS IN SCALE TODAY!
The beloved Ships in Scale Magazine is back and charting a new course for 2026!
Discover new skills, new techniques, and new inspirations in every issue.
NOTE THAT OUR FIRST ISSUE WILL BE JAN/FEB 2026
You are using an out of date browser. It may not display this or other websites correctly.
You should upgrade or use an alternative browser.
You should upgrade or use an alternative browser.
VASA 490 Build Log - Billing Boats, 1:75 [COMPLETED BUILD]
Daniel,
Indeed strops and deadeyes came out perfectly - Your build is coming along very nicely indeed.
I just bought a soldering gun - need to learn that skill as well -
Indeed strops and deadeyes came out perfectly - Your build is coming along very nicely indeed.
I just bought a soldering gun - need to learn that skill as well -
Thanks John. As far as soldering goes, having the flux in the right place at the right time along with the correct heat (and the ability to stand on your head at the same time) is key to a good weld.Daniel,
Indeed strops and deadeyes came out perfectly - Your build is coming along very nicely indeed.
I just bought a soldering gun - need to learn that skill as well -
Noted Daniel,
Thanks for the tips - Will need to work on the head part. lol - Will also go to Youtube University and learn much about this skill.
Thanks for the tips - Will need to work on the head part. lol - Will also go to Youtube University and learn much about this skill.
Hello Daniel. How are you doing? Is there any technique for glueing the masts in or do you just use some wood glue? Cheers GrantGood Monday morning everyone.
I just have a few odds and ends to show at this time.
I finally received my 3.5" 4 jaw lathe chuck which enabled me to finish up all the masting from square stock.
View attachment 278317
Next I installed the chain plate boards along with four of the exterior pully assemblies. Once I set the actual dead eyes and their stropping,
I will add the cover strip onto the boards. There is a carving that goes onto the face of the verticle pully at midship, not sure yet if I will use it.
View attachment 278318View attachment 278319
I have spent some time experimenting with different methods of attaching the metal (0.65mm brass) stropping to the dead eyes. At first made a little nail jig, bent the wire around and ended with an open but joint. I decided with the soft brass wire with an open but joint could produce unwanted problems at rigging time.
I tried soldering the butt joint with an iron but could not get enough heat, so I bought a micro butane torch and after some practice found my solution. I can either paint or brass black (if it works on silver solder) to color the wire. Still a work in progress.
View attachment 278324View attachment 278325View attachment 278326View attachment 278327
Then comes setting the rake on the main and mizzen mast, I did a little math and made a jig for it.
View attachment 278333View attachment 278334View attachment 278335
Note that I have not glued anything in or down yet concerning the mast.
I finally figured out how to construct the various tops by closely studying @PeterG 's effort, thank you sir. There are parts size issues with Billings in this area that one has to deal with.
View attachment 278336
I thank you all for checking in on my build. I sure hope everyone had a safe and merry Christmas.
Until next update Happy modeling!!
Hi Grant. No special technique when gluing in the mast, I carefully check where all the contact points are (especially the bottom of the mast) then apply a liberal amount of PVA wood glue. Once properly seated and adjusted, I wipe off any excess that might be noticed around the deck collar.
Excellent. Thank you.Hi Grant. No special technique when gluing in the mast, I carefully check where all the contact points are (especially the bottom of the mast) then apply a liberal amount of PVA wood glue. Once properly seated and adjusted, I wipe off any excess that might be noticed around the deck collar.
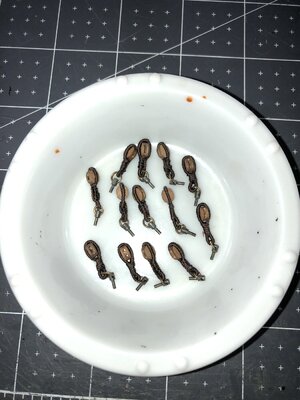
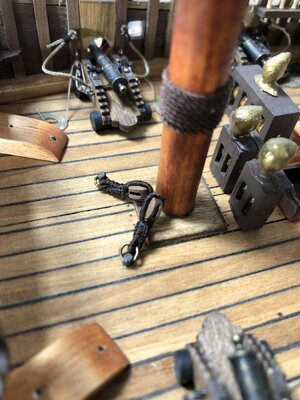
Good Saturday morning to all. I'm finally getting into the ships standing rigging along with a decent amount of block preparation. Billings uses an item they call eye bolts to fasten lines, rings or blocks to. At first, I was not going to use them but decided to go ahead with them anyway as they do make attaching things way more convenient. In this photo you can see where I made beckets to strop the blocks and attached a "deck bolt" to each one. Then it was just a matter of gluing the assembly down into my predrilled holes.
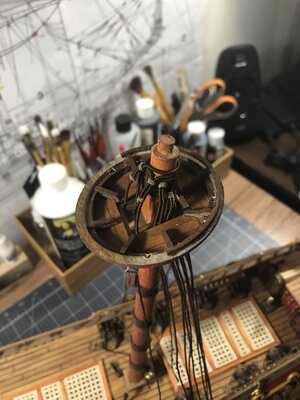
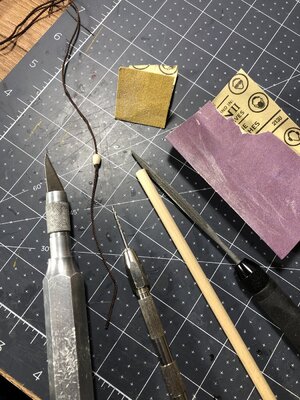
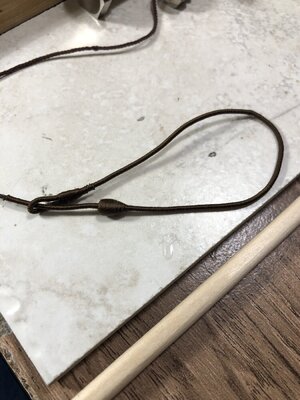
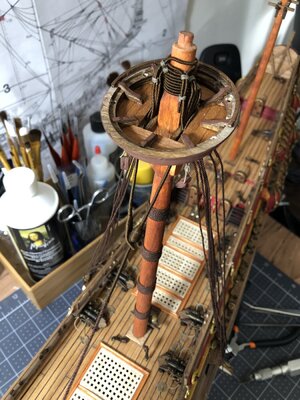
Next, I began setting lower main mast shroud lines which for the time being will just hang loose and tried my luck with serving the lines tops and built my first main stay complete with mouse. I have just barely scratched the surface on rigging and can see I will be doing this well into the summer at the rate I'm going.
I hope you enjoy the photos and I thank you all for checking in on me. Happy modeling!


Next, I began setting lower main mast shroud lines which for the time being will just hang loose and tried my luck with serving the lines tops and built my first main stay complete with mouse. I have just barely scratched the surface on rigging and can see I will be doing this well into the summer at the rate I'm going.


I hope you enjoy the photos and I thank you all for checking in on me. Happy modeling!
Oooh! It's a race and we're tied!
Your main stay rigging looks fantastic Daniel as do your shrouds. I am truly impressed with your work throughout this build, and I hope you are happy with it as well. You are such a gifted builder and your work product motivates me to try to do as well. Wonderful stuff! Congratulations!
Your main stay rigging looks fantastic Daniel as do your shrouds. I am truly impressed with your work throughout this build, and I hope you are happy with it as well. You are such a gifted builder and your work product motivates me to try to do as well. Wonderful stuff! Congratulations!
- Joined
- Oct 17, 2020
- Messages
- 1,691
- Points
- 488

Buona sera Daniel, le legature dell'incappellaggio delle sartie le lasci cosìBuon sabato mattina a tutti. Finalmente sto salendo sulle navi in piedi con il sartiame insieme a una discreta quantità di preparazione dei blocchi. Billings utilizza un elemento che chiamano golfari per fissare linee, anelli o blocchi a. All'inizio, non li avrei usati, ma ho deciso di procedere comunque con loro poiché rendono più conveniente attaccare le cose. In questa foto puoi vedere dove ho fatto dei becchi per tagliare i blocchi e ho attaccato un "bullone del ponte" a ciascuno di essi. Quindi si trattava solo di incollare l'assieme nei miei fori preforati.
View attachment 285054View attachment 285055
Successivamente, ho iniziato a impostare le linee di copertura dell'albero principale inferiore che per il momento si staccheranno e ho tentato la fortuna servendo le cime e ho costruito il mio primo soggiorno principale completo di mouse. Ho appena graffiato a malapena la superficie del sartiame e posso vedere che lo farò fino all'estate alla velocità con cui andrò.
View attachment 285057View attachment 285058View attachment 285059View attachment 285060
Spero che le foto vi piacciano e vi ringrazio tutti per avermi visitato. Buona modellazione!
- Joined
- Jan 9, 2020
- Messages
- 10,566
- Points
- 938

Yes my friend I enjoyed the pictures - a lot!  Your rope quality is amazing and as a result your servings are some of the neatest and cleanest and most clearly defined ones I have seen. Your "mice" almost looks sculpted - it is hard to believe it is something that is created from rope! And the shrouds around the mast? Again - clean, crisp and defined! You can be most pleased with this work!
 Your rope quality is amazing and as a result your servings are some of the neatest and cleanest and most clearly defined ones I have seen. Your "mice" almost looks sculpted - it is hard to believe it is something that is created from rope! And the shrouds around the mast? Again - clean, crisp and defined! You can be most pleased with this work!
Thank you for your very kind words Paul. If this is a race, then you have the nitro burning dragster (or should I say Porsche) against my 1969 Rambler American. Ha, no contest my friend but I do admire your one of kind Vasa and consider myself very fortunate to be on this journey together with you and our other Vasa brothers.Oooh! It's a race and we're tied!
Your main stay rigging looks fantastic Daniel as do your shrouds. I am truly impressed with your work throughout this build, and I hope you are happy with it as well. You are such a gifted builder and your work product motivates me to try to do as well. Wonderful stuff! Congratulations!
Thank you, Frank, for watching my build log.Buona sera Daniel, le legature dell'incappellaggio delle sartie le lasci così
I think I started more than six months before you - I'll be choking on your exhaust fumes in no timeThank you for your very kind words Paul. If this is a race, then you have the nitro burning dragster (or should I say Porsche) against my 1969 Rambler American. Ha, no contest my friend but I do admire your one of kind Vasa and consider myself very fortunate to be on this journey together with you and our other Vasa brothers.
 .
.And you know I'm joking right? NO RACING DURING HOBBY TIME (unless racing is your hobby
Thank you so much Heinrich. I actually did sculpt the mouse from a piece of round stock. Then incorporated it into the rope and served over it thus the serving assumed the shape of the mouse. These are all techniques I learned from our friends here on this forum.Yes my friend I enjoyed the pictures - a lot!Your rope quality is amazing and as a result your servings are some of the neatest and cleanest and most clearly defined ones I have seen. Your "mice" almost looks sculpted - it is hard to believe it is something that is created from rope! And the shrouds around the mast? Again - clean, crisp and defined! You can be most pleased with this work!
- Joined
- Jan 9, 2020
- Messages
- 10,566
- Points
- 938

Hey ... one never knows what is under the hood of the a 1969 Rambler!Thank you for your very kind words Paul. If this is a race, then you have the nitro burning dragster (or should I say Porsche) against my 1969 Rambler American. Ha, no contest my friend but I do admire your one of kind Vasa and consider myself very fortunate to be on this journey together with you and our other Vasa brothers.
I have to tell you it was an inline straight six three speed column shift (three on the tree) and back then (fall of 1973) when gas was 38 cents per gal. I got 25 mpg in it!Hey ... one never knows what is under the hood of the a 1969 Rambler!
Good morning Daniel. Brilliant my friend. Your rope, blocks, serving and lashings all make this beautiful. You are getting your VaSa soundly right. PS - I’ll bring my Husqvarna 701 rally to the race but can we do it in the bush or desert dunes please...Good Saturday morning to all. I'm finally getting into the ships standing rigging along with a decent amount of block preparation. Billings uses an item they call eye bolts to fasten lines, rings or blocks to. At first, I was not going to use them but decided to go ahead with them anyway as they do make attaching things way more convenient. In this photo you can see where I made beckets to strop the blocks and attached a "deck bolt" to each one. Then it was just a matter of gluing the assembly down into my predrilled holes.
View attachment 285054View attachment 285055
Next, I began setting lower main mast shroud lines which for the time being will just hang loose and tried my luck with serving the lines tops and built my first main stay complete with mouse. I have just barely scratched the surface on rigging and can see I will be doing this well into the summer at the rate I'm going.
View attachment 285057View attachment 285058View attachment 285059View attachment 285060
I hope you enjoy the photos and I thank you all for checking in on me. Happy modeling!
 .
.Cheers
Grant
Nothing like an American Vintage.I have to tell you it was an inline straight six three speed column shift (three on the tree) and back then (fall of 1973) when gas was 38 cents per gal. I got 25 mpg in it!


