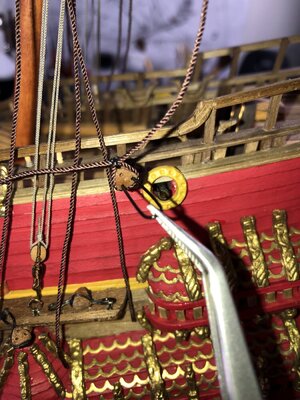
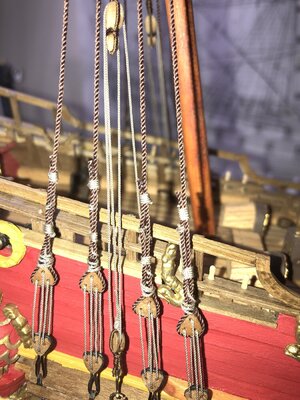
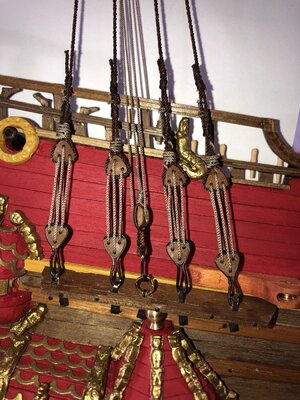
Really, really nice work Daniel. Your seizing is beautiful and your made ropes are excellent. That effort with the ropewalk is paying off…
Regards
PeterG
Regards
PeterG
 |
As a way to introduce our brass coins to the community, we will raffle off a free coin during the month of August. Follow link ABOVE for instructions for entering. |
 |
 |
The beloved Ships in Scale Magazine is back and charting a new course for 2026! Discover new skills, new techniques, and new inspirations in every issue. NOTE THAT OUR FIRST ISSUE WILL BE JAN/FEB 2026 |
 |
Hello Daniel hope you are doing well. No man...this is too good ! Your rope and metal work is brilliant...I struggle with this. Is there any rule for tensioning or is this just a feel you get over time? Well done Daniel. CheersGood Sunday evening all.
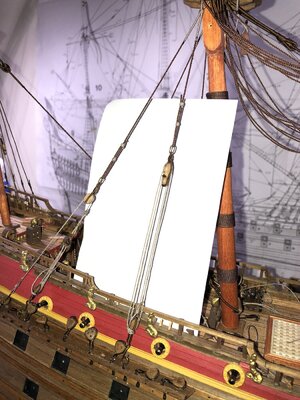
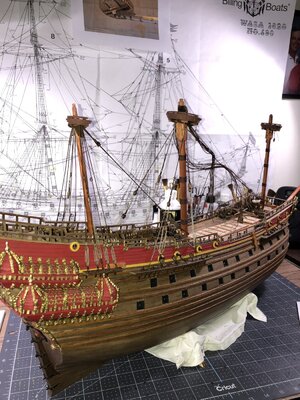
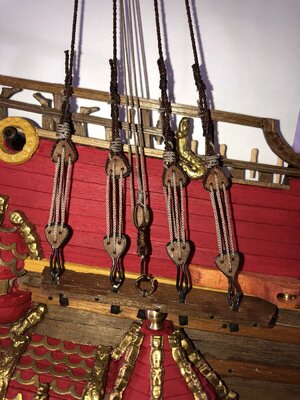
This update highlights installation of some of the lower backstays. The mizzen stays are complete, the main mast aft stays are shown but am waiting on some larger violin blocks from Dry Dock to finish the forward stays. I have spent a considerable amount of time just serving the beckets for the blocks, this is something that at least for me takes a lot of practice and I still have a way to go before I'm 100% satisfied. You may notice all my hooks and rings I hand made from a coated wire I found in the craft section of my hobby store.
View attachment 287545View attachment 287546View attachment 287547View attachment 287548
For now, the ropes are temporarily tied off. I think my critical path will be to set all the lower stays in their final permanent position then the lower shroud lines.
My goal is to keep my eye on line tension and mast alignment.
Thanks again for stopping by and Happy Modeling!
Thank you, Paul. For now, I'm just serving all the block beckets associated with the standing rigging especially since they tend to be the larger blocks.Wonderful work Daniel. I admire your dedication to serve all the rope strops!
Thank you so much Heinrich. Prior to starting the Vasa, I had visited quite a few builds where the rigging rope was just unbelievably beautiful, so realistic. I thought to myself rope and rigging done well is the crowning glory to these magnificent vessels. Your comments as well as others are confirmation I'm headed in the right direction.The servings and completed rigging looks great Daniel. And that rope of yours ... it's just to die for!
Thank you, Peter, as a fellow Vasa builder your opinion is very valuable to me. Hardly a day goes by where I don't visit your log for instruction.Really, really nice work Daniel. Your seizing is beautiful and your made ropes are excellent. That effort with the ropewalk is paying off…
Regards
PeterG
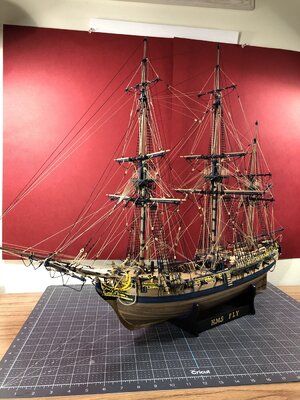
Thank you, Grant. As far as tensioning goes on my first major ship the HMS Fly I followed a rule I read somewhere on this forum 'make all your lines taught, not tight'. The results were quite satisfactory, and I will use the same strategy on the Vasa.Hello Daniel hope you are doing well. No man...this is too good ! Your rope and metal work is brilliant...I struggle with this. Is there any rule for tensioning or is this just a feel you get over time? Well done Daniel. Cheers

It's like you get to a point where you say, this looks good enough and I want to move on to something else. For me this usually happens at the rigging stage. I agree with you that I am not in for a 5-10 year project. Three years is definitely more palatable.You know, there has been some discussion on my build log about serving blocks and such. I can tell you that you are doing more than I think I am going to do. I'm going to limit my serving to only the largest lines and blocks. Perhaps that is incorrect but...I suspect we THINK we know more about how things were done in 1628 that we actually know. I am also aware that some of the builds I really admire are also 5-10 years in the making and I'm not on-board for that!
Hi Dean, thank you for your kind words. I'm happy to see you back posting again.Great rigging work Daniel! You are hired, I will subcontract my rigging on the NL to you .
Thank you, John.Daniel,
Last two sets of images look GREAT - nice work


Thanks Paul. I'm still trying to decide what to do about belaying the tackle lines. I have no room to coil them on the deck and unfortunately, I have no idea how many belay points I will need for the running rigging. I'll probably end up with a hanging hank inboard off the rail hopefully out of the way of the canons.Nice Daniel! I appreciate your attention to detail. I see you have lashed the end of the shroud lanyards to the shroud itself. I think I will do the same as it is done that way at the museum and it looks nice. I have seen other solutions in books and on other models as well. WHY CAN'T WE ALL JUST AGREE!
I also see that you have wrapped the tackle lines around the strop and tossed them inboard. Will they end up on a pin or coiled on deck?
Bummer about the ropes...
Hello Paul... imagine if we all just agreed... no debates, no challenges, no modelers decisions, no builders license, no heated opinions... no need for apologies.... we would all get bored.Nice Daniel! I appreciate your attention to detail. I see you have lashed the end of the shroud lanyards to the shroud itself. I think I will do the same as it is done that way at the museum and it looks nice. I have seen other solutions in books and on other models as well. WHY CAN'T WE ALL JUST AGREE!
I also see that you have wrapped the tackle lines around the strop and tossed them inboard. Will they end up on a pin or coiled on deck?
Bummer about the ropes...


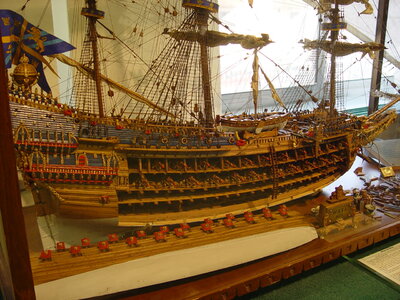
Good evening Daniele, with your permission, post this photo, source Museo del Mare NapoliGood morning, everyone.
I received my order of various size violin blocks which allowed me to continue with the standing rigging backstays on the mainmast. As you can see from the overall picture, I wanted to get the mainmast backstays installed prior to placing the shroud lines which are currently draped over the mainstay. I'm probably way oversize in scale on the violin block here(14mm), it should probably be no bigger than 8-10mm, but I want to highlight its shape. I can tell from the Vasa Museum pictures that it is a rather large block to begin with.
View attachment 289956View attachment 289957
Ok next is a macro of the mizzen shrouds which I spent quite a bit of time on. Sadley I am going to cut, remove and redo these 8 lines because I did not realize until I looked at the close-up photo, I had used a bad batch of rope. Here it is on zoom. Really ugly. One would think I would have caught it but under normal vision or even 3X reading glasses I use during all my building, it doesn't appear this bad but now I know it is. By the way I'm actually happy with the way the dead eye alignment turned out, I did it all by site using the rail as a guide.
View attachment 289967
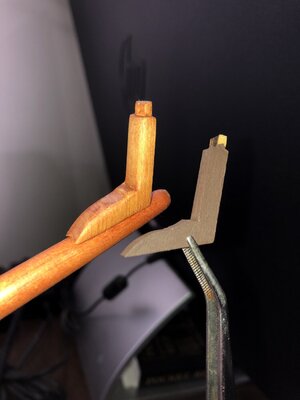
Finishing up on a positive note I fabricated a knee for the bow sprit top to sit on. I could not bring myself to use the kit supplied plywood knee that I painted.
View attachment 289968
I sure thank you all for checking in on me, I'll be in the REDO locker for a while, in the meantime happy modeling to you!
Thank you, Frank, I love this photo. The green shiplap siding is beautiful!Good evening Daniele, with your permission, post this photo, source Museo del Mare NapoliView attachment 290030
