VASA 490 Build Log - Billing Boats, 1:75 [COMPLETED BUILD]

Yes but I was thinking of the surprise factor - 1969 Rambler BUT with a Chevvy 350 cu-inch small-block, Edelbrock intake manifolds, Holley 750 cfm carburetor and 4-speed Hurst shifter. :)
Well you just about described my second car (and only bad a.. car) a 1970 Chevell that I rebuilt a bored out 350 small block. I gave it an Edelbrock C4B simi rise intake manifold, Holey 800cfm carb, appliance headers, aluminum pistons, a hot long dwell cam, plus a bunch of other bolt on goodies. I was punching around 13.5:1 compression ratio. Only problem was I was under the hood constantly fixing things. @GrantTyler, Grant about the only sand dunes my Rambler ever saw were the ones at
Surfside or Quintana Beach where I would take my girlfriend when we went to the beach. @dockattner Paul could give you a run for your money! Oh well back to rigging and making more rope.
 
With a 13.5: compression ration, pump gas is not advisable - that is when you start looking for your nearest Sunoco outlet! :)
 
Well you just about described my second car (and only bad a.. car) a 1970 Chevell that I rebuilt a bored out 350 small block. I gave it an Edelbrock C4B simi rise intake manifold, Holey 800cfm carb, appliance headers, aluminum pistons, a hot long dwell cam, plus a bunch of other bolt on goodies. I was punching around 13.5:1 compression ratio. Only problem was I was under the hood constantly fixing things. @GrantTyler, Grant about the only sand dunes my Rambler ever saw were the ones at
Surfside or Quintana Beach where I would take my girlfriend when we went to the beach. @dockattner Paul could give you a run for your money! Oh well back to rigging and making more rope.
Not with 3.4 inch clearance when she is rigged for the track I couldn't!!!
 
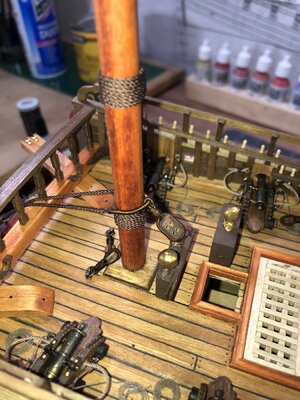
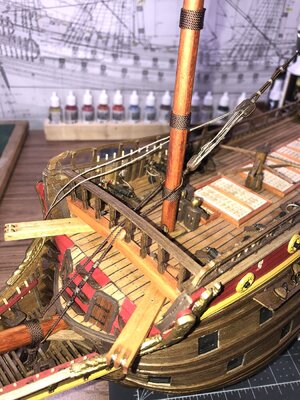
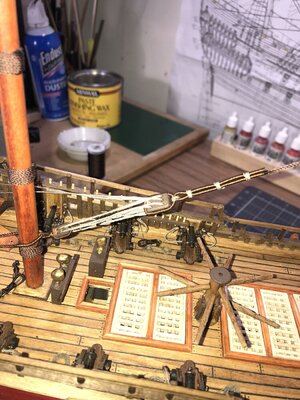
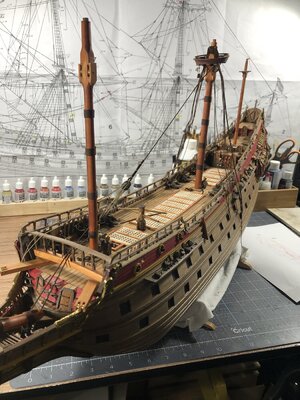
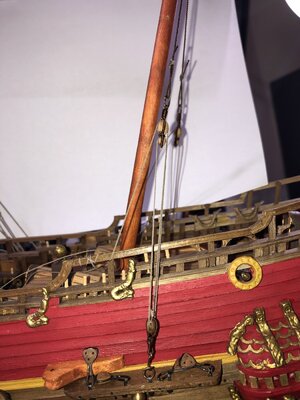
Good morning, all. I wanted to show my interpretation of the main mast forestay. The continuous loop around the bowsprit and the foremast was somewhat difficult. I had to map out the locations for serving so that when installed the served lengths lined up with the mast. Seizing the loop off, well not my best work but acceptable. I used @PeterG 's lacing diagram (thanks Peter) on the lanyard which is left loose for now.

IMG_1607.jpgIMG_1610.jpgIMG_1611.jpgIMG_1613.jpg

Next, I will set the foremast low top and shroud work.
Thanks for coming by your visits are a much appreciated and important part of this build log.
 
Brilliant Daniel!
Thanks Paul. I just realized that it was not necessary to serve the upper block (6 hole) stropped end... Oh well it still looks ok, and I suppose I have committed myself to keeping the other stays served in the same way for continuity's sake. I certainly will not serve all the shroud lines at their deadeyes though.
 
You know, there has been some discussion on my build log about serving blocks and such. I can tell you that you are doing more than I think I am going to do. I'm going to limit my serving to only the largest lines and blocks. Perhaps that is incorrect but...I suspect we THINK we know more about how things were done in 1628 that we actually know. I am also aware that some of the builds I really admire are also 5-10 years in the making and I'm not on-board for that!
 
If it were not for the fact that I'm retired, it certainly would take me a lot longer. As far as serving lines, I actually enjoy making the served beckets and stropping blocks with them. It did take quite a few attempts before I became comfortable with the process though.
 
Wow Daniel. I know the post is about rigging, but I just cannot help to comment on how much I love the wood color, ambience and character of your ship. It looks like a real working ship in miniature!
 
Wow Daniel. I know the post is about rigging, but I just cannot help to comment on how much I love the wood color, ambience and character of your ship. It looks like a real working ship in miniature!
Wow Heinrich! I sure thank you for that glowing complement. I am at a loss for words.
 
Daniel, this work is excellent. Thank you for the reference to my rigging of the main forestay.

One small point that you might want to check with the continuous loop around the bowsprit, is that I think the strop as it goes through the foredeck railing, crosses over so the port line goes around the starboard side of the foremast and vice versa. It is a small thing and will not be noticed but I think this is the case as there is a small block of shaped wood to hold the strop on the bottom rail of the foredeck railing.

5A9D404A-A8C0-4631-97C9-8F6A4025CEF8.jpeg

The tie lashing of the continuous loop I think is on the port side of the beakhead, as you have it, but if you reverse it with a crossover you would have to allow for this.

Regards,
PeterG
 
Last edited:
Daniel, this work is excellent. Thank you for the reference to my rigging of the main forestay.

One small point that you might want to check with the continuous loop around the bowsprit, is that I think the strop as it goes through the foredeck railing, crosses over so the port line goes around the starboard side of the foremast and vice versa. It is a small thing and will not be noticed but I think this is the case as there is a small block of shaped wood to hold the strop on the bottom rail of the foredeck railing.

View attachment 286810

The tie lashing of the continuous loop I think is on the port side of the beakhead, as you have it, but if you reverse it with a crossover you would have to allow for this.

Regards,
PeterG
Thanks Peter. You know I had fully intended to incorporate the cross over in the loop but must have lost focus in that area during assembly. The cross over helps keep the rope centered on the wood guide in the railing.
 
Good Sunday evening all.
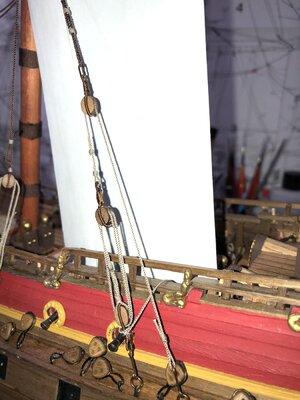
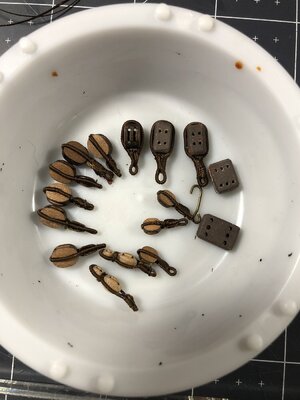
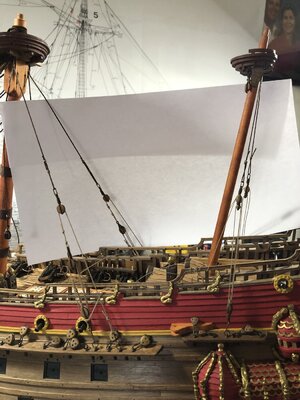
This update highlights installation of some of the lower backstays. The mizzen stays are complete, the main mast aft stays are shown but am waiting on some larger violin blocks from Dry Dock to finish the forward stays. I have spent a considerable amount of time just serving the beckets for the blocks, this is something that at least for me takes a lot of practice and I still have a way to go before I'm 100% satisfied. You may notice all my hooks and rings I hand made from a coated wire I found in the craft section of my hobby store.


IMG_1621.jpgIMG_1632.jpgIMG_1633.jpgIMG_1634.jpg

For now, the ropes are temporarily tied off. I think my critical path will be to set all the lower stays in their final permanent position then the lower shroud lines.
My goal is to keep my eye on line tension and mast alignment.

Thanks again for stopping by and Happy Modeling!
 
Back
Top