Oeps, just almost forgot you to answer………… Thanks, Tobias. Much appreciated!Beautiful, that's all I can say, Peter
Regards, Peter
 |
As a way to introduce our brass coins to the community, we will raffle off a free coin during the month of August. Follow link ABOVE for instructions for entering. |
 |
 |
The beloved Ships in Scale Magazine is back and charting a new course for 2026! Discover new skills, new techniques, and new inspirations in every issue. NOTE THAT OUR FIRST ISSUE WILL BE JAN/FEB 2026 |
 |
Oeps, just almost forgot you to answer………… Thanks, Tobias. Much appreciated!Beautiful, that's all I can say, Peter

The more sail you set, Peter, the more she becomes into her own. Beautiful...After a week's holiday, building started again.
The next step is to install the jib. I had already placed the MS/Lankford drawing when installing the jumbo jib. With the comment that I had replaced a single sheave block with a double sheave. This choice is also confirmed by L.B. Jenson in the Sage. The 2 drawings next to each other for the jib:
View attachment 362687
The halliard is also double here, due to 2 blocks at the top of the lower mast.
The sheet is double to pull the sail over the stay to starboard or to port. Depending on which side of the wind she sails. Jenson draws it with pieces of chain, I don't agree with that. Here again MS/Lankford, with lines.
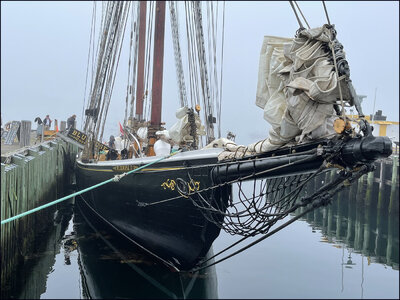
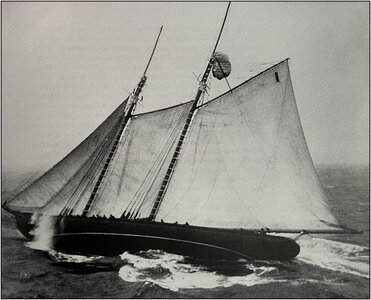
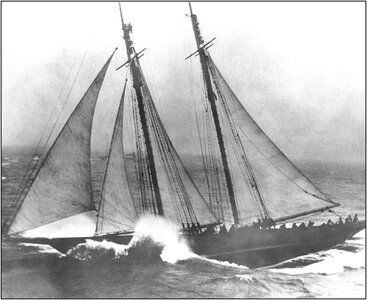
But I also have to take the balloon jib into account. Because the two bottom corners meet at the end of the bowsprit. And they are both stowed on the bowsprit:
View attachment 362688
On the left picture the balloon jib is stowed on the starboard side and they are busy with the jib. With the application or removal using the hank's.
Everything is stored in the right picture. But both sails must be secured separately from each other. You can also see the stored jumbo on the right picture.
The Theory:
I've been thinking about this for a while and came up with the following solution:
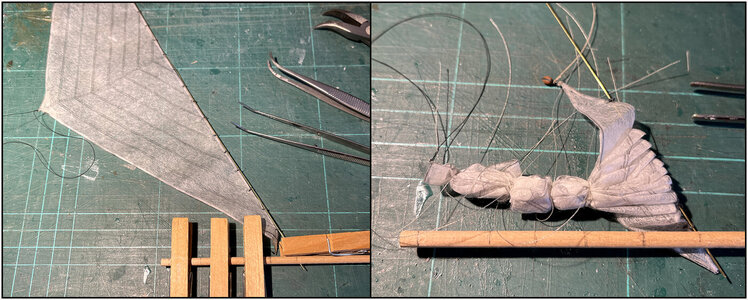
View attachment 362689
All 5 jib stops on both sides of the bowsprit will be doubled.
As an example, the piece of round wood on the starboard side, with the drawing below left as clarification:
A: the mast.
B: the sail (the piece of spar).
C: the blue line that goes up along the sail from the starboard side.
D: the red line that is drawn from the port side just over the mast to starboard, wrapped around the standing blue starboard line, and then drawn back to port. Then that red port line goes around and over the sail back and forth to starboard. And is then tied together with the blue starboard line. Where the pull is directed downwards to pull the sail against the bowsprit.
For the 2nd sail (a copy of the head of the spar) everything is repeated in mirror image.
Blue arrows: the ascending line.
The red arrows: the line that goes around the blue line and the sail.
The Premise:
The jib set with a number of temporary lines:
View attachment 362690
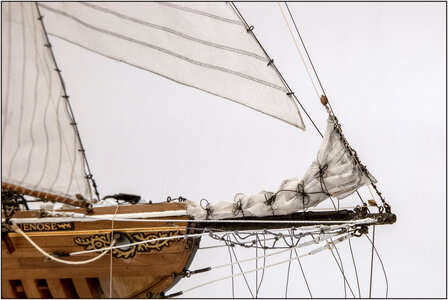
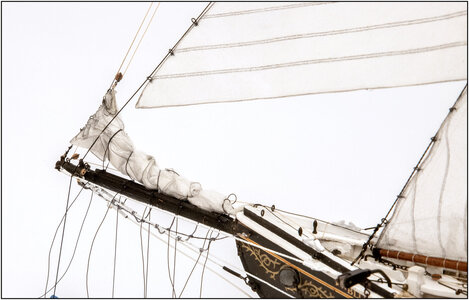
The jib sail is set to port with 22 hank’s on the stay. The arrow points to the starboard pendant of the sheet running over the stay to starboard. In case the sail needs to be set to the other side.
After applying the outside lines and drawing the stitching seams, the sails have acquired a bulge. That was desired and also came true. Just hard to show in the photo. But that will be fine with the studio photos to be taken later.
The tack of the sail is attached to a hook on the bowsprit:
View attachment 362691
With a 2,5mm/.09" block for the downhaul. I'm still happy with my scratch hank's. On the bowsprit the 2x5 jib stops. And white backrope and guys / bow stays still need to be updated with white and re-tightened. But with the recovery of the jib and balloon jib I will probably get into trouble again. So that's at the end. And of course still dusting.
The halliard:
View attachment 362693
A: the block to the sail.
B: the two blocks on the eye irons at the top of the lower mast.
C: both running parts still have to go through the 2 eyes on the front spreader bar.
All the previously placed blocks are now occupied.
The jib with the starboard pendant of the sheet running over the stay:
View attachment 362694
Temporarily put with a line, but that will be a complete sheet. The bulge is now slightly more visible.
Like the jib is on the port side with the port sheet.
View attachment 362695
Also with a single temporary thread.
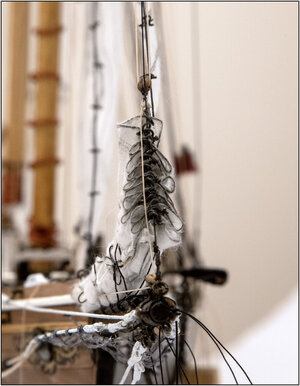
And one more picture from behind:
View attachment 362692
With the last view of this jib sail fully set.
Now it's time for the Practice. But that will take some time.
Regards, Peter
Thank you, Johan. Your post tickles........The more sail you set, Peter, the more she becomes into her own. Beautiful...
Good morning Peter.I Love this picture : “Chaos with intent “. I am repeating myself however you are the master of detail. You also pull it off so realistically which is my favourite modelling appearance. (One day I will get thereI've been thinking about this for a while and came up with the following solution:

Thank you, Dean, for the reply and the understanding. When I started with the first sail, the approach was indeed: furled sails. And the big mainsail confirmed that. That took way too much view of the rigging. Same with both top sails. At the foresail I received input to possibly set a reefed sail. And that was pretty good. The jumbo jib is also set in what I call 'visual balance' in combination with the reefed front sail: a balanced triangle.Beautiful work as always Peter! The choice of how to display the sails is a tough one. But as you say, it should make sense from a sailing stand point, not random. I had thought you were originally going to show them all furled, but displayed open is also nice. But it looks like you will do a combination that is feasible.
Thanks, Mark. I can find myself in your term ‘Remarkable’.Hi Peter, I've just caught up with your log after a bit of a break. I have no words, your work is simply remarkable. Looking forward to more, as always
That’s correct. That’s why I first pre-rigged every the sails with all the blocks and ropes. Then set it with all the ropes and then furled, reefed, stowed or set them. If I were to loosen the lines from the belaying pins and eyes, then I could set all sails. Apart from whether the length of the lines would be sufficient. Because now the ends have been cut and they still have to get the bundles of tied lines.Are you saying that all rigging lines are functional and in order?
And thanks for this compliment.It is amazing how detailed your rigging is. Fantastic!
Thanks, Grant. Chaos, that was also my thought when I set the 2x5 0,25mm/.009" jib stops. They whent everywhere, won’t hang down, were everywhere between each others when making the example knots with the piece of wood.Good morning Peter.I Love this picture : “Chaos with intent “. I am repeating myself however you are the master of detail. You also pull it off so realistically which is my favourite modelling appearance. (One day I will get there).
As I also wrote in my response to Dean, since this morning I'm also leaning in that direction. As you say it correct: 'it would flow through with your furled sails'. It would give a view balanceChoices…..I would stow the 2 jibs. It would flow through with your furled sails.

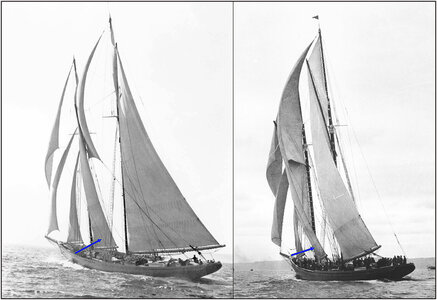
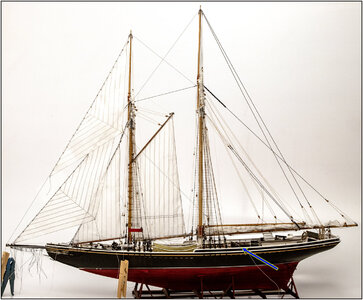
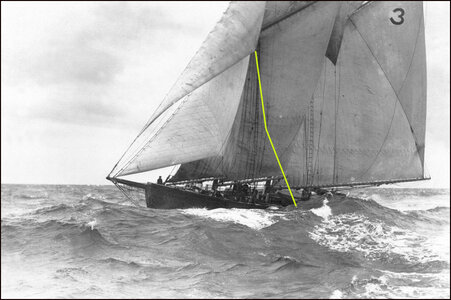
Hi Peter. I don't have any real sailing knowledge to draw on, but I wouldn't have thought that any lines go around the outside of the shrouds, getting in the way of anyone running up the ratlines?I also did this because on all the drawings I have, it is not indicated how the pendant and the tackle of the sheet goes backwards. Is it routed inside or outside the shrouds?
Thanks for the reply. Mark. And you are correct. After my post in a Dutch forum, a former professional skipper, also an experienced sailor, asked me about the attachment points of the tackle of the sheet. Given the mounting so far aft, he suspected that the hoist won’t be get much outside and simply runs on the inside of the shrouds of the main boom.Hi Peter. I don't have any real sailing knowledge to draw on, but I wouldn't have thought that any lines go around the outside of the shrouds, getting in the way of anyone running up the ratlines?
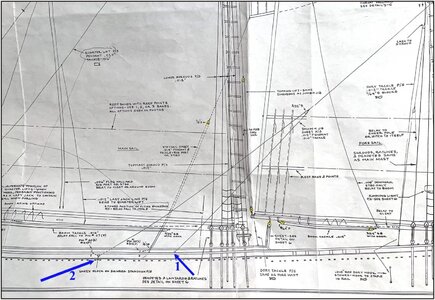

Hi Tobias. It is a kit where you can put in all your personal visions.I think I will also order and build this beautiful bluenose at some point. Peter this is so fantastic.
Thanks, Heinrich. You are correct with the rigging and all the options. I was not yet faced with a fait accompli and can still go in any direction. Even into the right one.Peter the beautiful thing about your build is the options that you have available - options that are available only because you have done the rigging 100% correct and functional. So, in my opinion, the final choice does not really matter as you can justify historically, whichever option you choose.
