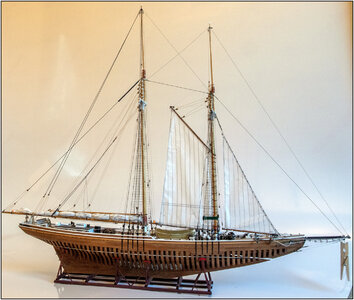
YUANQING BLUENOSE - Peter Voogt [COMPLETED BUILD]

I agree what you have created at scale already is a worthy part. I guess we are all thinking about if you wanted to make it exactly like the real thing. But that’s like a lot of rigging knots, etc., and sometimes scale limits us. So using what you have made is fine in my opinion. It’s all a matter of what you envision going on the ship, and what’s possible. ;)
Thanks for understanding, Dean. It was also with the ratlines with on both ends a splice. There are limits to what is possible.
And with the hanks, the 2 little eyes must also be in proportion to the used material. I can use thinner wire but I also have to tie a rope with a knot on both eyes. I used the Serafil for that. And than a knot is looking very big in those tiny ‘partly’ eyes.
Also here: Size does Matters.
But: it’s great that such not often used small items gives so much input from you all! Thanks for that! :)
Regards, Peter
 
A year into this POF-build in 1:72 scale I have to conclude that it's nigh impossible to get everything scaled down accurately. At a certain point it becomes increasingly difficult, moving to impossible, to manufacture, handle and assemble parts.
What's shown in this build log is probably as close as you can get without going full watch maker.
Johan, also thanks for understanding.
Regards, Peter
 
Thanks for understanding, Dean. It was also with the ratlines with on both ends a splice. There are limits to what is possible.
And with the hanks, the 2 little eyes must also be in proportion to the used material. I can use thinner wire but I also have to tie a rope with a knot on both eyes. I used the Serafil for that. And than a knot is looking very big in those tiny ‘partly’ eyes.
Also here: Size does Matters.
But: it’s great that such not often used small items gives so much input from you all! Thanks for that! :)
Regards, Peter
I truly understand, first I built the BN in 1:72 scale and now am building the Norske Love in 1:75 scale. ;)
 
First 3 images of the installation of the 'hank’s' on the jumbo jib:
1123 Hanks.jpg
From left to right:
-I'm glad I made the hank's from my iron wire and I also have magnetic tweezers. Then I can apply the mounting wire a little easier.
-then the thread from below through the eye of the sail and slide the open side of the hank over the sail.
-then tie a knot on the other end of the hank.
Both knots secured with a tiny tip of CA.

It took me a while to set sail.
When making it I didn't pay attention and I drew the stitching seams of the jobs parallel to the stay........ ggggrrrrr.
On the 2nd attempt I was busy securing the hank's. But on the mast side ....... ggggrrrrr ....ggggrrrrr.
Then give it a next try and pay more attention.
It allows me to do test with a wrong sail. Provide the delicate paper sail with a thin spray coat of varnish. That worked out well. The sail becomes a bit firmer and can now also be modeled properly. I do not do that for the furled other 2 sails at the front. The folds then become a bit sharper, which does not look natural.

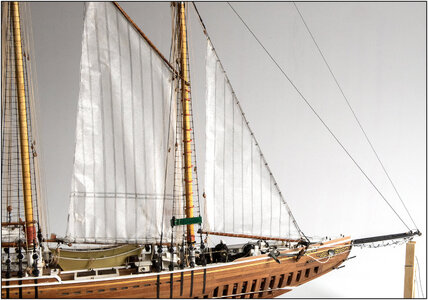
At the request of a member of the Dutch forum, decided to put the jumbo jib as a storm jib:
1124 Jumbo.jpg
The rigging of this sail took me a full afternoon.

A little closer with a view of the 20 applied hank's:
1125 Jumbo.jpg
INHO: they are much more on scale .......
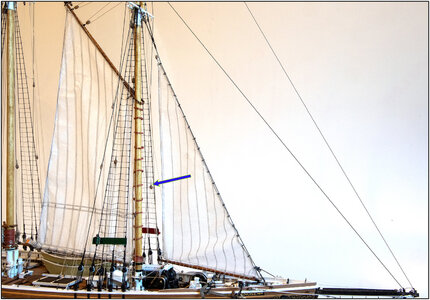
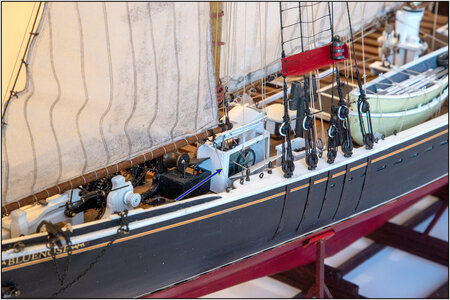
The sail is pulled up in a similar way to the gaffs. On 1 side a fetching part and on the other side a block with a tackle, both sides are fixed to the railing. The arrow points to the block with the tackle on the starboard side.
The end of the boom with the sheet and the boom topping lift.

The front of the boom was quite complex to secure:
1127 Jumbo.jpg
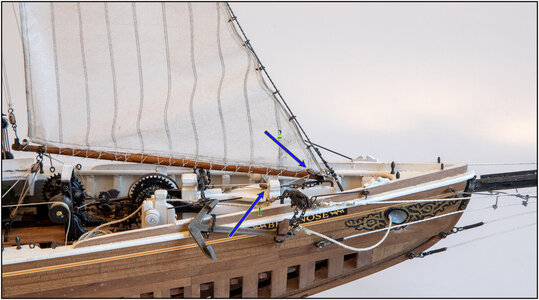
The end can slide with 2 brackets over a horse that is fixed on a block on the bowsprit.
A piece of chain is attached to the brackets. Attached to it is a block for a tackle that is attached to the end of the bowsprit (arrow 1).
At the end of the boom also a block for the downhaul (arrow 2).

Raising the sail:
1128 Jumbo.jpg
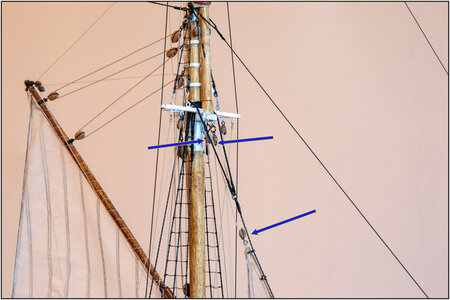
The halliard runs through 2 blocks under the base of the topmast and through a block at the top of the sail.

The boom is moved to port to keep a view on the foredeck:
1129 Jumbo.jpg
Some help was needed to tighten all the lines of the sheet and topping lift ………
If there is a no wind, you want to catch it in the sail as soon as possible with the first gust of wind. So that the boom does not have to be pushed out by a crew member, it is temporarily secured to the railing with an 'outliner'. The rope has a hook that is hooked to the bracket of the boom sheet. As soon as the wind picks up, the line is quickly unhooked.
Does it really exist........? ........ otherwise a case of BL-AL-FI .........;)

I was not able to put the sail completely tight along the stay. Making the mold wasn't easy maneuvering between all the lines. When I'm done with the whole front, I can divide the fold of the sail a bit. The hanks finally slide over the stay.
Regards, Peter
 
Last edited:
The fold in the sail literally and figuratively did not sit well with me. You know me by now ........... The advantage of a functionally rigged sail is that it can be adjusted:
1132 Jumbo.jpg
The problem is that there are 3 points at the front bottom corner of this sail that don't meet at 1 point. The sail is secured to the front of the boom. The pivot point of the boom is slightly behind it. And the sail with the hank's stitches again slightly in front of the attachment point towards the stay.
I lifted the boom slightly and pushed it forward a bit. And the fold came right out. Then put everything back together.

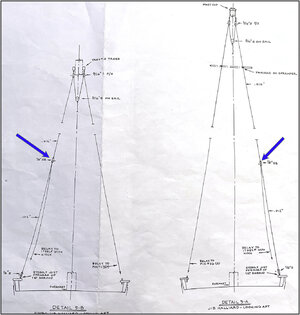
On the MS/Lankford drawings I came across something that I don't think is quite right:
1131 Jumbo.jpg
When he raised the two sails shown, he made the top block single sheave (SB=single block) at the tackle. With the similar halliards on both gaffs, this is a double sheave block.
As shown, the line starts at the hook block on the railing, goes through the top block and then needs to be secured. The disk of the bottom block is then not used. I have installed a double sheave trestle with now an extra stroke through the bottom block as well.

With another picture from a different position with the hank's:
1130 Jumbo.jpg
With a view of the tackle described above. By shifting for the photo and a little side wind, the sail folds slightly differently.
Regards, Peter
 
Last edited:
The problem is that there are 3 points at the front bottom corner of this sail that don't meet at 1 point. The sail is secured to the front of the boom. The pivot point of the boom is slightly behind it. And the sail with the hank's stitches again slightly in front of the attachment point towards the stay.
I lifted the boom slightly and pushed it forward a bit. And the crease came right out. Then put everything back together.
Nice safe.
One of the issues of being able to draw straight lines, where in reality an awful lot of assumed rigid interfaces are soft. Challenges...
 
When he raised the two sails shown, he made the top block single sheave (SB=single block) at the tackle. With the similar halliards on both gaffs, this is a double sheave block.
As shown, the line starts at the hook block on the railing, goes through the top block and then needs to be secured. The disk of the bottom block is then not used. I have installed a double sheave trestle with now an extra stroke through the bottom block as well.
Probably a rather stupid question, but...
Doesn't the line start at the upper single block, running through the lower single block, up to mentioned upper block and then back to the railing?
If not, then there's no use for the single block on the railing, or if the line must start at the lower block, followed by your route, with a double upper block.
Thanks for thinking with me, Johan. He has drawn no eye on both blocks. I also thought about it, but now made it equal to the other similar tackles.
Regards, Peter
 
Last edited:
Hey Peter. Amazing continuing job on your incomparable BN! I plan on rigging the full suite of said on mine, so your pictures and go-by's are incredibly useful. I'm currently working on my ribs and am sanding then and rounding the edges a bit although I need a replacement rib 41 as mine fell off the table and splattered into pieces. That being said, does any one know what has happened to Heinrich? I've tried contacting him over the last several weeks and haven't heard word one back from him? I hope he's okay!
 
Hey Peter. Amazing continuing job on your incomparable BN! I plan on rigging the full suite of said on mine, so your pictures and go-by's are incredibly useful. I'm currently working on my ribs and am sanding then and rounding the edges a bit although I need a replacement rib 41 as mine fell off the table and splattered into pieces. That being said, does any one know what has happened to Heinrich? I've tried contacting him over the last several weeks and haven't heard word one back from him? I hope he's okay!
Hi Joe. Thanks for the compliments and nice to hear that my rigging is helpful for you. About a splattered frame, you are not the only one, it recently happens Paul @dockattner also. ;)
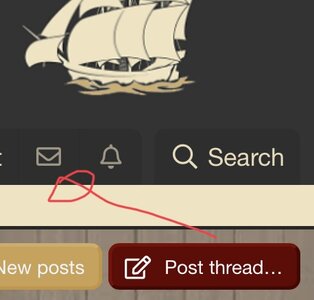
Heinrich is posting almost every day in het WB build-log. So perhaps send him een PM. That’s is the above right corner of the black top-band of the forum:
DF3DF4BA-FF7A-419D-B7D1-A86A96DEFE04.jpeg
If you clinch on the envelope, click on “start a new conversation“ and in the field ‘Recepients’ you type @Heinrich, you see his avatar and click on that. When you got a answer, a red circle appears with a white number.
Regards, Peter
 
Last edited:
After a week's holiday, building started again.
The next step is to install the jib. I had already placed the MS/Lankford drawing when installing the jumbo jib. With the comment that I had replaced a single sheave block with a double sheave. This choice is also confirmed by L.B. Jenson in the Sage. The 2 drawings next to each other for the jib:
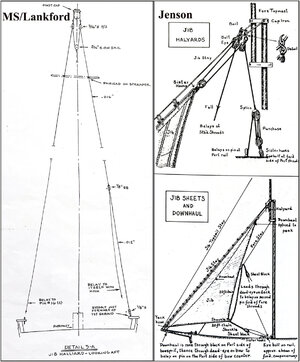
1133 Jib.jpg
The halliard is also double here, due to 2 blocks at the top of the lower mast.
The sheet is double to pull the sail over the stay to starboard or to port. Depending on which side of the wind she sails. Jenson draws it with pieces of chain, I don't agree with that. Here again MS/Lankford, with lines.

But I also have to take the balloon jib into account. Because the two bottom corners meet at the end of the bowsprit. And they are both stowed on the bowsprit:
1134 Jib.jpg
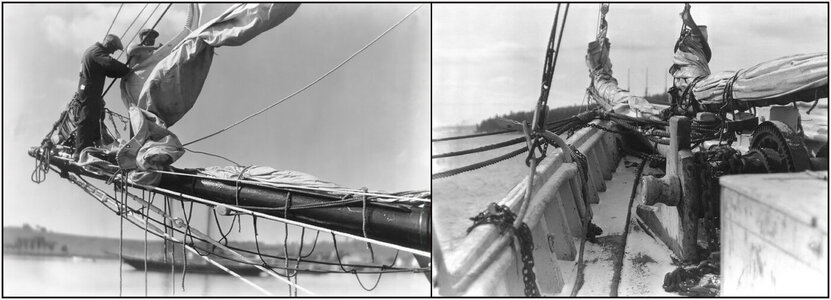
On the left picture the balloon jib is stowed on the starboard side and they are busy with the jib. With the application or removal using the hank's.
Everything is stored in the right picture. But both sails must be secured separately from each other. You can also see the stored jumbo on the right picture.

The Theory:
I've been thinking about this for a while and came up with the following solution:
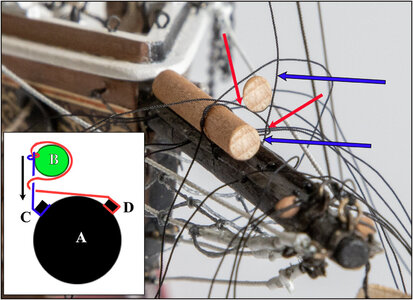
1135 Jib.jpg
All 5 jib stops on both sides of the bowsprit will be doubled.
As an example, the piece of round wood on the starboard side, with the drawing below left as clarification:
A: the mast.
B: the sail (the piece of spar).
C: the blue line that goes up along the sail from the starboard side.
D: the red line that is drawn from the port side just over the mast to starboard, wrapped around the standing blue starboard line, and then drawn back to port. Then that red port line goes around and over the sail back and forth to starboard. And is then tied together with the blue starboard line. Where the pull is directed downwards to pull the sail against the bowsprit.
For the 2nd sail (a copy of the head of the spar) everything is repeated in mirror image.
Blue arrows: the ascending line.
The red arrows: the line that goes around the blue line and the sail.

The Premise:
The jib set with a number of temporary lines:
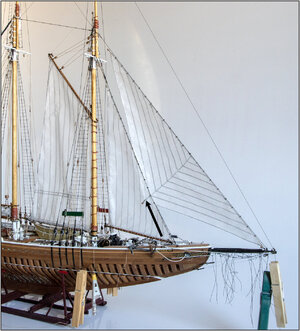
1136 Jib.jpg
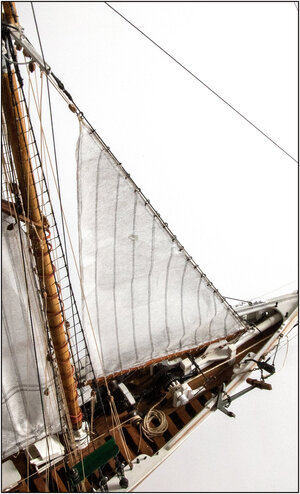
The jib sail is set to port with 22 hank’s on the stay. The arrow points to the starboard pendant of the sheet running over the stay to starboard. In case the sail needs to be set to the other side.
After applying the outside lines and drawing the stitching seams, the sails have acquired a bulge. That was desired and also came true. Just hard to show in the photo. But that will be fine with the studio photos to be taken later.

The tack of the sail is attached to a hook on the bowsprit:
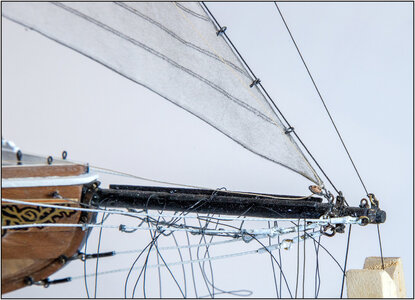
1137 Jib.jpg
With a 2,5mm/.09" block for the downhaul. I'm still happy with my scratch hank's. On the bowsprit the 2x5 double jib stops. And white backrope and guys / bow stays still need to be updated with white and re-tightened. But with the recovery of the jib and balloon jib I will probably get into trouble again. So that's at the end. And of course still dusting.

The halliard:
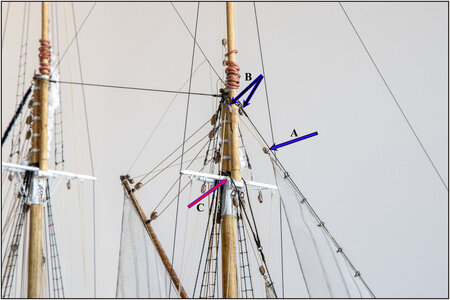
1139 Jib.jpg
A: the block to the sail.
B: the two blocks on the eye irons at the top of the lower mast.
C: both running parts still have to go through the 2 eyes on the front spreader bar.
All the previously placed blocks are now occupied.

The jib with the starboard pendant of the sheet running over the stay:
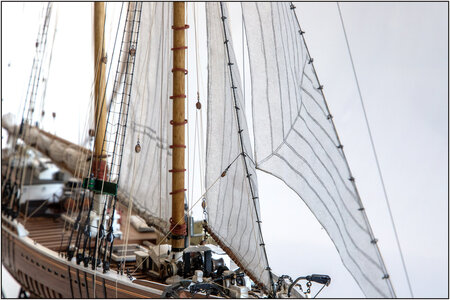
1140 Jib.jpg
Temporarily put with a line, but that will be a complete sheet. The bulge is now slightly more visible.

Like the jib is on the port side with the port sheet.
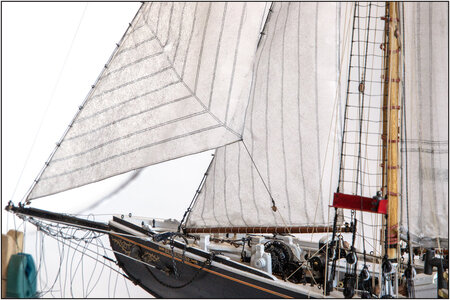
1141 Jib.jpg
Also with a single temporary thread.

And one more picture from behind:
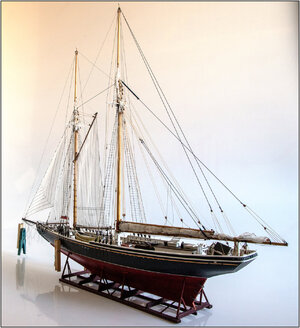
1138 Jib.jpg
With the last view of this jib sail fully set.

Now it's time for the Practice. But that will take some time.
Regards, Peter
 
Last edited:
Yes this is a master at work. Every time I look in your build I think how can he handle these small parts and let them look like big stuff.
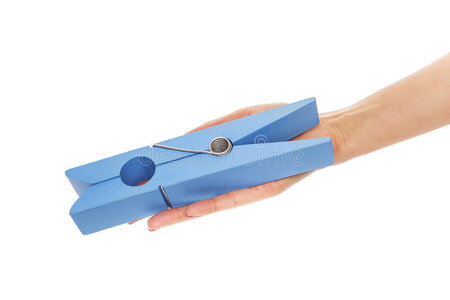
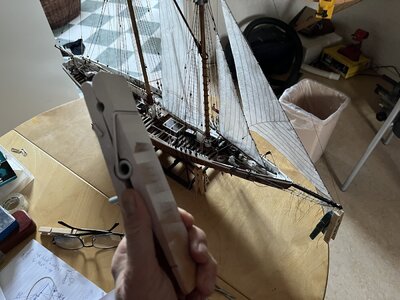
The peg's he is using show a bit the measurement of the parts. Well done Peter, you keep surprising us every time.

And no, he's not joking around and use these peg's

grote-wasknijper-zijn-hand-82782856.jpg
 
Yes this is a master at work. Every time I look in your build I think how can he handle these small parts and let them look like big stuff.
The peg's he is using show a bit the measurement of the parts. Well done Peter, you keep surprising us every time.

And no, he's not joking around and use these peg's

View attachment 362719
Thanks these nice words, Stephan.
And you are correct about that size: :)
1AB15A17-501F-43A6-838B-73A9A6D2BB53.jpeg
Regards, Peter
 
Oh my Gosh - WOW - this is just so life-like. The details are wonderful as they are very helpful to anyone. Well done Peter !!! Thumbs-Up
Hi Donnie. Also thanks for this compliments. It is a lot of figuring out how all the lines run and especially what their function is. And then it becomes more to understand how ingenious it all is. But it’s fun and the result gives a lot of satisfaction.
While taking the photos of the different stages and looking at the old photos, I already have some ideas to take some side-by-side photos of the model vs original (on picture).
Regards, Peter
 
Back
Top