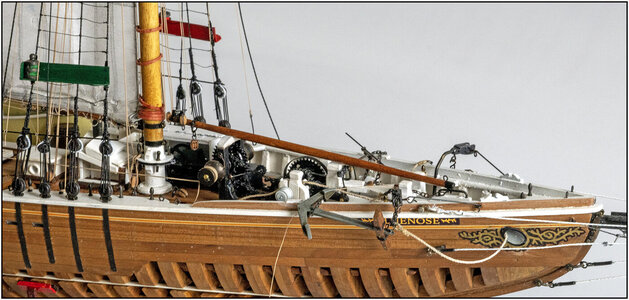
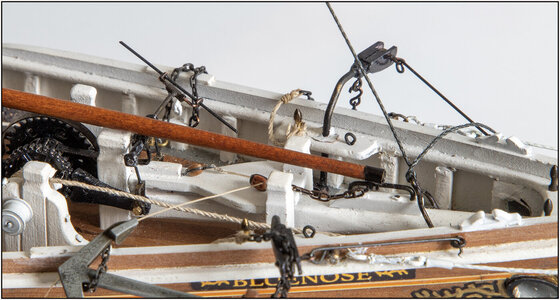
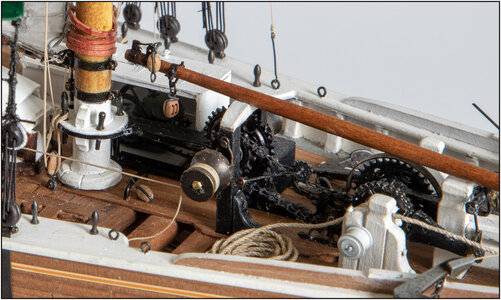
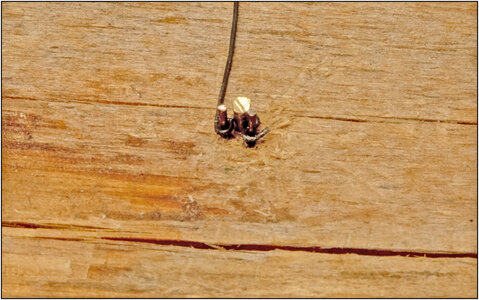
YUANQING BLUENOSE - Peter Voogt [COMPLETED BUILD]

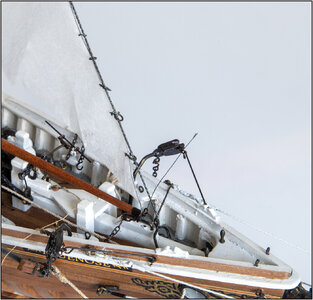
Wonderful detail, Peter. Being color blind am I seeing a green shelf on the starboard side and red on the port side?
That's correct, Daniel. These are the rules:
Watercraft navigation lights must permit other vessels to determine the type and relative angle of a vessel, and thus decide if there is a danger of collision. In general, sailing vessels are required to carry a green light that shines from dead ahead to 2 points (22+1⁄2°) abaft the beam on the starboard side (the right side from the perspective of someone on board facing forward), a red light from dead ahead to two points abaft the beam on the port side (left side).
Therefore I also painted the shelfs in there lighting colors.
PS: And 'imitation green and red glass' in the respective lanterns ...... ;)
Regards, Peter
 
Last edited:
Peter!

I am thrilled with the fine and careful work on every single part. Everything fits together beautifully and the model looks like a real ship.

Thomas
Thanks so very much, Thomas. :)
Once you've gone down a certain path in terms of detailing, there's no turning back and you have to stick with it until the end.

I now find that out when assembling the jib boom that will be placed in front of the foremast.
I started at the back with the largest boom with, among other things, the largest bands. So now the smallest boom with the smallest bands and extra parts. ;)
But in the meantime I have gained experience with it.
Anyway, hope to show this part soon.
Regards, Peter
 
Also prepared the Jumbo Jib Boom and placed dry-fit first:
1112 JibBoom.jpg
Then I can now determine the dimensions of the sail, the Jumbo Jib. I did remove some parts of the windlass, otherwise I couldn't reach it.

The small boom, so also the smallest metal work:
1113 JibBoom.jpg
On the band at the front, at the bottom 2 small brackets with which it can slide over the horse on the bowsprit.
On the rear of those 2 bracket is a piece of chain with a double sheave 2.5mm/.098" block on the other side. The line goes to a single sheave block on the saddle of the bowsprit.

At the back 3 bands:
1114 JibBoom.jpg
On the rear a 3.5mm/.13" single sheave block with a hook iron attached. That is for the 'topping lift' tackle which also serves as a 'Fish tackle' for hauling in an anchor.
The 3rd band again as 2 half straps with a bracket through it, secured with M0.6 nuts. In that bracket a 3.5mm/.13" double sheave block for the boom sheet.

The boom rests on the Boom Crutch which is part of the winch/windlass. The boom also goes exactly over the aft bitt of the bowsprit and gear bracket of the winch/windlass.
Regards, Peter
 
Last edited:
Hello Peter, You are putting me to shame with your display of detail you are adding to your YQ-Bluenose, you are sure Turing her into a very good replica of the original Bluenose, Well done. Just a question of interest how may rigging blocks and what sizes do you think you will require to fully rig her? I will soon have to put in an order to the Dock Yard, just love those pear wood blocks. Your help would be very much appreciated.
Regards Lawrence
Thanks Lawrence. At the beginning of the rigging I made a inventory of the block, compared to the MS/Lankford drawing.
I will ad you to the PM-group where I made the inventory. During the build a made some minor additions.
Regards, Peter
 
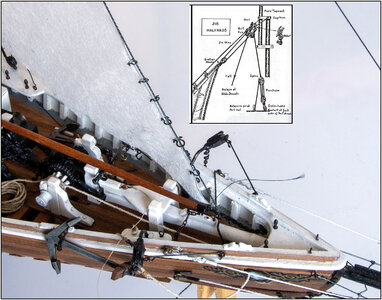
When making the Jumbo Jib sail, I also have to take into account how I am going to attach that sail to the stay.
Both Jenson and MS/Lankford indicate that this happens with so-called 'HANK’S':
1115 Hanks.jpg
The sail can be taken off and set without removing the stay. The bracket goes around the stay and the sail is tied with a piece of line via the 2 eyelets.

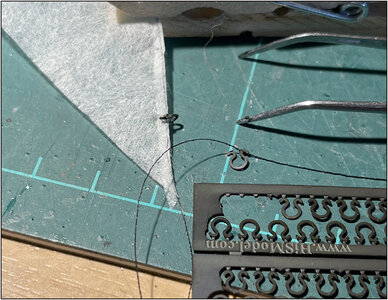
Alf @Alf in Iowa pointed out to me that there were those small hank’s for sale. I ordered some sets and made a test piece:
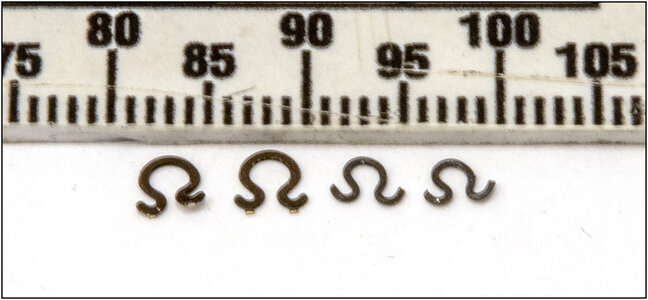
1116 Hanks.jpg
A 'hank' from HiS has an outer diameter of 3.6mm/.14". If I put it on, it would actually be 25.9cm/10.19" in 1:1 …. Mmmmmmm.......

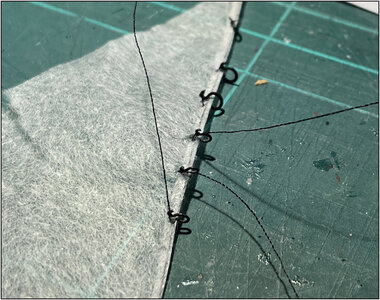
Installed the piece of test sail 3 hank’s and also 2 homemade rings, which I initially had in mind:
1117 Hanks.jpg
Do I now go for (IMHO to big) authenticity or to something more proportionate? I am slightly going for the smaller rings ........
Or another attempt to maken smaller hank’s myself …….. ;) But I need around 70 hank’s …….:confused:
And….. this example stay is 0.45mm The other two are 0.35mm and 0.25mm. Then those hank’s are gonna look even bigger.
Regards, Peter
 
Last edited:
When making the Jumbo Jib sail, I also have to take into account how I am going to attach that sail to the stay.
Both Jenson and MS/Lankford indicate that this happens with so-called 'HANKS':
View attachment 359397
The sail can be taken off and set without removing the stay. The bracket goes around the stay and the sail is tied with a piece of line via the 2 eyelets.

Alf @Alf in Iowa pointed out to me that there were those small hanks for sale. I ordered some sets and made a test piece:
View attachment 359400
A 'hank' has an outer diameter of 3.6mm/.14". If I put it on, it would actually be 25.9cm/10.19" in 1:1 …. Mmmmmmm.......

Installed the piece of test sail 3 hanks and also 2 homemade rings, which I initially had in mind:
View attachment 359399
Do I now go for (IMHO to big) authenticity or to something more proportionate? I am slightly going for the smaller rings ........
Or another attempt to maken smaller myself …….. ;) But I need around 70 hanks …….:confused:
And….. this example stay is 0.45mm The other two are 0.35mm and 0.25mm. Then those hanks are gonna look even bigger.
Regards, Peter
The hanks you purchased are great looking. However, as you mentioned they are out of scale. I know it’s a lot of work to make your own, but…you made mast hoops! :p
IMO I would opt to make smaller ones. You can make a jig to bend small diameter wire around. Just take a block, insert two pins for the ends, and an appropriate size dowel for the large dia. in the middle. With proper spacing of the pins and dowel, you just bend the wire around each and then slide up and off. Afterwards you could put them in a vice and flatten a little bit. Provided you want to go the extra mile. That should make for a repeatable and faster method. ;) Just food for thought!
I know you are putting some excellent detail on the BN that makes her look real in every way. I knew from the moment you put the board on the bottom of the keel and put treenails in it, that this was going to be the type build you were going to achieve. To go through that much trouble for something that may never be seen…it speaks volumes about your efforts and dedication to a great build! But in honesty, I feel you have exceeded any expectations anyone could have had. I know from your R. E. Lee that you don’t let scale stop you from achieving detail.
In conclusion, I am just as impressed as everyone else with your skills and determination. Just fantastic!
You hit the nail on the head, Dean. That's what's been going through my head for the last hour. Conquered so much already and then let this pass? I think a template is the solution. Try again tomorrow.....
Regards, Peter
 
You hit the nail on the head, Dean. That's what's been going through my head for the last hour. Conquered so much already and then let this pass? I think a template is the solution. Try again tomorrow.....
Regards, Peter
Glad to hear it! As you said before, you set the bar for detail and you can’t stop now! :p But you will be so glad you made them. That way you will never think to yourself, “why didn’t I…” ;)
 
Glad to hear it! As you said before, you set the bar for detail and you can’t stop now! :p But you will be so glad you made them. That way you will never think to yourself, “why didn’t I…” ;)
And once something is in my head, I better get started:
1118 Hanks.jpg
A template made of nails with 2 different diameters. With my own 0.4mm/.015" iron wire.
Then this comes out:
1119 Hanks.jpg
On the left the 2 oversized examples. On the right the just made.
Tie it to the test sail tomorrow. If still to big ......... smaller nails ....... ;)
Regards, Peter
 
And once something is in my head, I better get started:
View attachment 359411
A template made of nails with 2 different diameters. With my own 0.4mm/.015" iron wire.
Then this comes out:
View attachment 359412
On the left the 2 oversized examples. On the right the just made.
Tie it to the test sail tomorrow. If still to big ......... smaller nails ....... ;)
Regards, Peter
There you go! Just as nice as the large ones! ;)
 
When making the Jumbo Jib sail, I also have to take into account how I am going to attach that sail to the stay.
Both Jenson and MS/Lankford indicate that this happens with so-called 'HANKS':
View attachment 359397
The sail can be taken off and set without removing the stay. The bracket goes around the stay and the sail is tied with a piece of line via the 2 eyelets.

Alf @Alf in Iowa pointed out to me that there were those small hanks for sale. I ordered some sets and made a test piece:
View attachment 359400
A 'hank' from HiS has an outer diameter of 3.6mm/.14". If I put it on, it would actually be 25.9cm/10.19" in 1:1 …. Mmmmmmm.......

Installed the piece of test sail 3 hanks and also 2 homemade rings, which I initially had in mind:
View attachment 359399
Do I now go for (IMHO to big) authenticity or to something more proportionate? I am slightly going for the smaller rings ........
Or another attempt to maken smaller hanks myself …….. ;) But I need around 70 hanks …….:confused:
And….. this example stay is 0.45mm The other two are 0.35mm and 0.25mm. Then those hanks are gonna look even bigger.
Regards, Peter
Seeing the last pic there I have to agree that they _are_ out of proportion. That's a shame because by themselves as a part, they do look fairly prototypical. I gotta vote for your homemade rings.
 
I told Captain Voogt that I wanted to start on the foredeck with the 3 jib sails.
That was against the sore leg. “You are busy with almost all sails, but the Fisherman's Staysail also belongs between the two masts”.
OK, so let's get started:
View attachment 358937
Cutting, applying lines etc.

This is how it would appear:
View attachment 358938
But a BN with a storm sail and then also a Fisherman's Staysail? That is irresponsible!

Decided in consultation to fold the sail and tide it up with the tack line:
View attachment 358939
In 3 stages.

This is how it is now temporarily on deck:
View attachment 358940
To be stored in the hold.
Regards, Peter
Good morning Peter. Crates , folded sail ready to hoist…..this is a one of a kind BN. Extremely effective modeling. Cheers Grant
 
Also prepared the Jumbo Jib Boom and placed dry-fit first:
View attachment 359342
Then I can now determine the dimensions of the sail, the Jumbo Jib. I did remove some parts of the windlass, otherwise I couldn't reach it.

The small boom, so also the smallest metal work:
View attachment 359343
On the band at the front, at the bottom 2 small brackets with which it can slide over the horse on the bowsprit.
On the rear of those 2 bracket is a piece of chain with a double sheave 2.5mm/.098" block on the other side. The line goes to a single sheave block on the saddle of the bowsprit.

At the back 3 bands:
View attachment 359344
On the rear a 3.5mm/.13" single sheave block with a hook iron attached. That is for the 'topping lift' tackle which also serves as a 'Fish tackle' for hauling in an anchor.
The 3rd band again as 2 half straps with a bracket through it, secured with M0.6 nuts. In that bracket a 3.5mm/.13" double sheave block for the boom sheet.

The boom rests on the Boom Crutch which is part of the winch/windlass. The boom also goes exactly over the aft bitt of the bowsprit and gear bracket of the winch/windlass.
Regards, Peter
Insane work! How you have managed to effectively get sooooo much fine detail onto a scale model is unknown to me. It is like you have shrunk the real BN 72 times. Amazing work Peter. Cheers Grant
 
Good morning Peter. Crates , folded sail ready to hoist…..this is a one of a kind BN. Extremely effective modeling. Cheers Grant
Insane work! How you have managed to effectively get sooooo much fine detail onto a scale model is unknown to me. It is like you have shrunk the real BN 72 times. Amazing work Peter. Cheers Grant
Thanks for this nice words, Grant. I didn't envision this myself +2 years ago when the build started. Something like this grows, you read a lot about the original, you try something, it works, new input from forum members, experimenting with materials ...... and before you know it it's gotten out of hand or you walk on untrodden paths. But still great fun to do and hold on to the chosen theme.
Regards, Peter
 
Back
Top