Looking great Peter! Systematically moving your way across the ship! Soon you will be at the main cabin or captains quarters with stairs. 
-

Win a Free Custom Engraved Brass Coin!!!
As a way to introduce our brass coins to the community, we will raffle off a free coin during the month of August. Follow link ABOVE for instructions for entering.
-

PRE-ORDER SHIPS IN SCALE TODAY!
The beloved Ships in Scale Magazine is back and charting a new course for 2026!
Discover new skills, new techniques, and new inspirations in every issue.
NOTE THAT OUR FIRST ISSUE WILL BE JAN/FEB 2026
- Home
- Forums
- Ships of Scale Group Builds and Projects
- Bluenose PoF Group Build
- Bluenose Group Build Logs
You are using an out of date browser. It may not display this or other websites correctly.
You should upgrade or use an alternative browser.
You should upgrade or use an alternative browser.
YUANQING BLUENOSE - Peter Voogt [COMPLETED BUILD]
- Thread starter Peter Voogt
- Start date
- Watchers 74
Yes, Dean. Already thinking of what kind of furniture I will place there. Still a few meters/feet of FishHold to go. But I also enjoy building that. A challenge to make all lines run smoothly in height / width / length.Looking great Peter! Systematically moving your way across the ship! Soon you will be at the main cabin or captains quarters with stairs.
Regards, Peter
I do the same, always thinking ahead and planning the logical order to complete things, and how.Yes, Dean. Already thinking of what kind of furniture I will place there. Still a few meters/feet of FishHold to go. But I also enjoy building that. A challenge to make all lines run smoothly in height / width / length.
Regards, Peter
You are doing a fantastic job! I always look forward to your updates. And just think, ahead is the steering box, windlass system and motor! A lot of nice details!
A bit of the same but slightly different. The 5th Wall / 2nd FishHold:
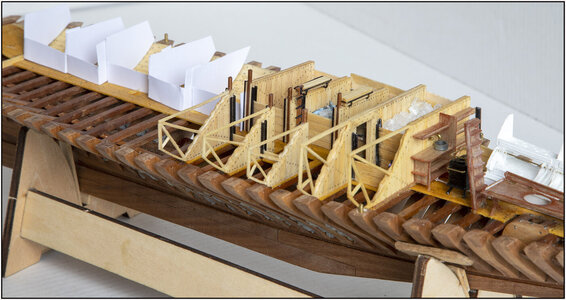
With the mold for the remaining 5.
Look for the differences:
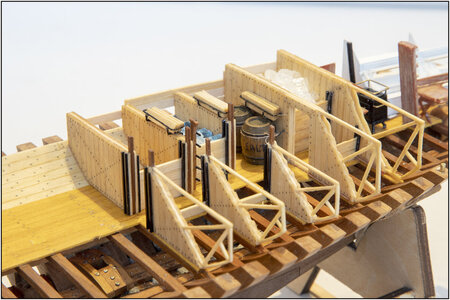
A holder with only 3 shelves, which therefore tilt a little in the rack.
Time to apply the 1st double beam layer.
They were not yet neatly thick across the full width. If you don't have all the machines, make some yourself to sand the beams to thickness:
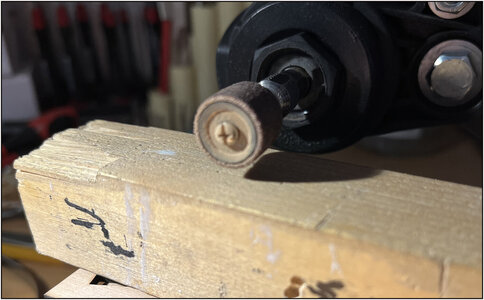
A bit out of focus, but you get the idea.
Installed with 3 planks as spacers:
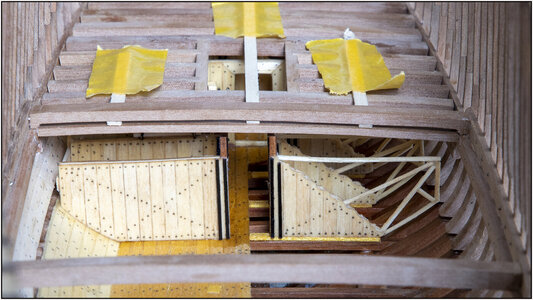
Small minus for Voogt: the passage in the 2nd wall is off center. I can put up a whole theory about that ......... the stairs are also placed off center ...... just half a plank missing.
With another look:
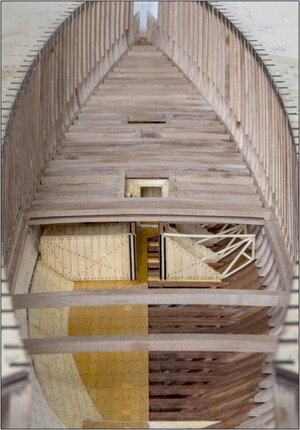
For the next wall and compartment I have to take into account the main boom and the two columns for the bilge pumps. And the beam frame around the main boom and both pumps. So it will be extra fitting and measuring.
Regards, Peter

With the mold for the remaining 5.
Look for the differences:

A holder with only 3 shelves, which therefore tilt a little in the rack.
Time to apply the 1st double beam layer.
They were not yet neatly thick across the full width. If you don't have all the machines, make some yourself to sand the beams to thickness:

A bit out of focus, but you get the idea.
Installed with 3 planks as spacers:

Small minus for Voogt: the passage in the 2nd wall is off center. I can put up a whole theory about that ......... the stairs are also placed off center ...... just half a plank missing.
With another look:

For the next wall and compartment I have to take into account the main boom and the two columns for the bilge pumps. And the beam frame around the main boom and both pumps. So it will be extra fitting and measuring.
Regards, Peter
As usual your AL-FI building looks terrific. I look forward to your next “modification”.
Jan
Jan
Thanxs Jan, AL-FI is working overtimeAs usual your AL-FI building looks terrific. I look forward to your next “modification”.
Jan
Dank Stephan, a comment doesn't have to be long to be appreciated.
Yes Heinrich, I am still building with a smile and looking forwards for Angus's cabin. Dean mentioned it also.Prachtige werk Peter! You can be very pleased with your progress. If the non-decorative items like fish-holds look like this, I can just imagine what you will conjure up in Angus's cabin.
I hope that soon Capt. Angus would be satisfied, just like Capt. Voogt.
Regards, Peter
Thanxs Johan. If you enjoy the build and take the time, the items will (almost) come naturally. And a lot of looking at others .....This is what I would like to define as "customization as a form of art"...
Regards, Peter
- Joined
- Sep 3, 2021
- Messages
- 5,190
- Points
- 738

That's exactly what I am currently doing; looking at (and of course learning from) others.And a lot of looking at others .....
First made the beam frame around the main mast:
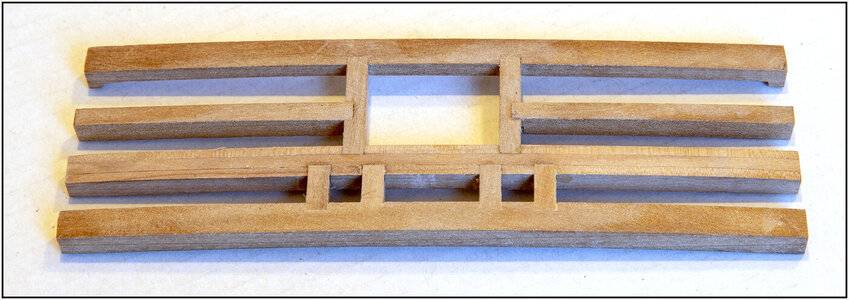
This also has the beam with 4 between baeams through which the bilge pumps run.
The position of the bilge pumps aligned:
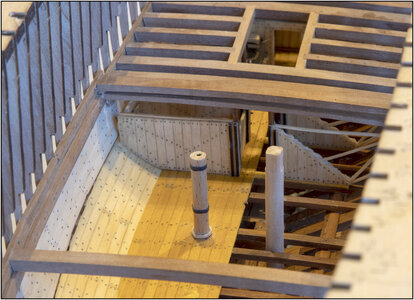
To starboard you can see the spar that YQ has intended for this. Just a bit too thick and with not much drawing in the wood.
Made a few myself from beech:
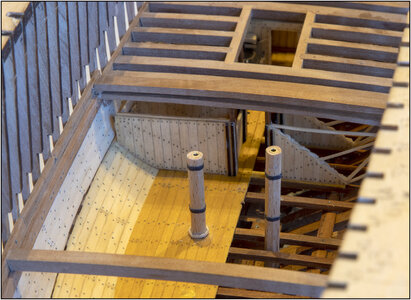
-sanded octagonal;
-3 bands around it;
-closure at the floor;
- copper inner pipe.
As you can see they are not equal in length/height.
They will be secured in the lower part and, when clearing out or reassembling both hull parts, must be able to pass through the gaps between the deck beams:
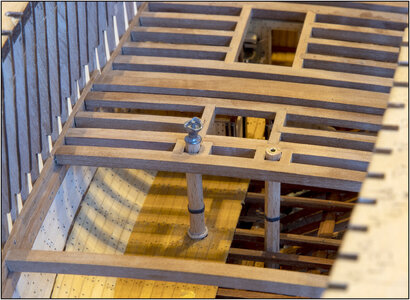
On the port side column will be the actual bilge pump, which cannot go through that hole. Therefore divided that column where the seam is between the beams.
If the model is shown in the 'exploded view', it will be approximately the following:
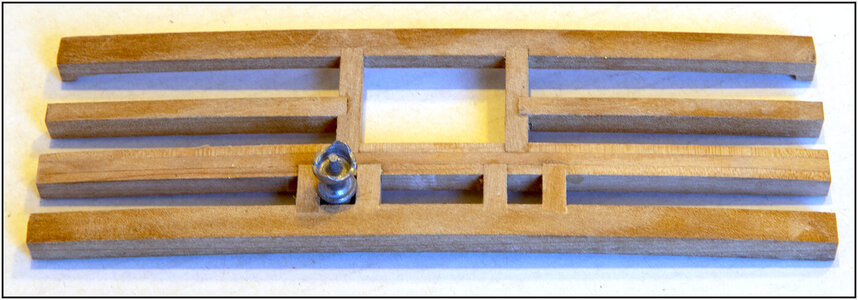
When I have provided this part with the center mast and the FishHold around or against it, I will also take another picture in the 'exploded view'. I'm also curious how that shows.
Regards, Peter

This also has the beam with 4 between baeams through which the bilge pumps run.
The position of the bilge pumps aligned:

To starboard you can see the spar that YQ has intended for this. Just a bit too thick and with not much drawing in the wood.
Made a few myself from beech:

-sanded octagonal;
-3 bands around it;
-closure at the floor;
- copper inner pipe.
As you can see they are not equal in length/height.
They will be secured in the lower part and, when clearing out or reassembling both hull parts, must be able to pass through the gaps between the deck beams:

On the port side column will be the actual bilge pump, which cannot go through that hole. Therefore divided that column where the seam is between the beams.
If the model is shown in the 'exploded view', it will be approximately the following:

When I have provided this part with the center mast and the FishHold around or against it, I will also take another picture in the 'exploded view'. I'm also curious how that shows.
Regards, Peter
Last edited:
- Joined
- Oct 28, 2018
- Messages
- 760
- Points
- 403

First made the beam frame around the main mast:
The cutouts are round
How and with what do you make the connections square?
Nice progress made, and nice to see the progress
Thanxs Henk.The cutouts are round
How and with what do you make the connections square?
Nice progress made, and nice to see the progress
The first connections I made partly with the mill and the rest with the scalpel knives.
But from the first fish hold opening I do everything with the scalpels.
By the next opening I will make some pictures from the different steps:
Regards, Peter
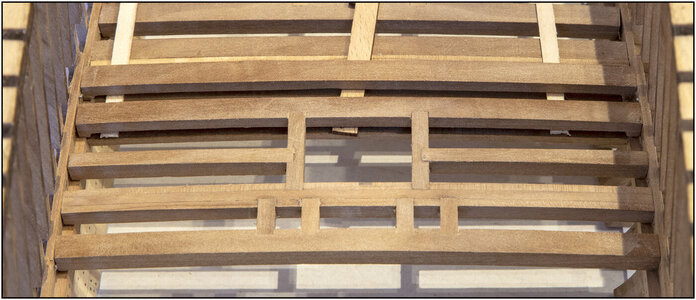
After the necessary fitting, measuring, adjusting etc .... placed the 6th wall in front of the 3rd FishHold. As mentioned before, I had to take into account the bilge pumps and the thickness of the mast:
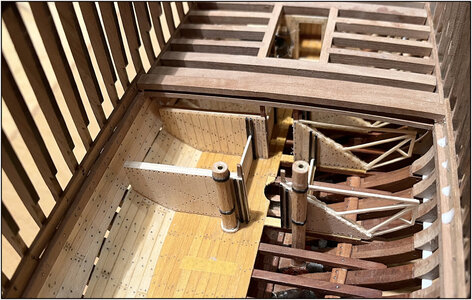
Now you can walk around the mast and the bilge pumps will soon be inside the shelves of the 4th FishHold.
With the new deck beams on the bearing beams:
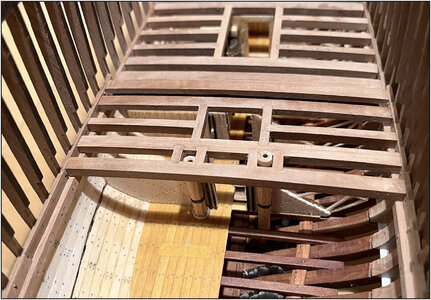
And everything can still slide in and out.
Also installed the 2nd new bottom beam so that there are now 2 double beams where the decking ends in between:
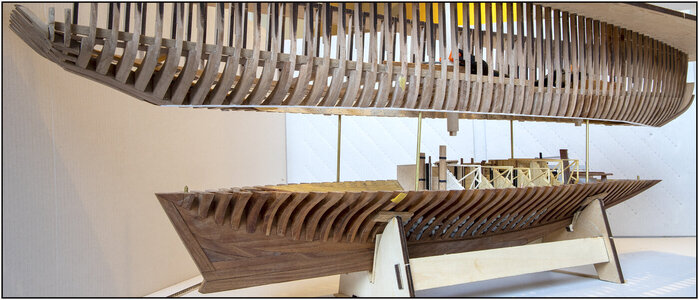
Just fit in the 'Exploded View' with the hanging mast ends:
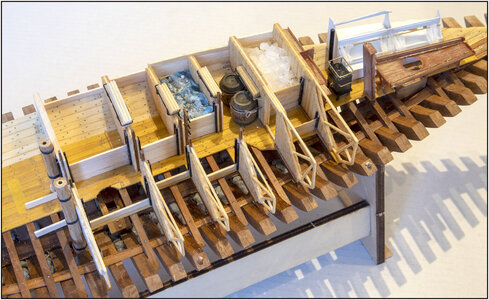
Where I again looked at the 2 holes where the masts should be:
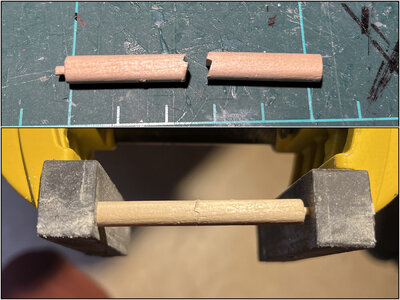
They are only filled when both parts are on top of each other, but then you have almost no view of it. There must be another way..... said AL-FI ..... If you have already sawed through a hull and a bilge pump, you might as well saw through the masts.
First a test of what I had in mind:
Because the half-walls have nibble walls and a partially visible beam in a technical drawing also has a zig-zag conditional end.
In order to fix the mast properly when I install the rigging, I drilled a 2mm hole with the lathe in the underside of the masts:
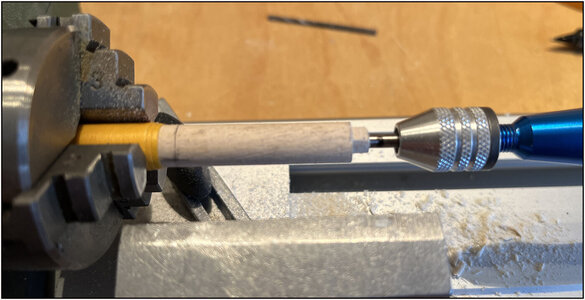
A Beech 2mm pen will be in it soon.
After the necessary hours of sawing, filing, fitting, filing etc ....
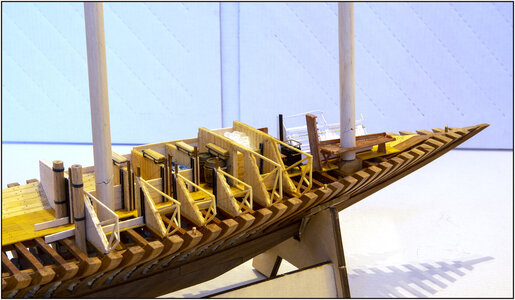
And when I take the masts apart, the holes are now filled:
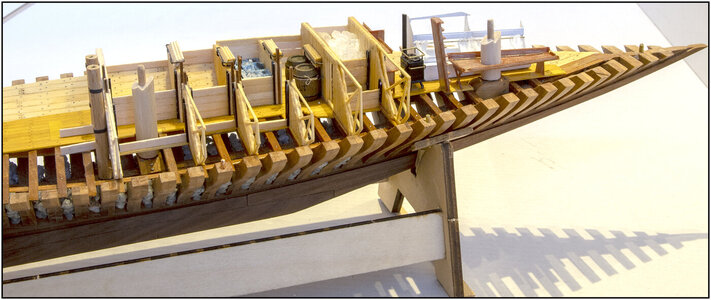
For the time being, they are dry-fit in place, because I don't know what I'm going to treat the masts with yet.
Anyway, I'm happy with this solution.
Then I can also put this wall and shelves in the linseed oil again.
Regards, Peter

Now you can walk around the mast and the bilge pumps will soon be inside the shelves of the 4th FishHold.
With the new deck beams on the bearing beams:

And everything can still slide in and out.
Also installed the 2nd new bottom beam so that there are now 2 double beams where the decking ends in between:

Just fit in the 'Exploded View' with the hanging mast ends:

Where I again looked at the 2 holes where the masts should be:

They are only filled when both parts are on top of each other, but then you have almost no view of it. There must be another way..... said AL-FI ..... If you have already sawed through a hull and a bilge pump, you might as well saw through the masts.
First a test of what I had in mind:

Because the half-walls have nibble walls and a partially visible beam in a technical drawing also has a zig-zag conditional end.
In order to fix the mast properly when I install the rigging, I drilled a 2mm hole with the lathe in the underside of the masts:

A Beech 2mm pen will be in it soon.
After the necessary hours of sawing, filing, fitting, filing etc ....

And when I take the masts apart, the holes are now filled:

For the time being, they are dry-fit in place, because I don't know what I'm going to treat the masts with yet.
Anyway, I'm happy with this solution.
Then I can also put this wall and shelves in the linseed oil again.
Regards, Peter
Last edited:
This is what I called - Master Craftsman!
Great job Peter!After the necessary fitting, measuring, adjusting etc .... placed the 6th wall in front of the 3rd FishHold. As mentioned before, I had to take into account the bilge pumps and the thickness of the mast:
View attachment 268639
Now you can walk around the mast and the bilge pumps will soon be inside the shelves of the 4th FishHold.
With the new deck beams on the bearing beams:
View attachment 268640
And everything can still slide in and out.
Also installed the 2nd new bottom beam so that there are now 2 double beams where the decking ends in between:
View attachment 268641
Just fit in the 'Exploded View' with the hanging mast ends:
View attachment 268642
Where I again looked at the 2 holes where the masts should be:
View attachment 268643
They are only filled when both parts are on top of each other, but then you have almost no view of it. There must be another way..... said ALFI .....
If you have already sawed through a hull and a bilge pump, you might as well saw through the masts. First a test of what I had in mind:
View attachment 268644
Because the half-walls have nibble walls and a partially visible beam in a technical drawing also has a zig-zag conditional end.
In order to fix the mast properly when I install the rigging, I drilled a 2mm hole with the lathe in the underside of the masts:
View attachment 268645
A Beech 2mm pen will be in it soon.
After the necessary hours of sawing, filing, fitting, filing etc ....
View attachment 268657
And when I take the masts apart, the holes are now filled:
View attachment 268658
For the time being, they are dry-fit in place, because I don't know what I'm going to treat the masts with yet.
Anyway, I'm happy with this solution.
Then I can also put this wall and shelves in the linseed oil again.
Regards, Peter
As you know, with the addition of the cut in the mast, your upper mast orientation with regard to the trestle trees, etc. will be crucial, because your angular orientation is now locked to fit the lower half. However I am sure you have considered this and will clock, or angularly orient, everything accordingly!
This is what I called - Master Craftsman!
Thanxs Jim and Johan. I try to be creative and build “out of the box” with the YQ-kit.Of course you know that increasing your interfaces, the difficulty in maintaining those increases exponentially...
It's becoming quite repetitive, but as usual: awesome!
Regards, Peter.
Thanxs for your concern and thinking with me, Dean. Post 1000 in this build-log is to attention to you!Great job Peter!
As you know, with the addition of the cut in the mast, your upper mast orientation with regard to the trestle trees, etc. will be crucial, because your angular orientation is now locked to fit the lower half. However I am sure you have considered this and will clock, or angularly orient, everything accordingly!
The orientation of the masts is still a bit flexibel. When I have completed all the deck beam and start with the deck, I fit the masts with the sqared fillings. Then I glued the lower parts. The first riggings are cruciaal for the correct position. Still quite a challenge!
Regards, Peter
