YUANQING BLUENOSE - Peter Voogt [COMPLETED BUILD]

Nothing is as changeable as man!
And if you take the time to take drastic steps, it is sometimes necessary to change your plan.
I was planning on putting in a 12-frame plank at a time and then sawing through. But the chance of splinters is quite high. Also in the places where the plank approaches the saw seam.
That's why I decided to cut in half. Every plank that runs over the saw seam can also be screened off with an adjacent plank.

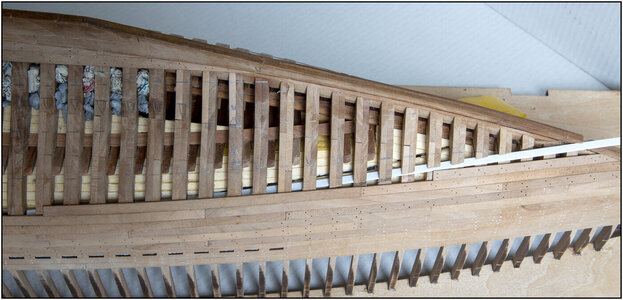
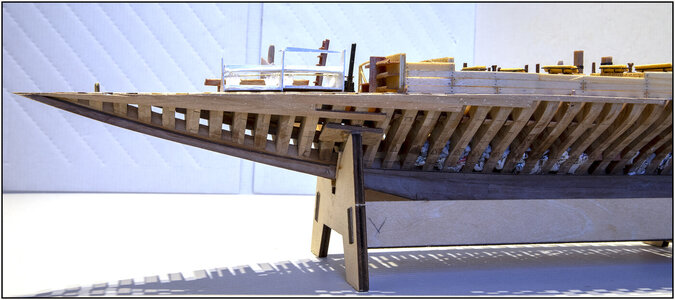
First remove the spacers and pins in the front part. Instead, the plastic strip was temporarily applied, which later serves as a saw seam filler and waterline:
595 PortPlanks.jpg
Planked over the saw seam layer by layer.

Pull the strip further and further forward and insert the end into the opening in the keel to also place the planks to close the entire saw seam:
596 PortPlanks.jpg
Different light, different wood colors!
I marked the drill holes. Because the 'seam planks’ are first given slightly longer treenails before sawing so that they sit firmly on the frames.
I can first turn on the saw in the seam on the left and right of the planks. So that I can get back on track. And with a trial placement of the saw in the current seam, I can use that seam nicely to align the saw. Gonna be fine!

So first drill again, point toothpicks, and place treenails.
But that's only in a week. First have fun in the snow.
Regards, Peter
 
Last edited:
Nothing is as changeable as man!
And if you take the time to take drastic steps, it is sometimes necessary to change your plan.
I was planning on putting in a 12-frame plank at a time and then sawing through. But the chance of splinters is quite high. Also in the places where the plank approaches the saw seam.
That's why I decided to cut in half. Every plank that runs over the saw seam can also be screened off with an adjacent plank.

First remove the spacers and pins in the front part. Instead, the plastic strip was temporarily applied, which later serves as a saw seam filler and waterline:
View attachment 286351
Planked over the saw seam layer by layer.

Pull the strip further and further forward and insert the end into the opening in the keel to also place the planks to close the entire saw seam:
View attachment 286352
Different light, different wood colors!
I marked the drill holes. Because the 'seam planks’ are first given slightly longer treenails before sawing so that they sit firmly on the frames.
I can first turn on the saw in the seam on the left and right of the planks. So that I can get back on track. And with a trial placement of the saw in the current seam, I can use that seam nicely to align the saw. Gonna be fine!

So first drill again, point toothpicks, and place treenails.
But that's only in a week. First have fun in the snow.
Regards, Peter
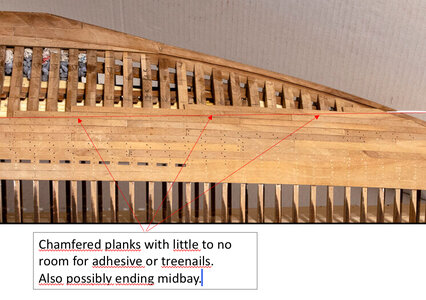
Peter, have you considered what to do if planks are terminated by the saw cut and ending halfway between two frames? You could end up with a pointed, unsupported end of a plank.
Or am I just seeing things that aren't there?

FA8DD1FE-D9B6-40AA-888B-1FA57E38CDEA.jpeg
 
Last edited:
Peter, have you considered what to do if planks are terminated by the saw cut and ending halfway between two frames? You could end up with a pointed, unsupported end of a plank.
Or am I just seeing things that aren't there?

View attachment 286410
Hi Johan. First of all, thank you for thinking along and preparing.
The short answer: yes, saw around them ....... ROTF
No, serious:
When I choose to work with 12-frame planks, then I new I could run into more problems than with the continuous planks. More seams and transitions. But I like Walking on the Edge. With the lengths of the kit you only need 1.5. So only 1 connection and play more on save.
That is why I also provided the sides of the planks with glue. After pressing the planks, I removed the excess glue with a wet cloth. Hoping that the little bit of moisture in the seam there the glue will also do its job better. :rolleyes:
And I will also glue the treenails first. And some treenails are cut in half / quarter / or less during sawing.
You can also say that the treadnailing will perhaps weaken or strengthen it more. But after sawing, I can certainly not apply treenails to the pointed planks.
I will only see if this works when its done. It will be exciting.
Otherwise I am a main member of the 'Restorer during New Construction' and I have some extra work
And after a night of extra work I am The Piper at the Egde of Dawn.
But if everything works out....... :):D
Regards, Peter
 
Last edited:
You sure like modeling on the edge!
The way you approach this gives you possibly the best chances of getting it right first-time. What has me most concerned is the inherited fragility after trimming the planks. That's something you won't know until you tried it. I admire your guts. Thumbs-Up
 
Picked up the thread again. Not too much text, I think the images speak for themselves.

Drilling:
597 Drilling.jpg

Treenailing:
598 Nailing.jpg

Raw Sanding:
599 Sanding.jpg

Start the 1st sawcut to determine the direction:
600 Sawing.jpg
One extra plank installed in the front. Because the saw cut was very tight along an open side.

In the vice, perpendicular to the waterline:
601 Sawing.jpg

Through:
602 Sawing.jpg

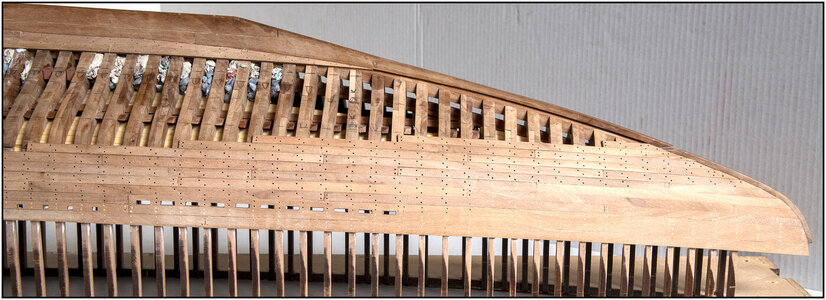
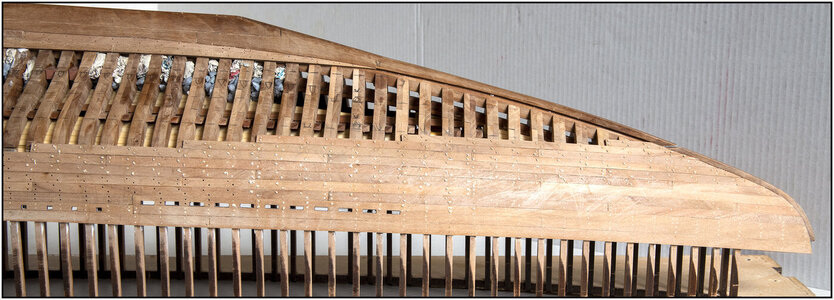
Relief:
603 Top.jpg
604 Bottom.jpg
By also applying glue to the sides of the planks, all points remain nicely in place.

As hoped, even the treenails are in half and staying in place, thanxs to the glue:
605 Treenails.jpg
With the macro lens, so everything can be seen. The finishing will come when part 2 has also been sawn and the rest of the planking has been applied.

Then someone will think, why not first planked, then sawn all at ones and installed the interior?
If I had known everything in advance how I was going to carry out the inside and outside, I could indeed have done it better in that order. But there are still plenty of follow-up items that I don't know exactly or have worked out yet. I've only just now decided how I'm going to make the planked hull black and red.
So let's just say it's mostly challenging right now.
Regards, Peter
 
Last edited:
Unbelievably accurate work with that saw Peter. To think that even the treenails are beautifully separated - is just beyond belief. My friend, very few people - if any - can imitate you on that feat! Thumbsup
 
Thanxs, Johan. And it's not over yet....
3x = Scheepsrecht. Fingers crossed.
Regards, Peter
From what I've seen so far; there's no doubt in my mind whatsoever that you will pull this off.
Having said that; I'm sitting at the tip of my chair, waiting for your next stunt...
 
Great job, my friend!
This is pure Science, and inventiveness, applied to ship modeling!
Thanks Piero.
I would like to know who would buy a model and then saw it in two parts ....

;)
Besides me, there are more ……
Take a look at this from Maarten.
It was the inspiration for me. But he did it after the planking.
Regards, Peter
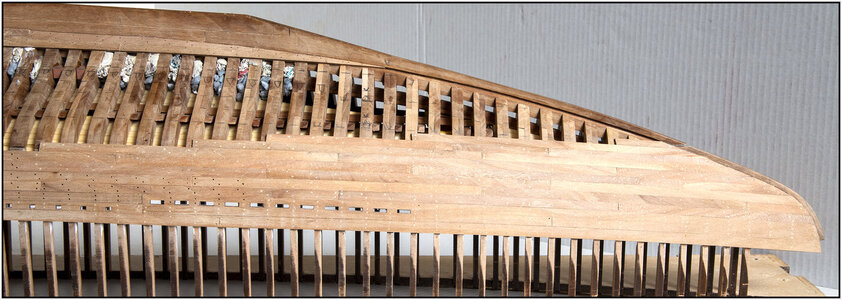
Now it is time for the big surprise, this was the reason for me to buy this kit.
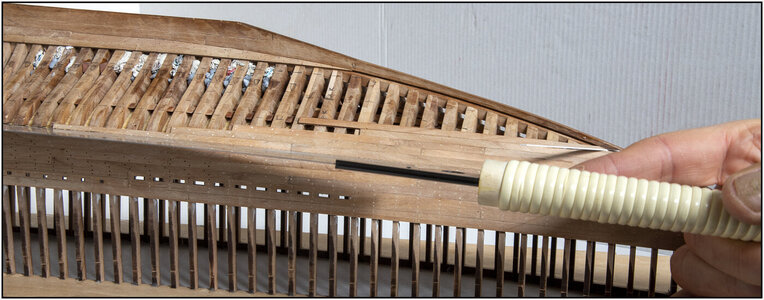
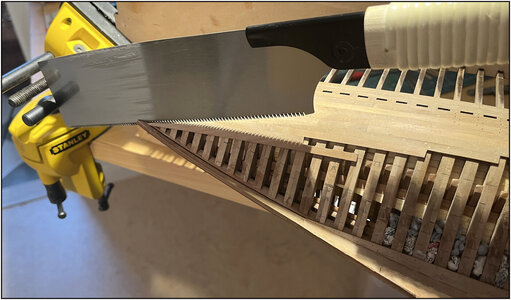
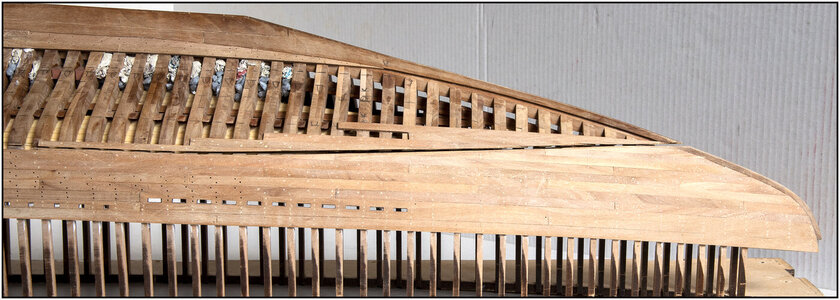
We are ready for the big cut.
With my Japanese saw I cut my hull in half.
20210206_110855.jpg
20210206_110850.jpg
 
Picked up the thread again. Not too much text, I think the images speak for themselves.

Drilling:
View attachment 288284

Treenailing:
View attachment 288285

Raw Sanding:
View attachment 288286

Start the 1st sawcut to determine the direction:
View attachment 288287
One extra plank installed in the front. Because the saw cut was very tight along an open side.

In the vice, perpendicular to the waterline:
View attachment 288288

Through:
View attachment 288289

Relief:
View attachment 288290
View attachment 288291
By also applying glue to the sides of the planks, all points remain nicely in place.

As hoped, even the treenails are in half and staying in place, thanxs to the glue:
View attachment 288292
With the macro lens, so everything can be seen. The finishing will come when part 2 has also been sawn and the rest of the planking has been applied.

Then someone will think, why not first planked, then sawn all at ones and installed the interior?
If I had known everything in advance how I was going to carry out the inside and outside, I could indeed have done it better in that order. But there are still plenty of follow-up items that I don't know exactly or have worked out yet. I've only just now decided how I'm going to make the planked hull black and red.
So let's just say it's mostly challenging right now.
Regards, Peter
At least you partially know what you do not know but the what you do not know is unknowable until you arrive at that place when it becomes apparently knowable but still unknown. Your courage with the razor saw is intimidating!!!! Rich
 
Back
Top