-

Win a Free Custom Engraved Brass Coin!!!
As a way to introduce our brass coins to the community, we will raffle off a free coin during the month of August. Follow link ABOVE for instructions for entering.
-

PRE-ORDER SHIPS IN SCALE TODAY!
The beloved Ships in Scale Magazine is back and charting a new course for 2026!
Discover new skills, new techniques, and new inspirations in every issue.
NOTE THAT OUR FIRST ISSUE WILL BE JAN/FEB 2026
You are using an out of date browser. It may not display this or other websites correctly.
You should upgrade or use an alternative browser.
You should upgrade or use an alternative browser.
Le Fleuron 1729 - 64 Gun Ship PoB Scratch Build in 1:48 - (Ancre Monograph-J. Boudriot/G. Delacroix)
- Thread starter Hoss6262
- Start date
- Watchers 54
-
- Tags
- ancre le fleuron pob
- Joined
- Oct 15, 2017
- Messages
- 1,190
- Points
- 443

Hello All, I had to go back and see where I was and when I last made an actual post on my ship. Incredibly, it's been well over a year. I'm hoping to join you all again and stay active. When I last posted, I was finishing up the stem and stern structures, both as modular elements to the build. Whenever I lose momentum, and get "stuck", in life or ship modeling, I try build momentum again, in the right direction with small victories.
So even though I was not posting, I was doing some small things to keep me connected to the build, none of them by themselves enough progress worthy of a post, but all together yes.
So some progress is listed below.
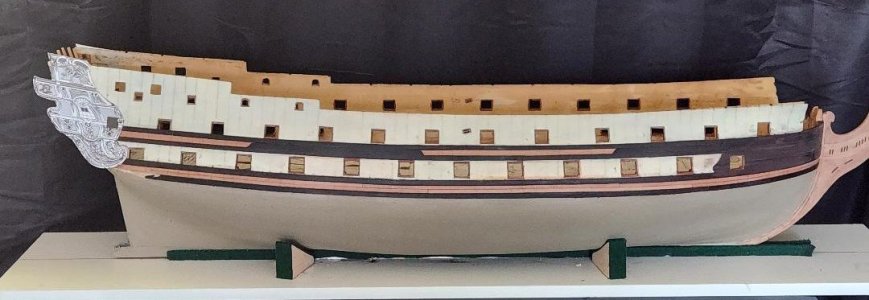
A few rough photos of where I am now, along with some notes.
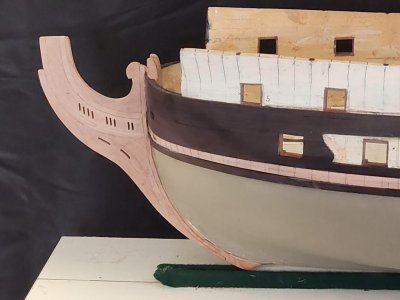
None of the wales or other wooden elements are treated beyond 220 grit work. As you can see, the aft end of the wales are not installed. They are fabricated and have been dry fitted, but not permanently affixed as the Stern module needs to be permanently installed before I can integrate the wales with it.
All in all, I am ok with the way the wales came out and happy with all of the hooked scarf joints, happily some are hard to find. I will post macro photos once I've improved my photo skills.

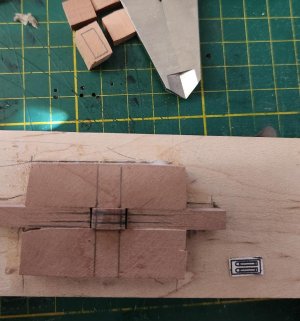
What cannot be seen in the two stern photos is the added pieces of pearwood I created to hold the stern module. This was needed as the aft section of the hull was too thin for my liking. I will show them in future posts, but they are nothing more than a set of solid pieces of wood slotted t receive the cross members of the stern module, rather then cutting slots into the layered material of the hull itself.
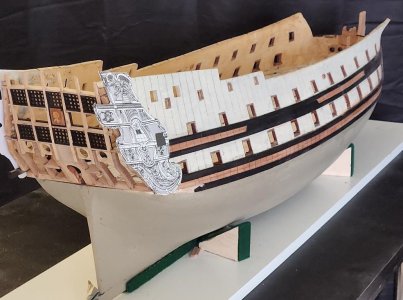
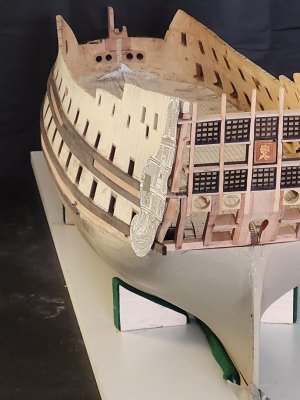

So, normally, I would complete planking the hull, keel up. The challenge I had here was in order to do that in I would need the stern module installed as both the transom and stern post rabbets are needed to terminate the hull planks. I chose to wait, due to the issue with the stern being out of square. The issue also caused the stern post and head to be out of alignment. Fixing this requires a bit of analysis and measuring of key elements before I install. With over 120 pieces in the stern module, I really don't want to do anything that would put it as risk. So this work is a BIG win and victory, which I need to be patient with.
It's for this reason, I will start to plank the hull from the main wails all the way up to the waist rail.
While I work installing planking, I will take small breaks and work on the solution for the stern module.
Just a couple of other small things I worked on to fill some time where I didn't care if I was interrupted.
Anyone who has worked on a scratch build, or scratch enhanced a kit of a scale greater than 1:48 knows what the photo below is.

Yes, that is right, TREENAILS!!! Perfect work for times you want to work on and don't care, and even sometimes HOPE you will be interrupted. Now, I know human beings are a diverse species, so I expect somewhere in some corner of the world there is someone who enjoys making treenails. I would like to find that person and ask them, "How old were you when you realized you had masochistic tendencies?" Anyway, my treenails will be cut long enough to be functional, increasing plank adhesion.
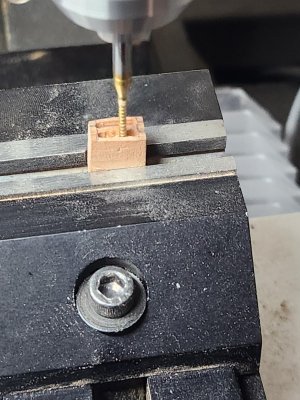
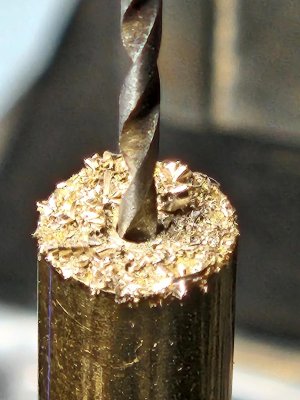
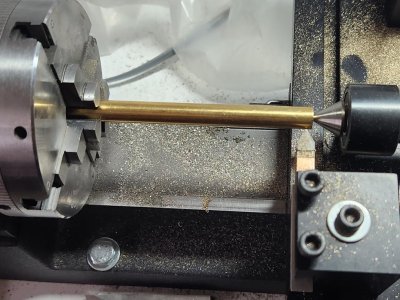
Some small work on waist sheaves. Self explanatory...

Next steps; I'll tape off all the exposed wooden elements and start planking the upper hull.
I hope everyone is doing well. It's good to be working on the "flower" again. I hope to get caught up on all of my favorite builds, over time.
Thanks for stopping by.
So even though I was not posting, I was doing some small things to keep me connected to the build, none of them by themselves enough progress worthy of a post, but all together yes.
So some progress is listed below.
- Keel rabbet cut and keel permanently fixed.
- Stem rabbet cut, steam and beakhead permanently fixed.
- Wales fabricated and installed (1st/2nd decks)
A few rough photos of where I am now, along with some notes.
None of the wales or other wooden elements are treated beyond 220 grit work. As you can see, the aft end of the wales are not installed. They are fabricated and have been dry fitted, but not permanently affixed as the Stern module needs to be permanently installed before I can integrate the wales with it.
All in all, I am ok with the way the wales came out and happy with all of the hooked scarf joints, happily some are hard to find. I will post macro photos once I've improved my photo skills.


What cannot be seen in the two stern photos is the added pieces of pearwood I created to hold the stern module. This was needed as the aft section of the hull was too thin for my liking. I will show them in future posts, but they are nothing more than a set of solid pieces of wood slotted t receive the cross members of the stern module, rather then cutting slots into the layered material of the hull itself.


So, normally, I would complete planking the hull, keel up. The challenge I had here was in order to do that in I would need the stern module installed as both the transom and stern post rabbets are needed to terminate the hull planks. I chose to wait, due to the issue with the stern being out of square. The issue also caused the stern post and head to be out of alignment. Fixing this requires a bit of analysis and measuring of key elements before I install. With over 120 pieces in the stern module, I really don't want to do anything that would put it as risk. So this work is a BIG win and victory, which I need to be patient with.
It's for this reason, I will start to plank the hull from the main wails all the way up to the waist rail.
While I work installing planking, I will take small breaks and work on the solution for the stern module.
Just a couple of other small things I worked on to fill some time where I didn't care if I was interrupted.
Anyone who has worked on a scratch build, or scratch enhanced a kit of a scale greater than 1:48 knows what the photo below is.

Yes, that is right, TREENAILS!!! Perfect work for times you want to work on and don't care, and even sometimes HOPE you will be interrupted. Now, I know human beings are a diverse species, so I expect somewhere in some corner of the world there is someone who enjoys making treenails. I would like to find that person and ask them, "How old were you when you realized you had masochistic tendencies?"
 Anyway, my treenails will be cut long enough to be functional, increasing plank adhesion.
Some small work on waist sheaves. Self explanatory...


Next steps; I'll tape off all the exposed wooden elements and start planking the upper hull.
I hope everyone is doing well. It's good to be working on the "flower" again. I hope to get caught up on all of my favorite builds, over time.
Thanks for stopping by.
Great to have you back, Ken! Really glad to see you return to the hobby. Wishing you smooth sailing on your Le Fleuron build — looking forward to watching your progress! May yer tools stay sharp, yer paint flow smooth, and yer deck planks stay true.
Fair winds
Fair winds
Good morning Ken,
it's good to see you back at work and I look forward to new updates. As for your question, I think I was 15. Joking aside , doing tree nails isn't my favorite activity.
it's good to see you back at work and I look forward to new updates. As for your question, I think I was 15. Joking aside
 , doing tree nails isn't my favorite activity.
Great to see you back at it Ken!
Ooh! A new country heard from!
Welcome back, my friend. We are all eager to watch your progress on this great project. Treenails? After nearly 14,000 on my half-planked Kingfisher I became rather numb to the experience. But it gives a look that one can only marvel at! You've got this!
Welcome back, my friend. We are all eager to watch your progress on this great project. Treenails? After nearly 14,000 on my half-planked Kingfisher I became rather numb to the experience. But it gives a look that one can only marvel at! You've got this!
- Joined
- Oct 15, 2017
- Messages
- 1,190
- Points
- 443

Thank Stephan, maybe I'll make a video, just for you! I think I have about 7,000 more to make. I get depressed when I type that number. It can seem a daunting task, like "how do you eat an elephant, one bite at a time."Good to see you back Ken. And follow your build.
Ps: I like treenails when someone else makes them. So make a lot of pictures during your work of that.
- Joined
- Oct 15, 2017
- Messages
- 1,190
- Points
- 443

Thanks Jim. It is good to be back.Great to have you back, Ken! Really glad to see you return to the hobby. Wishing you smooth sailing on your Le Fleuron build — looking forward to watching your progress! May yer tools stay sharp, yer paint flow smooth, and yer deck planks stay true.
Fair winds
@WojtasS thanks. I hope to slowly build momentum on the project and happy to share all of the "highs and lows".Hello Ken. Good to see you back. I hope you don't keep as waiting with new updates. I always look forward to seeing your work
Cheers

Thanks Tobias. I can't imagine there being more than 1 person that enjoys making treenails, but you just never know. It's good to be back.Good morning Ken,
it's good to see you back at work and I look forward to new updates. As for your question, I think I was 15. Joking aside, doing tree nails isn't my favorite activity.

Thanks Daniel. It's good to be back at it again.Great to see you back at it Ken!
Thanks Paul. Fourteen thousand on 1/2 the ship's hull?!? Almost makes me think about cutting my ship in half.Ooh! A new country heard from!
Welcome back, my friend. We are all eager to watch your progress on this great project. Treenails? After nearly 14,000 on my half-planked Kingfisher I became rather numb to the experience. But it gives a look that one can only marvel at! You've got this!
You would have half that number. I planked the inside too on one side of the model.Thanks Paul. Fourteen thousand on 1/2 the ship's hull?!? Almost makes me think about cutting my ship in half.
Good morning Ken. It is good to see you back in the shipyard. It’s good to know I do not have masochistic tendencies but seeing guys (we shouldn’t mention names - @dockattnerHello All, I had to go back and see where I was and when I last made an actual post on my ship. Incredibly, it's been well over a year. I'm hoping to join you all again and stay active. When I last posted, I was finishing up the stem and stern structures, both as modular elements to the build. Whenever I lose momentum, and get "stuck", in life or ship modeling, I try build momentum again, in the right direction with small victories.
So even though I was not posting, I was doing some small things to keep me connected to the build, none of them by themselves enough progress worthy of a post, but all together yes.
So some progress is listed below.
It seems over the last 1 year and 4 months the change in climate caused the open stern area of the hull to warp a little. Also, even though the wood of the stern structure module was sealed, it also changed. It is now 5 degrees out of square. Had I thought of this prior to packing things up, I would have dry fit it and lock it down in the hull, perhaps preventing the humidity from having a lot of effect on it. I will address both issues in future posts.
- Keel rabbet cut and keel permanently fixed.
- Stem rabbet cut, steam and beakhead permanently fixed.
- Wales fabricated and installed (1st/2nd decks)
A few rough photos of where I am now, along with some notes.
None of the wales or other wooden elements are treated beyond 220 grit work. As you can see, the aft end of the wales are not installed. They are fabricated and have been dry fitted, but not permanently affixed as the Stern module needs to be permanently installed before I can integrate the wales with it.
All in all, I am ok with the way the wales came out and happy with all of the hooked scarf joints, happily some are hard to find. I will post macro photos once I've improved my photo skills.
View attachment 513044View attachment 513048
What cannot be seen in the two stern photos is the added pieces of pearwood I created to hold the stern module. This was needed as the aft section of the hull was too thin for my liking. I will show them in future posts, but they are nothing more than a set of solid pieces of wood slotted t receive the cross members of the stern module, rather then cutting slots into the layered material of the hull itself.
View attachment 513045View attachment 513046View attachment 513047
View attachment 513049
So, normally, I would complete planking the hull, keel up. The challenge I had here was in order to do that in I would need the stern module installed as both the transom and stern post rabbets are needed to terminate the hull planks. I chose to wait, due to the issue with the stern being out of square. The issue also caused the stern post and head to be out of alignment. Fixing this requires a bit of analysis and measuring of key elements before I install. With over 120 pieces in the stern module, I really don't want to do anything that would put it as risk. So this work is a BIG win and victory, which I need to be patient with.
It's for this reason, I will start to plank the hull from the main wails all the way up to the waist rail.
While I work installing planking, I will take small breaks and work on the solution for the stern module.
Just a couple of other small things I worked on to fill some time where I didn't care if I was interrupted.
Anyone who has worked on a scratch build, or scratch enhanced a kit of a scale greater than 1:48 knows what the photo below is.
View attachment 513050
Yes, that is right, TREENAILS!!! Perfect work for times you want to work on and don't care, and even sometimes HOPE you will be interrupted. Now, I know human beings are a diverse species, so I expect somewhere in some corner of the world there is someone who enjoys making treenails. I would like to find that person and ask them, "How old were you when you realized you had masochistic tendencies?"Anyway, my treenails will be cut long enough to be functional, increasing plank adhesion.
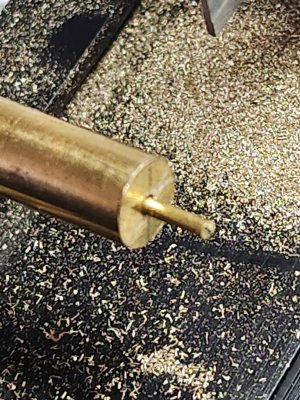
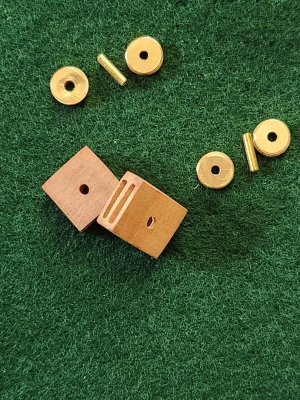
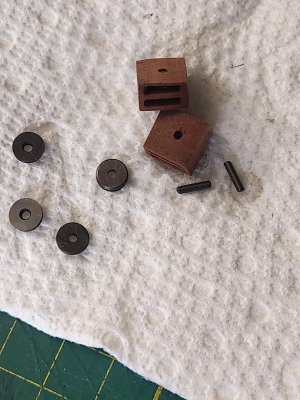
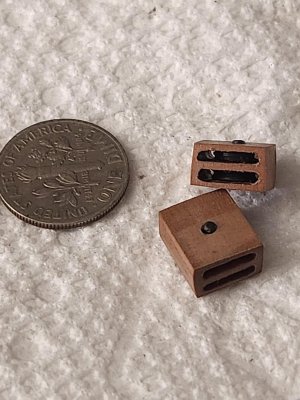
Some small work on waist sheaves. Self explanatory...
View attachment 513058View attachment 513059View attachment 513052View attachment 513055View attachment 513052View attachment 513054View attachment 513056View attachment 513057View attachment 513051
Next steps; I'll tape off all the exposed wooden elements and start planking the upper hull.
I hope everyone is doing well. It's good to be working on the "flower" again. I hope to get caught up on all of my favorite builds, over time.
Thanks for stopping by.
 ) who make 14000 on half a ship ……..no comment.
 . Seriously tho Ken good to see you back. Cheers Grant
- Joined
- Aug 8, 2019
- Messages
- 5,566
- Points
- 738

And after that.... taking the time to count them.... Seriously? I'm sure he count them twice to be correct.It’s good to know I do not have masochistic tendencies but seeing guys (we shouldn’t mention names - @dockattner) who make 14000 on half a ship ……..no comment.

- Joined
- Oct 15, 2017
- Messages
- 1,190
- Points
- 443

Thanks Grant. It's good to be back. On the other point, and I will mention names, it's hard for me to question anything Paul does, considering his results.Good morning Ken. It is good to see you back in the shipyard. It’s good to know I do not have masochistic tendencies but seeing guys (we shouldn’t mention names - @dockattner) who make 14000 on half a ship ……..no comment.
. Seriously tho Ken good to see you back. Cheers Grant

- Joined
- Oct 15, 2017
- Messages
- 1,190
- Points
- 443

Thank you all for the warm welcome back, taking the time to visit, and all the likes.
A small update. I started planking the hull, between first and second gun decks, only to realize I'm human and to be one is to err. After planking the bottom three of four runs of planks, I realized that the gun port cutouts on the bottom plank were incorrect, as they accounted for the sills of the ports extending to the outer edge of the external planks. I decided not to follow this standard for cosmetic reasons. The result was that the cutout was vertically too large. So off it came, and I'm now in the process of reconfiguring.
So as we do, when we get stuck, we take a small step of testing the plank fasteners' appearance, treenails, and bolts. French 74s of the period typically had a combination of treenails and iron bolts, offset and alternated, below the waterline. I will not be following this standard, installing treenails only below the waterline.
,
Photos of some test samples are below. Plank and treenail tests have different combinations of treatments. Planks include sanding sealer, Tung Oil, Bitumen wash with white spirits, and Bitumen/bees wax. Treenails are all of the same pearwood as the planks, but have three different treatments, including 1) no treatment, 2) flat black paint, and 3) graphite treated low viscosity PA glue applied during installation.
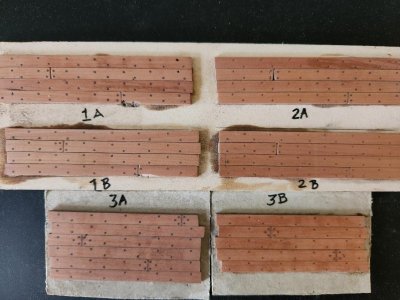
Although the samples are all relatively close in appearance, there are some subtle differences. I've yet to decide which I prefer. Input is always welcome.
So we all know the importance of using GREEN mats. I think I've uncovered some false advertisement in marketing. Mine are supposed to be "self-healing". I'm waiting for the drill holes to heal themselves!

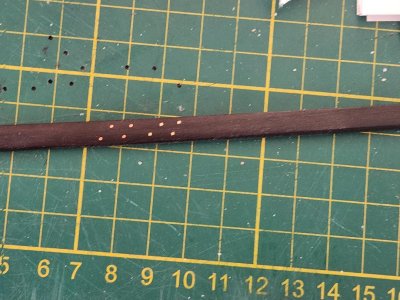
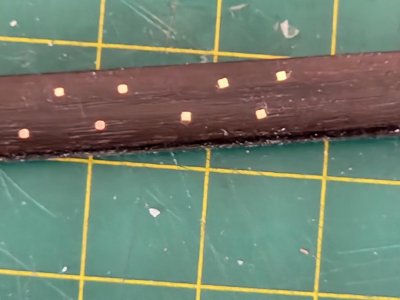 For the Wales bolts, I wanted to use copper or something similar. The photo below shows half-hard square copper wire as well as half-hard square red brass wire. From the usual viewing distance, you really can't tell the difference. Under magnification, the differences are slight. The key difference is that, even though both are "half-hard," the red brass was noticeably harder and therefore easier to work with during installation. So the decision has been made.
Thanks for stopping by to visit.
A small update. I started planking the hull, between first and second gun decks, only to realize I'm human and to be one is to err.
So as we do, when we get stuck, we take a small step of testing the plank fasteners' appearance, treenails, and bolts. French 74s of the period typically had a combination of treenails and iron bolts, offset and alternated, below the waterline. I will not be following this standard, installing treenails only below the waterline.
,
Photos of some test samples are below. Plank and treenail tests have different combinations of treatments. Planks include sanding sealer, Tung Oil, Bitumen wash with white spirits, and Bitumen/bees wax. Treenails are all of the same pearwood as the planks, but have three different treatments, including 1) no treatment, 2) flat black paint, and 3) graphite treated low viscosity PA glue applied during installation.

Although the samples are all relatively close in appearance, there are some subtle differences. I've yet to decide which I prefer. Input is always welcome.
So we all know the importance of using GREEN mats. I think I've uncovered some false advertisement in marketing. Mine are supposed to be "self-healing". I'm waiting for the drill holes to heal themselves!


 For the Wales bolts, I wanted to use copper or something similar. The photo below shows half-hard square copper wire as well as half-hard square red brass wire. From the usual viewing distance, you really can't tell the difference. Under magnification, the differences are slight. The key difference is that, even though both are "half-hard," the red brass was noticeably harder and therefore easier to work with during installation. So the decision has been made.
Thanks for stopping by to visit.
Taking time to build test and compare will almost always pay dividends in the appearance of your model. Way to go Ken!Thank you all for the warm welcome back, taking the time to visit, and all the likes.
A small update. I started planking the hull, between first and second gun decks, only to realize I'm human and to be one is to err.After planking the bottom three of four runs of planks, I realized that the gun port cutouts on the bottom plank were incorrect, as they accounted for the sills of the ports extending to the outer edge of the external planks. I decided not to follow this standard for cosmetic reasons. The result was that the cutout was vertically too large. So off it came, and I'm now in the process of reconfiguring.
So as we do, when we get stuck, we take a small step of testing the plank fasteners' appearance, treenails, and bolts. French 74s of the period typically had a combination of treenails and iron bolts, offset and alternated, below the waterline. I will not be following this standard, installing treenails only below the waterline.
,
Photos of some test samples are below. Plank and treenail tests have different combinations of treatments. Planks include sanding sealer, Tung Oil, Bitumen wash with white spirits, and Bitumen/bees wax. Treenails are all of the same pearwood as the planks, but have three different treatments, including 1) no treatment, 2) flat black paint, and 3) graphite treated low viscosity PA glue applied during installation.
View attachment 513691
Although the samples are all relatively close in appearance, there are some subtle differences. I've yet to decide which I prefer. Input is always welcome.
So we all know the importance of using GREEN mats. I think I've uncovered some false advertisement in marketing. Mine are supposed to be "self-healing". I'm waiting for the drill holes to heal themselves!
View attachment 513704View attachment 513705For the Wales bolts, I wanted to use copper or something similar. The photo below shows half-hard square copper wire as well as half-hard square red brass wire. From the usual viewing distance, you really can't tell the difference. Under magnification, the differences are slight. The key difference is that, even though both are "half-hard," the red brass was noticeably harder and therefore easier to work with during installation. So the decision has been made.
Thanks for stopping by to visit.
Kurt Konrath
Kurt Konrath
Good to hear your back at it, and you have the posts here to help jog the memory of where and what you need to do next.
Another great reason for post a build log.
Another great reason for post a build log.
- Joined
- Oct 15, 2017
- Messages
- 1,190
- Points
- 443

@WojtasS, the wire is 22 gauge. Sorry, but my calipers slipped right when I snapped the photo and show 0.71 when the wire is 0.65mm or right around 1.2 inches in 1:48 scale.
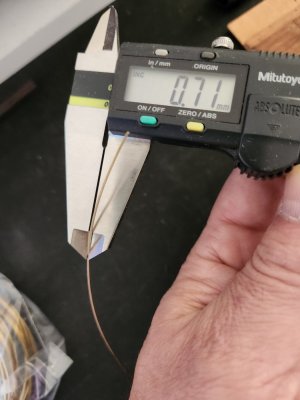
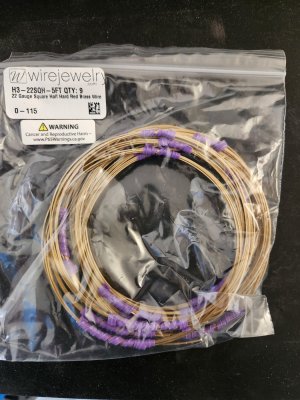
I'm not sure where in Europe this wire can be found, but in the U.S., you can find this and many other types of wire at the site linked below.

I hope this answers your question and helps. Let me know if you need anything else.


I'm not sure where in Europe this wire can be found, but in the U.S., you can find this and many other types of wire at the site linked below.

Jewelry Wire - Wire by WireJewelry.com
Top quality Jewelry Making Wire for your wire jewelry art! Gold Filled, Sterling, and Argentium wire for your jewelry wire needs.
www.wirejewelry.com
I hope this answers your question and helps. Let me know if you need anything else.


