Happy birthday Daniel. Best wishes for a wonderful day celebrating with family and friends.
-

Win a Free Custom Engraved Brass Coin!!!
As a way to introduce our brass coins to the community, we will raffle off a free coin during the month of August. Follow link ABOVE for instructions for entering.
-

PRE-ORDER SHIPS IN SCALE TODAY!
The beloved Ships in Scale Magazine is back and charting a new course for 2026!
Discover new skills, new techniques, and new inspirations in every issue.
NOTE THAT OUR FIRST ISSUE WILL BE JAN/FEB 2026
You are using an out of date browser. It may not display this or other websites correctly.
You should upgrade or use an alternative browser.
You should upgrade or use an alternative browser.
1682 HMY FUBBS - 1:24 - Stern Section [COMPLETED BUILD]
Happy birthday Daniel. Best wishes for a wonderful day celebrating with family and
HAPPY BIRTHDAY Daniel

wish you all the best and happiness
you are doing wonderful work on this model
THANK YOU VERY MUCH !!!!!HAPPY BIRTHDAY Daniel

wish you all the best and happiness
you are doing wonderful work on this model
Hi all again, I was getting this morning questions about what I did with the nails, and how the carvings (boxwood) will look over pear wood.
My Fubbs is and will be far away of being historically accurate. That has been the same with all my kits. If a color or whatever isn't historically correct. That is fine with me, if I like it. Most of the kits are simplified versions.
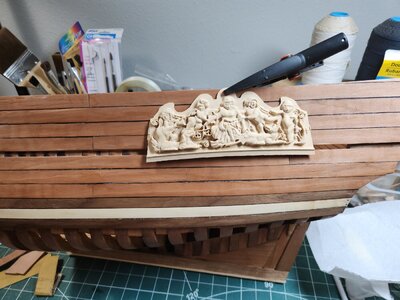
With that small intro, I do not plan to piant the carvings gold neither the hull blue. As others are thinking to do with this particular Weasel's kit. FOr those worried about how boxwood hull carvings over pear will look I took 2 fast pictures.
HMY FUBBS
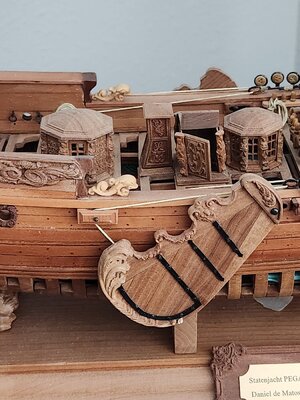
Another example: Pegasus (Statenjacht) dolphins
For those asking what I did with the nails. They stayed on place. I hammer them with a 1.5 mm nail puncher to get them flat. Then the veneer (0.6 mm thick) was glued over it.
For those asking how the veneer will look on the beams when watching the stern section from the front, I just did a zoom of my posted pictures.
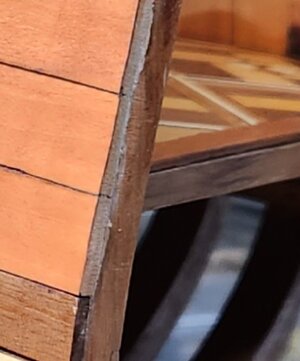
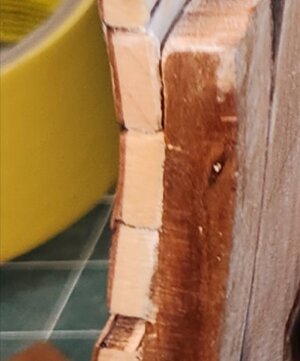
The veneer is only ~0.6 mm and the view from the from is something that it isn't bothering me. It was worst, for me, all the Hard Maple natural fibers colors/shadows, that at this scale was too noticeable for my taste. I could have painted brown/redish the tip of the plank to make it blend more with the pear. But, as of today I didn't and, for now, that isn't on my plans.
Another tip, I got this veneer from ebay around 2 years ago. When Paul (@dockattner ) was building the Wasa, doing the hull planking, he did some job using pear veneer and passed me the tip from were he got it. It was on my stock for another project not yet started. Unfortunately, this week, i wasn't able to find the same veneer from USA on ebay, but will continue looking.
I hope this will answer a few questions.
Cheers to all and have an excellent day !!!
Daniel
My Fubbs is and will be far away of being historically accurate. That has been the same with all my kits. If a color or whatever isn't historically correct. That is fine with me, if I like it. Most of the kits are simplified versions.
With that small intro, I do not plan to piant the carvings gold neither the hull blue. As others are thinking to do with this particular Weasel's kit. FOr those worried about how boxwood hull carvings over pear will look I took 2 fast pictures.
HMY FUBBS

Another example: Pegasus (Statenjacht) dolphins

For those asking what I did with the nails. They stayed on place. I hammer them with a 1.5 mm nail puncher to get them flat. Then the veneer (0.6 mm thick) was glued over it.
For those asking how the veneer will look on the beams when watching the stern section from the front, I just did a zoom of my posted pictures.


The veneer is only ~0.6 mm and the view from the from is something that it isn't bothering me. It was worst, for me, all the Hard Maple natural fibers colors/shadows, that at this scale was too noticeable for my taste. I could have painted brown/redish the tip of the plank to make it blend more with the pear. But, as of today I didn't and, for now, that isn't on my plans.
Another tip, I got this veneer from ebay around 2 years ago. When Paul (@dockattner ) was building the Wasa, doing the hull planking, he did some job using pear veneer and passed me the tip from were he got it. It was on my stock for another project not yet started. Unfortunately, this week, i wasn't able to find the same veneer from USA on ebay, but will continue looking.
I hope this will answer a few questions.
Cheers to all and have an excellent day !!!
Daniel
Last edited:
Happy Birthday, Daniel!

Thank you Jimsky!!!!Happy Birthday, Daniel!
Thank you Heinrich !!!Very belated BUT a very happy birthday my friend! I hope and pray that there will be many more years ahead in which you can delight us on SOS with your builds!
Hi Guys, here I am with an update after a few days.
First thank you very much for all your comments and likes. Keep them coming
A lot of pictures will be posted. Ask any questions you could have.
The lower section of the mast was added (forgot his name). Comes in 2 pieces that were adapted to the hull.
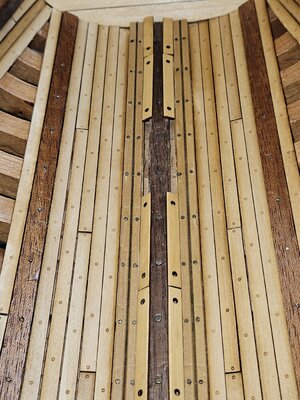
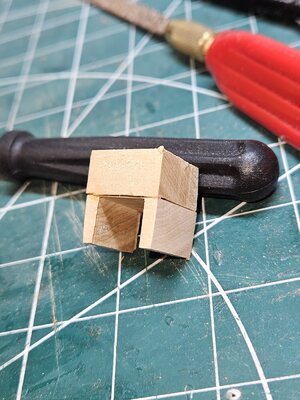
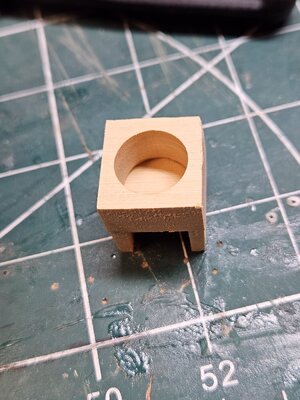
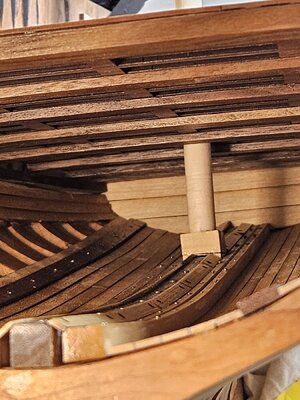
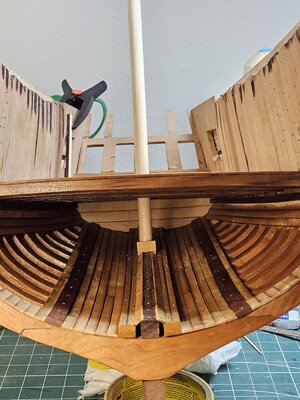
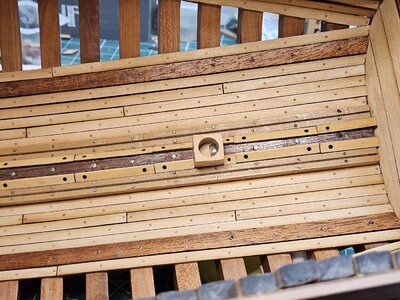
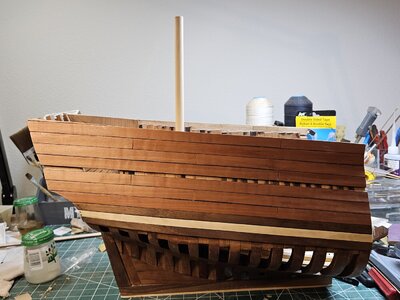
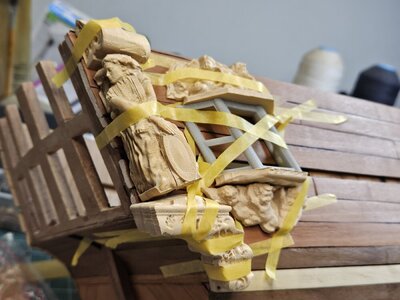
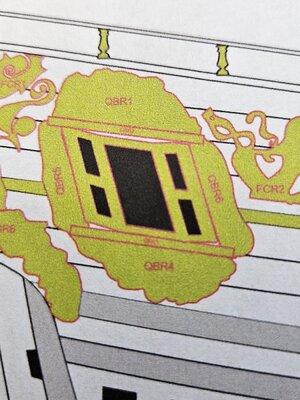
Then I was curious to see how the stern carvings around the window will fit, as many internal sections that soon I will have to built depend on the window/carvings position.
I assemble one carving, but it still need a lot of work to be done. I only did it to visualize the position and space.
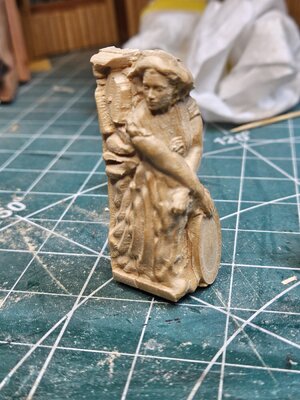
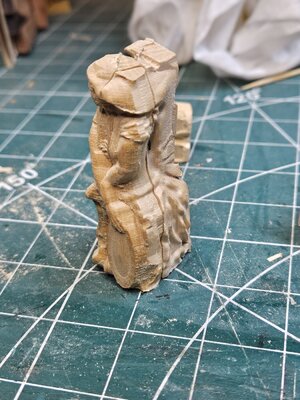
A note on this lady carving:
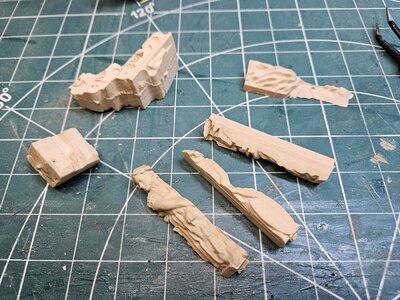
The stern corner carving is huge and complex. It has detail on 3 sides and is very thick in cross section. It was done using Vectric Aspire to slice up the part into different pieces. These pieces are then CNC carved in 3D and glued together like a mini model. This process is called "3D Assembly".
Here the pieces that have been 3D carved into a 3/4" slab of boxwood.
Remember, this carving still needs a LOT of work, from my side, to be perfect before being glued.
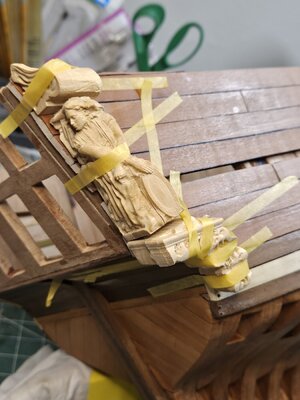
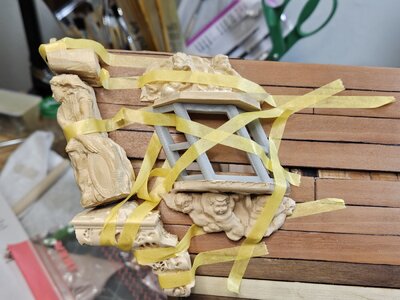
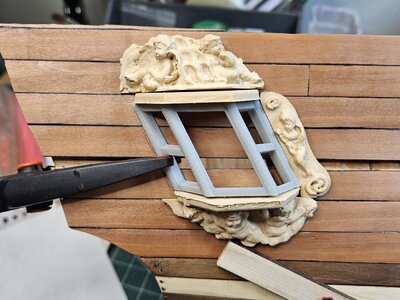
Now that I saw that the carvings fit well, I did a rough window position. The final window opening will come later.
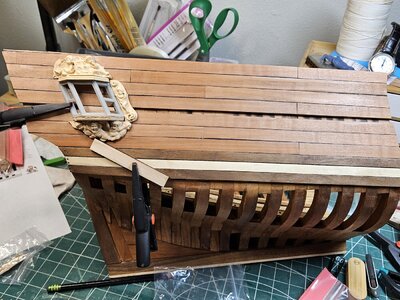
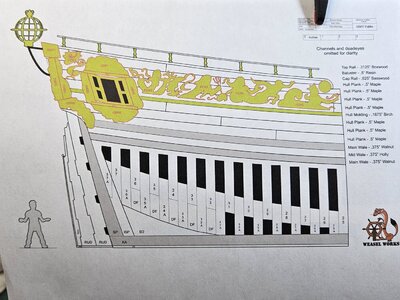
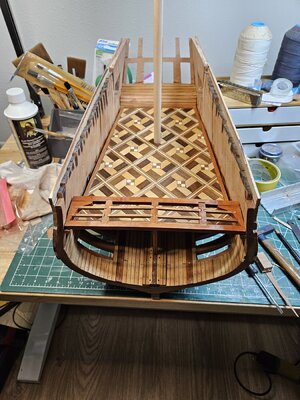
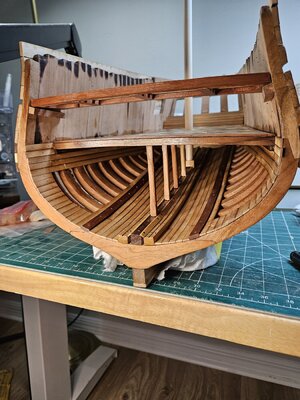
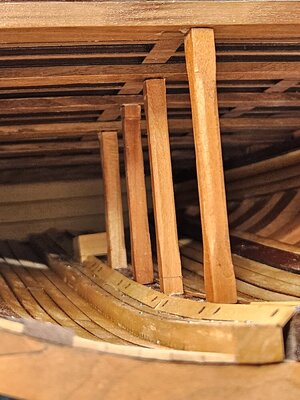
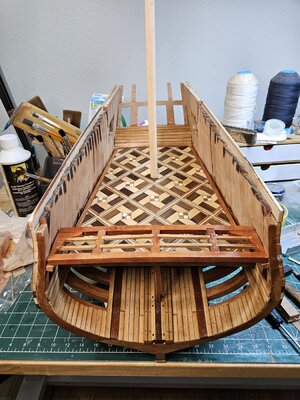
This work was followed by the great cabin deck gluing, support pillars added and Quarter deck built (yet not glued).
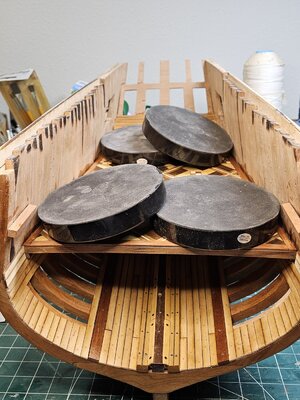
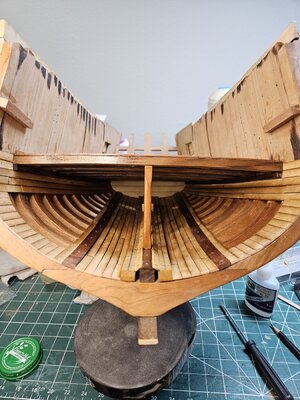
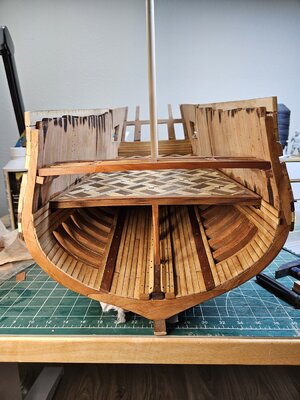
That's all for now....
Cheers !!
Daniel
First thank you very much for all your comments and likes. Keep them coming
A lot of pictures will be posted. Ask any questions you could have.
The lower section of the mast was added (forgot his name). Comes in 2 pieces that were adapted to the hull.


Then I was curious to see how the stern carvings around the window will fit, as many internal sections that soon I will have to built depend on the window/carvings position.
I assemble one carving, but it still need a lot of work to be done. I only did it to visualize the position and space.
A note on this lady carving:
The stern corner carving is huge and complex. It has detail on 3 sides and is very thick in cross section. It was done using Vectric Aspire to slice up the part into different pieces. These pieces are then CNC carved in 3D and glued together like a mini model. This process is called "3D Assembly".
Here the pieces that have been 3D carved into a 3/4" slab of boxwood.
Remember, this carving still needs a LOT of work, from my side, to be perfect before being glued.


Now that I saw that the carvings fit well, I did a rough window position. The final window opening will come later.


This work was followed by the great cabin deck gluing, support pillars added and Quarter deck built (yet not glued).


That's all for now....
Cheers !!
Daniel
Last edited:
Good morning Daniel. I’ve been away and had some catching up to do. Wow some serious work done and I missed your birthday. Happy belated birthday. Stunning progress and some fine detailed work. A clever plan to use pear veneer to make the planking to your taste. All looking mighty fine. Cheers GrantHi Guys, here I am with an update after a few days.
First thank you very much for all your comments and likes. Keep them coming
A lot of pictures will be posted. Ask any questions you could have.
The lower section of the mast was added (forgot his name). Comes in 2 pieces that were adapted to the hull.
View attachment 395832View attachment 395833View attachment 395834View attachment 395835View attachment 395836View attachment 395837View attachment 395838
Then I was curious to see how the stern carvings around the window will fit, as many internal sections that soon I will have to built depend on the window/carvings position.
I assemble one carving, but it still need a lot of work to be done. I only did it to visualize the position and space.
A note on this lady carving:
The stern corner carving is huge and complex. It has detail on 3 sides and is very thick in cross section. It was done using Vectric Aspire to slice up the part into different pieces. These pieces are then CNC carved in 3D and glued together like a mini model. This process is called "3D Assembly".
Here the pieces that have been 3D carved into a 3/4" slab of boxwood.
Remember, this carving still needs a LOT of work, from my side, to be perfect before being glued.
View attachment 395844View attachment 395845View attachment 395846View attachment 395847View attachment 395848View attachment 395849
Now that I saw that the carvings fit well, I did a rough window position. The final window opening will come later.
View attachment 395850View attachment 395851View attachment 395852View attachment 395853
This work was followed by the great cabin deck gluing, support pillars added and Quarter deck built (yet not glued).
View attachment 395854View attachment 395855View attachment 395858
View attachment 395862
View attachment 395859
View attachment 395857
View attachment 395860
That's all for now....
Cheers !!
Daniel
Very good progress my friend 
.... Yes a BQ ..... with the Stern wood ... HAHAHAThe Dematos shipyard is cooking! That looks beautiful, Daniel!
thank you !!
Very good progress my friend
Good morning Daniel. I’ve been away and had some catching up to do. Wow some serious work done and I missed your birthday. Happy belated birthday. Stunning progress and some fine detailed work. A clever plan to use pear veneer to make the planking to your taste. All looking mighty fine. Cheers Grant
Daniel, you are doing very impressive work and beautiful
Nice work Daniel. You are making great progress.
Mike
THANK YOU !!! Uwe, Grant, Shota and Mike. These comments encourage me to continue doing my best !!!
Cheers
Daniel
Hi All
As always, thank you very much for your comments and the likes !!! , I really appreciate them.
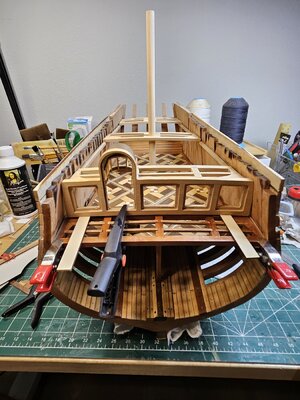
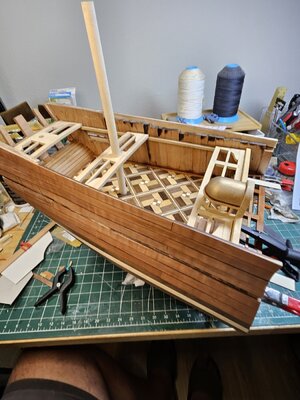
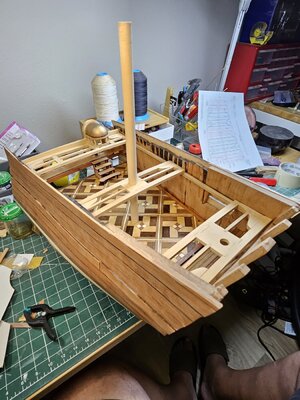
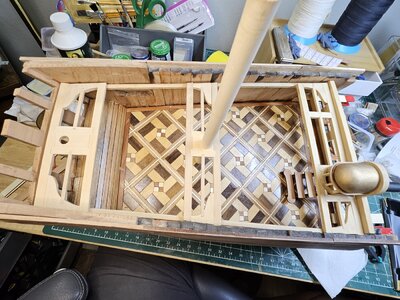
In order to install the wall panels of the Great cabin, I decided to set up the final deck clamps positions of the Quarter and pop deck.
Mike Shanks provided us with measurements taken from the prototype. But, as you already have seen in the SOS Fubbs builts, probably every hull will be unique. Due to that, most of the pices are oversized, to allow them to be shaped to each hull.
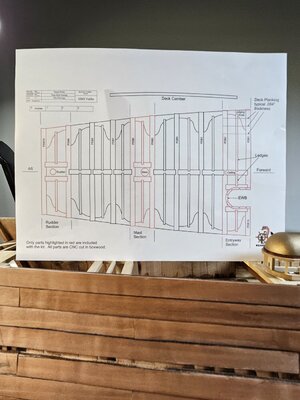
To adjust the clamps position to my hull, I built the Great room stair, position the entry facade and the dome. Plus the 3 sections of the pop deck, defined in red on the drawing.
My quarter decks clamps were high. So I unglued them and reposition using the stairs plus a mock up of the entry with the quarter deck planked.
Here are a few pictures.
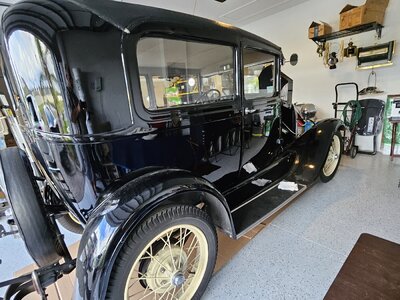
Now I need to share my free time with my other hobby. Driving my Ford A Tudor 1929. Temps are going down in Florida and is time to do some setup and repairs on it. Finally I was able to have a little order on the new house Garage. The cars (I also have a Mercury 1956) were relocate last September. Since then they were only started a few times. They stayed at my parents house 10 miles away. I drove that distance on a route that has 60 mph top. In Florida, drivers like go fast and my 1929 was flying at 40-45 mph top. I got some not happy looks .... HAHAHA
Cheers to all
Daniel.
As always, thank you very much for your comments and the likes !!! , I really appreciate them.
In order to install the wall panels of the Great cabin, I decided to set up the final deck clamps positions of the Quarter and pop deck.
Mike Shanks provided us with measurements taken from the prototype. But, as you already have seen in the SOS Fubbs builts, probably every hull will be unique. Due to that, most of the pices are oversized, to allow them to be shaped to each hull.
To adjust the clamps position to my hull, I built the Great room stair, position the entry facade and the dome. Plus the 3 sections of the pop deck, defined in red on the drawing.
My quarter decks clamps were high. So I unglued them and reposition using the stairs plus a mock up of the entry with the quarter deck planked.
Here are a few pictures.


Now I need to share my free time with my other hobby. Driving my Ford A Tudor 1929. Temps are going down in Florida and is time to do some setup and repairs on it. Finally I was able to have a little order on the new house Garage. The cars (I also have a Mercury 1956) were relocate last September. Since then they were only started a few times. They stayed at my parents house 10 miles away. I drove that distance on a route that has 60 mph top. In Florida, drivers like go fast and my 1929 was flying at 40-45 mph top. I got some not happy looks .... HAHAHA

Cheers to all
Daniel.
- Joined
- Apr 20, 2020
- Messages
- 6,241
- Points
- 738

magnificent carHi All
As always, thank you very much for your comments and the likes !!! , I really appreciate them.
In order to install the wall panels of the Great cabin, I decided to set up the final deck clamps positions of the Quarter and pop deck.
Mike Shanks provided us with measurements taken from the prototype. But, as you already have seen in the SOS Fubbs builts, probably every hull will be unique. Due to that, most of the pices are oversized, to allow them to be shaped to each hull.
To adjust the clamps position to my hull, I built the Great room stair, position the entry facade and the dome. Plus the 3 sections of the pop deck, defined in red on the drawing.
My quarter decks clamps were high. So I unglued them and reposition using the stairs plus a mock up of the entry with the quarter deck planked.
Here are a few pictures.
View attachment 397122View attachment 397123View attachment 397124View attachment 397125View attachment 397126
Now I need to share my free time with my other hobby. Driving my Ford A Tudor 1929. Temps are going down in Florida and is time to do some setup and repairs on it. Finally I was able to have a little order on the new house Garage. The cars (I also have a Mercury 1956) were relocate last September. Since then they were only started a few times. They stayed at my parents house 10 miles away. I drove that distance on a route that has 60 mph top. In Florida, drivers like go fast and my 1929 was flying at 40-45 mph top. I got some not happy looks .... HAHAHA
View attachment 397127
Cheers to all
Daniel.
A VERY BELATED HAPPY BIRTHDAY DANIEL AND MANY, MANY MORE. GOD BLESS STAY SAFE YOU AND YOURS DON
Hi Daniel, absolutely fantastic work.


