I am sorry for my synthax or mistake in my redaction of the previous post, but the ratio is not 99%, i use normal ratio like yours. 99% is the concentration of the isopropyl alcool found in the puchased bottes at the drug store. Therefore the amoumt of water added is very low and modified the evaporation rate. Thanks for your input.WOW! Isopropyl Alcohol at 99% thinning ratio. That would give you very thin paint and very little colour coverage but yes the solvent evaporation would be fast. l use Tamiya and Gunze Mr Hobby acrylic model paints and normally thin with IPA approx 40-50% determined by colour as some colours can be thicker than others due to pigments used. Also the thinning ratio can be dependant on room temperature. ie warmth reduces the paint viscosity so will or may need less thinning with solvent. Colder rooms/climates will or may require additional solvent thinning. (if using aerosols put the can under your armpit to warm it up. The spray will be finer and spray much better) ---- Dry spray coating is when you spray a surface and the paint is virtually dry at the end of each gun pass. Therefore if you spray from the bow to the stern of your model in one move, by the time you get to the stern the paint is already touch dry at the bow section. Try masking up a piece of wood and have a practice. Use maybe half trigger to start with and you'll find it gets easier as you go along. Apologises if you end up using good paint but sometimes a little waste becomes not only productive but cheaper in the long run. ------ Hope I haven't confused you. Anything else please feel free to ask. Cheers.
-

Win a Free Custom Engraved Brass Coin!!!
As a way to introduce our brass coins to the community, we will raffle off a free coin during the month of August. Follow link ABOVE for instructions for entering.
-

PRE-ORDER SHIPS IN SCALE TODAY!
The beloved Ships in Scale Magazine is back and charting a new course for 2026!
Discover new skills, new techniques, and new inspirations in every issue.
NOTE THAT OUR FIRST ISSUE WILL BE JAN/FEB 2026
You are using an out of date browser. It may not display this or other websites correctly.
You should upgrade or use an alternative browser.
You should upgrade or use an alternative browser.
Belem from Artesania Latina - by Fish & Chip
- Thread starter Fish&Chip
- Start date
- Watchers 25
-
- Tags
- artesania latina belem
Hi, there is my update infos. Again, wrong and inconsistent pictures from AL. Sometime they tell you to cut a piece to adjust it and on others pics there is no adjustments. I had a disaster with the PE Lader for two of the three smallest ones. I will check this weekend how to repair this mess.
Mast were put in place to made a check. No glue and painting done. Plywood ramp are thinner than wood strip... Well a disgusting experience for me with this build. I hope that my AL Bounty and Amati HMS Fly will be better even if they are more difficult in principle.
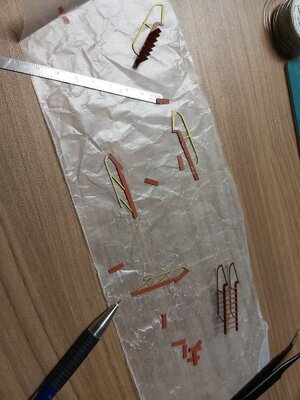
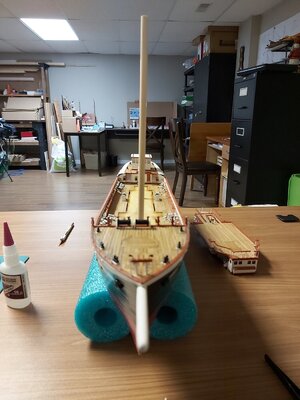
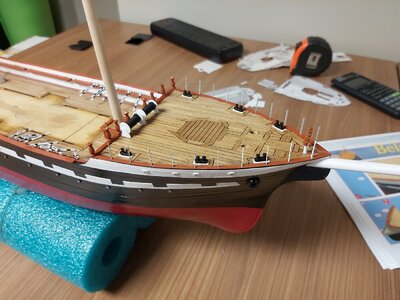
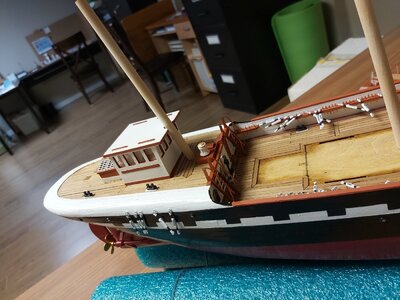
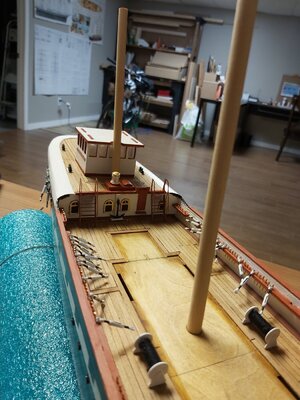
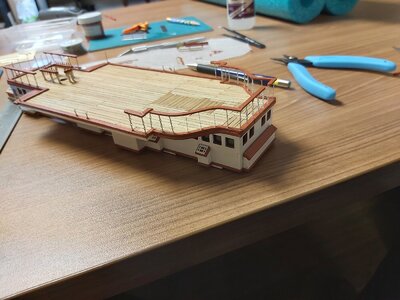
Mast were put in place to made a check. No glue and painting done. Plywood ramp are thinner than wood strip... Well a disgusting experience for me with this build. I hope that my AL Bounty and Amati HMS Fly will be better even if they are more difficult in principle.


Hi,
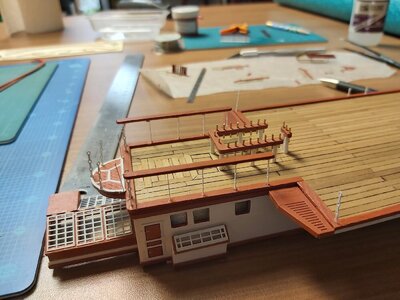
There is some more work done this week on my ship. Not perfect, but I am happy with the results. Difficult ship, so small pieces...
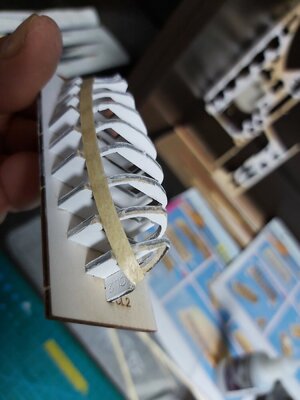
First pic. I do not know the name of the 10 bars in white that will be glue to the starboard. Some glue needed for repairing one.
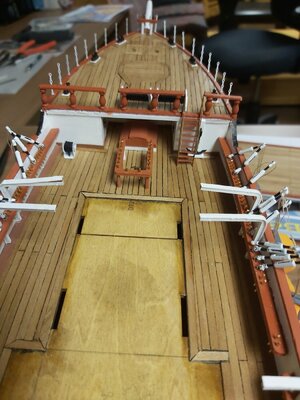
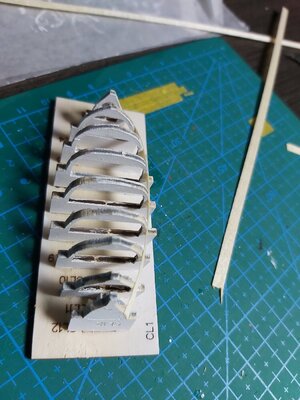
For this 2nd pic, space is missing to put another column between the step ladder and the first small coulumn.
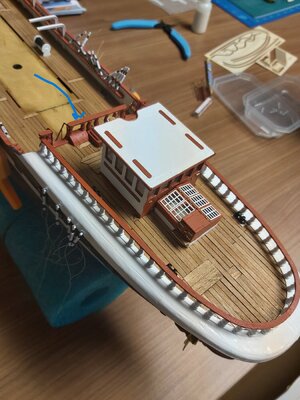
The roght step ladder is a recuperation of my disaster when manipulating it for the first time after putting the steps at the correct angle by plying them. May be the painting layer rendered them to stiff and let them broked when plying.
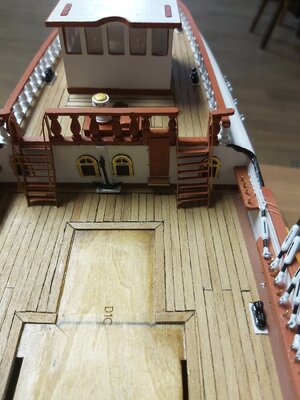
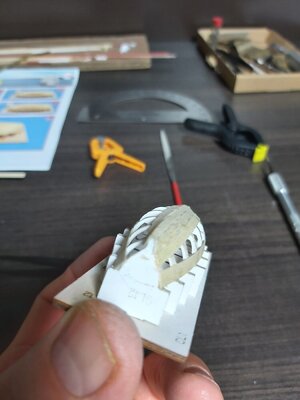
The with bars are not glue to the down side of the deck yet. Really difficult to place all the starboard (good name of it ?) plateform on the deck. The attachment to it on the rear, front and sides are to be perfectly level to let the insertion of the plateform in the slot dedicated to it on the main deck.
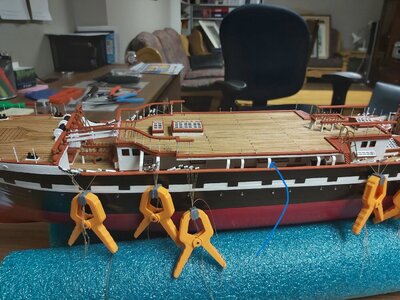
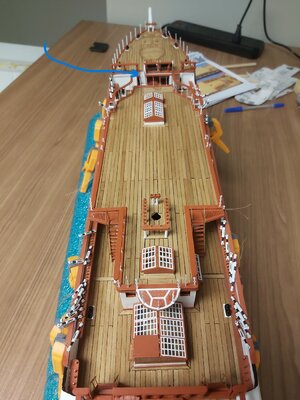
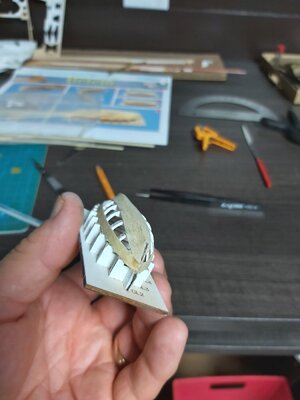
Well, not to bad. You see at the end of the blue arrow that more space is needed to put the piece perpendicularly to the deck. I followed the instruction ?!?!?
On the next post I will show you some glitches in the plan from AL.
There is some more work done this week on my ship. Not perfect, but I am happy with the results. Difficult ship, so small pieces...
First pic. I do not know the name of the 10 bars in white that will be glue to the starboard. Some glue needed for repairing one.

For this 2nd pic, space is missing to put another column between the step ladder and the first small coulumn.

The roght step ladder is a recuperation of my disaster when manipulating it for the first time after putting the steps at the correct angle by plying them. May be the painting layer rendered them to stiff and let them broked when plying.

The with bars are not glue to the down side of the deck yet. Really difficult to place all the starboard (good name of it ?) plateform on the deck. The attachment to it on the rear, front and sides are to be perfectly level to let the insertion of the plateform in the slot dedicated to it on the main deck.


Well, not to bad. You see at the end of the blue arrow that more space is needed to put the piece perpendicularly to the deck. I followed the instruction ?!?!?
On the next post I will show you some glitches in the plan from AL.
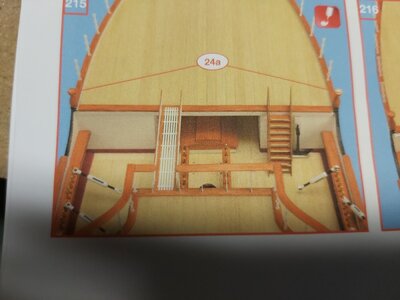
Ok, let me show you some funny instruction :
You have to cut the column. I did it... And have to glue it to repair the piece.
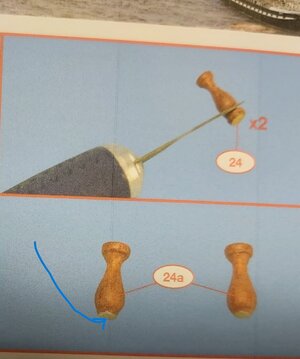
Because later you found this instruction without the column cutted.
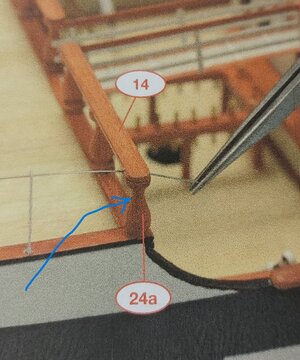
And here the column install too. And the bridge between the two deck do not seem to much perpendicular too. A consolation LOL!
The last one. A hole not required on the deck...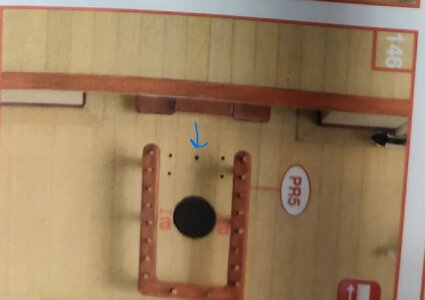
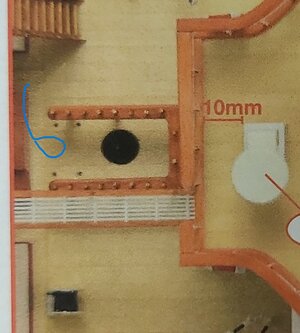
Thank you for watching my build
Michel
You have to cut the column. I did it... And have to glue it to repair the piece.

Because later you found this instruction without the column cutted.

And here the column install too. And the bridge between the two deck do not seem to much perpendicular too. A consolation LOL!

The last one. A hole not required on the deck...


Thank you for watching my build
Michel
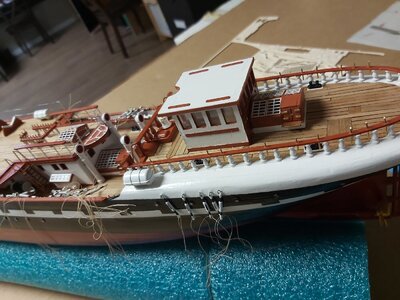
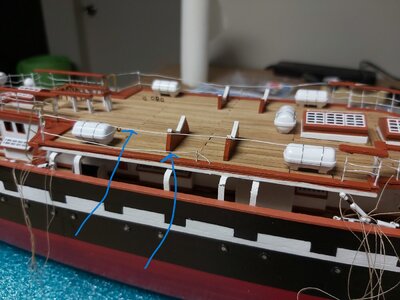
Hi, There is 2 others pics showing advancement in my built. The steel wire ramp are really difficult to manipulate and glue. I will paint them in white. The diameter of the column does not allowed the insertion of the belaying pins at the same position as per AAMM plan (2nd pic). I tried to do the same as AAMM as much as possible and thus deviate a littile bit from AL plan.
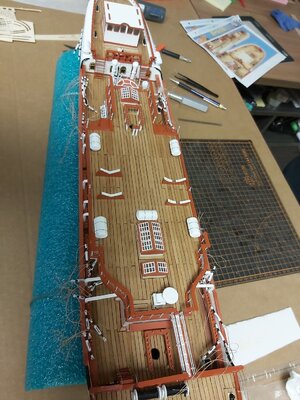


Thanks Uwek and Jimsky for your like. I am not satisfied with the tin wire for the ramp. May be should I redo with soldering approche and with thin rods
Good morning. Whew there is plenty of fitting on this ship. A lot Kit instructions are always full of irregularities - I think they manufacturers like to test or challenge usHi, There is 2 others pics showing advancement in my built. The steel wire ramp are really difficult to manipulate and glue. I will paint them in white. The diameter of the column does not allowed the insertion of the belaying pins at the same position as per AAMM plan (2nd pic). I tried to do the same as AAMM as much as possible and thus deviate a littile bit from AL plan.
View attachment 329141
View attachment 329142
Thanks Grant. I am afraid by the redo. Should I take brasse thicker wire or rods and usesoldering technic or take thick quality rope (white or paint in white) ? Steel thin wire tend to ply easily, but can be bend on the fly. This allow a single pass in the column hole by one wire that can be bend to be conform to the multiple angle of these ramps. The column are very fragile in position too. If I use thicker wire, I think it will necessitate to do the ramps step by step, not in a single pass. It will be difficult to glue (may be), so soldering could help. Thicker brass wire should allow some bending propriety. Rope should allow easy bending and tensionning.
So ? Any idea from more experimented ones ?
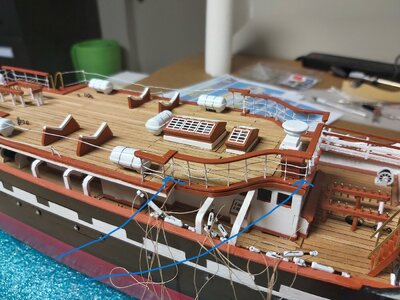
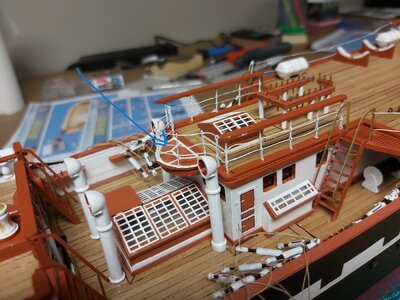
I put somepics of the steel wire painted in white. It is more easy to see the result and figure out the difficulties. Blue arrows shows difficult area. Veey fragile setup for columns in the last pic. Everything showed here are PE. The column holes are easy to see in this pic. The hole diam. allow the use of thicker wire or rod at the cost of less self adjustment if column to column hole arre not exactly at the same level.
.


Good evenning,
I am waiting for purchased tools to help me correct the ramp (railing). Let me show my new tools for the Belem and futur build.
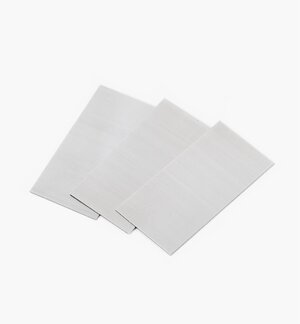
These miniature scrapers are especially useful for working in tight corners and scraping glue off joints. Made to the same specifications as our larger super-hard milled scrapers, they are 0.4mm (0.016") thick and hardened to Rc48-52. They are just 2" long by 1" wide to provide considerable control. Sold in a package of three with sharpening instructions. (Description for Lee Valley)
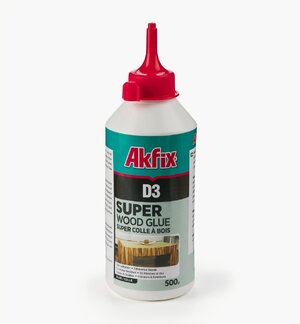
Akfix D3 PVA Super Wood Glue
This water-resistant adhesive has an excellent bond strength when used on all types of wood and wood composites. It dries clear, minimizing glue lines, especially on lighter wood. With an open time of approximately 10 minutes, it has a thick consistency that reduces running and dripping on vertical surfaces, and helps facilitate tricky glue-ups by staying where you put it.
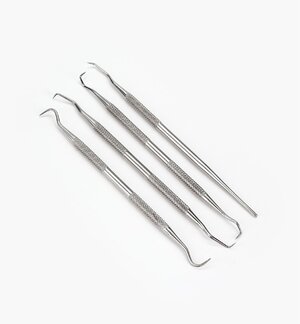
Carving and Clean-Up Picks
Made from hardened 440 stainless steel, this set has seven different ends with primarily triangular cross sections. All are about 7" long and have 1/4" dia. serrated grips for easy control.
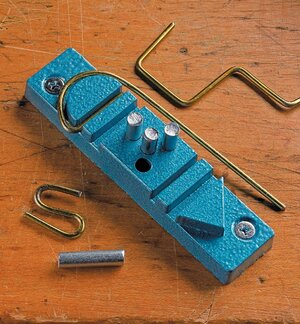
And finally, for the rail remplacement by 0,81mm brass rods (0,032 in) beending : Wire Bender.
With the wire bending jig held in a vise (or mounted), you can bend mild steel wire up to 3/16" or 5mm diameter to any shape. Made in Japan.
Thats it from Lee V. Now I also purchased the micro-bending tool from Xuron.
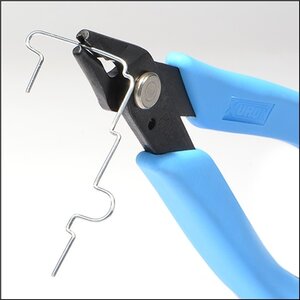
All these won't let me an expwert, but I will learn anothers skill. I have to choose fgrom glueing or soldering the brass rods to the really smal and thin column made in PE.
I will receive these tool next week.
I am waiting for purchased tools to help me correct the ramp (railing). Let me show my new tools for the Belem and futur build.
These miniature scrapers are especially useful for working in tight corners and scraping glue off joints. Made to the same specifications as our larger super-hard milled scrapers, they are 0.4mm (0.016") thick and hardened to Rc48-52. They are just 2" long by 1" wide to provide considerable control. Sold in a package of three with sharpening instructions. (Description for Lee Valley)

Akfix D3 PVA Super Wood Glue
This water-resistant adhesive has an excellent bond strength when used on all types of wood and wood composites. It dries clear, minimizing glue lines, especially on lighter wood. With an open time of approximately 10 minutes, it has a thick consistency that reduces running and dripping on vertical surfaces, and helps facilitate tricky glue-ups by staying where you put it.

Carving and Clean-Up Picks
Made from hardened 440 stainless steel, this set has seven different ends with primarily triangular cross sections. All are about 7" long and have 1/4" dia. serrated grips for easy control.

And finally, for the rail remplacement by 0,81mm brass rods (0,032 in) beending : Wire Bender.
With the wire bending jig held in a vise (or mounted), you can bend mild steel wire up to 3/16" or 5mm diameter to any shape. Made in Japan.

Thats it from Lee V. Now I also purchased the micro-bending tool from Xuron.

All these won't let me an expwert, but I will learn anothers skill. I have to choose fgrom glueing or soldering the brass rods to the really smal and thin column made in PE.
I will receive these tool next week.
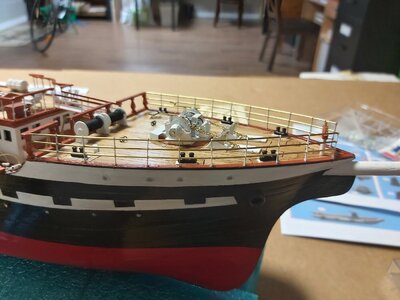
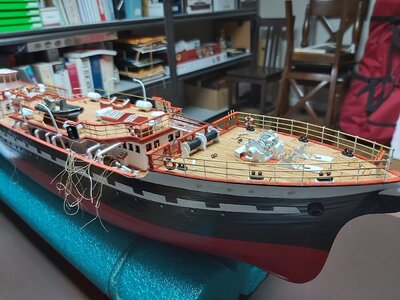
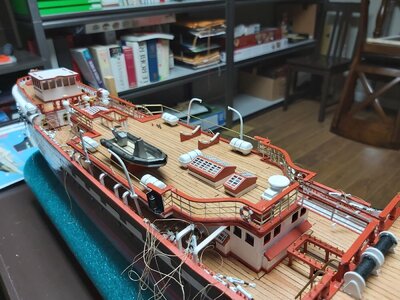
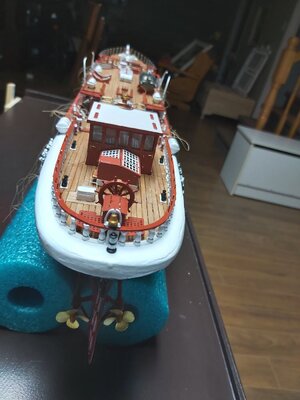
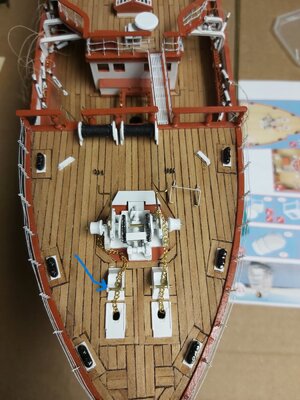
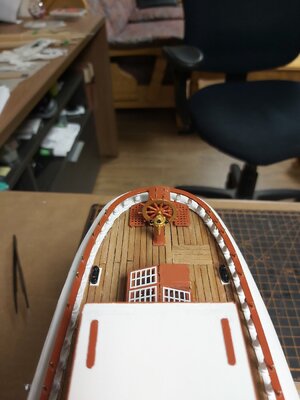
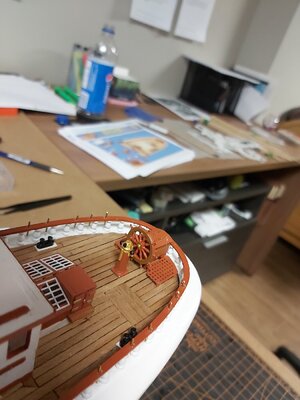
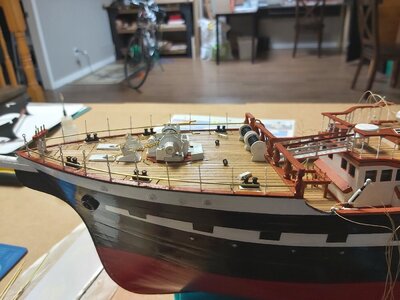
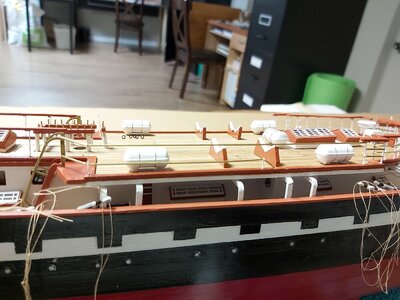
In the waiting of my tools, I continue to install the wheel and the winchs. I have to decide where to pass the anchor chains, under or over the rods indicated by the blue arrow on the pics. Al and AAM plans do not indicated the same pattern. On the real picture, they seem to pass under the rods. I had to redo the winchs since I forgot to put to pieces !!! And the picture act as a microscope... The really small defect appear substantial in the alignment of the starboard wheel that support the chain. I will try to correct it.


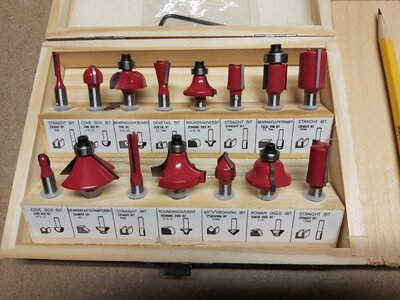
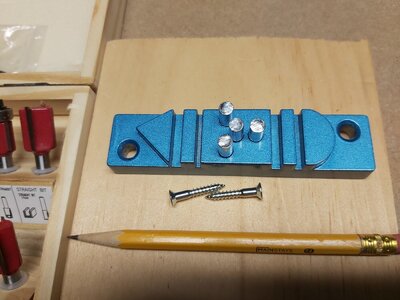
Good evenning. I received my new tool for bending rods, my Makita rt0701c and some bits, Waiting for my threads. I try the 0,08mm brass rod for the railis and I would like to obtain your opinion before continuing all the installation of them. Is it to thick in diam. ? I quit a bit easy to install on the front, but on the others locations it will require more patience.
Thanks,
Thanks,


Thanks guys for the like. I assume you agree and the rod size is acceptable.
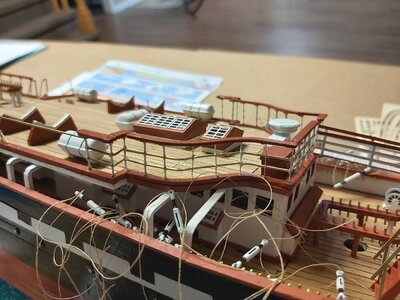
Then, there is one try and the last one for tonight. It took seveeral steps, the xuron bender and a flat xuron plier. I used also aKakko CHP-170 micro wire cutter. Done with abit of tension applied on the coloumn. Some unglue from the top ramp without consequences and frankly, it help the process. I have to decide if I will paint the rods in white or not.


Good morning. With your decision to paint the railings white or not - clearly that preference is yours, however I do know that most paints do not go well on brass. There are ways to blacken brass, however I would have no idea how to paint it white? May cause some issues here. Maybe some of the “clever” guys know. Cheers GrantThen, there is one try and the last one for tonight. It took seveeral steps, the xuron bender and a flat xuron plier. I used also aKakko CHP-170 micro wire cutter. Done with abit of tension applied on the coloumn. Some unglue from the top ramp without consequences and frankly, it help the process. I have to decide if I will paint the rods in white or not.
View attachment 331319
View attachment 331320
- Joined
- Oct 17, 2020
- Messages
- 1,691
- Points
- 488

Good morning Grant, adhesion primer for metals, for metal and substrate protection, excellent adhesion, FrankGood morning. With your decision to paint the railings white or not - clearly that preference is yours, however I do know that most paints do not go well on brass. There are ways to blacken brass, however I would have no idea how to paint it white? May cause some issues here. Maybe some of the “clever” guys know. Cheers Grant
Thanks for the comment.Other possibility I think about is to varnish the rods then paint it. Real Belem have White rails, but brass looks good too.
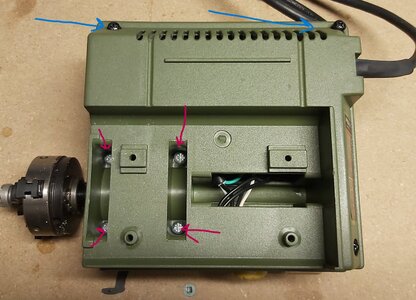
As promise elsewhere on SOS, I finaly found time to change the bearing of my Proxxon mini lathe. I tried it with the three jaw chuck before and after. NO DIFFERENCE. It was easy to verify by putting the endtail on front of the chuck with I think is name the drive center. I can saw the oscillation easily with this setup. SO, I tough that may be the problem was the chuck... I removed it and then put a collet with the face plate that have a small pin in the center to opposed to the tail stock (endtail or tail stock ? not sure). RESULT : no oscillation at all. May be I change the bearing for nothing useful, but for helping the longevity of them since they are SFK quality instead of CW. I took pics for you with color line to identify screw and pieces.
So, for precision, collet is better than the chuck for my setup.
PIC 1 - In blue the black screw and in red the usual metallic color.
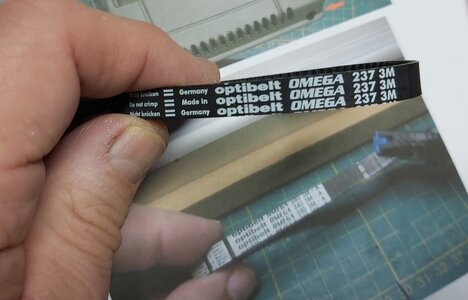
Pic 2 - My belt was made in Germany, 237 which is different from the one found by Stephan (240 instead).
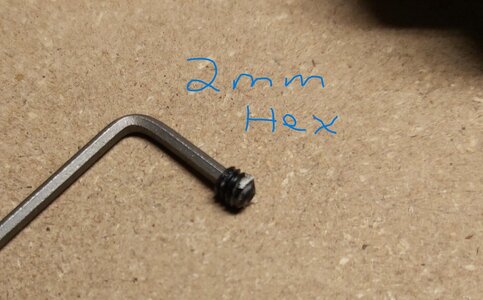
Pic 3 - The first bearing , the one near the the open center, as been removed easily. This is the one on the table. The second one slip from is position and required to remoeved a small screw of 2 mm secure with something white, by easily unscrewed with hex.
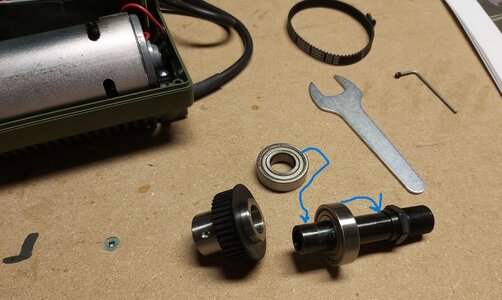
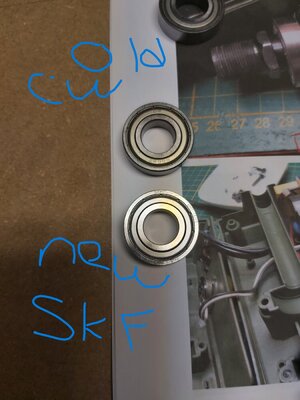
Pic 3- COmparing the old CW 6002Z (Generic China ?) vs new SKF 6002-2Z/C3 (made in Italy) bearing.
So, for precision, collet is better than the chuck for my setup.
PIC 1 - In blue the black screw and in red the usual metallic color.

Pic 2 - My belt was made in Germany, 237 which is different from the one found by Stephan (240 instead).

Pic 3 - The first bearing , the one near the the open center, as been removed easily. This is the one on the table. The second one slip from is position and required to remoeved a small screw of 2 mm secure with something white, by easily unscrewed with hex.


Pic 3- COmparing the old CW 6002Z (Generic China ?) vs new SKF 6002-2Z/C3 (made in Italy) bearing.


