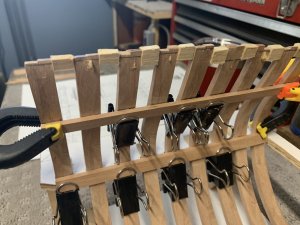
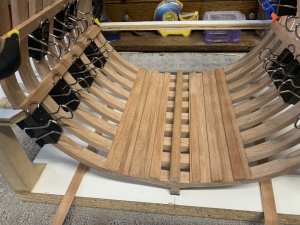
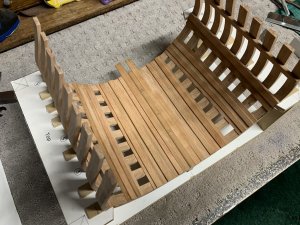
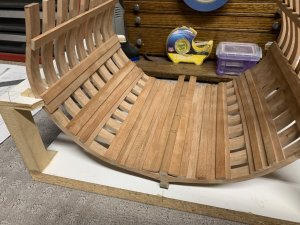
Hey Mike, nice clean woodwork its looking fantastic 
-

Win a Free Custom Engraved Brass Coin!!!
As a way to introduce our brass coins to the community, we will raffle off a free coin during the month of August. Follow link ABOVE for instructions for entering.
-

PRE-ORDER SHIPS IN SCALE TODAY!
The beloved Ships in Scale Magazine is back and charting a new course for 2026!
Discover new skills, new techniques, and new inspirations in every issue.
NOTE THAT OUR FIRST ISSUE WILL BE JAN/FEB 2026
- Home
- Forums
- Ships of Scale Group Builds and Projects
- Group Build Archives
- Blandford Cross Section PoF Group Build
You are using an out of date browser. It may not display this or other websites correctly.
You should upgrade or use an alternative browser.
You should upgrade or use an alternative browser.
BigMike,s Blandford Cross Section 1:32 scale [COMPLETED BUILD]
Thanks for the kind words Steve.
another awesome Blandford build,nice work Mike!!
Thanks Zoly. I appreciate the work Mike, Donnie and yourself do. I hope more people take advantage of these builds.another awesome Blandford build,nice work Mike!!
Very nice work, Mike. The hold looks fabulous.
G'day Mike
As Zoly said....another awesome Blandford build.
I'll be watching
As Zoly said....another awesome Blandford build.
I'll be watching
Thanks everyone, having fun and learning a lot.
Hi everyone a little progress this week. I made the mast step and shot locker. The well and shot locker is made of boxwood. I fit the post on LDB2 and glued it to locker and built lid around post.
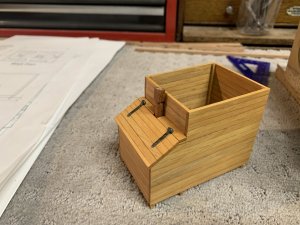
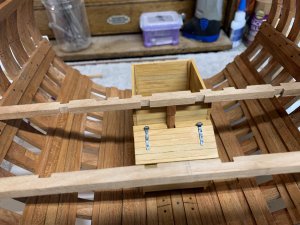
I tried different ways to simulate bolts. The bolts on the keelson are railroad track nails. For the strakes I used cherry wood filler and footwaling used cherry wood pulled through the draw plate. Both look good just slightly visible. The filler was easy and a fast way to do treenails. Deck clamp has small blackened brass nails.
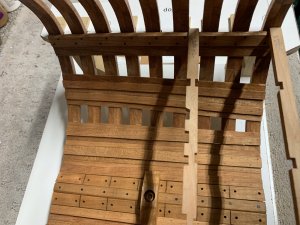
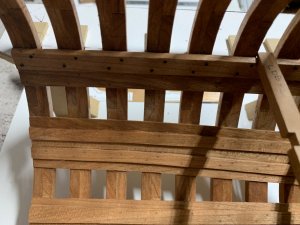
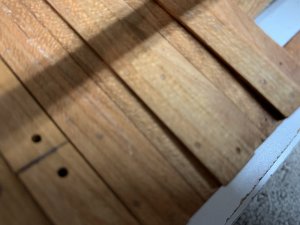
Thanks Dave Doc for the limber board idea, I think it turned out pretty good. Working on lower deck beams now, they will be cherry also. Man there are a lot of notches to cut, I went the easy route cutting them all the way down the beam.
That’s it for now, thanks for following along.


I tried different ways to simulate bolts. The bolts on the keelson are railroad track nails. For the strakes I used cherry wood filler and footwaling used cherry wood pulled through the draw plate. Both look good just slightly visible. The filler was easy and a fast way to do treenails. Deck clamp has small blackened brass nails.


Thanks Dave Doc for the limber board idea, I think it turned out pretty good. Working on lower deck beams now, they will be cherry also. Man there are a lot of notches to cut, I went the easy route cutting them all the way down the beam.
That’s it for now, thanks for following along.
Veery niccccccccccccccccce, Mike. Can you tell us how you made hinges? Is it brass?
Thanks Jim. The hinges are made of 2mm wide brass strip. I wrapped the strip around a piece of 1/32 brass rod. Solder on the joint and cut rod to length. I have a staking tool I use for clock work that I used to make dimples to simulate bolts on the hinge. I tried to blacken them but it didn't turn out very well. I cleaned the brass with steel wool and used a degreaser on them but the black wouldn't take, so I painted with a gun metal black. I think they turned out ok fo faux hinges.Veery niccccccccccccccccce, Mike. Can you tell us how you made hinges? Is it brass?
Thanks, Mie for sharing with us your techniquehe hinges are made of 2mm wide brass strip. I wrapped the strip around a piece of 1/32 brass rod. Solder on the joint and cut rod to length. I have a staking tool I use for clock work that I used to make dimples to simulate bolts on the hinge. I tried to blacken them but it didn't turn out very well. I cleaned the brass with steel wool and used a degreaser on them but the black wouldn't take, so I painted with a gunmetal black. I think they turned out ok for faux hinges.
Thanks for this info Mike as I plan to get into scratch big time. Next crucial investment is a nice thicknes planer. Any pointers from the guys on brands and model types would be very welcome.Hi Mike,
You are off to a fine start; the frames look very nice. I always must adjust the sawtooth type jigs to make things work right. I normally use a gantry jig but since this is an introductory project, I felt like a basic jig would be best to use. If you decide to continue scratch building, you should consider a gantry system. I posted some info on the type I use.
https://shipsofscale.com/sosforums/threads/building-board-gantry-type.1331/#post-21091
Mike
Great build thread
I have a Byrnes also. Top notch quality.
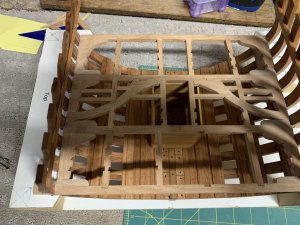
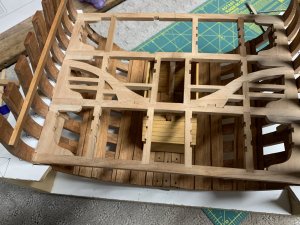
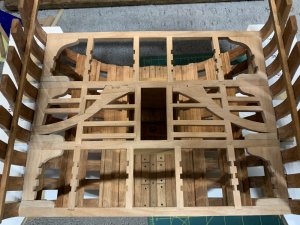
Making some progress on the Blandford. I have been working on the lower deck. I started with LDB2 and 3 and getting the arm beams set. Once they were fitted I set the well. LDB1 and 2 were next getting fit into place making sure beams were centered. Notches were cut on the mill then sanded curve into the beams. Knees and hanging knees were next, scroll saw and files did the notches for those to handle the angles in those notches. I cut those over size to allow for shaping to my model. Carlings were fit once beams and knees were glued in place. All the notches were marked on the carlings on the model checking measurements from plan. I used deck beam 2 and 3 for the reference point to measure from. A lot of fitting and sanding but it went pretty smooth. If you keep everything a little big you should be good fitting everything up. Working on the ledges now, cutting one at a time and fitting each one. Measurements are very close to plan so I'm pretty happy. Probably not the fastest way of doing this but its working out so far.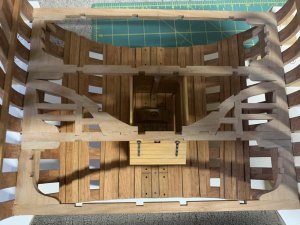


Excellent work Mike!
Thanks Jim, all the great build logs here help a lot.


