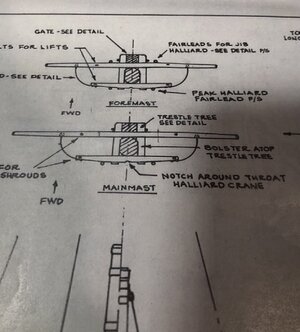
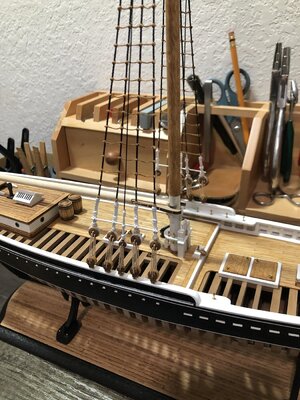
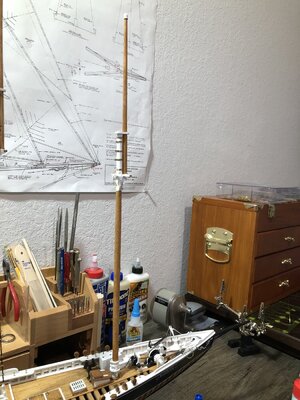
Din62 check the position of the spreaders on the bushings. They should cut into the bushings and the beveled part of the spreader should be down. Maybe on Bluenose it should be, I don't know. I only saw as I described.
-

Win a Free Custom Engraved Brass Coin!!!
As a way to introduce our brass coins to the community, we will raffle off a free coin during the month of August. Follow link ABOVE for instructions for entering.
-

PRE-ORDER SHIPS IN SCALE TODAY!
The beloved Ships in Scale Magazine is back and charting a new course for 2026!
Discover new skills, new techniques, and new inspirations in every issue.
NOTE THAT OUR FIRST ISSUE WILL BE JAN/FEB 2026
- Home
- Forums
- Ships of Scale Group Builds and Projects
- Bluenose PoF Group Build
- Bluenose Group Build Logs
You are using an out of date browser. It may not display this or other websites correctly.
You should upgrade or use an alternative browser.
You should upgrade or use an alternative browser.
That’s how I turn the mast and ball on the end. A cheap lathe…lolwell, you can continue with your mission and shape it by hand, but why? You can use the simple cordless\corded drill to insert one end and shape using the sandpaper of various grits, IMHO.
Before all those 'fancy tools' we use a bench plane and square stock to make masts and spars. This is somewhat a long process but has proven to work. In fact, Dr. Mike, a famous Russian modeler for his precision modeling work, still uses this method for most of his work.That’s how I turn the mast and ball on the end. A cheap lathe…lol
Today, we have lathes and already made round dowels, with pretty much the same results, using those tools, we can fabricate all masts\spars with much fewer efforts, IMHO.
From the comments and recommendations related to spars, those do not seem to realize that the spars on BN were not round, including the bowsprit, but had one side straight and the others (aft and to the sides) tapered. THE MS kit and instructions/plan details present this very well. So in reality, for at least this schooner, the spars are not round but it really doesn't matter at the scale of the YQ model. The only way to get that non-rounded shapes and tapers, that I know of, is by hand filing and sanding, You can toss that off to the pier as your work is well done to look at and in the detailing that you are providing for your excellently built/building model. RIchFinished lower mast.
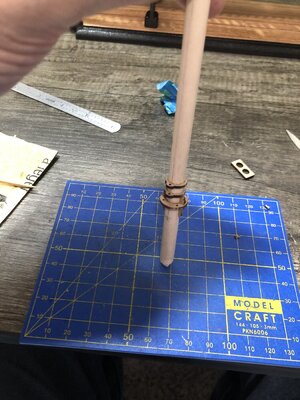
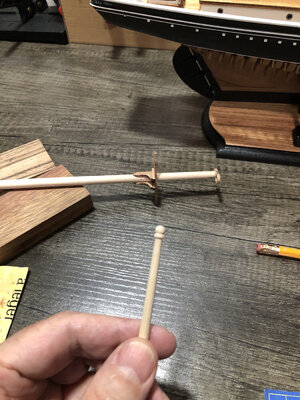
Turned the upper mast and ball…with drill…
Adjusted the flat at the bottom of the upper mast until it was parallel to the lower mast.
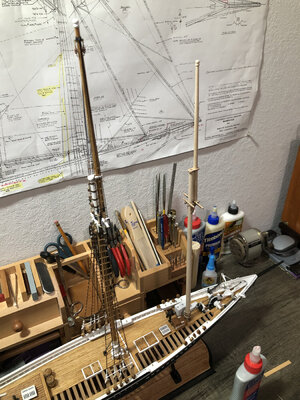
Test fit in ship, now I can stain and paint…prior to starting all the metal work.
View attachment 249528View attachment 249529View attachment 249530
Yes the bottom portion of the upper mast was square…but I just added a flat on the back so it will sit properly in the trestle tree area and be parallel to the lower.From the comments and recommendations related to spars, those do not seem to realize that the spars on BN were not round, including the bowsprit, but had one side straight and the others (aft and to the sides) tapered. THE MS kit and instructions/plan details present this very well. So in reality, for at least this schooner, the spars are not round but it really doesn't matter at the scale of the YQ model. The only way to get that non-rounded shapes and tapers, that I know of, is by hand filing and sanding, You can toss that off to the pier as your work is well done to look at and in the detailing that you are providing for your excellently built/building model. RIch
And I am also aware that the end of the bowsprit that goes to the Samson post is square up to the bits. But given a round dowel…I left it be as it would have been undersized if I squared it. That leaves you scratch building it and the upper mast. I have scratch built enough…lol. So I am compromising in some areas, as I don’t want to spend another year on this ship…lol
But I feel I have gone above and beyond thus far on the rigging, verses what is shown in the instructions.
I also think at this scale, adding sails will make it too busy! More and more I’m leaning towards no sails. There is so much rigging to be done just for the masts, booms and gaffs, that I can’t image trying to squeeze in sails and the lines for them! So I have a decision to make soon.
Last edited:
It sounds to me like you have made your decision from the facts that you state. It will be an impressive model. RichYes the bottom portion of the upper mast was square…but I just added a flat on the back so it will sit properly in the trestle tree area and be parallel to the lower.
And I am also aware that the end of the bowsprit that goes to the Samson post is square up to the bits. But given a round dowel…I left it be as it would have been undersized if I squared it. That leaves you scratch building it and the upper mast. I have scratch built enough…lol. So I am compromising in some areas, as I don’t want to spend another year on this ship…lol
But I feel I have gone above and beyond thus far on the rigging, verses what is shown in the instructions.
I also think at this scale, adding sails will make it too busy! More and more I’m leaning towards no sails. There is so much rigging to be done just for the masts, booms and gaffs, that I can’t image trying to squeeze in sails and the lines for them! So I have a decision to make soon.
There is nothing boring on your build, Dean.  Always aware of new details!
Nice to see also here the alu sheet on the mast.
Regards, Peter
Nice to see also here the alu sheet on the mast.
Regards, Peter
Oh...there is absolutely nothing boring in your build. It might be repetitive, yes, but certainly NOT boring.
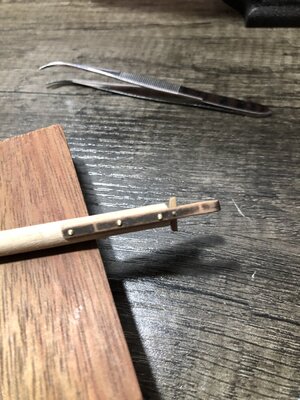
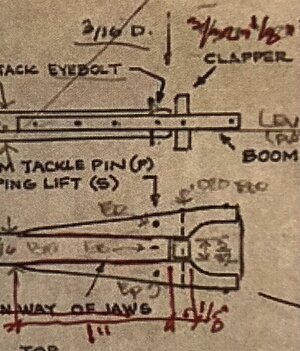
Ok I added a detail most seem to leave out, even most of the kit manufacturers! A boom and gaff can have a clapper, sometimes referred to as a sliding chock. This pivoting block rides against the mast and allows the boom or gaff to rotate. Without this block the boom or gaff would be riding on one edge if at an angle, which could damage the mast! I used some brass rod for the pivot pin. I angled the block in both directions from the centerline, to allow better rotation. It is a working piece. 
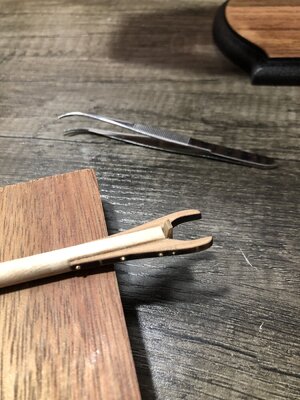
And I got to use my new twist drill…love this thing!
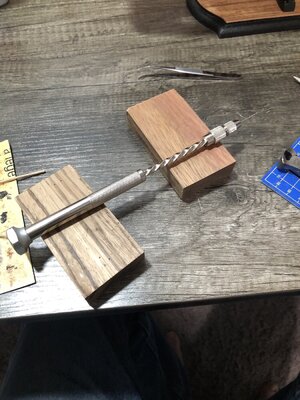


And I got to use my new twist drill…love this thing!

Last edited:
...I recently learn a new name for it called - Archimedean drill. thanks to @Stevedownunder for the hint.And I got to use my new twist drill…love this thing!
Aha…the technical term or name! Good to know! Wish I had it when I did all the treenail holes in the hull by hand!...I recently learn a new name for it called - Archimedean drill. thanks to @Stevedownunder for the hint.
Last edited:
The more I get into the rigging, the more I realize a ship this size with sails and all the rigging that raise and lower the sails, along with mast hoops and blocks, etc…would be very busy and almost cluttered!Beautiful progress Dean. I agree with you on presenting her only with the rigging - provided that you go for that. I concur that with sails the look might just be too busy.
Sometimes a ship looks better without sails. I plan to have the gaffs raised up in the position they would be with sails on. I think it will be a better presentation that way.
It turns out that many schooner boom and gaff clappers had a metal facing on that contact face. That makes more sense with the main mast having the galvanized wrapper where it is in contact with the jaws. I broke up my rats knotting tedium by doing all of the sails with the associated rigging and furling lanyards and the additional step of bending them onto the related spars and hoops. One small part at a time and hopefully it all comes together toward the end. Keep up your excellent work. RichOk I added a detail most seem to leave out, even most of the kit manufacturers! A boom and gaff can have a clapper, sometimes referred to as a sliding chock. This pivoting block rides against the mast and allows the boom or gaff to rotate. Without this block the boom or gaff would be riding on one edge if at an angle, which could damage the mast! I used some brass rod for the pivot pin. I angled the block in both directions from the centerline, to allow better rotation. It is a working piece.
View attachment 249840View attachment 249841View attachment 249842
And I got to use my new twist drill…love this thing!
View attachment 249843
Hopefully you have some progress to show soon, I will be looking for an update on your build log!It turns out that many schooner boom and gaff clappers had a metal facing on that contact face. That makes more sense with the main mast having the galvanized wrapper where it is in contact with the jaws. I broke up my rats knotting tedium by doing all of the sails with the associated rigging and furling lanyards and the additional step of bending them onto the related spars and hoops. One small part at a time and hopefully it all comes together toward the end. Keep up your excellent work. Rich
I am just doing a little here and there. Mainly small wood working and gluing with wood glue. I’m afraid to get out the CA or stain right now with my current bronchitis. So I’m waiting to get well, so I can return to full steam ahead…lol. Then I will have lost time to make up for!
Any current photos would be a reply of the first time that I made the horizontal jig to tie the shrouds and ratlines with those deadeyes, running lights, and dory handling single block on the aft shroud line. It would have been better to be younger, not possible, and with better hand/arm control for working vertically instead of without the mast being stepped to get the shrouds properly set and tensioned ahead of the rats . . . . RATS!!! Oh well, it will be what it will be. I hope that you shake your bronchitis and can return to working. RichHopefully you have some progress to show soon, I will be looking for an update on your build log!
I am just doing a little here and there. Mainly small wood working and gluing with wood glue. I’m afraid to get out the CA or stain right now with my current bronchitis. So I’m waiting to get well, so I can return to full steam ahead…lol. Then I will have lost time to make up for!


