Ummmmm....that Lake Trout looks yammmmmmmy!
-

Win a Free Custom Engraved Brass Coin!!!
As a way to introduce our brass coins to the community, we will raffle off a free coin during the month of August. Follow link ABOVE for instructions for entering.
-

PRE-ORDER SHIPS IN SCALE TODAY!
The beloved Ships in Scale Magazine is back and charting a new course for 2026!
Discover new skills, new techniques, and new inspirations in every issue.
NOTE THAT OUR FIRST ISSUE WILL BE JAN/FEB 2026
You are using an out of date browser. It may not display this or other websites correctly.
You should upgrade or use an alternative browser.
You should upgrade or use an alternative browser.
Bonhomme Richard - Pear Cross section kit (with scratch duplicate using alder) Unicorn Model
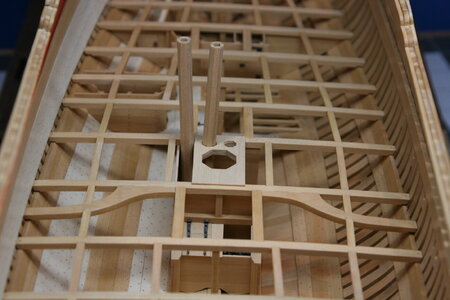
Making room for the four pumps while ensuring there is room for the mast bracing.
1. I diagramed my intentions to thin the horizontal beams below. Note the 45-degree braces are touching:
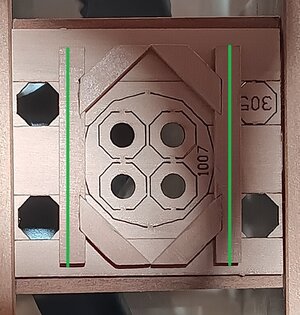
2. The support beams in place, with some still wet WATCO oil. Note the gap now present between the 45-degree braces:
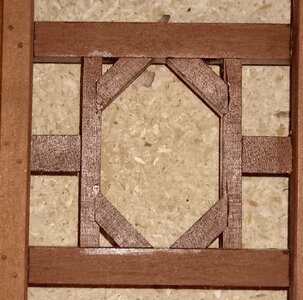
3. First test, the area where the hexagonal pumps run is clear!
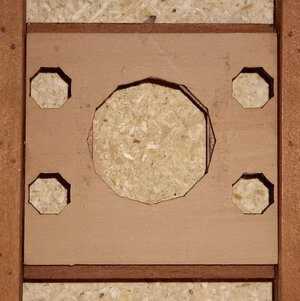
4. Final test passed...Placing the mast to ensure there will be room for bracing wedges/pieces, all the way around.
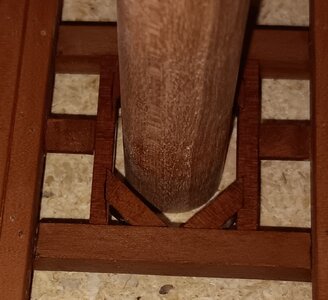
1. I diagramed my intentions to thin the horizontal beams below. Note the 45-degree braces are touching:

2. The support beams in place, with some still wet WATCO oil. Note the gap now present between the 45-degree braces:

3. First test, the area where the hexagonal pumps run is clear!

4. Final test passed...Placing the mast to ensure there will be room for bracing wedges/pieces, all the way around.

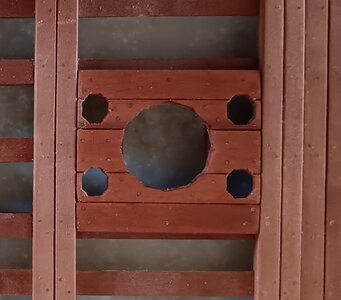
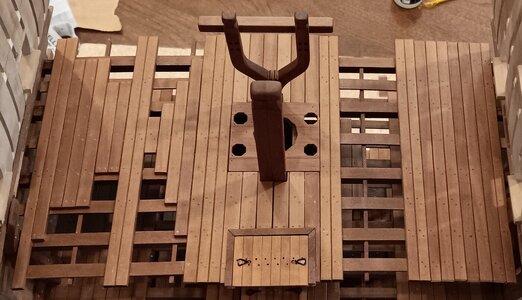
I worked on the main gun deck area that has holes for the mast and the pumps. It appears the kit wants you to use a piece that has the planks etched and the holes cut out.
I wasn't happy with this idea, so I used some left over pieces from the cut-out scraps. I milled them to the correct thickness and width (the kit does not supply any planks in the width/thickness needed for the wide planks).
I glued the planks to the template provided in the kit (using only a few tiny spots of wood glue) so the template can be easily removed. I then used drill bits and rotary tool to get close to the edges.
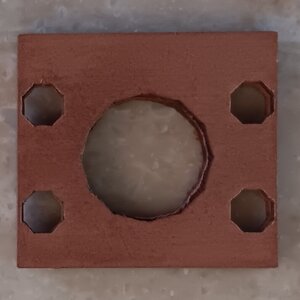
Then small files and chisels were used to create the facets or angles for the wedges to sit on.
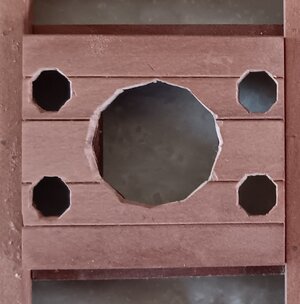
Finally, the template was removed, treenails were added and a coat of Watco wood oil was applied.
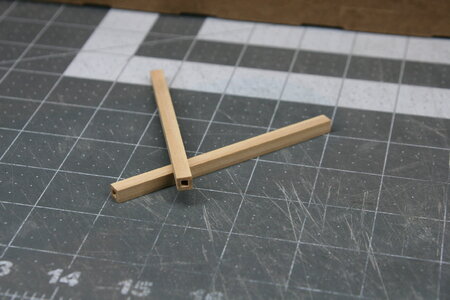
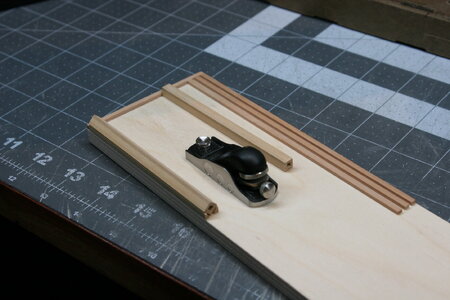
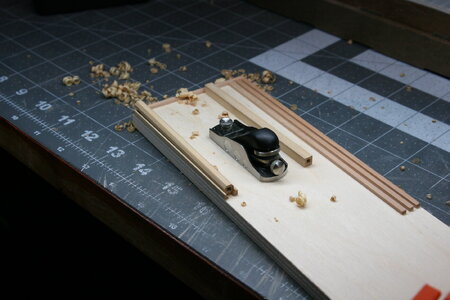
Now comes the fun part of trying to make hexagons from square pieces of wood. If anyone has a technique to make this easy and accurate...please share.
I wasn't happy with this idea, so I used some left over pieces from the cut-out scraps. I milled them to the correct thickness and width (the kit does not supply any planks in the width/thickness needed for the wide planks).
I glued the planks to the template provided in the kit (using only a few tiny spots of wood glue) so the template can be easily removed. I then used drill bits and rotary tool to get close to the edges.

Then small files and chisels were used to create the facets or angles for the wedges to sit on.

Finally, the template was removed, treenails were added and a coat of Watco wood oil was applied.

Now comes the fun part of trying to make hexagons from square pieces of wood. If anyone has a technique to make this easy and accurate...please share.
Paul,
I did the same with the keel rabbet. Thanks for reminding me (duh).
I'll have to make a new jig, since that one was not 45 degrees...and it's still in the basement at home!
Wish I had a milling machine. Watching your build, that is probably my next big purchase when we return to CO this fall.
I did the same with the keel rabbet. Thanks for reminding me (duh).
I'll have to make a new jig, since that one was not 45 degrees...and it's still in the basement at home!
Wish I had a milling machine. Watching your build, that is probably my next big purchase when we return to CO this fall.
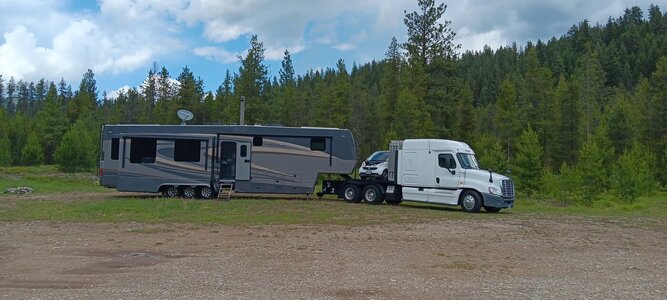
Mobile shipyard left Flaming Gorge Lake, after a 12-day solar powered stay. It is currently in Rock Springs Wyoming, County fairgrounds, with electrical, water and sewer hookups. Shipyard workers got a LONG luxurious shower and were able to do some work, starting on the ship's pumps.
Thanks to Docattner's advice (Thanks Paul for the reminder) about the jig, I was able to quickly set one up and produce the first of eight octagonal sections required for the dewatering pumps.
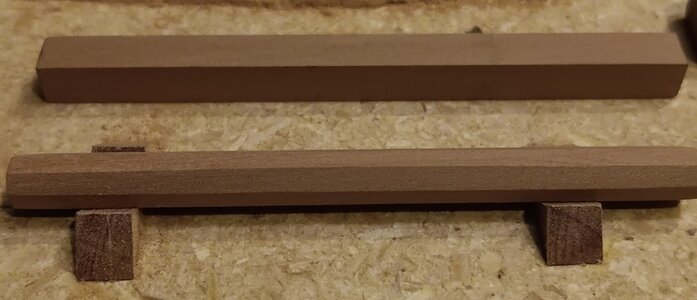
Thanks to Docattner's advice (Thanks Paul for the reminder) about the jig, I was able to quickly set one up and produce the first of eight octagonal sections required for the dewatering pumps.

Progress with hand tools only. Used a drill (in lieu of a lathe) and sanding sticks (in lieu of hand planes) both of which are at home. I managed to turn the washers using the drill and plane the octagon facets with a sanding stick. Ah, the trials and tribulations of a mobile shipyard!!
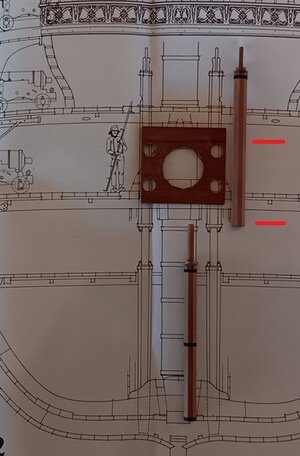
Picture 1 shows the pump sections over the Boudroit plans. I can't assemble them yet, because the black tape (simulating metal bands) won't fit through the octagonal deck openings. I plan to slide them through, just prior to final placement, then applying the black tape (at red arrows) on the upper pump section. The wings on the pump top will also be placed at that time, as they appear fragile. I do not plan on drilling through the frames at the bottom, so I cut the bottom pump section flush with the deck.
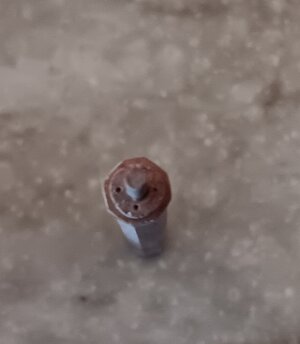
Picture 2 shows the top of the pump and the simulated bolt holes on the top washer, made using small needle holes.
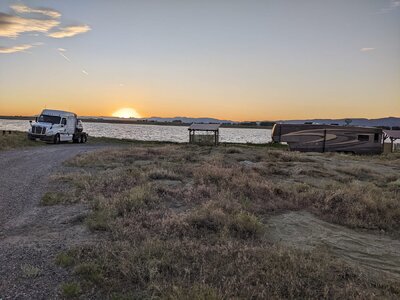
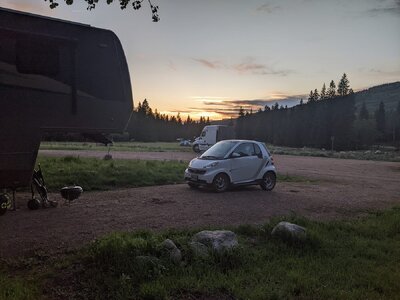
Picture 3 shows sunset on the shipyard next to Bass Lake, WY (elev 6,992ft). I had to back the trailer 150 yards down a gravel path because there was no turnaround spot. Shipyard quality of life is high, with the workers enjoying a nice Imperial Pale Ale as the sun set!!
Picture 1 shows the pump sections over the Boudroit plans. I can't assemble them yet, because the black tape (simulating metal bands) won't fit through the octagonal deck openings. I plan to slide them through, just prior to final placement, then applying the black tape (at red arrows) on the upper pump section. The wings on the pump top will also be placed at that time, as they appear fragile. I do not plan on drilling through the frames at the bottom, so I cut the bottom pump section flush with the deck.

Picture 2 shows the top of the pump and the simulated bolt holes on the top washer, made using small needle holes.

Picture 3 shows sunset on the shipyard next to Bass Lake, WY (elev 6,992ft). I had to back the trailer 150 yards down a gravel path because there was no turnaround spot. Shipyard quality of life is high, with the workers enjoying a nice Imperial Pale Ale as the sun set!!

Some progress was made between the archery competition, hiking and biking!
The main gundeck planking was completed and the topsail bitts, as well as the jeer bitts were shaped and stained.
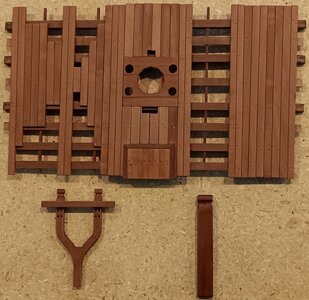
Below shows the bitts and brick stove, dry fit. The hatch cover, with its lifting handles and simulated nail holes is also shown.
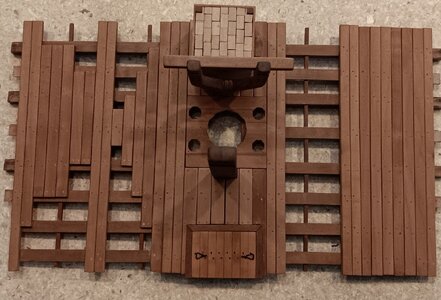
This picture shows the deck slid into place. We are in a nice park in Three Rivers Montana, and I will work on fairing the two deck planks at the outer edge of the deck and then finally glue the deck and the hanging knees in their permanent positions.
The final picture shows the shipyard at its highest elevation yet, at 7,900ft, surrounded by snow covered 12,000ft peaks. We saw herds of 100+ elk, plus numerous deer and moose! My performance at the archery competition was not my best but the surroundings were phenomenal!!
The main gundeck planking was completed and the topsail bitts, as well as the jeer bitts were shaped and stained.

Below shows the bitts and brick stove, dry fit. The hatch cover, with its lifting handles and simulated nail holes is also shown.

This picture shows the deck slid into place. We are in a nice park in Three Rivers Montana, and I will work on fairing the two deck planks at the outer edge of the deck and then finally glue the deck and the hanging knees in their permanent positions.

The final picture shows the shipyard at its highest elevation yet, at 7,900ft, surrounded by snow covered 12,000ft peaks. We saw herds of 100+ elk, plus numerous deer and moose! My performance at the archery competition was not my best but the surroundings were phenomenal!!

Your BR is really taking shape now. These recent additions add a lot of interest and they are so well done! I'm not sure I noticed it before but I like how you have handled the deck planking. I assume the edges have been eased?
Good afternoon Brad. Wonderful modelling and beautiful pics of the surroundings where you are at. There is nothing like being in Gods nature. Cheers GrantSome progress was made between the archery competition, hiking and biking!
The main gundeck planking was completed and the topsail bitts, as well as the jeer bitts were shaped and stained.
View attachment 454040
Below shows the bitts and brick stove, dry fit. The hatch cover, with its lifting handles and simulated nail holes is also shown.
View attachment 454038
This picture shows the deck slid into place. We are in a nice park in Three Rivers Montana, and I will work on fairing the two deck planks at the outer edge of the deck and then finally glue the deck and the hanging knees in their permanent positions.
View attachment 454041
The final picture shows the shipyard at its highest elevation yet, at 7,900ft, surrounded by snow covered 12,000ft peaks. We saw herds of 100+ elk, plus numerous deer and moose! My performance at the archery competition was not my best but the surroundings were phenomenal!!
View attachment 454042
Paul and Grant,
Thanks for your positive and encouraging words as I work through this kit!
Paul, I do ease the edges slightly, just a few passes with a 240-grit sanding stick. I will do the same for all the decks (no simulated caulking/paper on the weather decks).
Grant, being able to enjoy his inspiring vistas and works is certainly one of the joys of a traveling shipyard! The workers only need to open the trailer door to be rejuvenated!!
Made some progress on the main gundeck knees and waterways.
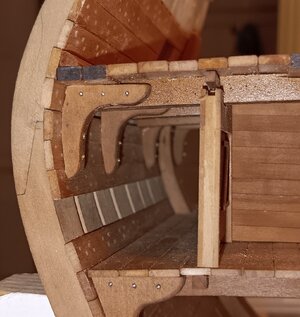
First picture shows the knees supporting the main gundeck.
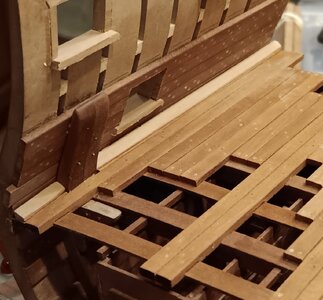
Second picture is a test fit of the waterways on the main gundeck.
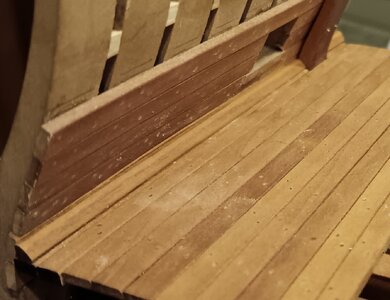
Third picture shows the waterways stained and glued in place.
Final picture shows the new location of the mobile shipyard, high in the mountains on the western edge of Montana. We will cross into the upper horn of Idaho tomorrow to visit friends.
First picture shows the knees supporting the main gundeck.

Second picture is a test fit of the waterways on the main gundeck.

Third picture shows the waterways stained and glued in place.

Final picture shows the new location of the mobile shipyard, high in the mountains on the western edge of Montana. We will cross into the upper horn of Idaho tomorrow to visit friends.

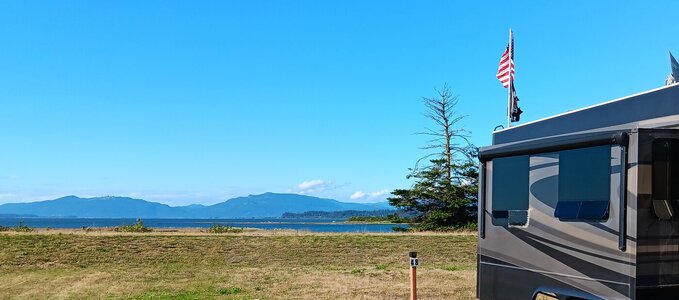
Shipyard is at sea level where a shipyard belongs, right? We're on the Puget Sound, in Anacortes, WA! Work has been slow, as we've been busy visiting our two grandchildren (life has its priorities)!!
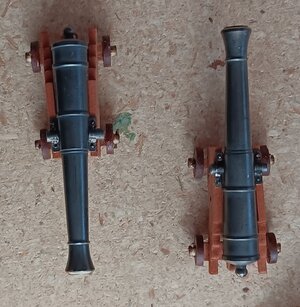
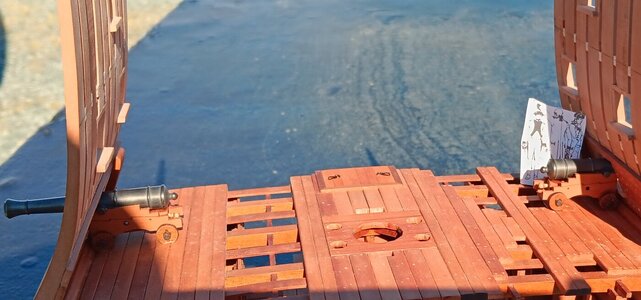
I did manage to assemble the two main gundeck cannons. See photo's below for documentation on their assembly:
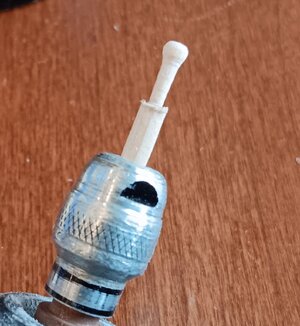
1. The handles for the elevating wedges were turned on a Dremel rotary tool.
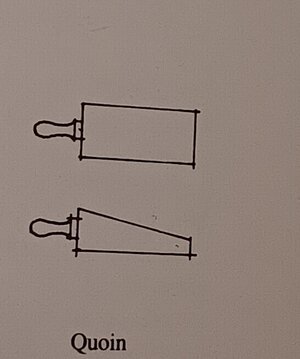
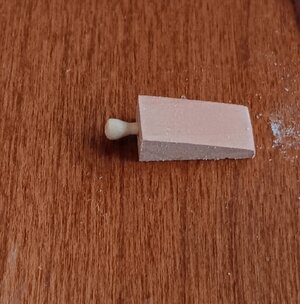
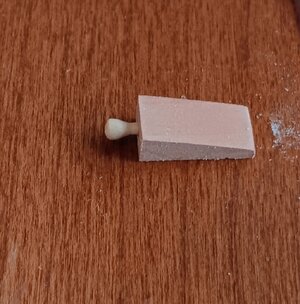
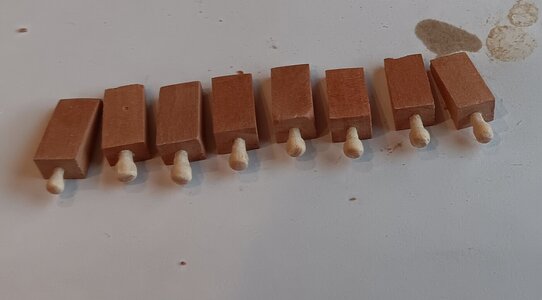
2. Left over pear wood scraps were used to cut the eight elevating wedges for the cannons, which were then stained with WATCO dark walnut and repeated eight times.
3. I stained the cannon carriages with light walnut WATCO oil and the wheels with dark walnut. The cannons were my first attempt at blueing brass, using Birchwood Casey Brass Black. Key is to clean the brass very carefully with steel wool and a degreaser prior to treatment!
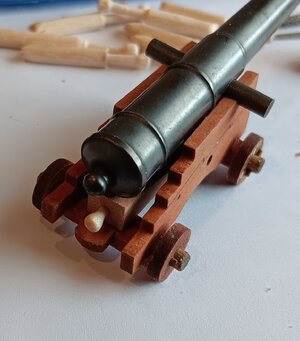
4. The two finished cannons.
5. Cannons placed on the deck. The inspectors showed up and wanted to inspect the cannon rigging. Unfortunately, the "just in time" supply process is not working, and the shipyard received low marks on its supply chain! I argued, to no avail, that the supply chain for a mobile shipyard is problematic. Eventually the inspection team gave the go ahead for continued work, after a few drams of my best Scotch!
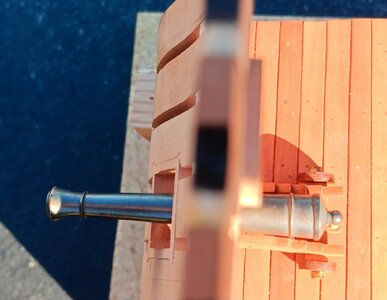
6. The inspectors did approve of the new ocean view of the shipyard and felt the cool ocean breeze off the Puget Sound was healthy for the shipyard workers!!
I did manage to assemble the two main gundeck cannons. See photo's below for documentation on their assembly:
1. The handles for the elevating wedges were turned on a Dremel rotary tool.

2. Left over pear wood scraps were used to cut the eight elevating wedges for the cannons, which were then stained with WATCO dark walnut and repeated eight times.


3. I stained the cannon carriages with light walnut WATCO oil and the wheels with dark walnut. The cannons were my first attempt at blueing brass, using Birchwood Casey Brass Black. Key is to clean the brass very carefully with steel wool and a degreaser prior to treatment!

4. The two finished cannons.

5. Cannons placed on the deck. The inspectors showed up and wanted to inspect the cannon rigging. Unfortunately, the "just in time" supply process is not working, and the shipyard received low marks on its supply chain! I argued, to no avail, that the supply chain for a mobile shipyard is problematic. Eventually the inspection team gave the go ahead for continued work, after a few drams of my best Scotch!


6. The inspectors did approve of the new ocean view of the shipyard and felt the cool ocean breeze off the Puget Sound was healthy for the shipyard workers!!

Trying to size the various cannons.
According to Boudroit, in Lorient, FR, they took on board the old style 9ft 18 pounders for the main gundeck.
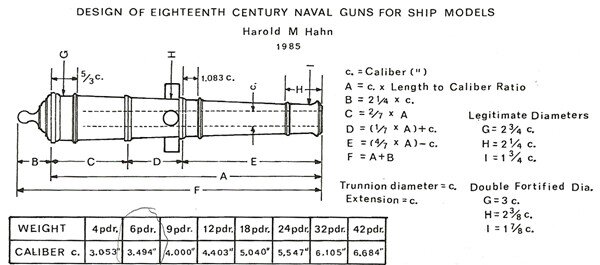
The two large cannons supplied in the kit, closely agree with Boudroit's documentation...the A measurement below of the kit guns is 9.05ft. I am quite happy to use these for the two guns on the main deck.
According to Boudroit, they also took on board 26 x 12 pounders May 18th.
- 12 were the old model 8'-6"
- 14 were the new model 7'-6"
-The heavier guns (8'-6" were placed in the after gunports).
For the 6 smaller cannons supplied in the kit...the A measurement is 7'-7" so they correspond with the newer 7'-6" barrels. I am happy to use these for the two guns on the middle deck.
Boudroit says all the quarterdeck guns were solely composed of 8 pounders, all of which were the new model of 6'-10". I ordered two guns with an A measurement of 6'-6" and will use them for the quarterdeck guns and adjust the gun carriages slightly to accommodate the shorter guns.
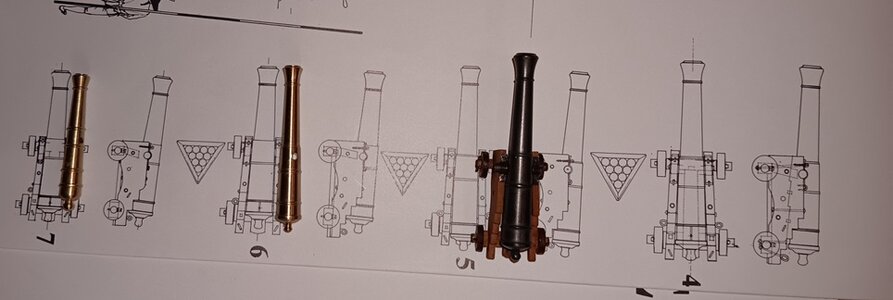
The last photo shows the three different guns I plan to use, laid on the Boudroit drawings. I like the contrast of THREE different size guns vice the TWO different sizes provided in the kit.
 2
2
According to Boudroit, in Lorient, FR, they took on board the old style 9ft 18 pounders for the main gundeck.
The two large cannons supplied in the kit, closely agree with Boudroit's documentation...the A measurement below of the kit guns is 9.05ft. I am quite happy to use these for the two guns on the main deck.
According to Boudroit, they also took on board 26 x 12 pounders May 18th.
- 12 were the old model 8'-6"
- 14 were the new model 7'-6"
-The heavier guns (8'-6" were placed in the after gunports).
For the 6 smaller cannons supplied in the kit...the A measurement is 7'-7" so they correspond with the newer 7'-6" barrels. I am happy to use these for the two guns on the middle deck.
Boudroit says all the quarterdeck guns were solely composed of 8 pounders, all of which were the new model of 6'-10". I ordered two guns with an A measurement of 6'-6" and will use them for the quarterdeck guns and adjust the gun carriages slightly to accommodate the shorter guns.
The last photo shows the three different guns I plan to use, laid on the Boudroit drawings. I like the contrast of THREE different size guns vice the TWO different sizes provided in the kit.

 2
2This is one most interesting fact with the Bonhomme Richard - you can build and also arm her in two different versionsTrying to size the various cannons.
According to Boudroit, in Lorient, FR, they took on board the old style 9ft 18 pounders for the main gundeck.
The two large cannons supplied in the kit, closely agree with Boudroit's documentation...the A measurement below of the kit guns is 9.05ft. I am quite happy to use these for the two guns on the main deck.
According to Boudroit, they also took on board 26 x 12 pounders May 18th.
- 12 were the old model 8'-6"
- 14 were the new model 7'-6"
-The heavier guns (8'-6" were placed in the after gunports).
For the 6 smaller cannons supplied in the kit...the A measurement is 7'-7" so they correspond with the newer 7'-6" barrels. I am happy to use these for the two guns on the middle deck.
Boudroit says all the quarterdeck guns were solely composed of 8 pounders, all of which were the new model of 6'-10". I ordered two guns with an A measurement of 6'-6" and will use them for the quarterdeck guns and adjust the gun carriages slightly to accommodate the shorter guns.
The last photo shows the three different guns I plan to use, laid on the Boudroit drawings. I like the contrast of THREE different size guns vice the TWO different sizes provided in the kit.
View attachment 457200
View attachment 4572012
USS BONHOMME RICHARD - POF - Cross Section in Pear - 1:48 - by Uwe
In Johns alias @neptune topic somebody asked about the possibility of adding a second section in order to prolong the section from 9 to 18 frames. So I took the Boudriot drawings of the HMS Bonhomme Richard and checked it roughly - The border lines would be the metal rulers you can see, that...
shipsofscale.com
USS BONHOMME RICHARD - POF - Cross Section in Pear - 1:48 - by Uwe
Nice explanation of how this can be done Uwe, bdw, nice result.
shipsofscale.com
This is one most interesting fact with the Bonhomme Richard - you can build and also arm her in two different versions
Thanks Uwe! I have poured over your awesome build log for hours and also the Boudroit plan set and discussion in his book.
My plan for the cannons is to use all four ports (even though only the two middle were armed).
I will use four guns on each side:
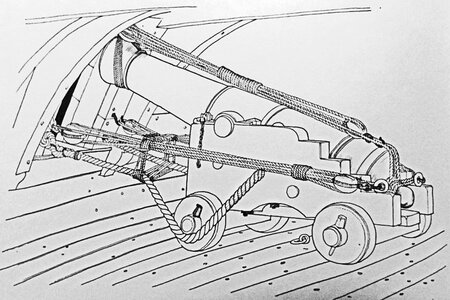
-Bottom ports (which did NOT have a gun)...I plan to keep the port shut and have the guns rigged (inside) in a stowed position. I think it will add interest to the interior to show the guns tight against the bulkhead (see photo below).
-Middle two ports (which were armed)...I plan to fully rig both guns, port and starboard.
-Top port (which were NOT armed)...I plan to fully rig the smaller 8 pounders I purchased, on both sides, to show the three size cannons used on the ship.
This will alleviate questions from 99% of the viewers as to why there are no cannons on half the ports. The nuances of the conversion and not arming certain ports would be confusing to most viewers. Besides that, cannons are interesting to build and will extend my time with this ship. Also they are usually the first thing that catches the viewers eye!
Good point - and fully understandableThanks Uwe! I have poured over your awesome build log for hours and also the Boudroit plan set and discussion in his book.
My plan for the cannons is to use all four ports (even though only the two middle were armed).
I will use four guns on each side:
-Bottom ports (which did NOT have a gun)...I plan to keep the port shut and have the guns rigged (inside) in a stowed position. I think it will add interest to the interior to show the guns tight against the bulkhead (see photo below).
-Middle two ports (which were armed)...I plan to fully rig both guns, port and starboard.
-Top port (which were NOT armed)...I plan to fully rig the smaller 8 pounders I purchased, on both sides, to show the three size cannons used on the ship.
This will alleviate questions from 99% of the viewers as to why there are no cannons on half the ports. The nuances of the conversion and not arming certain ports would be confusing to most viewers. Besides that, cannons are interesting to build and will extend my time with this ship. Also they are usually the first thing that catches the viewers eye!
View attachment 457297
Your plan will result in a very interesting model
I have to keep this in mind, when I finish mine
Mobile shipyard is still in Anacortes, WA. Workers are awaiting proper sized rigging for the cannons.
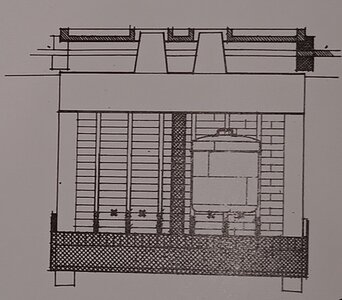
During the wait, I decided to embellish the "bread oven" provided in the kit. According to the Boudroit plans, the BHR had a proper metal oven, where the kit shows the simple "bread oven".
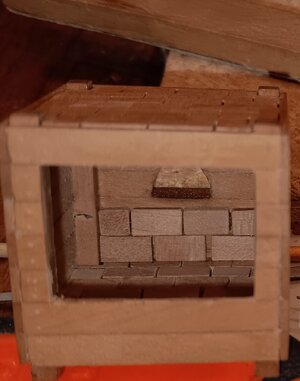
Since I had time, while waiting for line, I cut a hole in the side of the "bread oven" I had completed. I then began the painstaking process of lining the interior with simulated firebricks, hoping to incorporate some of the functions and feel of the Boudroit "metal stove/oven" above.
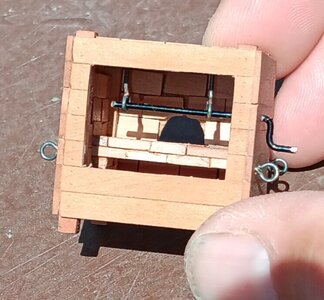
I then added a platform for the "bread" to cook on, which created a "firebox" for the coals/fire. Then a simple "spit" for rotating the rare piece of fresh meat was added (I do need some black touch up paint for the spit). Finally, four eyebolts were added to secure the oven to the deck. I will wait to secure the oven till the cannons on this deck are completed.
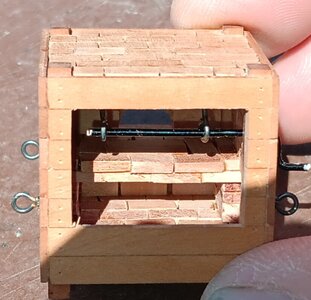
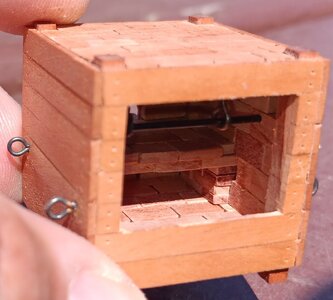
I have ordered a few scale pots. Depending on what they look like, I may hang or place them somewhere in the oven.
During the wait, I decided to embellish the "bread oven" provided in the kit. According to the Boudroit plans, the BHR had a proper metal oven, where the kit shows the simple "bread oven".

Since I had time, while waiting for line, I cut a hole in the side of the "bread oven" I had completed. I then began the painstaking process of lining the interior with simulated firebricks, hoping to incorporate some of the functions and feel of the Boudroit "metal stove/oven" above.

I then added a platform for the "bread" to cook on, which created a "firebox" for the coals/fire. Then a simple "spit" for rotating the rare piece of fresh meat was added (I do need some black touch up paint for the spit). Finally, four eyebolts were added to secure the oven to the deck. I will wait to secure the oven till the cannons on this deck are completed.


I have ordered a few scale pots. Depending on what they look like, I may hang or place them somewhere in the oven.
Fabulous! Some very nice enhancements!
BTW - how do you get stuff delivered to a camp ground?
BTW - how do you get stuff delivered to a camp ground?


