Thanks Uwe...coming from someone with your experience and expertise, it means a lot!I remember, that I also tried a longer time to find the "correct" way with the openings in the well box
Very good work
and enjoy ......
-

Win a Free Custom Engraved Brass Coin!!!
As a way to introduce our brass coins to the community, we will raffle off a free coin during the month of August. Follow link ABOVE for instructions for entering.
-

PRE-ORDER SHIPS IN SCALE TODAY!
The beloved Ships in Scale Magazine is back and charting a new course for 2026!
Discover new skills, new techniques, and new inspirations in every issue.
NOTE THAT OUR FIRST ISSUE WILL BE JAN/FEB 2026
You are using an out of date browser. It may not display this or other websites correctly.
You should upgrade or use an alternative browser.
You should upgrade or use an alternative browser.
Bonhomme Richard - Pear Cross section kit (with scratch duplicate using alder) Unicorn Model
that is a beautiful well box Brad
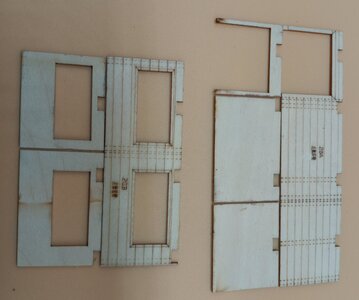
Below are three photos of the two cabins, nearing completion.
The first shows how I cut the templates apart (exactly the thickness of the walls). I can then glue up each individual wall on their corresponding posts.
The two following photos show the cabins constructed. I still have to make nail holes, oil the wall planks and window frames.
I also invested in a photo box (less than $50 on Amazon)!! It ensures there are no distractions in the background, and I think it makes the parts being photographed appear much crisper. I have to thank Paul "Dockattner" who used something similar in his latest photos...imitation is the sincerest form of flattery, right!
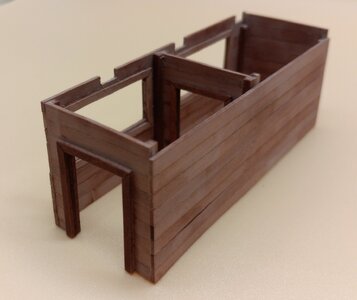
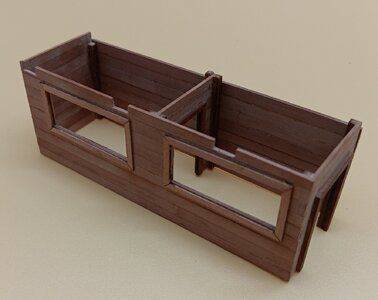
The first shows how I cut the templates apart (exactly the thickness of the walls). I can then glue up each individual wall on their corresponding posts.

The two following photos show the cabins constructed. I still have to make nail holes, oil the wall planks and window frames.
I also invested in a photo box (less than $50 on Amazon)!! It ensures there are no distractions in the background, and I think it makes the parts being photographed appear much crisper. I have to thank Paul "Dockattner" who used something similar in his latest photos...imitation is the sincerest form of flattery, right!


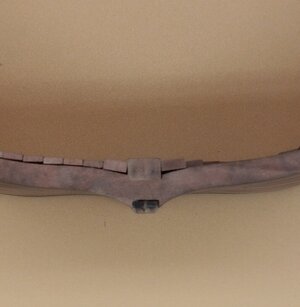
I returned to the final fit of the riders for the mainmast step. The kit parts fit the hull curve very well with just a little chisel and sanding work. I did follow Uwe's lead and added the thick plank (3mm vs 2mm) next to the keel, as shown in Boudroit's drawings (see photos below for drawing and my interpretation).
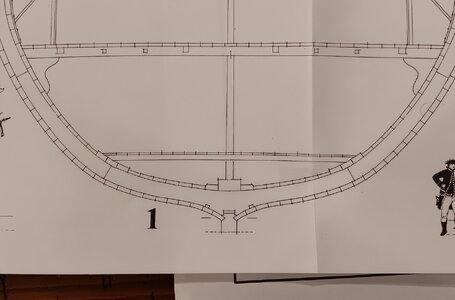
This meant I had to modify the riders to fit around the thicker planks. Here is how they look from bow/stern. I've oiled the riders with WATCO dark walnut. The deck planking will be left light with clear WATCO danish oil.
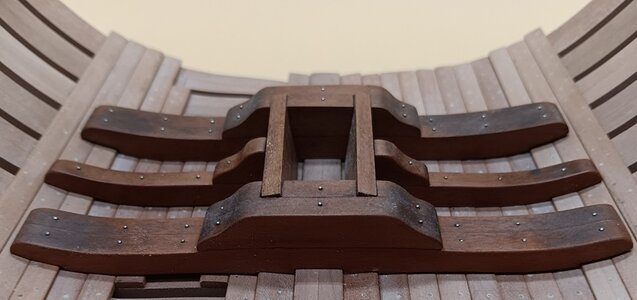
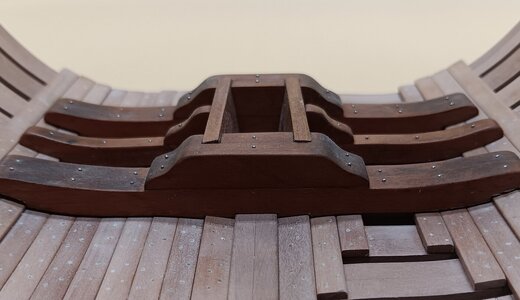


This meant I had to modify the riders to fit around the thicker planks. Here is how they look from bow/stern. I've oiled the riders with WATCO dark walnut. The deck planking will be left light with clear WATCO danish oil.


Very good work on the riders - I like also the final appearance of the wood
Definitely Very good work
Definitely Very good work
Spent the day making a sliding window for the carpenter's room. See photos of it in several different positions.
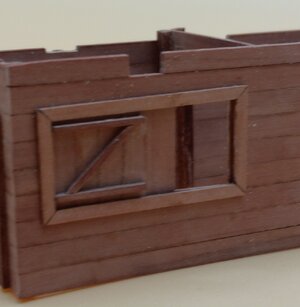
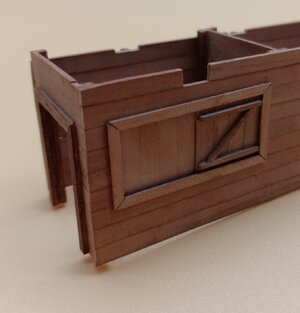
Also began making a hanging, sliding barn door for the carpenters walk. The door will hang from the rails built inside the frame above the door (shown below). Things are getting very thin and delicate, but a test fit today looks like it will all function!
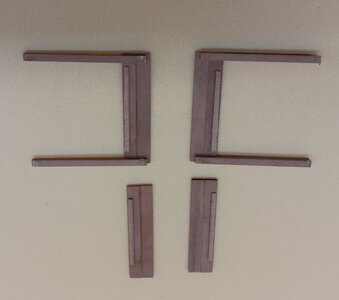


Also began making a hanging, sliding barn door for the carpenters walk. The door will hang from the rails built inside the frame above the door (shown below). Things are getting very thin and delicate, but a test fit today looks like it will all function!

Looks great Brad! Are you building only from the regular kit or are some of these details in the 'extra' package?
Paul,
Thanks for the interest. It's the pear kit with extra details, especially in the lowest two decks. I am modifying those little details, like making the sliding doors/windows fully functional. This means adding things like the extra "Z" bracing, which I think may have been necessary to hold a sliding door together. Below are some photos, showing:
1) Boudriot's drawing - 8 being the door I'm working on.
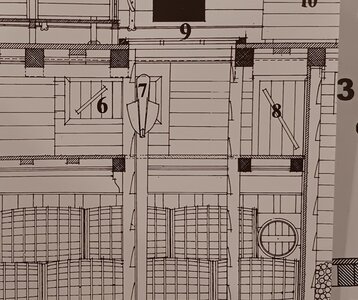
2) The kit standard fixed piece from Signet's build which is awesome but I don't believe it functions. Signet can chime in if he made them movable. they obviously follow the photo from Boudriot's drawing.
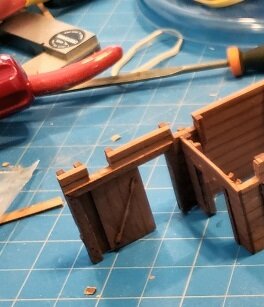
3) My modifications start by making a hollow frame, which I slide the below door into. It hangs on a rider along the top of the frame.
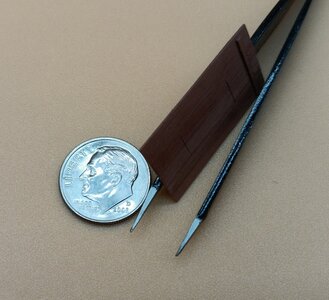
4. Finally, the final product both shut/open.
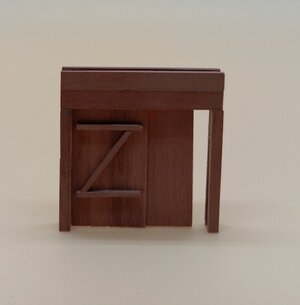
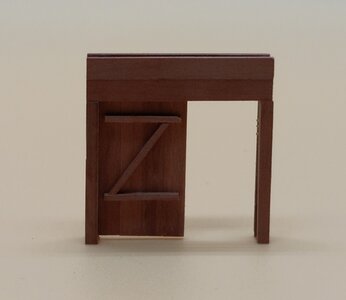
Only reasons for the modifications are: To make the build last a little longer, add my interpretation of what certain details may have looked like and because it's fun.
Thanks for the interest. It's the pear kit with extra details, especially in the lowest two decks. I am modifying those little details, like making the sliding doors/windows fully functional. This means adding things like the extra "Z" bracing, which I think may have been necessary to hold a sliding door together. Below are some photos, showing:
1) Boudriot's drawing - 8 being the door I'm working on.

2) The kit standard fixed piece from Signet's build which is awesome but I don't believe it functions. Signet can chime in if he made them movable. they obviously follow the photo from Boudriot's drawing.

3) My modifications start by making a hollow frame, which I slide the below door into. It hangs on a rider along the top of the frame.

4. Finally, the final product both shut/open.


Only reasons for the modifications are: To make the build last a little longer, add my interpretation of what certain details may have looked like and because it's fun.
No, I didn't make mine movable. For my particular build, I saw no reason to.2) The kit standard fixed piece from Signet's build which is awesome but I don't believe it functions. Signet can chime in if he made them movable. they obviously follow the photo from Boudriot's drawing.
View attachment 445914
I can think of no better reason for you to do this. I made a few changes from the kit too. Well done!Only reasons for the modifications are: To make the build last a little longer, add my interpretation of what certain details may have looked like and because it's fun.
My obsession with handholds while climbing out of deep holds, on a rolling/pitching ship (usually hauling some load with one hand) continues!
First, the plans show NO ladder to climb out of the shot locker (see below photo)???? BUT they show BOTH a Monkey Pole and a Ladder to climb out of the mast step, very redundant.
I've opted to keep the Monkey Pole for mast step access. Then I MOVED the redundant ladder to the shot locker so sailors can haul the heavy shot out of the locker.
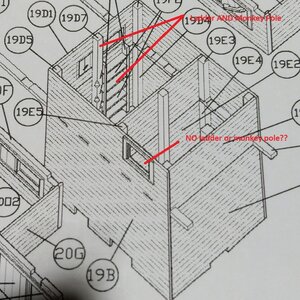
Next, my obsession with handholds stems from climbing up the side of pitching and rolling ships, at night, while moving at 10-15knots. It can't be done without solid handholds! SO, I have added handholds to give the sailors something positive to grip with their hands (see photo below)!
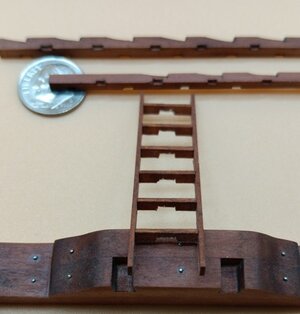
First, the plans show NO ladder to climb out of the shot locker (see below photo)???? BUT they show BOTH a Monkey Pole and a Ladder to climb out of the mast step, very redundant.
I've opted to keep the Monkey Pole for mast step access. Then I MOVED the redundant ladder to the shot locker so sailors can haul the heavy shot out of the locker.

Next, my obsession with handholds stems from climbing up the side of pitching and rolling ships, at night, while moving at 10-15knots. It can't be done without solid handholds! SO, I have added handholds to give the sailors something positive to grip with their hands (see photo below)!

Started experimenting with the lower deck planks.
In the two picture below, the planks Left of the Red lines, got a slight rounding of the top edges on each side, using a small (fine grain) sanding stick. The ones on the Right are squared edges. I think the slight rounding makes the seams pop, especially with side lighting.
On the upper decks, I will probably use the same technique and use pencil lead to simulate the tar/pitch used to waterproof the deck.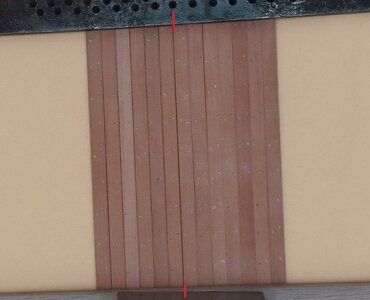

Last edited:
I do the round-edge thing too, and feel that is enough at this scale without any blackening of any type.
I'll do a few tests when I get to the weather decks. (I can always erase the pencil lead) if it doesn't make any difference.I do the round-edge thing too, and feel that is enough at this scale without any blackening of any type.
I've got a feeling you are spot on....it won't be worth the time at this scale, Thanks for the feedback.
Hello Brad, a very nice build of the RB section. Beautiful color of the wood and really cleanly implemented.
My first big disappointment in the Unicorn Kit.
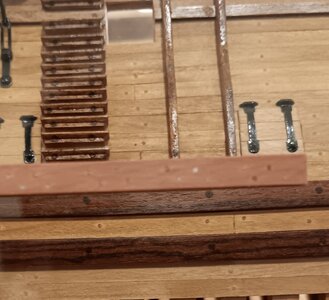
I've been concerned about the "red" hue to the cabin planking provided in the Unicorn kit. I didn't realize how red this wood is until I cut planks out of leftover pear wood from my Serapis build to add a wall. See below photo of pear wood with clear Watco Danish Wood oil, compared to the cabin planking from Unicorn with clear Watco Danish Wood oil.
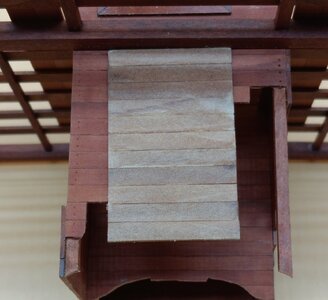
My only option was to stain the beautiful pear wood with two coats of "Sedona Red" to get planking that matched the Unicorn off color.
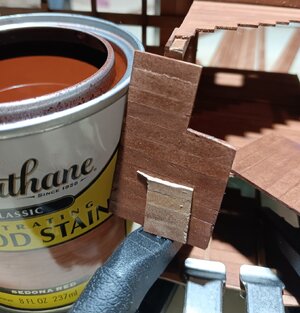
I also took a photo with the Unicorn planking up against my scratch build of Serapis, which used alder and pear. Notice the distinct RED tint to the Unicorn planks. I'm glad the two models will not be on the same shelf, so this red tint will not be quite as apparent.
I've been concerned about the "red" hue to the cabin planking provided in the Unicorn kit. I didn't realize how red this wood is until I cut planks out of leftover pear wood from my Serapis build to add a wall. See below photo of pear wood with clear Watco Danish Wood oil, compared to the cabin planking from Unicorn with clear Watco Danish Wood oil.

My only option was to stain the beautiful pear wood with two coats of "Sedona Red" to get planking that matched the Unicorn off color.

I also took a photo with the Unicorn planking up against my scratch build of Serapis, which used alder and pear. Notice the distinct RED tint to the Unicorn planks. I'm glad the two models will not be on the same shelf, so this red tint will not be quite as apparent.

Still dryfitting!! The only thing glued to the frames are the mast steps/risers.
I've finally confirmed that the main deck cannons will be centered in the gunports. I was paranoid there might be small errors in the lower deck heights that would compound, to throw main deck off enough so the cannons would be too high or low, but they are spot on!!
Below are port/starboard pictures of the carpenters walk. It shows how the main gun deck beams ride perfectly on their support planks and fit tightly into the cutouts on the cabins and carpenters walk.
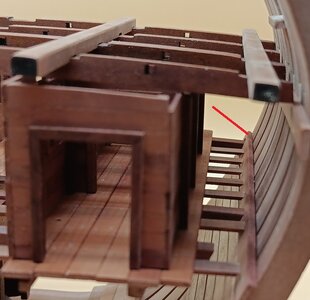
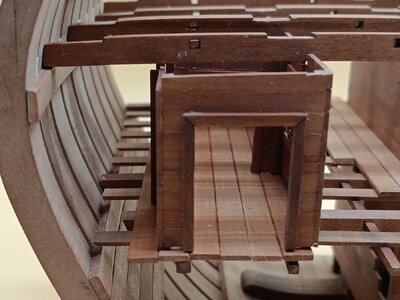
The hardest piece so far, is the plank, with cutouts for the beams, in the left picture above (see arrow). That plank took an hour of careful chisel work but it will lock those beams in tightly. The opposite beam in the right picture is done but I didn't put it in to show the difference. I've dry fit both and clamped them down and they fit tightly.
Won't be long till I start glueing things permanently!!
I've finally confirmed that the main deck cannons will be centered in the gunports. I was paranoid there might be small errors in the lower deck heights that would compound, to throw main deck off enough so the cannons would be too high or low, but they are spot on!!
Below are port/starboard pictures of the carpenters walk. It shows how the main gun deck beams ride perfectly on their support planks and fit tightly into the cutouts on the cabins and carpenters walk.


The hardest piece so far, is the plank, with cutouts for the beams, in the left picture above (see arrow). That plank took an hour of careful chisel work but it will lock those beams in tightly. The opposite beam in the right picture is done but I didn't put it in to show the difference. I've dry fit both and clamped them down and they fit tightly.
Won't be long till I start glueing things permanently!!
Good morning Brad. You are owing this. Cheers GrantStill dryfitting!! The only thing glued to the frames are the mast steps/risers.
I've finally confirmed that the main deck cannons will be centered in the gunports. I was paranoid there might be small errors in the lower deck heights that would compound, to throw main deck off enough so the cannons would be too high or low, but they are spot on!!
Below are port/starboard pictures of the carpenters walk. It shows how the main gun deck beams ride perfectly on their support planks and fit tightly into the cutouts on the cabins and carpenters walk.
View attachment 446939View attachment 446940
The hardest piece so far, is the plank, with cutouts for the beams, in the left picture above (see arrow). That plank took an hour of careful chisel work but it will lock those beams in tightly. The opposite beam in the right picture is done but I didn't put it in to show the difference. I've dry fit both and clamped them down and they fit tightly.
Won't be long till I start glueing things permanently!!
Back down to the mast steps.
Brutis has been busy hammering in the wedges to secure the base of the mast. The hammer in his belt was too small, so I provided him with the proper tool!
I did add two thinner wedges fore and aft (8 vice 6 in the kit), and modified the kit by using four wedges on the port/starboard sides of the mast.
I figured I'd cut and angle these, while they are easily accessible. The fit is tight and secure now, thanks to Brutis. I will glue the wedges and remove the mast, as it shouldn't be permanently placed until much later in the build.
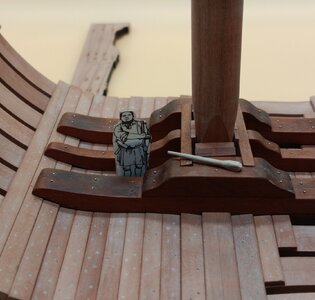
I was also able to configure the main timbers of the main gun deck. It just barely slides over the cabins on the deck below.
Brutis has been busy hammering in the wedges to secure the base of the mast. The hammer in his belt was too small, so I provided him with the proper tool!
I did add two thinner wedges fore and aft (8 vice 6 in the kit), and modified the kit by using four wedges on the port/starboard sides of the mast.
I figured I'd cut and angle these, while they are easily accessible. The fit is tight and secure now, thanks to Brutis. I will glue the wedges and remove the mast, as it shouldn't be permanently placed until much later in the build.

I was also able to configure the main timbers of the main gun deck. It just barely slides over the cabins on the deck below.

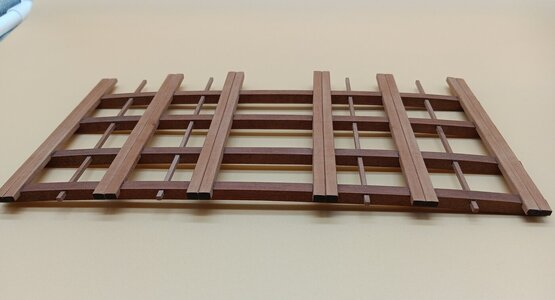
Inspectors shut down Main Gun Deck construction!! They are consulting tonight to determine if my Naval Architecture degree should be rescinded, and the shipyard permanently closed!!
I will fix the error before they return in the hopes it that will influence them in a positive manner.
Unfortunately, I placed the main beams in the slots that the thin 1x6mm strips should go in. The four main beams should be moved as indicated in red below. This will allow the thin 1x6 beams to rest in the notches.
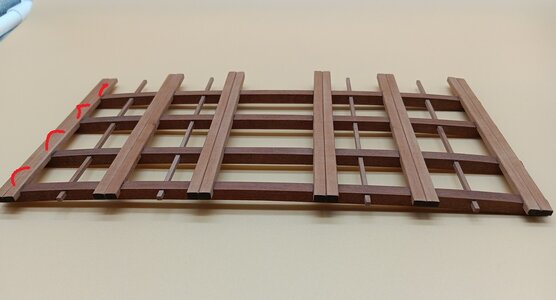
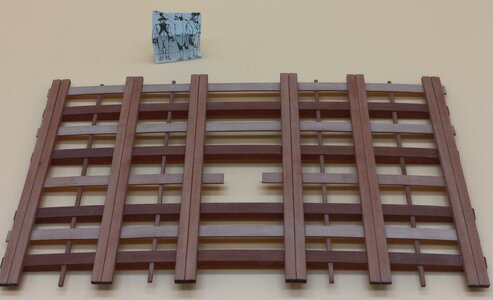
The deck should look much more like the photo from Signet's build when the inspectors return. I have my fingers crossed they don't take their business to another shipyard!!!
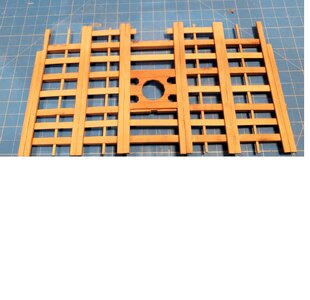
I will fix the error before they return in the hopes it that will influence them in a positive manner.
Unfortunately, I placed the main beams in the slots that the thin 1x6mm strips should go in. The four main beams should be moved as indicated in red below. This will allow the thin 1x6 beams to rest in the notches.

The deck should look much more like the photo from Signet's build when the inspectors return. I have my fingers crossed they don't take their business to another shipyard!!!

Just in time! The inspectors returned.
I was told to go to my room by the head inspector, for working when they had closed the shipyard. Fortunately, his assistant pleaded my case, explaining the quick and accurate rearrangement of the beams showed the shipyard and crew should be given a second chance.
Now, onto placement of planking, and mast supports, then the tedious work of drilling the treenails.
I was told to go to my room by the head inspector, for working when they had closed the shipyard. Fortunately, his assistant pleaded my case, explaining the quick and accurate rearrangement of the beams showed the shipyard and crew should be given a second chance.

Now, onto placement of planking, and mast supports, then the tedious work of drilling the treenails.


