-

Win a Free Custom Engraved Brass Coin!!!
As a way to introduce our brass coins to the community, we will raffle off a free coin during the month of August. Follow link ABOVE for instructions for entering.
You are using an out of date browser. It may not display this or other websites correctly.
You should upgrade or use an alternative browser.
You should upgrade or use an alternative browser.
Bonhomme Richard - Pear Cross section kit (with scratch duplicate using alder) Unicorn Model
So, is the Tooth Fairy real,The smaller Kingfisher (1771) (and the entire Swan class of ships) had them:
View attachment 437943
However, I'm much better at answering questions about orthodontic treatment...
. best regards John,
The french ships were partly different - the Bonhomme Richard had not such a channel covered with these boardsWouldn't the Bonhomme Richard have had short Limber Boards to cover the Limber Channel, along the keel??
The Boudroit plans I have DO NOT show a Limber Channel but I believe all ships of this era had short Limber Boards (with holes to allow removal) running along the keel. These boards allowed access and cleaning (or un-clogging) of the Limber Channel.
View attachment 437902
Would it be wrong to include these on this build, as neither the ZHL Kit or the Boudroit plans have Limber Boards??
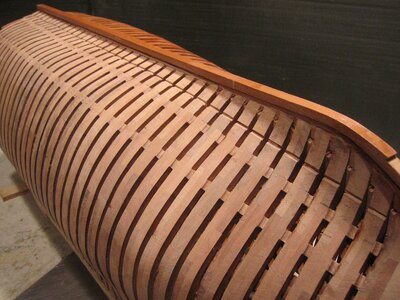
She had small limber holes along the width of each frame along and inside the outer hull planking - you can see these two square holes left and right from the keel - through these holes the bilge water was flowing to the pumps - btw: there was a small chain to clean these holes (channel)
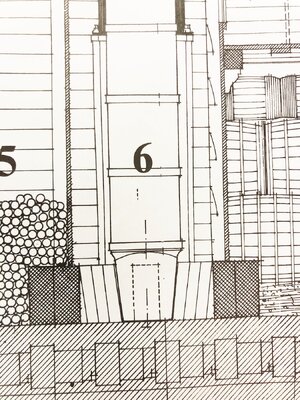
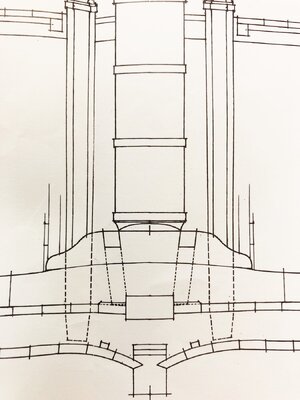
This is shown f.e. on @Jeronimo model very good
and explained in Gerard Delacroix sketch
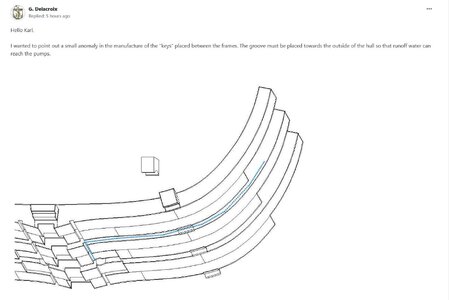
This was often the french way - the english made it different, but the Bonhomme Richard was a french ship

and explained in Gerard Delacroix sketch

This was often the french way - the english made it different, but the Bonhomme Richard was a french ship
Thanks so much for calling my attention to these small limber holes on the French ships! I have not planked the bottom of the cross section yet, so it will be easy to put this detail in. My initial thoughts would be to leave the floor plank next to the keel off, on one side and cut the limber channels and lay a chain. Should be able to see the chain and holes, (from above) through this missing floor plank, between the first and second frames on either end.
Thanks again for the pictures and links Uwe!! Love this forum!
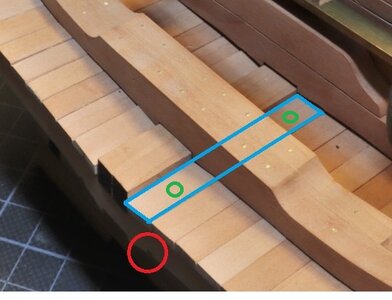
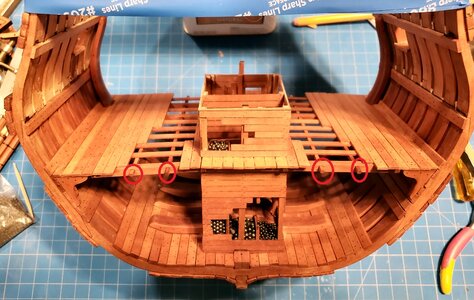
Looking at a photo from your build, I see the Limber Holes you included (red circle). The Blue is the Limber Plank I may cut mine short, at the mast step (blue rectangle) , so one can just catch sight of the chain, between the frames. I wonder about access to the chains, for cleaning/unclogging the bilge channel? Was this Limber plank removable? Maybe small holes to lift them off (green circles)?

Last edited:
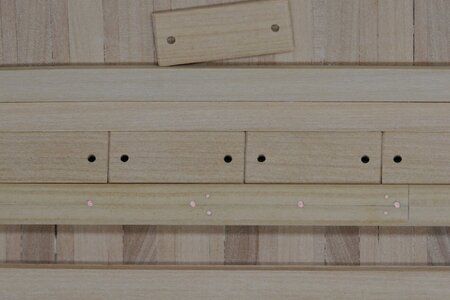
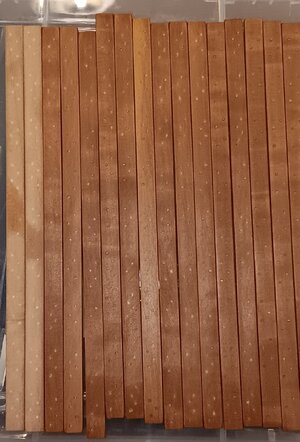
I finally was able to stain a bunch of planks, using clear Watco Danish Wood oil (photo 1). The two on the left do not have any oil on them.
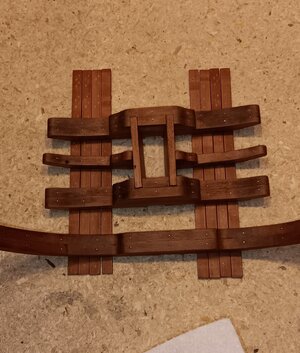
Photo 2 shows how I will use Watco Dark Walnut, to highlight structural timbers like the Main Rider and Mast Step.
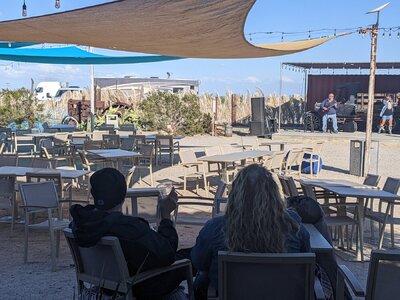
The mobile workshop is in the Arizona desert (background of photo 3) . We're slowly working our way from skiing in Colorado, to the Beach in San Diego, where we will arrive this Monday, for a few weeks of shipbuilding Oceanside!


That looks like a very nice trip Brad, from the snow to the desert, and also the beach, your crossection sees a lot of Amerika
That looks awsome by the way, magnificent colors on your wood
That looks awsome by the way, magnificent colors on your wood
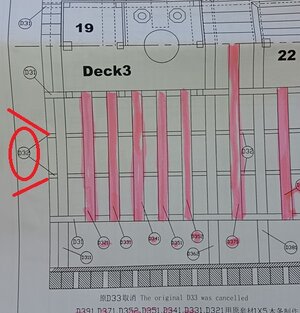
I can't find these cross members. They are square cross members that go through the three small holes in the three main deck beams.
Are they cut from the 2x2 stock provided in the kit? It's hard to determine if they are laser cut pieces on one of the boards, which I can't seem to find. OR if they are cut from the 2x2 stock.
If cut from the stock, the instructions should NOT give them a part number. Instead, somewhere it should say cut from the 2x2 stock provided.
Any advice or help would be appreciated!!!


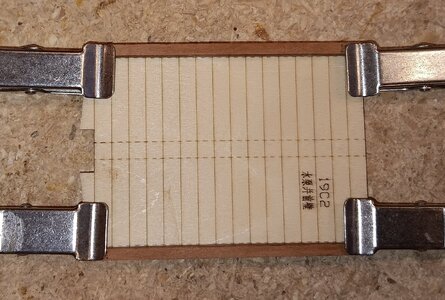
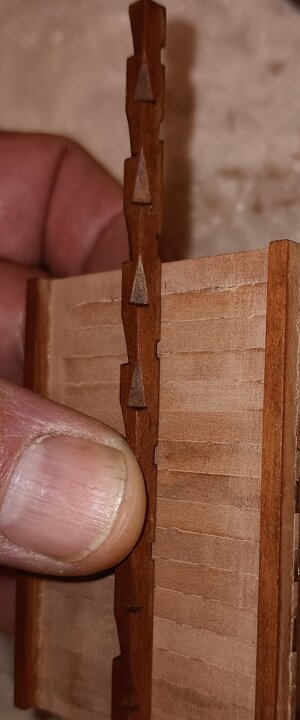
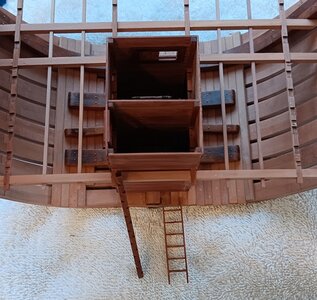
Starting to work on the structure and walls of the pump room/lower deck. My plan is to use Dark Walnut Danish wood oil for the timbers and Clear Danish wood oil for the walls and planking. For the "pole ladder" into the hold, I cut the footsteps BUT ALSO ADDED small handholds. I believe the hands needed something to grip, especially if a sailor was carrying a load up the pole.
1. Spot glued the timbers to the provided template with two tiny spots of wood glue.
2. The "ladder" with footholds per the instructions and the small handholds on the back of the "ladder". The wall planking has yet to be oiled with clear WATCO oil. Once that is applied, the grain should pop nicely, and it will contrast well with the structural timbers.
2.
1. Spot glued the timbers to the provided template with two tiny spots of wood glue.

2. The "ladder" with footholds per the instructions and the small handholds on the back of the "ladder". The wall planking has yet to be oiled with clear WATCO oil. Once that is applied, the grain should pop nicely, and it will contrast well with the structural timbers.
2.

Take a look here into my building logI can't find these cross members. They are square cross members that go through the three small holes in the three main deck beams.
Are they cut from the 2x2 stock provided in the kit? It's hard to determine if they are laser cut pieces on one of the boards, which I can't seem to find. OR if they are cut from the 2x2 stock.
If cut from the stock, the instructions should NOT give them a part number. Instead, somewhere it should say cut from the 2x2 stock provided.
Any advice or help would be appreciated!!!
View attachment 440349View attachment 440350
USS BONHOMME RICHARD - POF - Cross Section in Pear - 1:48 - by Uwe
GREAT and BEAUTIFUL work UWE, hate to give advice to such a master builder such as YOU, because i have been a a RE=DO expert in taking things apart my procedure works well on both PVA and CA what i do is using NAIL POLISH REMOVER it has bto be 100% acotone i swab the joints with a cotton swab...
shipsofscale.com
Thanks Uwe, you are correct they are 2x2mm.Take a look here into my building log
when I remember correctly they are 2*2mm and no laser caut - laser cut makes no senseUSS BONHOMME RICHARD - POF - Cross Section in Pear - 1:48 - by Uwe
GREAT and BEAUTIFUL work UWE, hate to give advice to such a master builder such as YOU, because i have been a a RE=DO expert in taking things apart my procedure works well on both PVA and CA what i do is using NAIL POLISH REMOVER it has bto be 100% acotone i swab the joints with a cotton swab...shipsofscale.com
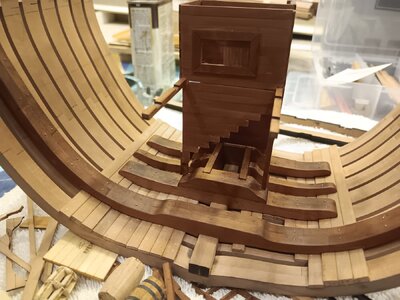
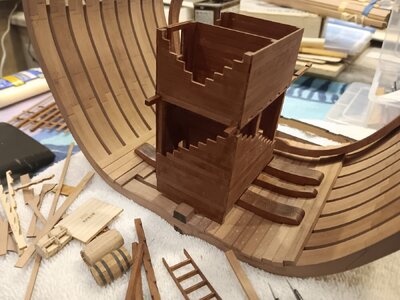
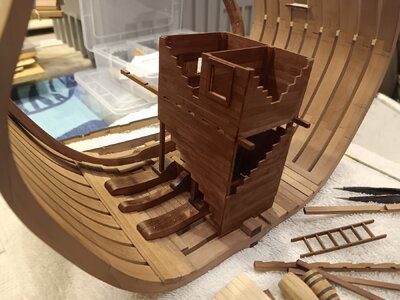
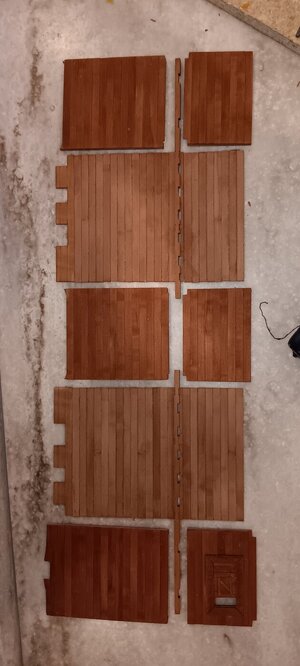
Pump room and lower deck structure walls are laid out. The access hatch with sliding door, actually works.
The port and starboard walls are very fragile, as they have no vertical support beams. They planks are just glued butt joints. I'm eager to get the three athwartship walls glued in squarely, to give them some rigidity.
The exterior walls have WATCO clear wood oil to bring out the grain.
Once glued, I will coat the inside walls, as the glue adheres better to untreated wood.
Things look like they will fit together nicely.
I still have one access hatch to add, a ladder, and several monkey poles. Then I will select areas to cut the wall structure to allow viewing into the pump room.

The Beach Shipyard:
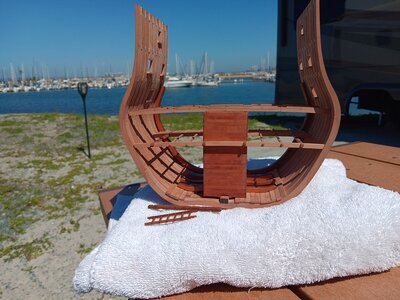
1. Dry fit of the Riser, pump room structure, lower deck beams. The only issue is the deck beams seem to be 1-2mm higher than the line drawn for the support plank, using the template provided in the kit. This template measures from the top of the frames which I'm not super confident in. I'll take some measurements from the keel and see if that moves the line. Everything else seems to be fitting VERY tightly!
2. Side view with Fiddlers Cove and Coronado Bridge in background.
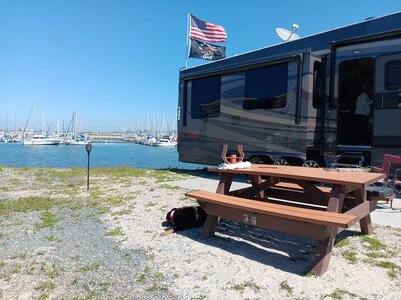
3. Overview of the incredible shipyard location. We've been here for a week and leave for Colorado Sunday. The dog is enjoying the sun, sand and water!
1. Dry fit of the Riser, pump room structure, lower deck beams. The only issue is the deck beams seem to be 1-2mm higher than the line drawn for the support plank, using the template provided in the kit. This template measures from the top of the frames which I'm not super confident in. I'll take some measurements from the keel and see if that moves the line. Everything else seems to be fitting VERY tightly!

2. Side view with Fiddlers Cove and Coronado Bridge in background.

3. Overview of the incredible shipyard location. We've been here for a week and leave for Colorado Sunday. The dog is enjoying the sun, sand and water!

Good morning Brad. The good life, visiting all these wonderful locations and getting some boat building in as well. I'm a tad jealous right nowThe Beach Shipyard:
1. Dry fit of the Riser, pump room structure, lower deck beams. The only issue is the deck beams seem to be 1-2mm higher than the line drawn for the support plank, using the template provided in the kit. This template measures from the top of the frames which I'm not super confident in. I'll take some measurements from the keel and see if that moves the line. Everything else seems to be fitting VERY tightly!
View attachment 442073
2. Side view with Fiddlers Cove and Coronado Bridge in background.
View attachment 442074
3. Overview of the incredible shipyard location. We've been here for a week and leave for Colorado Sunday. The dog is enjoying the sun, sand and water!
View attachment 442075
Thanks Grant!!Good morning Brad. The good life, visiting all these wonderful locations and getting some boat building in as well. I'm a tad jealous right now. Cheers Grant
San Diego used to be my home. My ship modeling club met on the USS Berkeley and/or the Star of India...http://sdshipmodelersguild.org
Pretty cool, plus we have the beach and incredible sunsets to enjoy.
This is superb modeling Brad. I'm really liking the different wood tones.
That is a great location to place the shipyard Brad, and wonderfull work you are showing us
I was able to place all the lower deck beams. The deck planking will be oiled with clear WATCO and it should be much lighter than the structural beams.
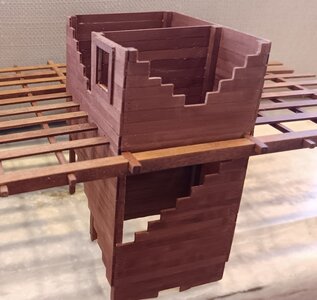
I'm still trying to get the deck height exactly correct. Now I can spend some time tweaking the beam lengths versus height from the keel, so they all are flush with the frame curve and rest on the notched support rail.
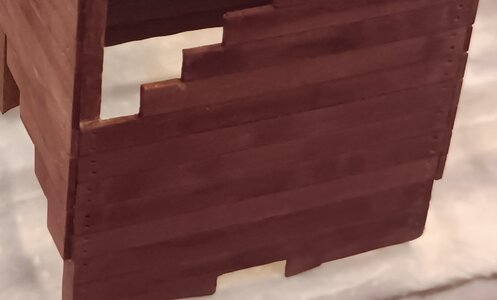
I was also able to use a small needle to simulate the nails in the wall boards of the pump room.
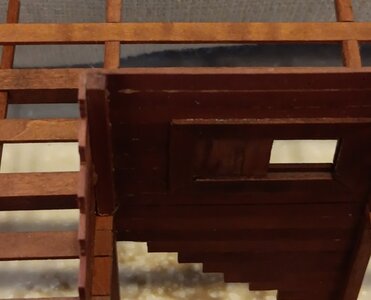
The sliding hold access actually works, in this photo you can see the groove the doors slide in.
The Shipyard left the ocean and headed inland to some beautiful cliffs in Gallup, New Mexico.


I'm still trying to get the deck height exactly correct. Now I can spend some time tweaking the beam lengths versus height from the keel, so they all are flush with the frame curve and rest on the notched support rail.
I was also able to use a small needle to simulate the nails in the wall boards of the pump room.

The sliding hold access actually works, in this photo you can see the groove the doors slide in.

The Shipyard left the ocean and headed inland to some beautiful cliffs in Gallup, New Mexico.

Last edited:
I remember, that I also tried a longer time to find the "correct" way with the openings in the well box
Very good work
and enjoy ......
Very good work
and enjoy ......


