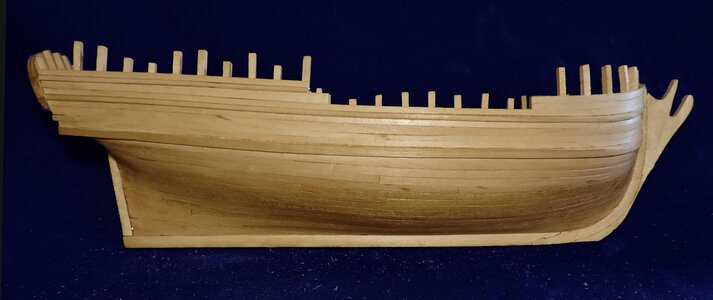
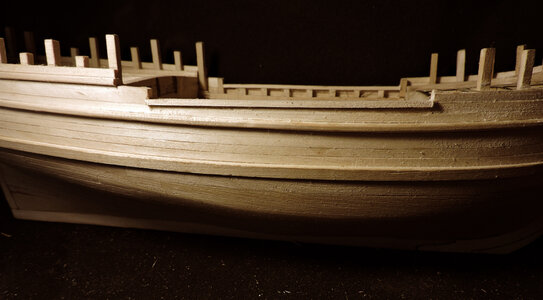
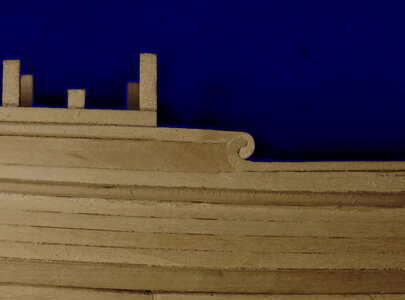
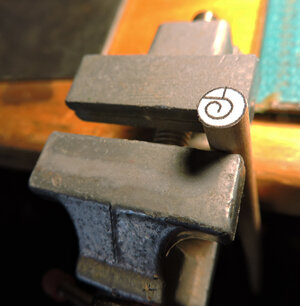
Nice work!when i finished shaping the molding i soaked the end in hot water for about 1/2 an hour then bent it around the bow and let it sit until the molding dried. When the molding dried the bend set so i glued it to the hull with little effort.
you can see by the shadows of the wale and sheer molding they run parallel to one another.
View attachment 369739
The plank above the molding is the last hull plank.
View attachment 369740
View attachment 369743View attachment 369742
-

Win a Free Custom Engraved Brass Coin!!!
As a way to introduce our brass coins to the community, we will raffle off a free coin during the month of August. Follow link ABOVE for instructions for entering.
-

PRE-ORDER SHIPS IN SCALE TODAY!
The beloved Ships in Scale Magazine is back and charting a new course for 2026!
Discover new skills, new techniques, and new inspirations in every issue.
NOTE THAT OUR FIRST ISSUE WILL BE JAN/FEB 2026
You are using an out of date browser. It may not display this or other websites correctly.
You should upgrade or use an alternative browser.
You should upgrade or use an alternative browser.
Colonial Schooner Sultana
- Thread starter Dave Stevens (Lumberyard)
- Start date
- Watchers 19
-
- Tags
- 1:48 colonial schooner sultana
it was my second kit and first carved hull. At the time I enjoyed the build And learned a lot Over all it was valuable learning experience.This model is based on the original set of kit plans, however the new drawings have been modified from a solid hull model to plank on bulkhead and corrections have been made. So even though the POB model is in general bassed on the original it is a totally different building experence.
The Basswood took me by surprise with this build after the bad rap it got for so long by the eliete purists, it is great wood to work with. For beginners or a novice builder it is more about learning how to build and the techniques used. Basswood lends itself to such a build without the fustration of working with hardwoods trying to cut and bend them. However Basswood is in the hardwood catagory it is just at the softer end.
Basswood for as long as i can remember was the go to wood for carvers so they must of known something about the wood.
- Joined
- Dec 1, 2016
- Messages
- 6,383
- Points
- 728

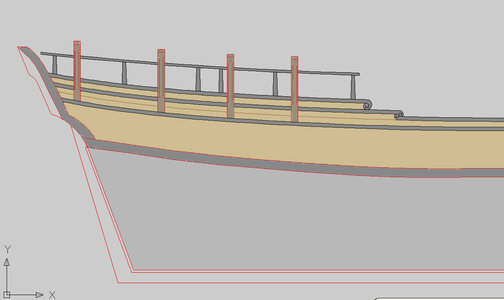
lets take a look at the CAD drawing before i go on with the upper planking.
the trick in doing the upper works is knowing everythig runs parallel to the wale.
the gray line above the wale is the sheer molding i just put on the model and the plank that runs above it. There is a faint line that shows a second plank that runs from the scroll of the cap rail to the stern. There is no tapper to these upper planks and they are cut to the correct width to fit between the moldings.
To get a proper run of the moldings and planks in the upper works it is very important you get the run of the wale just right. To little of an arc or to much will throw off the the upper works and it all goes off-kilter.
For this reason you may want to draw the wale on the hull and install the wales before you do anything. I drew in the wale line and planked the hull from the keel up. but then again i have done many hulls over the years i have enough experence to shape and taper the hull planking to hit the wale line perfectly. Not to say a novice can't do it, it can be done just line off sections of the hull and keep a close eye on the run of the planks.

- Joined
- Dec 1, 2016
- Messages
- 6,383
- Points
- 728

- Joined
- Dec 1, 2016
- Messages
- 6,383
- Points
- 728

the first scroll will be the double scroll so a pattern was used from the plans
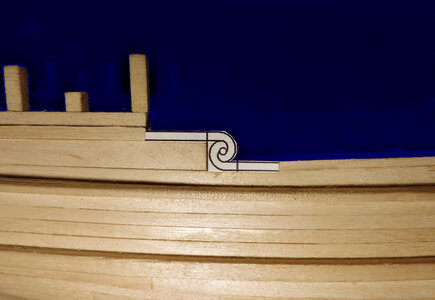
Before i get into carving the scroll cut by cut a few words on using Basswood. The model is totally built from Basswood except for the plywood bulkheads. Up to this point in the build the Basswood works great it bent well, easy to work with and takes a nice finish. But we have reached the limits of using a soft wood.
Trying to make such delicate cuts the wood will rip, tear and not hold a fine edge. This is why experenced builders will use a wood such as pearwood and boxwood these woods will take an ultra fine cut. The draw back is well! they are extremely hard and difficult to cut with a knife. it can be done but you can only take a sliver of a cut at a time. Keep in mind you are looking at the scroll very,very close and it will not look like this when you back off.
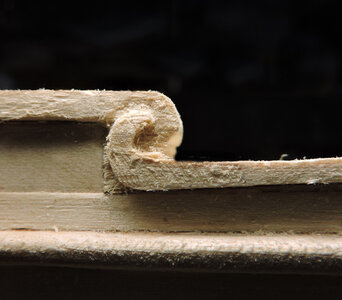
The cap rails are painted black so i sat down and pondered a different method for making the scrolls. One way was to create a 3D model and print them. The issue with that idea is not to many hobby guys have a 3D printer or are able to do the 3D print file, i needed some way that anyone can do. i tried to use a polymer clay and mold the piece that kind of worked except the clay was a little to soft and the smallest move of the tool resulted in a big move of the clay. An advantage to Polymer clay is depending on how long you bake it affects the hardness of the clay. So i spent a day experimenting.
this is the Basswood blank i used so what i did was to make a Polymer clay blank and bake it.
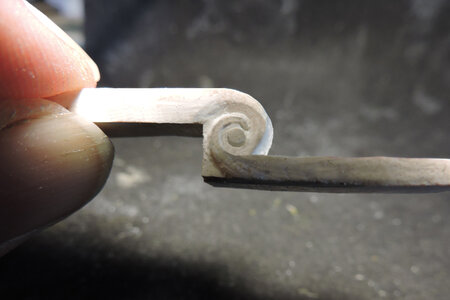
the resultes were better than i expected, you can carve and sand the clay also files worked great. As you can see from the tests you can get a clean sharp scroll. The clay is easy to work with an Exacto blade and files. the scrolls are tiny pieces.
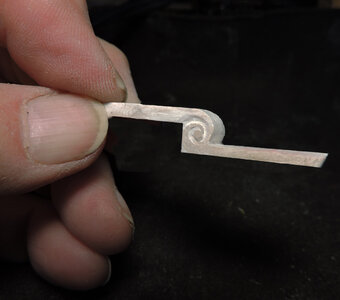

Before i get into carving the scroll cut by cut a few words on using Basswood. The model is totally built from Basswood except for the plywood bulkheads. Up to this point in the build the Basswood works great it bent well, easy to work with and takes a nice finish. But we have reached the limits of using a soft wood.
Trying to make such delicate cuts the wood will rip, tear and not hold a fine edge. This is why experenced builders will use a wood such as pearwood and boxwood these woods will take an ultra fine cut. The draw back is well! they are extremely hard and difficult to cut with a knife. it can be done but you can only take a sliver of a cut at a time. Keep in mind you are looking at the scroll very,very close and it will not look like this when you back off.

The cap rails are painted black so i sat down and pondered a different method for making the scrolls. One way was to create a 3D model and print them. The issue with that idea is not to many hobby guys have a 3D printer or are able to do the 3D print file, i needed some way that anyone can do. i tried to use a polymer clay and mold the piece that kind of worked except the clay was a little to soft and the smallest move of the tool resulted in a big move of the clay. An advantage to Polymer clay is depending on how long you bake it affects the hardness of the clay. So i spent a day experimenting.
this is the Basswood blank i used so what i did was to make a Polymer clay blank and bake it.
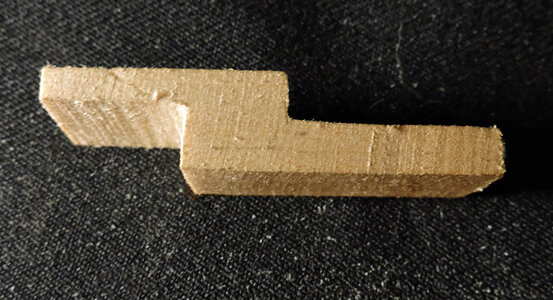
the resultes were better than i expected, you can carve and sand the clay also files worked great. As you can see from the tests you can get a clean sharp scroll. The clay is easy to work with an Exacto blade and files. the scrolls are tiny pieces. 

Last edited:
- Joined
- Dec 1, 2016
- Messages
- 6,383
- Points
- 728

- Joined
- Aug 8, 2019
- Messages
- 5,568
- Points
- 738

It looks better in basswood, nice carving. Did you try to wet the wood before carving?Sometimes that will help cutting. And use very sharp tiny chisels. X-acto is not always sharp enough to do the job. My experience. Maybe when you use a leather strop to sharpen the X-acto a little more.
- Joined
- Dec 1, 2016
- Messages
- 6,383
- Points
- 728

It looks better in basswood, nice carving. Did you try to wet the wood before carving?Sometimes that will help cutting. And use very sharp tiny chisels. X-acto is not always sharp enough to do the job. My experience. Maybe when you use a leather strop to sharpen the X-acto a little more.
wetting does work on hard woods wetting Basswood is like cutting a wet sponge and the wood gives even with the slightes pressure.
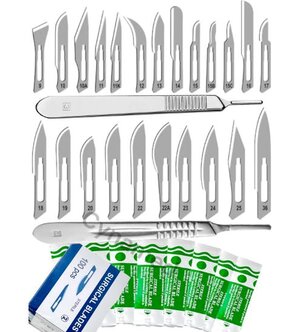
actually i should have mentioned the final scroll was carved with scalpel blades and needle files,
wetting does work on hard woods wetting Basswood is like cutting a wet sponge and the wood gives even with the slightes pressure.
actually i should have mentioned the final scroll was carved with scalpel blades and needle files,

- Joined
- Dec 1, 2016
- Messages
- 6,383
- Points
- 728

Does anyone know if there is a link for Chuck Passaro's practicuum for the Sultana.
I just found a box with the Sultana and plan to start it.
there are a couple build logs on the solid hull Saltana
Model Shipways Sultana Schooner Build Log
May 18, 2006 Model Shipways - Sultana Colonial Schooner - Solid Hull Kit Built by Benjamin Hollowell in Boston in 1767, Sultana was seaworthy far beyond her size of 51 feet. The Royal Navy bought her in 1768, and she became one of Britain´s most effective weapons in the fight against...
shipsofscale.com
if you need any help just ask this build log is based on the original Model Expo solid hull kit. which i have here
you can download chuck's practicum from the NRG web sight
Last edited:
- Joined
- Aug 8, 2019
- Messages
- 5,568
- Points
- 738

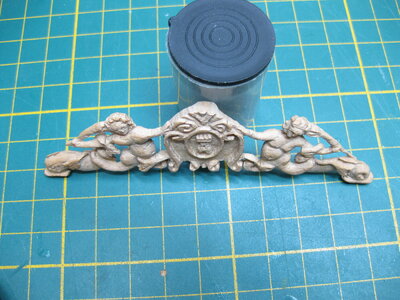
By wetting I don't mean submerging the wood for a while. But just wetting the surface a little with a brush or with a spray can. Just wetting the surface is enough to make the knife go through the wood better. Wood carvers apply that technique to basswood. I did this technique on this part what is made of cherry

Great work still Dave ! Thanks again for all your sharing !there are a couple build logs on the solid hull Saltana
Model Shipways Sultana Schooner Build Log
May 18, 2006 Model Shipways - Sultana Colonial Schooner - Solid Hull Kit Built by Benjamin Hollowell in Boston in 1767, Sultana was seaworthy far beyond her size of 51 feet. The Royal Navy bought her in 1768, and she became one of Britain´s most effective weapons in the fight against...shipsofscale.com
if you need any help just ask this build log is based on the original Model Expo solid hull kit. which i have here
you can download chuck's practicum from the NRG web sight
- Joined
- Dec 1, 2016
- Messages
- 6,383
- Points
- 728

By wetting I don't mean submerging the wood for a while. But just wetting the surface a little with a brush or with a spray can. Just wetting the surface is enough to make the knife go through the wood better. Wood carvers apply that technique to basswood. I did this technique on this part what is made of cherry
interesting i will give it a try
actually i live about half an hour from the Amish community and i did notice they run water on the logs at the saw mills when cutting.
- Joined
- Aug 8, 2019
- Messages
- 5,568
- Points
- 738

And another thing is sharpening using a leather strop.
The cutting edges will look like a mirror when you sharp in that way. And it makes a difference when you do it like that.
Here is a little video, but there a plenty of them to find.
I always sharp my chisels in this way now, it makes them go glide through the wood like a knife through butter. I keep the strop always nearby when using my chissel. Barbers in the old days did this too.
The cutting edges will look like a mirror when you sharp in that way. And it makes a difference when you do it like that.
Here is a little video, but there a plenty of them to find.
- Joined
- Dec 1, 2016
- Messages
- 6,383
- Points
- 728

And another thing is sharpening using a leather strop.
The cutting edges will look like a mirror when you sharp in that way. And it makes a difference when you do it like that.
The most important thing to remember is you need a very sharp cutting edge
There are a variety of tools you can use which includes needle files, scalpels, Exacto blades, mini chisels and diamond burs. I use them all.
to start i first cut a blank
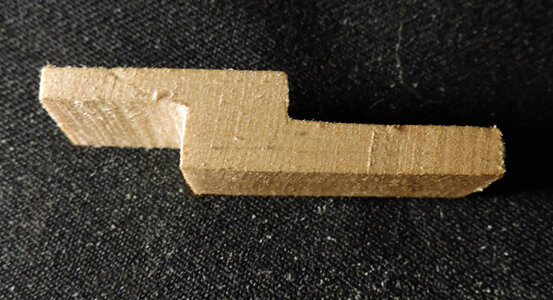
then i fit the blank on the model
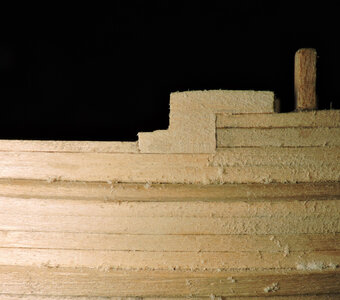
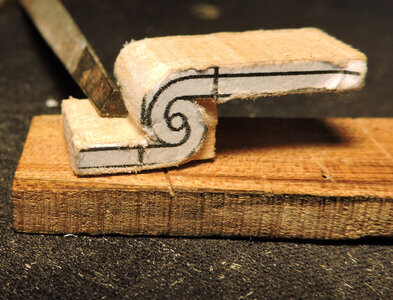
then using rubber cement i glue the drawing to the blank. The first cut is the back of the lower scroll, an easy cut just make a cut along the pattern and because the grain runs with the scroll it does not take much to cut the depth. The section being cut sits against the upper planks, you could cut away the section up to the back of the scroll then you will have to shape the ends of the planks to match the scroll. Either way works it is just buiders choice.
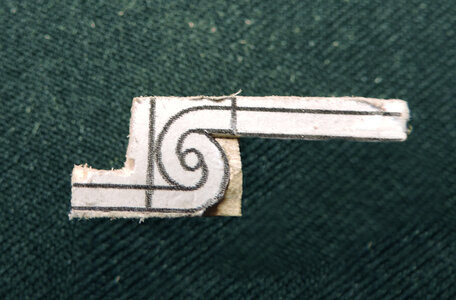
The scroll is tiny and it looks like a lot of wood to cut away from the front scroll but actually is ia very little

once again i made a stop cut along the pattern and whittled away the material
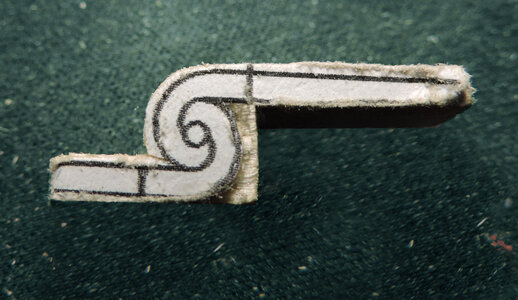
As you cut the top scroll it is a good idea to check you cutting to make sure you are square looking down on the piece the edge of the scroll is parallel to the leading edge.
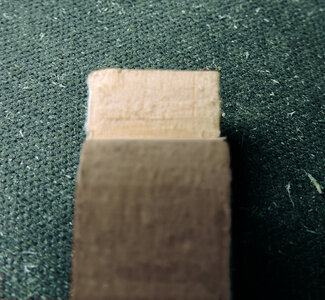
looking at it from the front the top of the scroll is even from side to side.
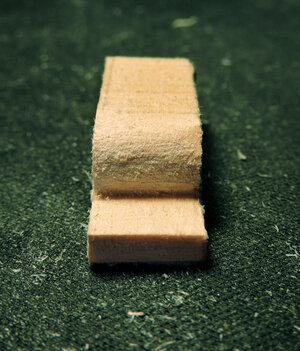
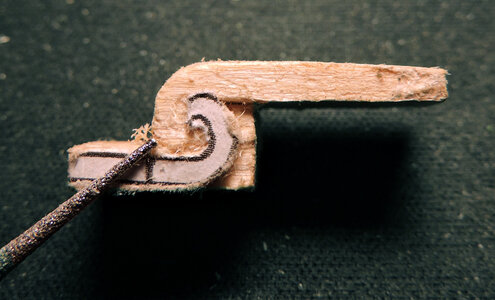
Satisfied with the shape of the top scroll i went in with a needle file and sharpened up where the bottom of the scroll meets the top of the cap rail. Yes that is the end of the file and i just used it in the photo to show what i did.
The cutting edges will look like a mirror when you sharp in that way. And it makes a difference when you do it like that.
The most important thing to remember is you need a very sharp cutting edge
There are a variety of tools you can use which includes needle files, scalpels, Exacto blades, mini chisels and diamond burs. I use them all.
to start i first cut a blank

then i fit the blank on the model

then using rubber cement i glue the drawing to the blank. The first cut is the back of the lower scroll, an easy cut just make a cut along the pattern and because the grain runs with the scroll it does not take much to cut the depth. The section being cut sits against the upper planks, you could cut away the section up to the back of the scroll then you will have to shape the ends of the planks to match the scroll. Either way works it is just buiders choice.

The scroll is tiny and it looks like a lot of wood to cut away from the front scroll but actually is ia very little

once again i made a stop cut along the pattern and whittled away the material

As you cut the top scroll it is a good idea to check you cutting to make sure you are square looking down on the piece the edge of the scroll is parallel to the leading edge.

looking at it from the front the top of the scroll is even from side to side.

Satisfied with the shape of the top scroll i went in with a needle file and sharpened up where the bottom of the scroll meets the top of the cap rail. Yes that is the end of the file and i just used it in the photo to show what i did.

- Joined
- Dec 1, 2016
- Messages
- 6,383
- Points
- 728

The shape and size of the scrolls have been established so now it is time to shape the scrolls themselves.
I will be using diamond coated burs starting with a rought 80 grit and hog out material, this is a bit rought and it will rip the grain, no worry it is just the first shaping.
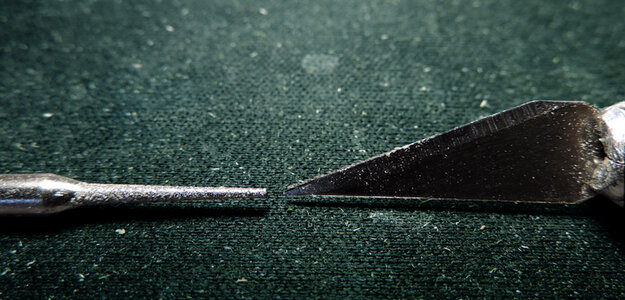
the diamond tools run from 80 to 600 grit and the finer the grit the finer the point. you can see a 400 grit comparisons to the point of an Exacto blade.
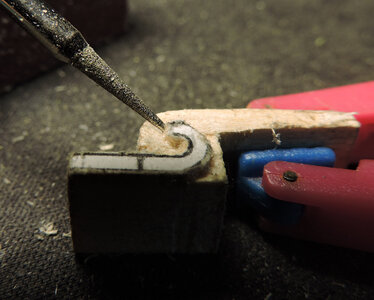
The scroll is taking shape, Notice the angle of the cutting, i do not want to cut away the outer edge of the scroll. If i did that i will be making the scroll narrower than the width of the cap rail. The idea here is to seperate the two scrolls from one another so the deep end of the cut runs along the edge of the second scroll.
I will be using diamond coated burs starting with a rought 80 grit and hog out material, this is a bit rought and it will rip the grain, no worry it is just the first shaping.

the diamond tools run from 80 to 600 grit and the finer the grit the finer the point. you can see a 400 grit comparisons to the point of an Exacto blade.

The scroll is taking shape, Notice the angle of the cutting, i do not want to cut away the outer edge of the scroll. If i did that i will be making the scroll narrower than the width of the cap rail. The idea here is to seperate the two scrolls from one another so the deep end of the cut runs along the edge of the second scroll.

- Joined
- Dec 1, 2016
- Messages
- 6,383
- Points
- 728

i went from 80 to 300 to 600 for the final shaping and as you can see a 600 really smooths things out.
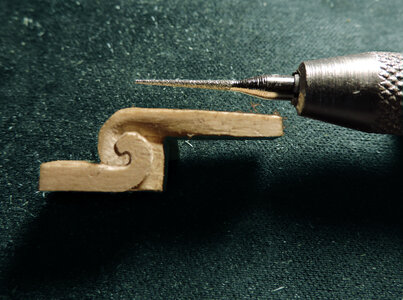
If your wondering what is at the other end of the diamond burs? I use them in my Dremel tool and they cut fast and aggressively. With such delicate work as the scrolls i use a pin vice and mussel memory and do it by hand. You will need to do this 12 times because there are 6 two sided scrolls in the cap rails.
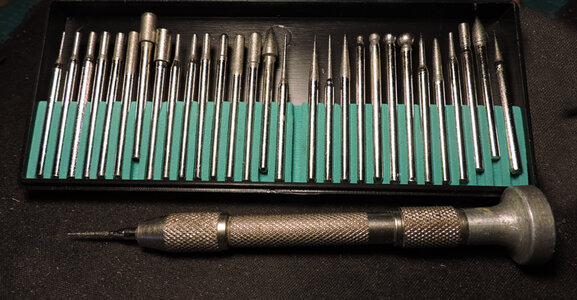

If your wondering what is at the other end of the diamond burs? I use them in my Dremel tool and they cut fast and aggressively. With such delicate work as the scrolls i use a pin vice and mussel memory and do it by hand. You will need to do this 12 times because there are 6 two sided scrolls in the cap rails.

- Joined
- Dec 1, 2016
- Messages
- 6,383
- Points
- 728

- Joined
- Dec 1, 2016
- Messages
- 6,383
- Points
- 728

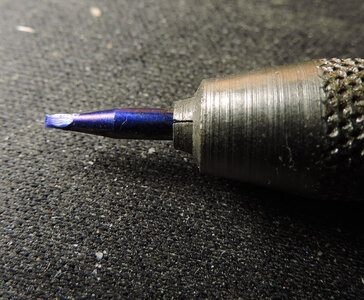
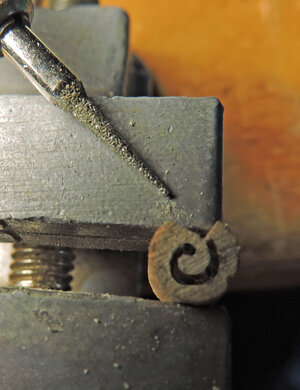
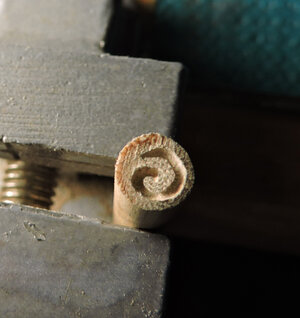
for this scroll i made a tiny little chisel from a broked drill bit
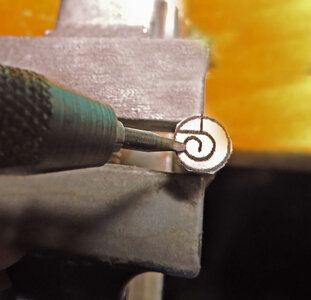
using the chisel i poked a stop cut along the pattern
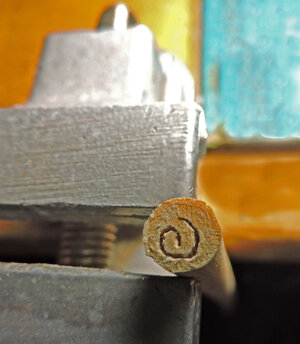
This is the result
back to the diamond burs i am using a cone shape to widen the stop cut.
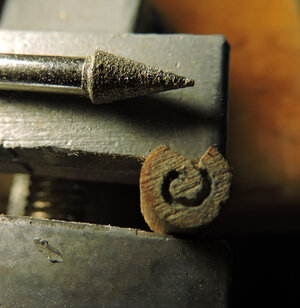
When i have a clean wider channel i will use a smaller diamond bur and refine the scroll
The finished scroll it notches for the cap rail and the cap rail and scroll is glued to the model.
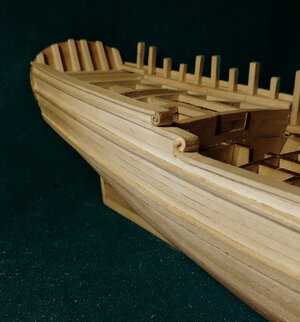
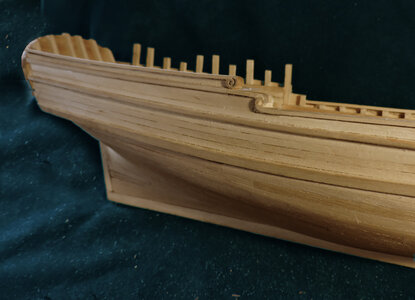
This completes one side of the hull now i have to do it all again for the other side.
a note;
i debated with myself how to handle the stanchions at the stern and the timber heads around the bow. i could have cut a hole through the cap rail for them. This would require cutting 24 perfect square holes in the cap rails and if you mess one up the piece is scrap and you have to start over. The cap rails and the stanchions and timberheads are all painted black so with that in mind i cut them off even with the top of the last plank. My plan is to fabricate the timberheads seperate and glue them to the top of the cap rails, same with the rail stanchions at the stern. I think this way will be way more accurateand a cleaner job, and much faster.
If this were a model showing how the ship was built then yes i would cut the cap rails so the stanchions and timberheads would protrude through. But this is a model showing what the Sultana looked like and not necessarily how it was built.

using the chisel i poked a stop cut along the pattern

This is the result

back to the diamond burs i am using a cone shape to widen the stop cut.

When i have a clean wider channel i will use a smaller diamond bur and refine the scroll


The finished scroll it notches for the cap rail and the cap rail and scroll is glued to the model.


This completes one side of the hull now i have to do it all again for the other side.
a note;
i debated with myself how to handle the stanchions at the stern and the timber heads around the bow. i could have cut a hole through the cap rail for them. This would require cutting 24 perfect square holes in the cap rails and if you mess one up the piece is scrap and you have to start over. The cap rails and the stanchions and timberheads are all painted black so with that in mind i cut them off even with the top of the last plank. My plan is to fabricate the timberheads seperate and glue them to the top of the cap rails, same with the rail stanchions at the stern. I think this way will be way more accurateand a cleaner job, and much faster.
If this were a model showing how the ship was built then yes i would cut the cap rails so the stanchions and timberheads would protrude through. But this is a model showing what the Sultana looked like and not necessarily how it was built.
- Joined
- Dec 1, 2016
- Messages
- 6,383
- Points
- 728

now i need a few days to a week to do the scrolls and cap rail on the other side. Once that is done i will be back with the cap rail and molding pieces for the stern.


