-

Win a Free Custom Engraved Brass Coin!!!
As a way to introduce our brass coins to the community, we will raffle off a free coin during the month of August. Follow link ABOVE for instructions for entering.
-

PRE-ORDER SHIPS IN SCALE TODAY!
The beloved Ships in Scale Magazine is back and charting a new course for 2026!
Discover new skills, new techniques, and new inspirations in every issue.
NOTE THAT OUR FIRST ISSUE WILL BE JAN/FEB 2026
- Home
- Forums
- Ships of Scale Group Builds and Projects
- Group Build Archives
- Blandford Cross Section PoF Group Build
You are using an out of date browser. It may not display this or other websites correctly.
You should upgrade or use an alternative browser.
You should upgrade or use an alternative browser.
Donnie's HMS Blandford Cross Section Build: 1/32 Scale [COMPLETED BUILD]
Thank you all.
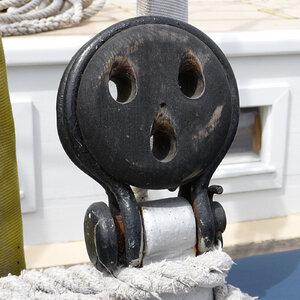
I COMPLETELY ruined my Dead Eyes on the Cannon side -- as I went back to revisit those to dress them up. On the three holes, I wanted to make a tapered trough that the lines go through instead of having a blunt drilled out hole. I used a Dremel tool with a very shallow taper and it seems I got carried away with it. I did not take pictures as it is ugly as H&&&
It might be the wood that I was working with also did not do well. I am not sure what to do as to just leave well enough alone or not. The black India ink seems to exaggerate the effect worse than what it is. I really do not feel like redoing these. Now, the other side of Dead Eyes that I did, seems to be done a little better and I could swap those out. I am not sure. I should have left well enough alone, but that was my decision to dress them up some. It is what it is. They do not look too bad with the naked eye, but the camera shows all the defects thereof.
If it is really bad you could perhaps leave them out completely on the side where there is no deck etc.
well, I have to remind myself that this is my first scratch build and the reason for it was for a learning experience. Sometimes that 'pride' thing gets in the way. But it is all good. I can always take the good ones and swap them out and put the not-so-good ones on the non-cannon side or just redo them if time permits.
I just got a little too heavy handed with the Dremel tool as the thing is really way too fast in RPM. I really need to buy a VARIAC to slow it down alot. Even on #1 setting, it is way too fast.
I just got a little too heavy handed with the Dremel tool as the thing is really way too fast in RPM. I really need to buy a VARIAC to slow it down alot. Even on #1 setting, it is way too fast.
Ok, so I went ahead and redid my Dead Eyes and I looked at the Video that Uwe Post and tried to make one like the video. I think I am going to stick with this and I might just stain it a natural color instead of black - not sure. Also using a different approach to mounting the eyes to the strops ( I assume that is what you call them).
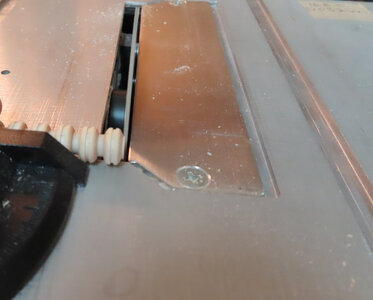
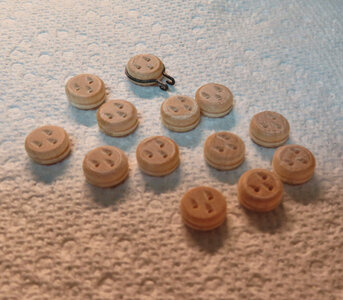
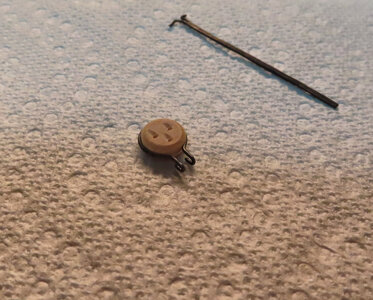
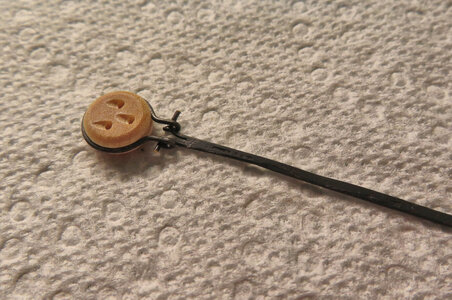


Very good work - I am happy, that my small hint was helping ->temporarily installed one Dead in the channel to see how it is going to look. I probably need to put a natural stain on the Dead Eye so the eyelets and rope troughs will stand out better.

Looks good, Donnie. Dead eyes are nearly universal in model ship kits, and are usually some of the crudest parts in the box!
After-market deadeyes are rarely better and cumbersome to assemble if they are. Scratch building is the best current option. Yours look great.
There are some of us working on simpler ways of mass producing quality deadeyes for ship models!
After-market deadeyes are rarely better and cumbersome to assemble if they are. Scratch building is the best current option. Yours look great.
There are some of us working on simpler ways of mass producing quality deadeyes for ship models!
Donnie: Can you post a link to Uwe’s video here?
Donnie: Can you post a link to Uwe’s video here?
Thanks, Uwe!
Thank you.
From watching the Video and pausing it a few times in the process, it seems that his holes or openings are NOT at 120° spacing. But rather it seems that two of the holes are spaced at near the center line of the Dead Eye. Then the other is offset at 90° as this CAD drawing I did represents what I tried to accomplish.
The Eye on left was my first attempt (which is wrong), then the one on the right is the corrected one (as far as I can tell)
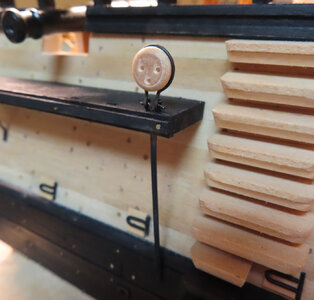
BTW: I am still not happy with the hardware (strops) and chain plates. There has to be a better way and a better-looking method.
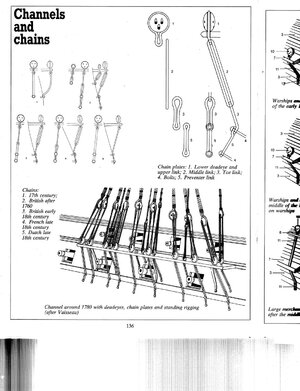
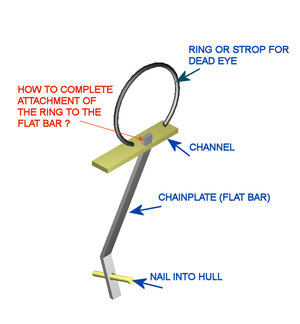
So, my question in my mind has been, how do they go from a "FLAT bar" chainplate to the ROUND strop?
Last edited:
BTW: I am still not happy with the hardware (strops) and chainplates. There has to be a better way and a better-looking method.
So, my question in my mind has been, how do they go from a "FLAT bar" chainplate to the ROUND strop? What is the method of joining these two dissimilar objects?
Using Chain for the Chainplates has never been a problem. Also, a round bar has never been a problem. But at "flat bar" ???
So, my question in my mind has been, how do they go from a "FLAT bar" chainplate to the ROUND strop? What is the method of joining these two dissimilar objects?
Using Chain for the Chainplates has never been a problem. Also, a round bar has never been a problem. But at "flat bar" ???
Excellent points for a discussion, Donnie!
Up until 1760, the British convention for chain plates connecting the stropped deadeye to the hull was a flat bar with an eyehole in it to bolt the chainplate in place. The "link" system was adopted after that date. I simulated this by simply stropping my deadeyes with copper wire and soldering the wires together below the deadeye. File flat and blacken to give a flat bar!
You are correct about the deadeye hole placement. zuMondfeld shows this on page 244 of his book. The equally spaced deadeyes are for ease of mass production by kit makers.
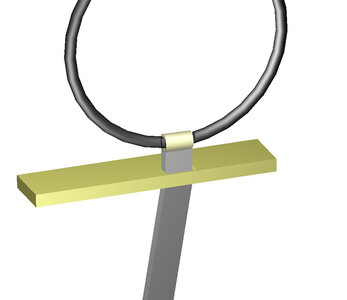
Ok, so this is a pretty bad drawing of a typical assembly. Please elaborate on how the ring or strop is supposed to be or properly attached to the flat bar. I know that Dave soldered TWO wired together and FILED the edges to obtain the flat bar, then (before) that was done, he basically had made the whole assembly first. Yes, I know that in Dave's case, (let me say it this way) - that his whole assembly is one wire, but he soldered the base together. However, I am (now curious) as to how this was really done on a real ship. I assume that the blacksmiths or whoever welded the ring to the flat bar. If that is the case, then it would be quite difficult to copy the process on such a small scale (at least for the Blandford, and nearly impossible for any lesser scale.
Or it could be that as they extended the loop (ring) and had some short straight ends that they hammered out FLAT and then attached it that way.
Or lastly, that TIP of the flat bar that is protruding out from the Channel will have a tiny LOOP put in it and the strop will pass through the loop.
Or it could be that as they extended the loop (ring) and had some short straight ends that they hammered out FLAT and then attached it that way.
Or lastly, that TIP of the flat bar that is protruding out from the Channel will have a tiny LOOP put in it and the strop will pass through the loop.
If you would do it that way I would make the the ring more like a figure 8 where the o passing through the chain plate should of course be much smaller than the one around the deadeye . Kinda like this:I think now I know what I should have done, but it is too late. At the tip of the flat bar, I should have soldered a 3/32 x 1/8 brass "tubing" and I could have passed my strop through that. Arrggg too late.
View attachment 191952
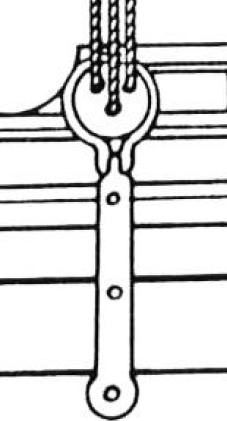
IRL I guess it would perhaps be more in this direction:
