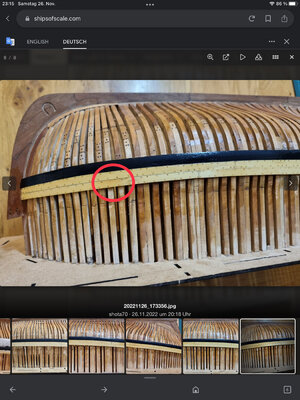
Each of us has his\her own acceptance level...there is no right or wrong, as long as you like it! 
-

Win a Free Custom Engraved Brass Coin!!!
As a way to introduce our brass coins to the community, we will raffle off a free coin during the month of August. Follow link ABOVE for instructions for entering.
-

PRE-ORDER SHIPS IN SCALE TODAY!
The beloved Ships in Scale Magazine is back and charting a new course for 2026!
Discover new skills, new techniques, and new inspirations in every issue.
NOTE THAT OUR FIRST ISSUE WILL BE JAN/FEB 2026
- Home
- Forums
- Ships of Scale Group Builds and Projects
- HMS Alert 1777 1:48 PoF Group Build
- HMS Alert 1777 1:48 Group Build Logs
You are using an out of date browser. It may not display this or other websites correctly.
You should upgrade or use an alternative browser.
You should upgrade or use an alternative browser.
HMS ALERT 1777 cutter POF by shota70 [COMPLETED BUILD]
- Joined
- Apr 20, 2020
- Messages
- 6,257
- Points
- 738

good evening dear friends
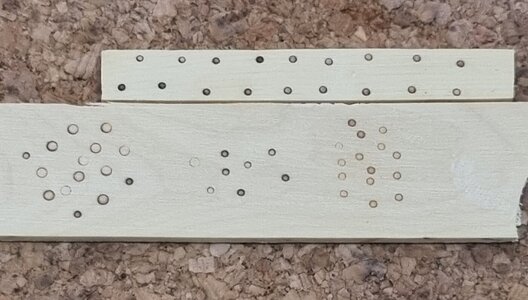
In the last few days I produced a third burn head with an inner diameter of 0.67 mm and an outer diameter of 0.9 mm.
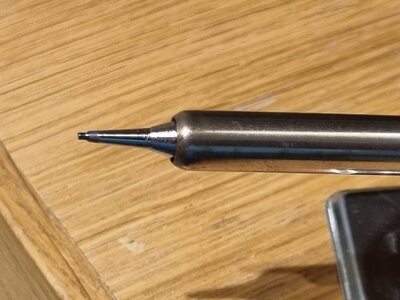
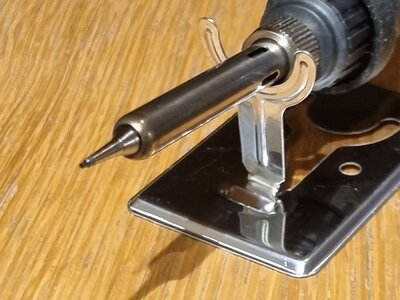
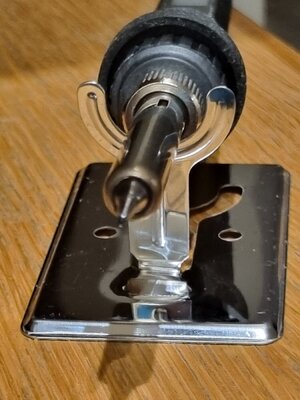
Today I went to perform the experiment of the new burning head. This time I also changed the temperature of the soldering iron. In the previous attempts I burned at 400 degrees Celsius, today I went down to 375 to refine the burn mark.
I am attaching the results of my experiments In the first you can see in the wide panel the three attempts 1, 0.5 and 0.67 and above it in the narrow panel 0.5 and 0.67.
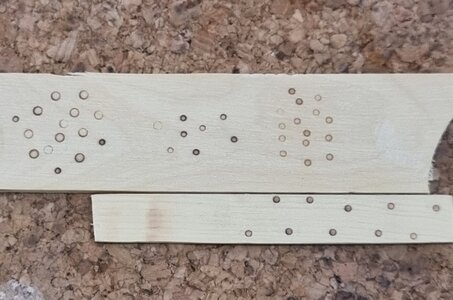
And in the second picture the narrow panel is all 0.67 internal radius.
After the three attempts, I tend to use the new plates I made with the 0.67mm burner. I would love to hear your opinion.
My intention is to remove the boxwood panels, make new ones, glue and burn again.
I understand that I am in a bit of a hurry in the construction progress and that I should examine the possibilities of improving the products before installation/gluing.
Happy Thanksgiving and a pleasant and enjoyable weekend to all of us
In the last few days I produced a third burn head with an inner diameter of 0.67 mm and an outer diameter of 0.9 mm.


Today I went to perform the experiment of the new burning head. This time I also changed the temperature of the soldering iron. In the previous attempts I burned at 400 degrees Celsius, today I went down to 375 to refine the burn mark.
I am attaching the results of my experiments In the first you can see in the wide panel the three attempts 1, 0.5 and 0.67 and above it in the narrow panel 0.5 and 0.67.

And in the second picture the narrow panel is all 0.67 internal radius.

After the three attempts, I tend to use the new plates I made with the 0.67mm burner. I would love to hear your opinion.
My intention is to remove the boxwood panels, make new ones, glue and burn again.
I understand that I am in a bit of a hurry in the construction progress and that I should examine the possibilities of improving the products before installation/gluing.
Happy Thanksgiving and a pleasant and enjoyable weekend to all of us
Hi Shota,
I appreciate your perseverance! I do like the smaller trunnels at this scale. But don't miss Maarten's note about sanding. I felt like my burned-in trunnels were distractingly prominent until I sanded off some of the burn marks. I also didn't put as many because scale modeling (in my opinion) can't always fully replicate the full-size ship.
You're going to be a master-builder one day my friend!
- Joined
- Sep 3, 2021
- Messages
- 5,199
- Points
- 738

Ha Shota,good evening dear friends
In the last few days I produced a third burn head with an inner diameter of 0.67 mm and an outer diameter of 0.9 mm.
View attachment 342505View attachment 342506View attachment 342507
Today I went to perform the experiment of the new burning head. This time I also changed the temperature of the soldering iron. In the previous attempts I burned at 400 degrees Celsius, today I went down to 375 to refine the burn mark.
I am attaching the results of my experiments In the first you can see in the wide panel the three attempts 1, 0.5 and 0.67 and above it in the narrow panel 0.5 and 0.67.
View attachment 342508
And in the second picture the narrow panel is all 0.67 internal radius.
View attachment 342509
After the three attempts, I tend to use the new plates I made with the 0.67mm burner. I would love to hear your opinion.
My intention is to remove the boxwood panels, make new ones, glue and burn again.
I understand that I am in a bit of a hurry in the construction progress and that I should examine the possibilities of improving the products before installation/gluing.
Happy Thanksgiving and a pleasant and enjoyable weekend to all of us
Lovely, just lovely. The sanding aside, see @dockattner suggestion, I would personally opt for the 0,5mm and the lower temp settings.
I also would convince myself which option I prefer, before demolishing the ship...
- Joined
- Apr 20, 2020
- Messages
- 6,257
- Points
- 738

Hi Shota,
I appreciate your perseverance! I do like the smaller trunnels at this scale. But don't miss Maarten's note about sanding. I felt like my burned-in trunnels were distractingly prominent until I sanded off some of the burn marks. I also didn't put as many because scale modeling (in my opinion) can't always fully replicate the full-size ship.
You're going to be a master-builder one day my friend!
thank you very much my dear friends,Ha Shota,
Lovely, just lovely. The sanding aside, see @dockattner suggestion, I would personally opt for the 0,5mm and the lower temp settings.
I also would convince myself which option I prefer, before demolishing the ship...
I greatly appreciate their opinion and words of encouragement

- Joined
- Jan 9, 2020
- Messages
- 10,566
- Points
- 938

I would go for the smallest one at a lower temperature and most certainly sand it afterwards. Please heed @dockattner Paul's advice about the number of trennels versus the scale in which we are building. I have a bee in my bonnet about the number of trennels and copper/brass nails that some modelers use. In the end, that becomes the prominent feature instead of the ship. Subtle, subtle, subtle ....
- Joined
- Apr 20, 2020
- Messages
- 6,257
- Points
- 738

good evening dear friends
Today I dedicated several hours to make the wale again. I handled with the boxwood boards as well as the black painted board.
First I sanded all the black paint and then the burn marks on the boxwood panels. It became clear to me that I did not make a deep burn and with a light sanding I made the big burns disappear. I sanded and smoothed the surface of the three rows of boards to a uniform height.
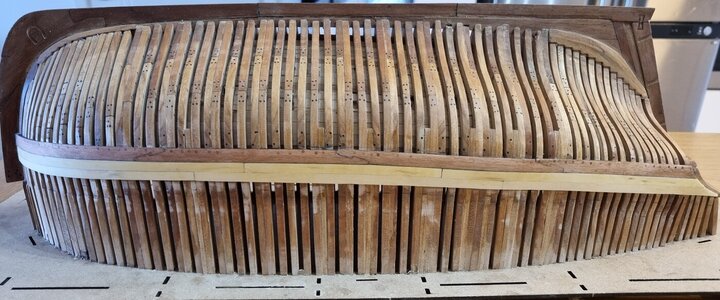
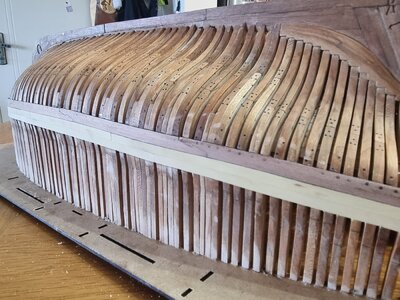
I repainted the wide black board with three coats of acrylic paint.
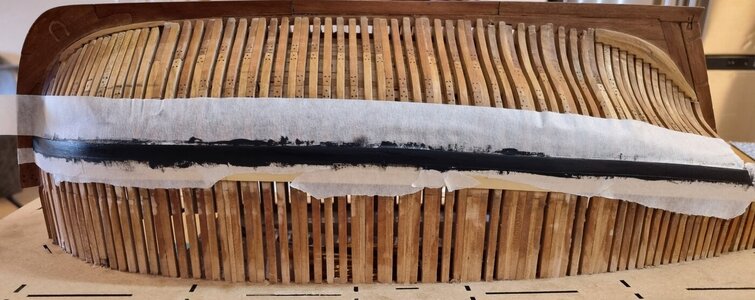
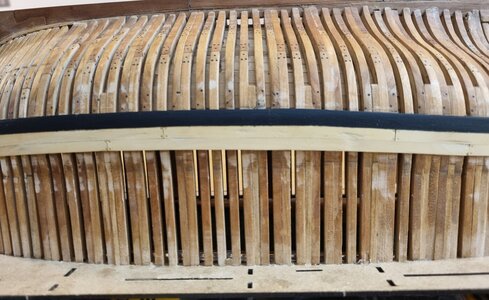
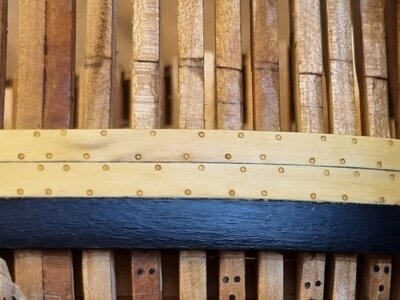
Later I made the burns with the head of 0.67 mm internal diameter. This time I lowered the burning temperature to 360 degrees. Then I sanded the surface of the burn with fine sandpaper and applied a layer of bees wax.

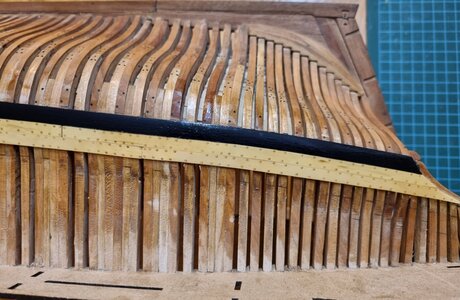
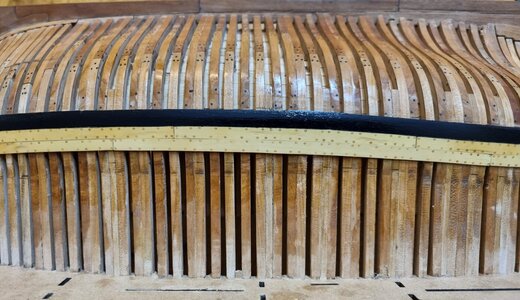
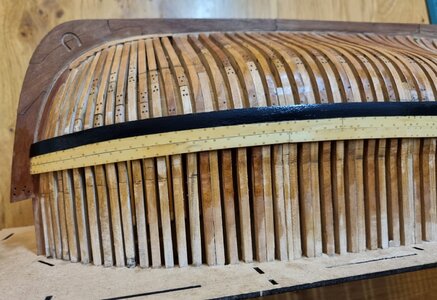
I am satisfied with the result that I achieved with your help Dearfriends, Good night
Today I dedicated several hours to make the wale again. I handled with the boxwood boards as well as the black painted board.
First I sanded all the black paint and then the burn marks on the boxwood panels. It became clear to me that I did not make a deep burn and with a light sanding I made the big burns disappear. I sanded and smoothed the surface of the three rows of boards to a uniform height.


I repainted the wide black board with three coats of acrylic paint.


Later I made the burns with the head of 0.67 mm internal diameter. This time I lowered the burning temperature to 360 degrees. Then I sanded the surface of the burn with fine sandpaper and applied a layer of bees wax.


I am satisfied with the result that I achieved with your help Dearfriends, Good night
Last edited:
- Joined
- Apr 20, 2020
- Messages
- 6,257
- Points
- 738

thanks for your attention, my Dear friendSteady improvement Shota, looks very good, however you need to do one more here and then it will be perfect.
View attachment 342669

Much better now
Good to have eagles´s eye Tobias in our group -> I am also happy for such small hints
Good to have eagles´s eye Tobias in our group -> I am also happy for such small hints
- Joined
- Apr 20, 2020
- Messages
- 6,257
- Points
- 738

Steady improvement Shota, looks very good, however you need to do one more here and then it will be perfect.
View attachment 342669
Thank you very much dear friendsMuch better now
Good to have eagles´s eye Tobias in our group -> I am also happy for such small hints

for your attention and compliments.
the blank marking has been completed
- Joined
- Apr 20, 2020
- Messages
- 6,257
- Points
- 738

thank you very much my dear friendThis looks a 100% better, Shota and these wales also fit better than the first ones.
- Joined
- Apr 20, 2020
- Messages
- 6,257
- Points
- 738

Hello dear friends
I would like to pay your attention to a new topic that I opened this evening A new carving project - a body figure of a ship captain in a 1:48 scale
After three months that I finished carving the lion figure, I felt a need and longing for the craft of carving, so I started this project, welcome to take a look
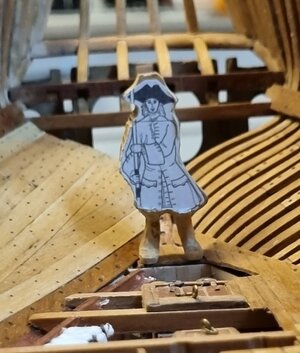
A new carving project: a full body figure of a ship captain in a 1:48 scale [COMPLETED BUILD]
Hello dear friends About two or three months after finishing my carving project - a lion figurehead of the ship la Belle Poule https://shipsofscale.com/sosforums/threads/a-new-carving-project-a-lion-figurehead-of-the-ship-la-belle-poule.10057/ and focusing on the Alert model, I felt longing...
shipsofscale.com

Wow, I assume you've sanded it now too. Looks great even though I agree with Jim, but I have to say great.Thank you very much dear friends
for your attention and compliments.
the blank marking has been completed
View attachment 343197
Hi Shota,
Looks great. BTW the wales are bolted and tree nailed, one frame bolted, the next frame tree nailed followeed by a bolted frame etc.
Looks great. BTW the wales are bolted and tree nailed, one frame bolted, the next frame tree nailed followeed by a bolted frame etc.
Good morning Shota- yes I agree with you- you may be well satisfied. Cheers Grantgood evening dear friends
Today I dedicated several hours to make the wale again. I handled with the boxwood boards as well as the black painted board.
First I sanded all the black paint and then the burn marks on the boxwood panels. It became clear to me that I did not make a deep burn and with a light sanding I made the big burns disappear. I sanded and smoothed the surface of the three rows of boards to a uniform height.
View attachment 342628View attachment 342629
I repainted the wide black board with three coats of acrylic paint.
View attachment 342630View attachment 342631
Later I made the burns with the head of 0.67 mm internal diameter. This time I lowered the burning temperature to 360 degrees. Then I sanded the surface of the burn with fine sandpaper and applied a layer of bees wax.
View attachment 342632View attachment 342633View attachment 342634View attachment 342635
I am satisfied with the result that I achieved with your help Dearfriends, Good night
and what a difference to the first yellow painted version - great improvement
It was definitely the correct move
It was definitely the correct move


