Repaired what? nothing can be recognized....... very good work
-

Win a Free Custom Engraved Brass Coin!!!
As a way to introduce our brass coins to the community, we will raffle off a free coin during the month of August. Follow link ABOVE for instructions for entering.
-

PRE-ORDER SHIPS IN SCALE TODAY!
The beloved Ships in Scale Magazine is back and charting a new course for 2026!
Discover new skills, new techniques, and new inspirations in every issue.
NOTE THAT OUR FIRST ISSUE WILL BE JAN/FEB 2026
You are using an out of date browser. It may not display this or other websites correctly.
You should upgrade or use an alternative browser.
You should upgrade or use an alternative browser.
HMS Blandford 1:48 POF Modelship Dockyard [COMPLETED BUILD]
- Joined
- Dec 16, 2016
- Messages
- 1,192
- Points
- 493

Hi Jack, It’ll be just like Jack Aubrey’s HMS Surprise, a quick repair at sea then up and at em!Racked across the stern by the darned French eh! Swing round give 'em a broadside, then carry on making repairs.
- Joined
- Apr 20, 2020
- Messages
- 6,256
- Points
- 738

I don't see any signs of an accident here, are you sure it even happenedHi, One careful owner from new, never been in an accident, Honest!
View attachment 407354
View attachment 407355
View attachment 407356
well done
Repairs as much as they scarry sound, are very good teachers: they teach us to be careful next time and find a way to repair or redo)  You did a good job (no surprises here)
- Joined
- Dec 16, 2016
- Messages
- 1,192
- Points
- 493

Hello and welcome, Thank you all for being so understanding and upbeat about my small mishap, the replies have ranged from it happens, to, when its repaired it never really happened and everything in between. I’m not upset about it at all, in fact quite the opposite, if it hadn’t happened I wouldn’t have had the great satisfaction of making my best ever repair.
No excitement today, I’m afraid just normal, cut, sand, glue, then do it again and again. Fitting the batens is not quite the simple task that I thought it was going to be. They are a simple butt fit, but I am having to be so precise, if they are the slightest bit too small they won’t hold but just drop through the beams into the hold, if they are the slightest bit too long they are impossible to fit, even just a small pass with a sanding block makes a big difference. It’s also tricky wiping any excess glue away, if the glue is too wet you end up pushing the baton down yet if you wait until the glue grabs it’s then too late and when varnished will leave whitish stains, and there’s a lot of them. I think that the beams turned out just a little too dark in colour for my liking so to compensate I’m going to do my batons a bit lighter which I hope will give the deck a bit of a lift; I also like the idea of a slight contrast.
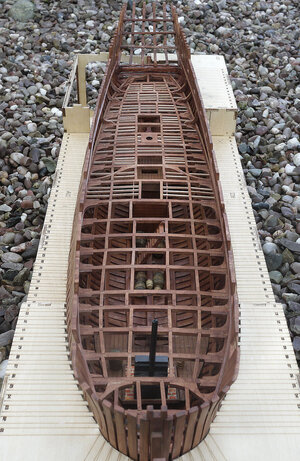
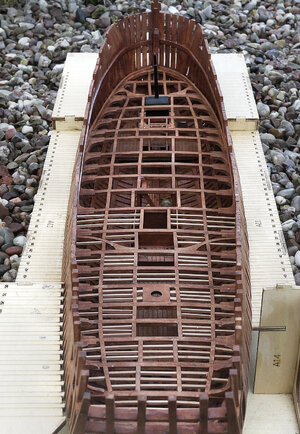
No excitement today, I’m afraid just normal, cut, sand, glue, then do it again and again. Fitting the batens is not quite the simple task that I thought it was going to be. They are a simple butt fit, but I am having to be so precise, if they are the slightest bit too small they won’t hold but just drop through the beams into the hold, if they are the slightest bit too long they are impossible to fit, even just a small pass with a sanding block makes a big difference. It’s also tricky wiping any excess glue away, if the glue is too wet you end up pushing the baton down yet if you wait until the glue grabs it’s then too late and when varnished will leave whitish stains, and there’s a lot of them. I think that the beams turned out just a little too dark in colour for my liking so to compensate I’m going to do my batons a bit lighter which I hope will give the deck a bit of a lift; I also like the idea of a slight contrast.


Last edited:
- Joined
- Jan 10, 2022
- Messages
- 862
- Points
- 403

Yes you are right, it is very precise work and a little repetitive but there's no easy way round it. I actually quite enjoyed this stage but l did the carlings and ledges together in stages so as not to leave all the ledges to be done at the end. Sort of evenly split the workHello and welcome, Thank you all for being so understanding and upbeat about my small mishap, the replies have ranged from it happens, to, when its repaired it never really happened and everything in between. I’m not upset about it at all, in fact quite the opposite, if it hadn’t happened I wouldn’t have had the great satisfaction of making my best ever repair.
No excitement today, I’m afraid just normal, cut, sand, glue, then do it again and again. Fitting the batons is not quite the simple task that I thought it was going to be. They are a simple butt fit, but I am having to be so precise, if they are the slightest bit too small they won’t hold but just drop through the beams into the hold, if they are the slightest bit too long they are impossible to fit, even just a small pass with a sanding block makes a big difference. It’s also tricky wiping any excess glue away, if the glue is too wet you end up pushing the baton down yet if you wait until the glue grabs it’s then too late and when varnished will leave whitish stains, and there’s a lot of them. I think that the beams turned out just a little too dark in colour for my liking so to compensate I’m going to do my batons a bit lighter which I hope will give the deck a bit of a lift; I also like the idea of a slight contrast.
View attachment 407480
View attachment 407481
- Joined
- Dec 16, 2016
- Messages
- 1,192
- Points
- 493

Welcome Friends. Thank you all for your likes and kind comments, they really do motivate me when I’m struggling.
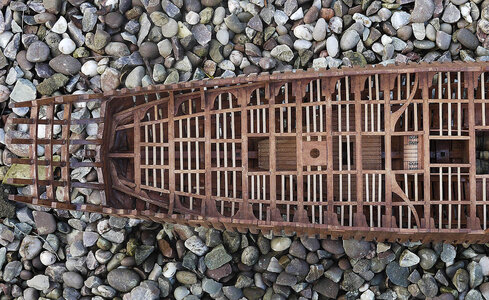
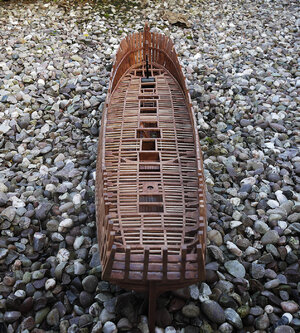
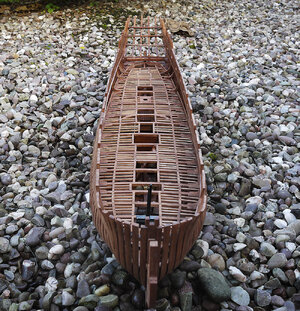
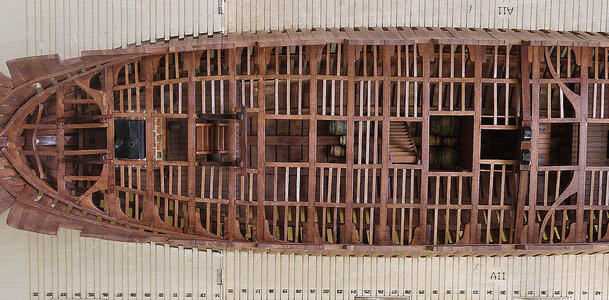
Today I’m showing pictures of the completed lower deck gratings, as I mentioned earlier these were a bit fiddly to do but towards the end I was getting better and progressing more quickly. I’m going to see if I can neaten this deck a bit, give the batons a light stain then a coat of poly.
I think this deck has come out only ok, I’m not overly happy with my work, I think that I approached it somewhat wrong, the fit and finish could be much better. After my apprentiship on this deck I’ve learned where and how I could improve. Fortunately this deck will be mostly in dappled shade and details won’t be seen much, I’ve given myself a good talking to, so because I get a second chance with the upper deck I’m convinced that there will be a noticeable improvement. It’s all a learning curve.
A little insight as to how I got the transom repair invisible. The breaks were clean, I applied a very small amount of cyno, not enough that would squeeze out of the join, I held it tight in position until it had grabbed then clamped with clips for about an hour. I then rubbed into the joints some wood glue, I wiped the surface off with a moist cloth then sanded the area with very fine grade paper whilst the glue was still wet, the sawdust impregnated the glue at the same time as smoothing the joint it then took the appearance of the wood. After I’d stained it even close up I can’t see the break
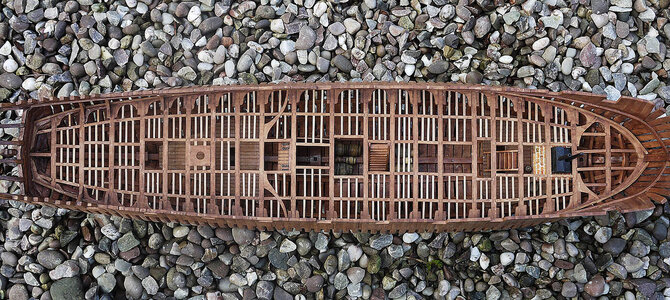
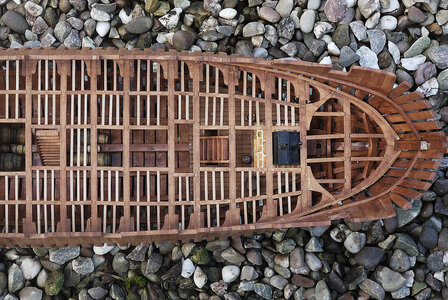


I think it looks great Ken. Once it is part of the forest no one will ever notice a tree or two isn't perfectly placed. The overall look is just so impressive!
- Joined
- Dec 16, 2016
- Messages
- 1,192
- Points
- 493

Hi Paul, Thanks for the encouragement. I’m really enjoying the build and am still very enthusiastic about it so not a problem there, but if I’m not self critical I won’t improve. It’s difficult for mere mortals try to follow in the footsteps of the Gods.I think it looks great Ken. Once it is part of the forest no one will ever notice a tree or two isn't perfectly placed. The overall look is just so impressive!
Good evening Ken. Wow, I’m away a few days and your Blandford has had quite a journey- breakages, repairs, and plenty batons….She looks impressive Ken. Cheers GrantWelcome Friends. Thank you all for your likes and kind comments, they really do motivate me when I’m struggling.
Today I’m showing pictures of the completed lower deck gratings, as I mentioned earlier these were a bit fiddly to do but towards the end I was getting better and progressing more quickly. I’m going to see if I can neaten this deck a bit, give the batons a light stain then a coat of poly.
I think this deck has come out only ok, I’m not overly happy with my work, I think that I approached it somewhat wrong, the fit and finish could be much better. After my apprentiship on this deck I’ve learned where and how I could improve. Fortunately this deck will be mostly in dappled shade and details won’t be seen much, I’ve given myself a good talking to, so because I get a second chance with the upper deck I’m convinced that there will be a noticeable improvement. It’s all a learning curve.
A little insight as to how I got the transom repair invisible. The breaks were clean, I applied a very small amount of cyno, not enough that would squeeze out of the join, I held it tight in position until it had grabbed then clamped with clips for about an hour. I then rubbed into the joints some wood glue, I wiped the surface off with a moist cloth then sanded the area with very fine grade paper whilst the glue was still wet, the sawdust impregnated the glue at the same time as smoothing the joint it then took the appearance of the wood. After I’d stained it even close up I can’t see the break
View attachment 407878
View attachment 407879
View attachment 407880
View attachment 407881
View attachment 407882
- Joined
- Jan 10, 2022
- Messages
- 862
- Points
- 403

Really nice work Ken. She's coming along a treat! and it's so good to hear you're still enjoying the experienceWelcome Friends. Thank you all for your likes and kind comments, they really do motivate me when I’m struggling.
Today I’m showing pictures of the completed lower deck gratings, as I mentioned earlier these were a bit fiddly to do but towards the end I was getting better and progressing more quickly. I’m going to see if I can neaten this deck a bit, give the batons a light stain then a coat of poly.
I think this deck has come out only ok, I’m not overly happy with my work, I think that I approached it somewhat wrong, the fit and finish could be much better. After my apprentiship on this deck I’ve learned where and how I could improve. Fortunately this deck will be mostly in dappled shade and details won’t be seen much, I’ve given myself a good talking to, so because I get a second chance with the upper deck I’m convinced that there will be a noticeable improvement. It’s all a learning curve.
A little insight as to how I got the transom repair invisible. The breaks were clean, I applied a very small amount of cyno, not enough that would squeeze out of the join, I held it tight in position until it had grabbed then clamped with clips for about an hour. I then rubbed into the joints some wood glue, I wiped the surface off with a moist cloth then sanded the area with very fine grade paper whilst the glue was still wet, the sawdust impregnated the glue at the same time as smoothing the joint it then took the appearance of the wood. After I’d stained it even close up I can’t see the break
View attachment 407878
View attachment 407879
View attachment 407880
View attachment 407881
View attachment 407882
- Joined
- Dec 16, 2016
- Messages
- 1,192
- Points
- 493

Thanks Keith. Yes it’s a pleasure to build. The kit still amazes me with its quality of design and fit of parts, a difficult act to follow.Really nice work Ken. She's coming along a treat! and it's so good to hear you're still enjoying the experience
- Joined
- Dec 16, 2016
- Messages
- 1,192
- Points
- 493

Thanks Grant. I’ve never had the opportunity to build a kit of this quality before, although it’s a complicated design it makes you want to push on to the next stage of the build.Good evening Ken. Wow, I’m away a few days and your Blandford has had quite a journey- breakages, repairs, and plenty batons….She looks impressive Ken. Cheers Grant
- Joined
- Jun 17, 2021
- Messages
- 3,202
- Points
- 588

Somehow, I got behind following this exceptional build. It is a treat to see at every stage and has a finished quality to be enjoyed at every stage, the workmanship being so exquisite and a joy to behold at any interval in its' construction. I look forward to being so impressed, and inspired as you progress. Well done. 
Pete

Pete
- Joined
- Dec 16, 2016
- Messages
- 1,192
- Points
- 493

Hi Peter, Thank you for your very kind remarks, I hope that you continue to enjoy the build.Somehow, I got behind following this exceptional build. It is a treat to see at every stage and has a finished quality to be enjoyed at every stage, the workmanship being so exquisite and a joy to behold at any interval in its' construction. I look forward to being so impressed, and inspired as you progress. Well done.
Pete
- Joined
- Dec 16, 2016
- Messages
- 1,192
- Points
- 493

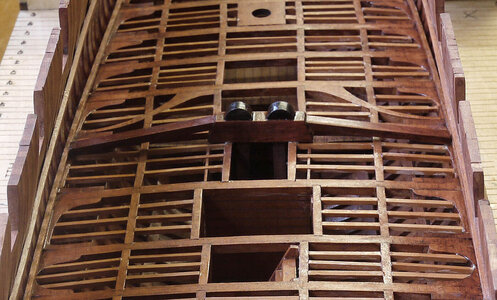
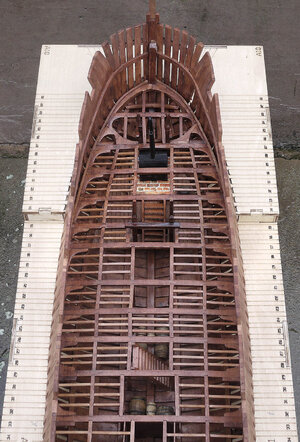
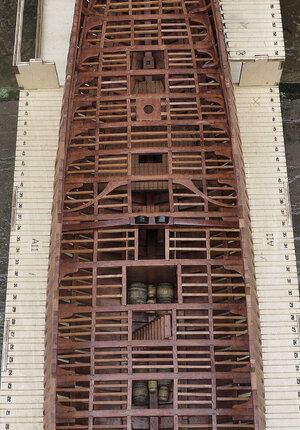
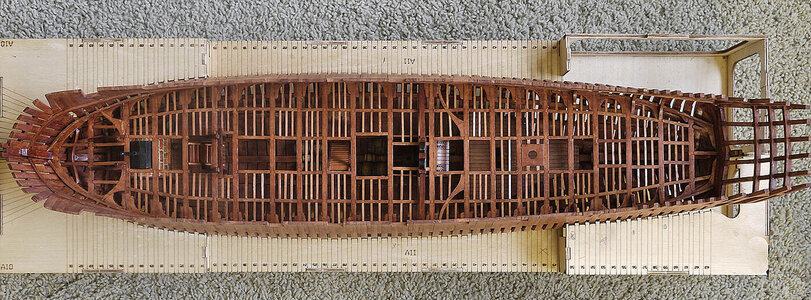
Hello and welcome, again thanks for visiting and for your likes. Dave it looks like you’ve joined the party, nice to have you along.
I have now fitted the riding bitts, made up and fitted the pump, tidied things up a bit and finished off with a coat of poly, I think it’s looking a bit better.
Next will be the upper deck. It’s not very often that you get a second chance knowing that you can improve on your first attempt, but this build gives me that opportunity so I’m determined not to waste it and I’m really looking forward to that challenge


- Joined
- Dec 16, 2016
- Messages
- 1,192
- Points
- 493

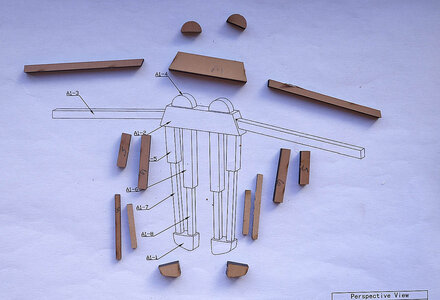
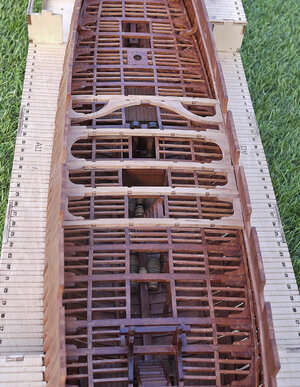
Hello and welcome once more. Today’s post is about what I learned making up the lower deck and how with hindsight I’m going to change the way I do things to bring about the desired improvement on the upper deck. My first mistake was when fitting the main beams I concentrated on getting a good fit to the ribs and not making sure that the slots for the longitude beams were perfectly in line first. This time my priority will be lining up the slots and then addressing the end fit, adding or sanding as needed to fit, hopefully avoiding the dogleg look of some of the beams which offended my eye.
I had great difficulty fitting the batons consistently even. Because of my hand issue I need to use tweezers to put them into place, using wood glue it took nearly a minute for them to get a good grab but I just couldn’t hold them steadily enough in place for that time and some ended up a bit skew then they were difficult to correct, just a few out of place spoiled the look so this time I’m going to use cyno. The issue with cyno is that it seems to get everywhere and once it gets onto wood it stains with no way back. To avoid issues, once all the beams are in place I’m going to stain, seal and varnish before fitting the batons, I’m going to do the same with the strip wood before cutting up the batons this way even if I get cyno where I don’t want, it won’t stain and can be wiped off, hopefully giving me a better surface finish than before. I’ve done a trial on a mock up and found that with a dab of cyno in place I can hold the baton steady for the few seconds that it takes to get sticky, because the varnished surface is shinny I found that it was then easy to slide the baton to its exact position before it fully sets. As I mentioned it’s good to get a second chance and I’m really looking forward to getting stuck in, it’s great to have a plan.
The photo shows the beginning of the deck.


 It's as though it never happened. Super results on your reconstruction Ken.