Good morning. I don’t get it, Arlene laughs at me as well but I have no shortcomingsLoved this. My wife laughs at my shortcomings as well - especially those that I create...
Framing looks very promising!
-

Win a Free Custom Engraved Brass Coin!!!
As a way to introduce our brass coins to the community, we will raffle off a free coin during the month of August. Follow link ABOVE for instructions for entering.
-

PRE-ORDER SHIPS IN SCALE TODAY!
The beloved Ships in Scale Magazine is back and charting a new course for 2026!
Discover new skills, new techniques, and new inspirations in every issue.
NOTE THAT OUR FIRST ISSUE WILL BE JAN/FEB 2026
You are using an out of date browser. It may not display this or other websites correctly.
You should upgrade or use an alternative browser.
You should upgrade or use an alternative browser.
HMS Blandford 1:48 POF Modelship Dockyard [COMPLETED BUILD]
- Joined
- Dec 16, 2016
- Messages
- 1,192
- Points
- 493

Good morning Grant, I can see that you are as humble as me, if only our wives could see that.Good morning. I don’t get it, Arlene laughs at me as well but I have no shortcomings……..Cheers Grant
- Joined
- Dec 16, 2016
- Messages
- 1,192
- Points
- 493

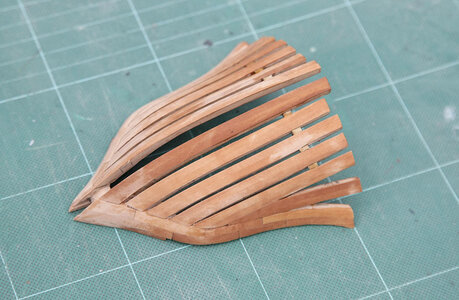
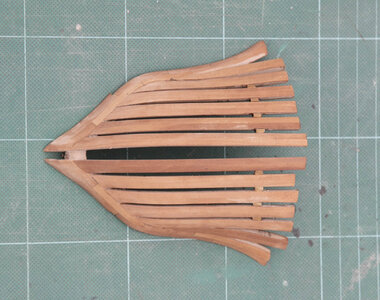
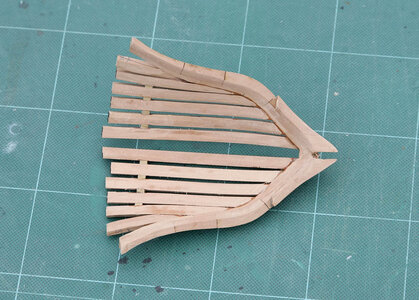
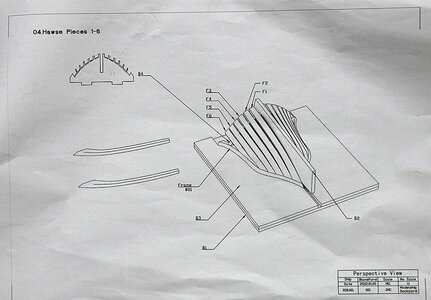
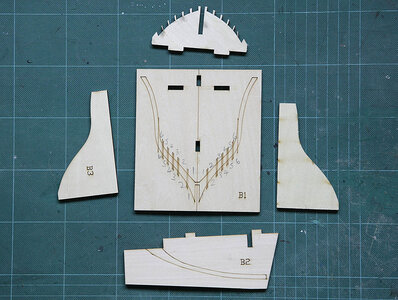
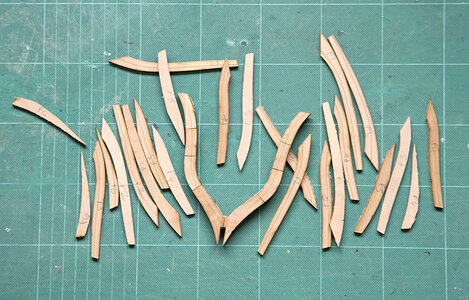
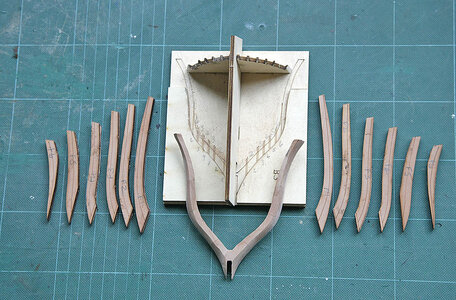
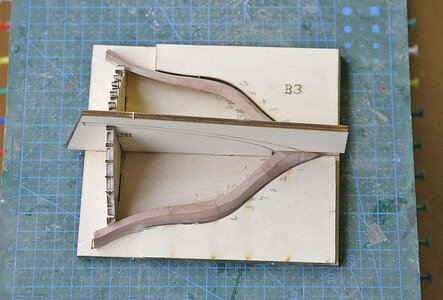
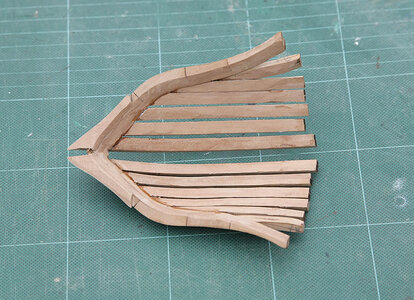
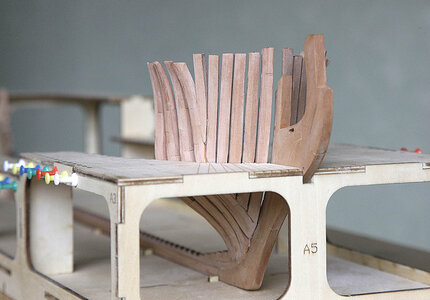
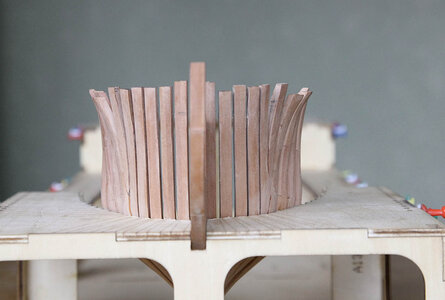
Hello and welcome, again thanks for your support, I’ve really needed needed it over the past few hair wrenching days. As I mentioned I was now going to make up the hawse timbers, these I believe can sometimes prove difficult to get right, in this case for me they were. First as you can see for a tricky part the instruction sheet is pretty inadequate, it just shows a finished part with no indication on how to get there. A jig was provided; this was quite good and made the way that it was to be made up more understandable. The first problem was that there are six timbers each side and these are each numbered, 1 – 6, on the pear sheets there were four pieces for each number, they were to be doubled up to make the timbers, each piece is exactly the same shape but every piece has different taper markings, left, right, inside and outer, they really needed to have been marked a b c d rather than leave you to try and guess which way round they are assembled as these markings dictate the shape needed, a tricky challenge.
Whilst scratching my head over this I knocked and broke off a rib grrr! I managed to replace a section and made a good repair that can’t be seen, so happiness restored. My inner peace must have been disturbed because a few minutes later my next mistake caused me great distress. I picked up the leading rib, the one that the hawse timbers mount onto and started to taper it; I was about half way through when I realised that I’d tapered it the wrong way round. The taper angle was quite acute so there was no way to correct it, I had to turn it around and use the rear of the rib as the front, the taper markings were obviously different so I had to make a guess as to the taper profiles for each side. The front should have been flat but was now stepped so this had to be removed and a new stepped piece made up for the rear, the step inside the bottom that fits the keel now needed re making, much of this was guesswork as until it was fitted I couldn’t know if it would all work out and line up correctly. The modelling gods must have been with me as the rib with timbers attached fitted pretty well, not 100% but looks okay, Nelson wouldn’t notice, but he’s was half blind. I’ve attached photos that I think show each stage of building the hawse timbers rather than describe how, as I’ve run out of words and need a cup of tea.
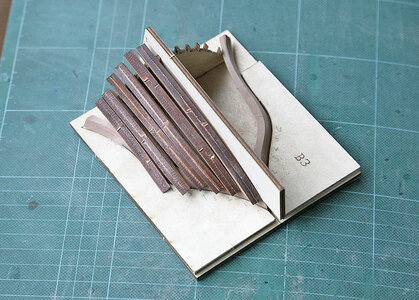
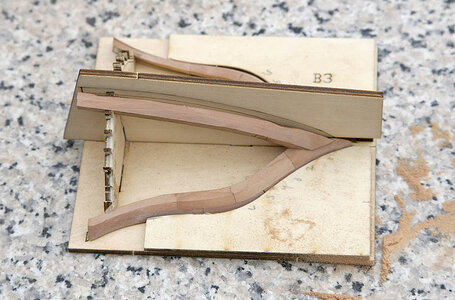
You'll notice the rain drops on this picture, I'm still banned from sanding in the house.
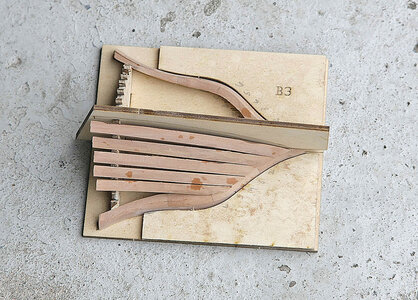
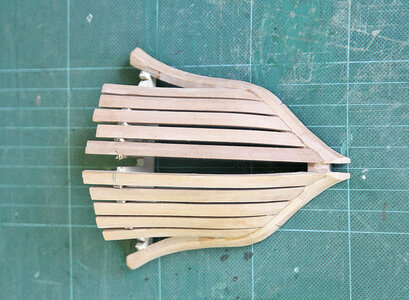
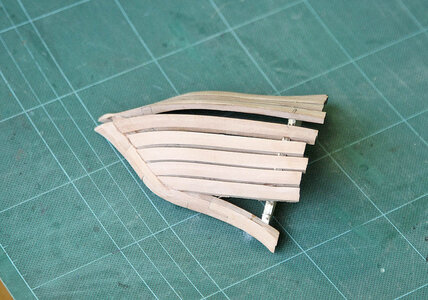
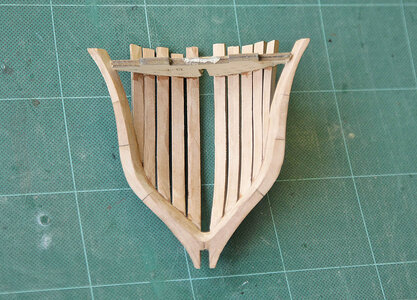
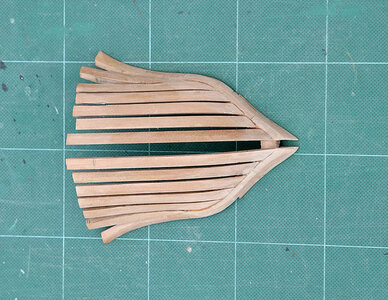
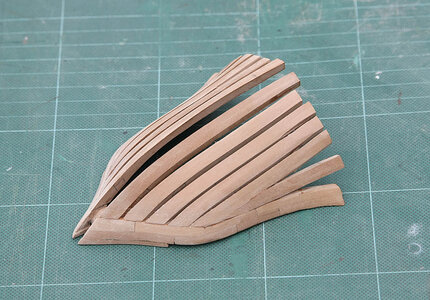
Whilst scratching my head over this I knocked and broke off a rib grrr! I managed to replace a section and made a good repair that can’t be seen, so happiness restored. My inner peace must have been disturbed because a few minutes later my next mistake caused me great distress. I picked up the leading rib, the one that the hawse timbers mount onto and started to taper it; I was about half way through when I realised that I’d tapered it the wrong way round. The taper angle was quite acute so there was no way to correct it, I had to turn it around and use the rear of the rib as the front, the taper markings were obviously different so I had to make a guess as to the taper profiles for each side. The front should have been flat but was now stepped so this had to be removed and a new stepped piece made up for the rear, the step inside the bottom that fits the keel now needed re making, much of this was guesswork as until it was fitted I couldn’t know if it would all work out and line up correctly. The modelling gods must have been with me as the rib with timbers attached fitted pretty well, not 100% but looks okay, Nelson wouldn’t notice, but he’s was half blind. I’ve attached photos that I think show each stage of building the hawse timbers rather than describe how, as I’ve run out of words and need a cup of tea.


You'll notice the rain drops on this picture, I'm still banned from sanding in the house.


Very good result !!!!
and many thanks for showing us the individual working steps - I think very informative step by step
Do you plan to install some distancers between the frames? So that they are fixed during the later sanding
and many thanks for showing us the individual working steps - I think very informative step by step
Do you plan to install some distancers between the frames? So that they are fixed during the later sanding
- Joined
- Dec 16, 2016
- Messages
- 1,192
- Points
- 493

Hi Ewe, Thanks for the thumbs up. Yes, spacers are supplied and will be fitted, hopefully they’ll hold all the ribs in-line KenVery good result !!!!
and many thanks for showing us the individual working steps - I think very informative step by step
Do you plan to install some distancers between the frames? So that they are fixed during the later sanding
- Joined
- Aug 14, 2018
- Messages
- 829
- Points
- 403

Hi Ken, I think it has been mentioned already, but be very careful with the frame spacers even if they are the correct thickness,(4mm if I remember right), the addition of adhesive to each spacer causes a growing error that even by half way can amount to a couple of millimetres. Also I found the hawse frames very fragile when assembled so I made some small spacers out of scrap and fixed them near the top. This made the whole assembly far more stable.Hi Ewe, Thanks for the thumbs up. Yes, spacers are supplied and will be fitted, hopefully they’ll hold all the ribs in-line Ken
Hope this helps. JJ..
WOW! That is a very impressive first attempt Ken. I think I spend several weeks trying to wrap my brain around this step and still ended up patching or remaking parts. That jig is brilliant - I could have used something like that!
- Joined
- Dec 16, 2016
- Messages
- 1,192
- Points
- 493

Hi Jack, Thanks for the tip. Your right about the fragile hawse timbers, I left the upper part of the jig attached as Long as possible for that reason, I think I’ll take your advice and brace them as I’m sure I’d break them if I didn’t. KenHi Ken, I think it has been mentioned already, but be very careful with the frame spacers even if they are the correct thickness,(4mm if I remember right), the addition of adhesive to each spacer causes a growing error that even by half way can amount to a couple of millimetres. Also I found the hawse frames very fragile when assembled so I made some small spacers out of scrap and fixed them near the top. This made the whole assembly far more stable.
Hope this helps. JJ..
- Joined
- Jan 10, 2022
- Messages
- 862
- Points
- 403

l used the gap between the ribs right at the point where they come out the jig. This should be the correct width and sand each one so that it just slides in. All need to be sanded slightly and check constantly the ribs are 90 degrees to the jigHi Ken, I think it has been mentioned already, but be very careful with the frame spacers even if they are the correct thickness,(4mm if I remember right), the addition of adhesive to each spacer causes a growing error that even by half way can amount to a couple of millimetres. Also I found the hawse frames very fragile when assembled so I made some small spacers out of scrap and fixed them near the top. This made the whole assembly far more stable.
Hope this helps. JJ..
I can only affirm what Keef has just posted. While I am building an entirely different model I did also place spacers between frames and you would be surprised how easy it is to force things out of alignment. The spacers have to either be passive or active in a way that IMPROVES alignment of frames.
- Joined
- Jan 10, 2022
- Messages
- 862
- Points
- 403

Hi Ken. Sorry to hear of your problems but it all seems to have worked out in the end. lt's been a long time since l did this and l remember it was quite trickyHello and welcome, again thanks for your support, I’ve really needed needed it over the past few hair wrenching days. As I mentioned I was now going to make up the hawse timbers, these I believe can sometimes prove difficult to get right, in this case for me they were. First as you can see for a tricky part the instruction sheet is pretty inadequate, it just shows a finished part with no indication on how to get there. A jig was provided; this was quite good and made the way that it was to be made up more understandable. The first problem was that there are six timbers each side and these are each numbered, 1 – 6, on the pear sheets there were four pieces for each number, they were to be doubled up to make the timbers, each piece is exactly the same shape but every piece has different taper markings, left, right, inside and outer, they really needed to have been marked a b c d rather than leave you to try and guess which way round they are assembled as these markings dictate the shape needed, a tricky challenge.
Whilst scratching my head over this I knocked and broke off a rib grrr! I managed to replace a section and made a good repair that can’t be seen, so happiness restored. My inner peace must have been disturbed because a few minutes later my next mistake caused me great distress. I picked up the leading rib, the one that the hawse timbers mount onto and started to taper it; I was about half way through when I realised that I’d tapered it the wrong way round. The taper angle was quite acute so there was no way to correct it, I had to turn it around and use the rear of the rib as the front, the taper markings were obviously different so I had to make a guess as to the taper profiles for each side. The front should have been flat but was now stepped so this had to be removed and a new stepped piece made up for the rear, the step inside the bottom that fits the keel now needed re making, much of this was guesswork as until it was fitted I couldn’t know if it would all work out and line up correctly. The modelling gods must have been with me as the rib with timbers attached fitted pretty well, not 100% but looks okay, Nelson wouldn’t notice, but he’s was half blind. I’ve attached photos that I think show each stage of building the hawse timbers rather than describe how, as I’ve run out of words and need a cup of tea.
View attachment 397248
View attachment 397249
View attachment 397250
View attachment 397251
View attachment 397252
View attachment 397253
View attachment 397254
You'll notice the rain drops on this picture, I'm still banned from sanding in the house.
View attachment 397255
View attachment 397256
View attachment 397257
View attachment 397258
View attachment 397259
View attachment 397260
View attachment 397261
View attachment 397262
View attachment 397263
- Joined
- Dec 16, 2016
- Messages
- 1,192
- Points
- 493

- Joined
- Dec 16, 2016
- Messages
- 1,192
- Points
- 493

Hi Keith, Thank goodness that you posted loads of photos of your go at this part, I poured over them all for quite a while, without these I think I’d still be trying to work it out. KenHi Ken. Sorry to hear of your problems but it all seems to have worked out in the end. lt's been a long time since l did this and l remember it was quite tricky
- Joined
- Jan 10, 2022
- Messages
- 862
- Points
- 403

I'm really pleased they helped. lt's looking great, so l think l may be right in saying that's the hard part over withHi Keith, Thank goodness that you posted loads of photos of your go at this part, I poured over them all for quite a while, without these I think I’d still be trying to work it out. Ken
Good evening Ken. An interesting and I’m sure frustrating journey (broken ribs etc) with a marvellous outcome. Cheers GrantHello again, Just a few pics, except for setting the heights of the timbers which I'll do much later, this is now the finished article, I added the fillers that Jack suggested and sanded it to death for a surface that I was happy with, now for me it's at 95% so I'm delighted.
View attachment 397283
View attachment 397284
View attachment 397285
- Joined
- Dec 16, 2016
- Messages
- 1,192
- Points
- 493

Hello and welcome again. Progress is being made and for the first time I think that I might eventually end up with a complete model of sorts, though I did have my doubts at times.
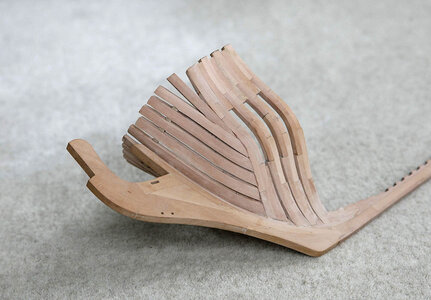
I’ve glued the hawse timber section to the keel along with the first three ribs so that I could fair them to shape, I also added the rib spacers to give it some rigidity whilst I sanded as without them the ribs just flexed. Although the hawse timbers with rib one initially looked good it was not the right shape and needed correcting. I previously mentioned that because of my mistake I had to guess the amount and shape of the taper, not wanting to overdo it I had ended up being too conservative, I hadn’t allowed for the concave part of the lower bow so now I had a good deal of sanding to do. I can’t believe just how much sanding it took, my fingers are raw, I think that this build is about 80% sanding, much more than I’d expected, but I think that the result is about ok. The rib fillers are about 2mm too low and will need correcting, a couple of the rib tops are a bit thin, hopefully the handrails will hide these, I also used a small amount of filler on a couple of the spacers, these will be hidden by the planking, so I think all is acceptable. I put the keel and bow section back into the jig where it will now reside for some time and was pleased to see that it conformed quite well to its shape so hopefully nothing will come back and bite me. I found this part of the build quite a challenge and a bit stressful, not what I had expected, I’m sure that I could do it much better if I were to build it again.
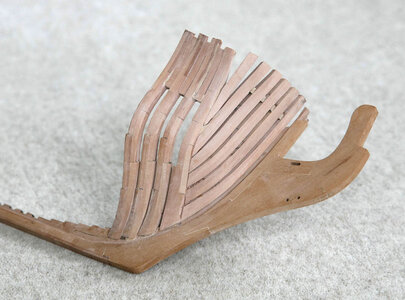
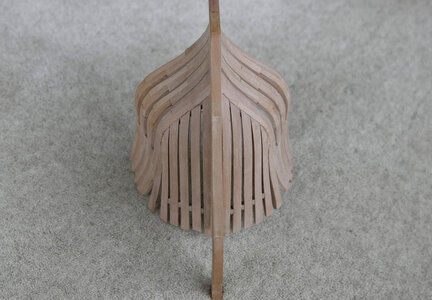
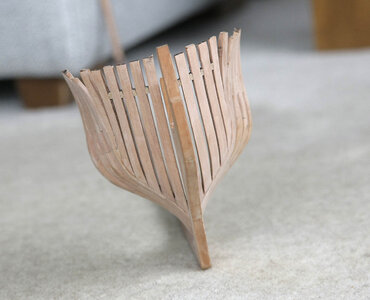
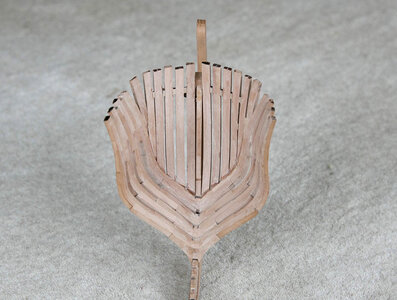
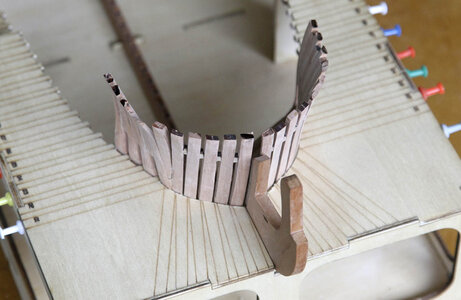
I’ve glued the hawse timber section to the keel along with the first three ribs so that I could fair them to shape, I also added the rib spacers to give it some rigidity whilst I sanded as without them the ribs just flexed. Although the hawse timbers with rib one initially looked good it was not the right shape and needed correcting. I previously mentioned that because of my mistake I had to guess the amount and shape of the taper, not wanting to overdo it I had ended up being too conservative, I hadn’t allowed for the concave part of the lower bow so now I had a good deal of sanding to do. I can’t believe just how much sanding it took, my fingers are raw, I think that this build is about 80% sanding, much more than I’d expected, but I think that the result is about ok. The rib fillers are about 2mm too low and will need correcting, a couple of the rib tops are a bit thin, hopefully the handrails will hide these, I also used a small amount of filler on a couple of the spacers, these will be hidden by the planking, so I think all is acceptable. I put the keel and bow section back into the jig where it will now reside for some time and was pleased to see that it conformed quite well to its shape so hopefully nothing will come back and bite me. I found this part of the build quite a challenge and a bit stressful, not what I had expected, I’m sure that I could do it much better if I were to build it again.


- Joined
- Dec 16, 2016
- Messages
- 1,192
- Points
- 493

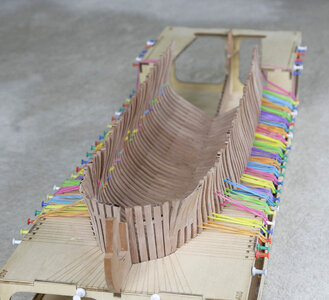
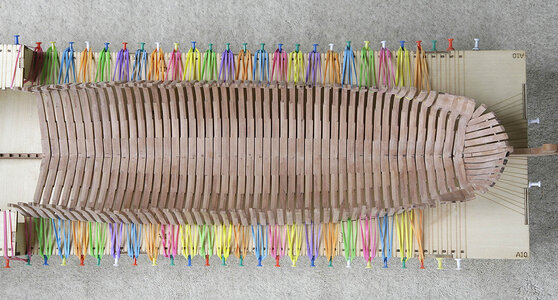
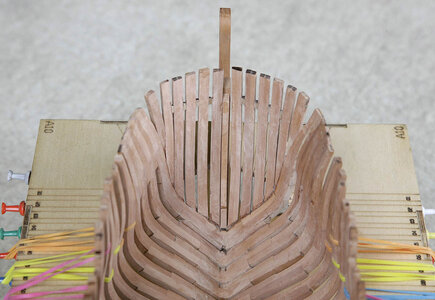
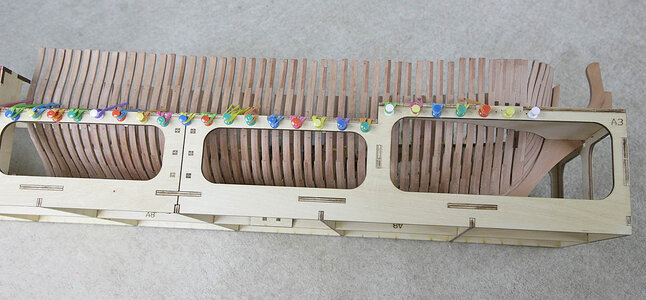
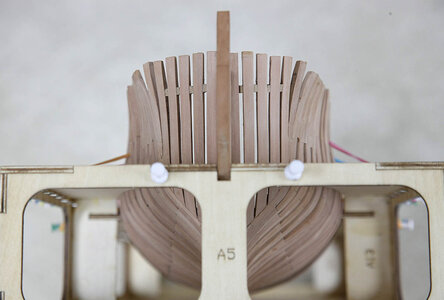
Hello, Thanks for dropping by and of course for all your likes. Now I’m really smoking the good stuff, the build is progressing rapidly and without issues. I managed to raise the rib fillers to their correct height just using small inserts which blend in well and can hardly be noticed and with a final tweak the bow is now done as good as I’m going to get it. I’ve completed another ten ribs which along with all the others are now glued to the keel and I’m pleased to say everything appears to line up nicely. After a first attempt at this type of build I’m saying to myself I wish that I could do that part again because I know that I could do better, but you only get one chance at it, you do your best then have to live with it.
This will be my last post for a few weeks as we’re going on holiday, Mrs Ken thinks that she deserves some time in the sun, who am I to deny her.
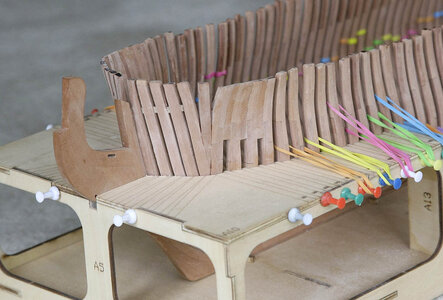
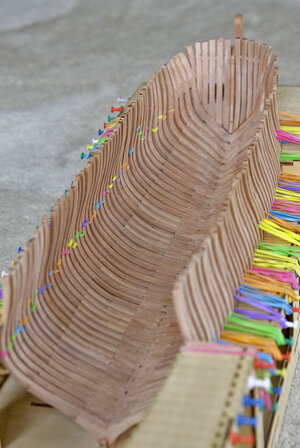
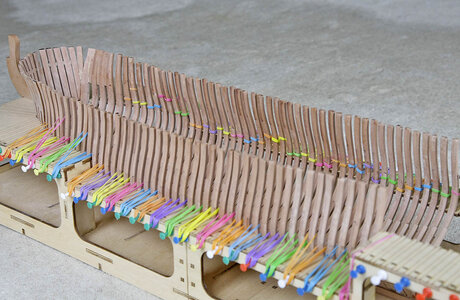
Blandford wants to come on holiday too
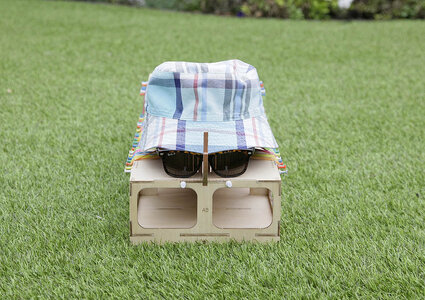
This will be my last post for a few weeks as we’re going on holiday, Mrs Ken thinks that she deserves some time in the sun, who am I to deny her.


Blandford wants to come on holiday too

Last edited:
- Joined
- Apr 20, 2020
- Messages
- 6,255
- Points
- 738

great progress, your explanation with the pictures are very helpfulHello, Thanks for dropping by and of course for all your likes. Now I’m really smoking the good stuff, the build is progressing rapidly and without issues. I managed to raise the rib fillers to their correct height just using small inserts which blend in well and can hardly be noticed and with a final tweak the bow is now done as good as I’m going to get it. I’ve completed another ten ribs which along with all the others are now glued to the keel and I’m pleased to say everything appears to line up nicely. After a first attempt at this type of build I’m saying to myself I wish that I could do that part again because I know that I could do better, but you only get one chance at it, you do your best then have to live with it.
This will be my last post for a few weeks as we’re going on holiday, Mrs Ken thinks that she deserves some time in the sun, who am I to deny her.
View attachment 398075
View attachment 398076
View attachment 398077
View attachment 398078
View attachment 398079
View attachment 398080
View attachment 398081
View attachment 398082
Blandford wants to come on holiday to
View attachment 398083
Have a wonderful vacation Ken!
Enjoy your vacation, Ken. For sure Blandford will wait!Hello, Thanks for dropping by and of course for all your likes. Now I’m really smoking the good stuff, the build is progressing rapidly and without issues. I managed to raise the rib fillers to their correct height just using small inserts which blend in well and can hardly be noticed and with a final tweak the bow is now done as good as I’m going to get it. I’ve completed another ten ribs which along with all the others are now glued to the keel and I’m pleased to say everything appears to line up nicely. After a first attempt at this type of build I’m saying to myself I wish that I could do that part again because I know that I could do better, but you only get one chance at it, you do your best then have to live with it.
This will be my last post for a few weeks as we’re going on holiday, Mrs Ken thinks that she deserves some time in the sun, who am I to deny her.
View attachment 398075
View attachment 398076
View attachment 398077
View attachment 398078
View attachment 398079
View attachment 398080
View attachment 398081
View attachment 398082
Blandford wants to come on holiday too
View attachment 398083
Regards, Peter

