-

Win a Free Custom Engraved Brass Coin!!!
As a way to introduce our brass coins to the community, we will raffle off a free coin during the month of August. Follow link ABOVE for instructions for entering.
-

PRE-ORDER SHIPS IN SCALE TODAY!
The beloved Ships in Scale Magazine is back and charting a new course for 2026!
Discover new skills, new techniques, and new inspirations in every issue.
NOTE THAT OUR FIRST ISSUE WILL BE JAN/FEB 2026
You are using an out of date browser. It may not display this or other websites correctly.
You should upgrade or use an alternative browser.
You should upgrade or use an alternative browser.
- Joined
- Jul 24, 2016
- Messages
- 540
- Points
- 188

think i have boobed AGAIN did you stain each of the frames before you assembled the framesI thinks so too. Two coats make for a richer colour and gives it a very slight sheen (not too much) which l like very much. btw is the 1954 in your title your date of birth. lf so, you and l are the same age.(17th July, 1954)
Guess you must have done !!}~}
Lovely work Keef. She's really a work of art!
I agree with Doctor Kattner, She is getting dressed and will be an awesome model! Very good work. Ken!
- Joined
- Jan 10, 2022
- Messages
- 860
- Points
- 403

NO. The frames cannot be stained until they are completely finished and the hull taken out of the cradle as they have to be fine sanded to finish. I have not used a stain, this is a clourless wood preservative as l have mentioned earlier in my logthink i have boobed AGAIN did you stain each of the frames before you assembled the frames
Guess you must have done !!}~}
Last edited:
Hi Frank, there are plenty of frames before and aft. It is a ceiling plank, as said no caulking.Sorry Maarten, if there's nothing underneath, how do they nail? (Fixing)
See below ceiling planks on the replica of Willem Barentz ship.
See a ceiling plank joint on the edge of a frame.
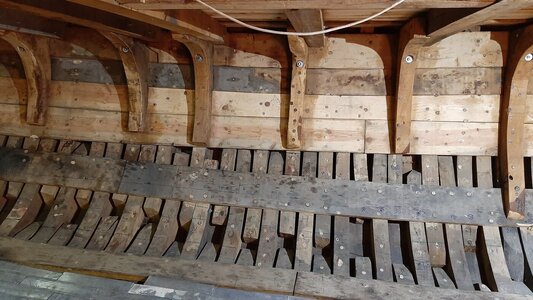
Reality is not allways so correct as we think with our 21st century engineering mind.
- Joined
- Jul 24, 2016
- Messages
- 540
- Points
- 188

think i have boobed AGAIN did you stain each of the frames before you assembled the framesI thinks so too. Two coats make for a richer colour and gives it a very slight sheen (not too much) which l like very much. btw is the 1954 in your title your date of birth. lf so, you and l are the same age.(17th July, 1954)
Guess you must have done !!}~}
group build sound goodIt didn’t seem like it would add anything to the high quality build logs in progress (and to come).
Upon further reflection I’ve decided to go ahead anyway .
I think I’d like to do a commentary of the kit, build challenges and knuckle head things I’ve done.
Are we considering a group build section?
- Joined
- Jul 24, 2016
- Messages
- 540
- Points
- 188

similar problems to ou on riggingThank you Jimsky for your comments. l am now 6 weeks into this project and, yes you’re right, it is a good idea to discuss this kit as well as just showing the progress of the build. I have built a few wooden ship kits over the past 40 odd years but this is my first attempt at a POF kit and as for my opinion on the difficulty level, I myself have not found it too hard so far, although this is undoubtedly being down to the quality of the materials and the accuracy of the laser cut parts. Having said that, l would not recommend attempting this kit without at least some experience of building a wooden ship kit. Not just because of the basic woodworking skills needed, but because of the lack of actual written instructions, a knowledge of some of the building procedures of a wooden ship kit is needed. This is quite a general statement as there are many levels of skill and abilities.
There are many reasons leading to a modeller’s choice of a kit and this is mine. l did not want to mention this but it is quite relevant to the subject. 5 years ago l had a major stroke, which for 2 months left me completely paralysed on my left side. Slowly over these following years since, l have gained enough movement to be able to continue with this hobby which l love, having maybe 75 to 80% use of my left hand. I was able to go as far as finishing the standing rigging on the build l was working on but was struggling with tying the knots and small blocks. I saw the posts in SOS of the Blandford kit. It looked perfect and because of the relatively large scale and the fact it is all woodwork and no rigging, l decided this was my ideal next build and certainly have no regrets. Congratulations to Victor and his team at Modelship Dockyard on producing this great kit
I cant stand still for long need to sit down and therefore cant continue with my Victory
- Joined
- Oct 17, 2020
- Messages
- 1,691
- Points
- 488

Hi Maarten, I didn't doubt what you mentionedHi Frank, there are plenty of frames before and aft. It is a ceiling plank, as said no caulking.
See below ceiling planks on the replica of Willem Barentz ship.
See a ceiling plank joint on the edge of a frame.
View attachment 331567
Reality is not allways so correct as we think with our 21st century engineering mind.
- Joined
- Jul 24, 2016
- Messages
- 540
- Points
- 188

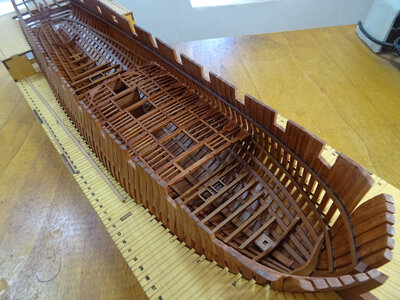
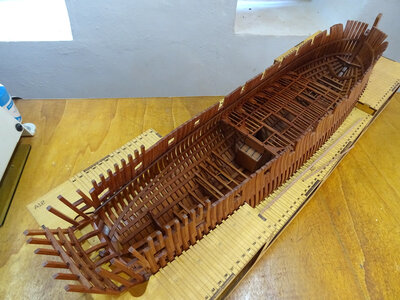
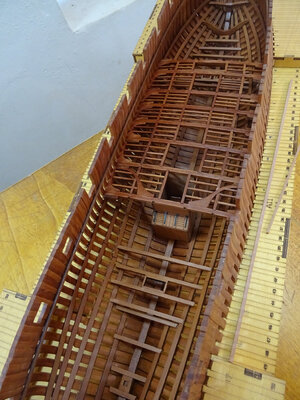
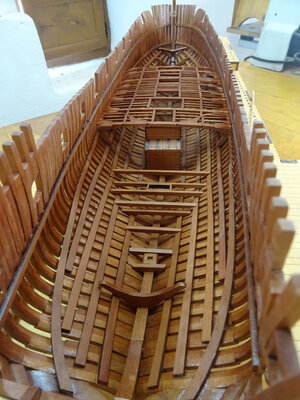
how did you work out "the correct height"Ribs trimmed to their correct heights and spacers placed between to bring them into line. That's the frames just about complete apart from marking and cutting out the gun ports. The instructions show this to be the last step in the construction of the hull frames, so my next step will be to take the whole assembly out of the cradle to add the transom timbers. Then it will be ready for its final sanding and 2 coats of the wood finish that l mentioned earlier.
View attachment 321158
View attachment 321159
View attachment 321160
View attachment 321161
View attachment 321162
View attachment 321163
View attachment 321164
View attachment 321165
- Joined
- Jul 24, 2016
- Messages
- 540
- Points
- 188

looking great the wood colour is greatIt's like just about any POF-build is balm to sore eyes. Your build is no exception.
looks like you applied the finish after you completed most of the work on the outer hull - few thought id messed up
Just a point on a ship they are guns not canons canons have large wheels for land use
Guns are on a ship - hence the term 20 Gun Ship
- Joined
- Jul 24, 2016
- Messages
- 540
- Points
- 188

on a full size ship the thick stuff is bolted or nailed to the side i wonder if we could do the same might make it easier ?Thank you very much Herman. Really glad you like it
Thank you Jimsky . That's great!
View attachment 328210
View attachment 328211
View attachment 328212
View attachment 328213
- Joined
- Jan 10, 2022
- Messages
- 860
- Points
- 403

As l said yesterday, all the measurements you need can be taken from the scale drawings of the hull. Take the measurement of each frame from the bottom of the keel. Each of the platform steps of the jig is an exact mm measure. Use that as a guide and use dividers to mark the frames at their correct heighthow did you work out "the correct height"
- Joined
- Jul 24, 2016
- Messages
- 540
- Points
- 188

Question pleaseThe transom pieces are now in place. Final sanding and application of wood finish next.
View attachment 322575
View attachment 322576
View attachment 322577
View attachment 322578
View attachment 322579
How did you judge where those transon pieces fit as there is no plan of the stern from the stern
- Joined
- Jul 24, 2016
- Messages
- 540
- Points
- 188

my digital vernier collapsed today (it is about 20 years old 1 10 22
Went to Lidl for some milk and Bread and the In The Middle of Lidl" was a set of Digital metal Verniers 10.00ukp
whew
Went to Lidl for some milk and Bread and the In The Middle of Lidl" was a set of Digital metal Verniers 10.00ukp
whew
- Joined
- Jul 24, 2016
- Messages
- 540
- Points
- 188

if we look at the actual ship these planks are bolted to the hull - i wonder if that would work -Deck clamps fitted and inner strakes in the process of fitting. 3 1/2 weeks work but not a lot to show for it. l had to improvise as l don't have clamps deep enough to reach the lower planks and as you can see the curves are pretty tight so the timbers have to be held securely while the glue dries. l came up with this idea using hair clips, bent to fit and it works surprisingly well
- Joined
- Jul 24, 2016
- Messages
- 540
- Points
- 188

sorry to keef he has put spacers under the frames SORRYKeef's frames look perfect to me. JJ.
- Joined
- Aug 14, 2018
- Messages
- 825
- Points
- 403

Hello Richard, Can you explain what you mean by spacers below the frames?sorry to keef he has put spacers under the frames SORRY
- Joined
- Jul 24, 2016
- Messages
- 540
- Points
- 188

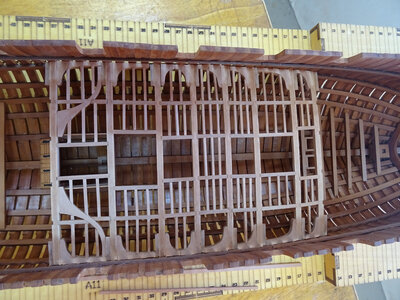
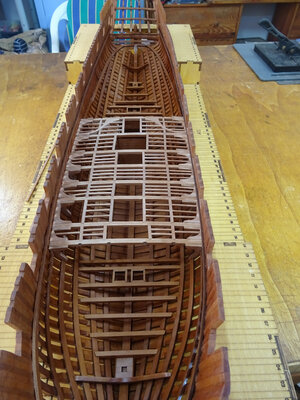
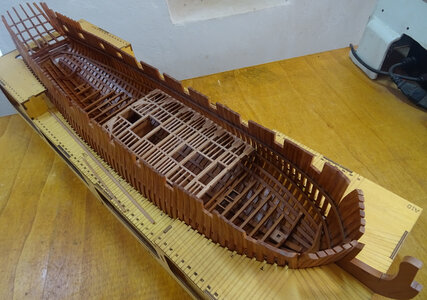
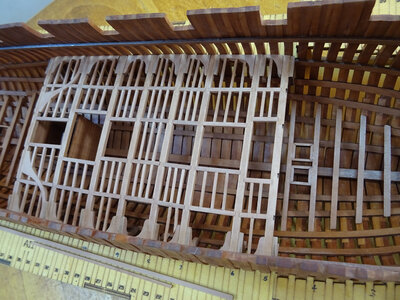
I can only admire the incredible cleanliness of your workSome more progress with the lower deck beams with just a few smaller cross beams needed to finish this section. The part that l have done is painted with the wood sealer so as to get an idea of the finished result. Very nice l think.
View attachment 331527
View attachment 331528
View attachment 331529
View attachment 331530
View attachment 331531
View attachment 331532
View attachment 331533
View attachment 331534
- Joined
- Jul 24, 2016
- Messages
- 540
- Points
- 188

when you build the frames other than no 1 & 63 the lower frames are thicker than the higher onesHello Richard, Can you explain what you mean by spacers below the frames?
the lowest rib which goes across the frames is 5mm the next 2 on either side are 4mm and the top 6 are 3mm
so you need a 1 mm spacer UNDER the frame to progressivly build each frame
Keef has done this but i dont think it was obvious if you are following his incredible build
I am making cook after cook up as i go along

