HMS Diana by Caldercraft

But, Won't these ropes be an obstacle to hoisting the Mizzen Staysail?
Sorry for the late reply. You make an excellent point! Sorry, I cannot be of any help as I am now very confused. I just did some digging and found the below photo of a 38 gun ship of 1805. There appears to be no wooldings on the mizzen. Then again it does not seem to show wooldings on any lower mast. I have no idea if the staysail even had rings rather than just being secured at the throat and tack like some other gaff rigged sails.
1740747546408.png
 
I followed with the biggest interest this discussion.
However the kit only mentions natural hemp thread, and no black colored thread was included for the gratings.
The instruction book clearly states that they have done extensive research and they recommend following their instructions closely?
Now I have so much respect for you that I dare not join in the debate.
What should I use now? Black or the Hemp?

Something similar I have come across with the Woolding of the Mizzen mast. No scale model of the period when the Diana was built has Woulding/Mizzen mast. Here I decided not to apply one.

View attachment 503747
Hello , each modeler is master of what he likes to do most but , the real choice is hemp for all “runners.Frank
 
Hello , each modeler is master of what he likes to do most but , the real choice is hemp for all “runners.Frank
Thx Frank,

So I will use for the runners the natural hemp, as provided in the Kit.
PS
I try to approach reality as close as possible. So I find that discussion super important and I learn a lot again.Of course I am a Master of my model but I don't want to make a "carnaval" of the Diana...

Cheers

Marc
 
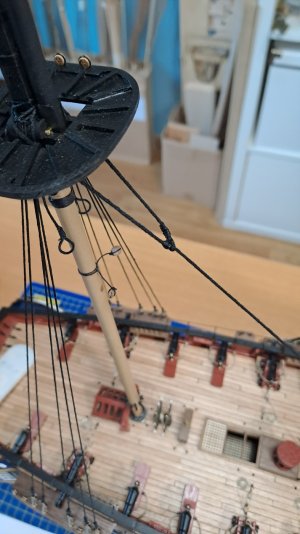
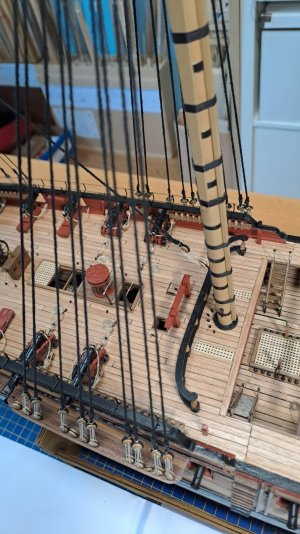
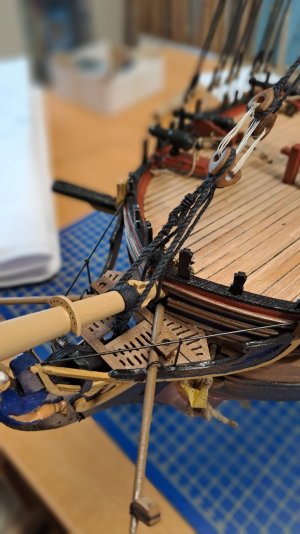
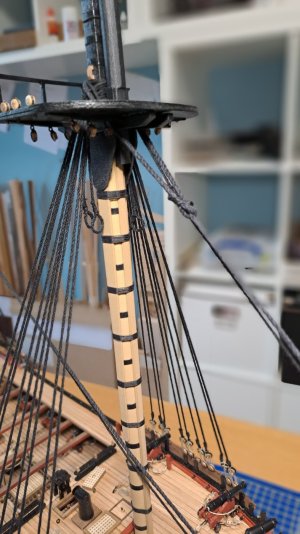
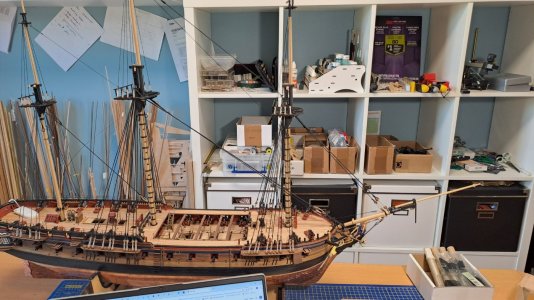
A small update:
It is slowly progressing. I am trying to apply the rigging as faithfully as possible. I am doing a lot of research and am fortunate that I have (finally) received the correct reference book from Frank.

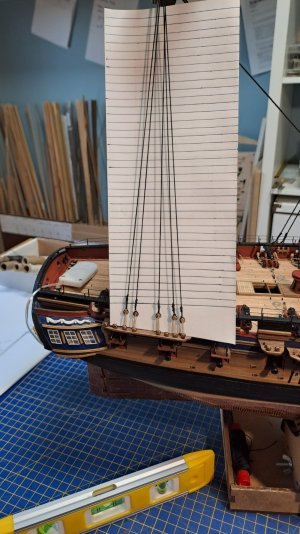
Before starting with the ratlines I chose to first apply the Stays. This is because of the accessibility of the masts, i.e. you can work nicer...
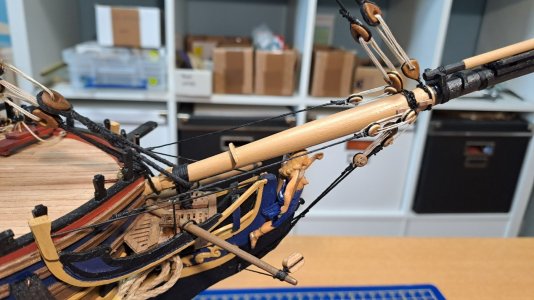
At the moment I have wired the bowprit: the bobstays and now the Maringale.
And now a confession:
there has been a very interesting discussion about whether or not to tar the shrouds and ratlines. The kit provides Natural Hemp (0.25 mm) for the ratlines. However, in the accompanying text it is clearly stated that the Ratlines should be colored with black ink. So indeed black!
I had overlooked this.
In the meantime I ordered black rigging cord of 0.25 mm (Mantua).
excellent quality but too stiff which makes it difficult to make the knots. Today I ordered another cord and have to wait a few days before finally starting on the ratlines.
Cheers

Marc

Diana921.jpg

Diana923.jpg

Diana924.jpg

Diana925.jpg
 
A small update:
It is slowly progressing. I am trying to apply the rigging as faithfully as possible. I am doing a lot of research and am fortunate that I have (finally) received the correct reference book from Frank.

Before starting with the ratlines I chose to first apply the Stays. This is because of the accessibility of the masts, i.e. you can work nicer...
At the moment I have wired the bowprit: the bobstays and now the Maringale.
And now a confession:
there has been a very interesting discussion about whether or not to tar the shrouds and ratlines. The kit provides Natural Hemp (0.25 mm) for the ratlines. However, in the accompanying text it is clearly stated that the Ratlines should be colored with black ink. So indeed black!
I had overlooked this.
In the meantime I ordered black rigging cord of 0.25 mm (Mantua).
excellent quality but too stiff which makes it difficult to make the knots. Today I ordered another cord and have to wait a few days before finally starting on the ratlines.
Cheers

Marc

View attachment 505060

View attachment 505061

View attachment 505062

View attachment 505063
Good morning Marc. The rigging is looking great. Enjoy the ratlines….only a gazillion clove hitches to tieo_O. Cheers Grant
 
Yeah, I don't feel like it
Well maybe a better morning after your cup of coffee, tea, or what gets you going, but after a dozen rows of ratlines, you will "defiantly be feeling it".

When I was doing ratlines on my cross section (only one mast) I would get a dozen or so rows a day, and have to take time on other projects or tasks to give eyes, fingers and arms a rest.
Thanks for giving me some courage...pfffffff
ROTF ;)

Cheers

Marc
 
WELL DONE! Great to see you using David White's book as a primary information source. His research is a great benefit including his reference to the contract information.
Allan
 
One of the best things about this site is that we can all ask questions and know we will get sincere responses. No one person can do all the research that has been done by the whole of this group over the years so we all can benefit from others' work.
Allan
 
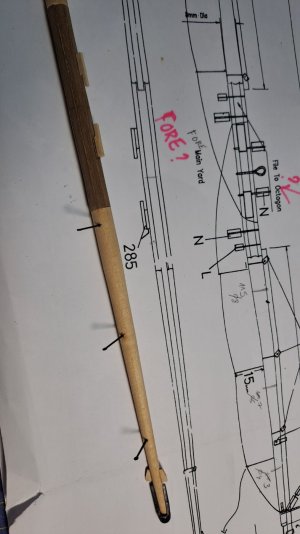
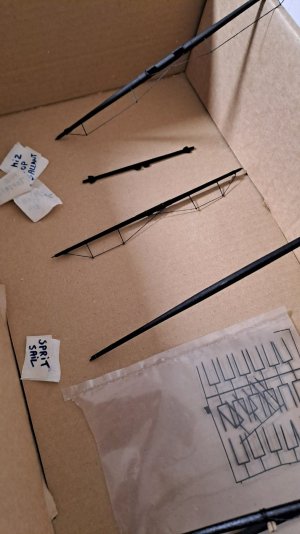
The footropes crossed each near the center of the yard after 1760 like you show them, well done. :) Do the kit instructions call for metal rods for the stirrups instead of rope? Never saw this before, thus my question. If you go with rope like on the ship the stirrups were a little under 25mm (0.4mm at 1:64) in diameter that hung down three feet (14mm at 1:64 scale) and secured with three round turns and then nailed to the yard. For models, a little glue is all that is really needed, no tiny nail. If rope is used, it tends to bend but after the stirrups and foot rope are rigged together wetting the stirrups with diluted white glue or matte medium and adding a little piece of weight to pull it down until the glue or medium dries works very nicely. Just a thought....
Allan
1741632112018.png
 
The footropes crossed each near the center of the yard after 1760 like you show them, well done. :) Do the kit instructions call for metal rods for the stirrups instead of rope? Never saw this before, thus my question. If you go with rope like on the ship the stirrups were a little under 25mm (0.4mm at 1:64) in diameter that hung down three feet (14mm at 1:64 scale) and secured with three round turns and then nailed to the yard. For models, a little glue is all that is really needed, no tiny nail. If rope is used, it tends to bend but after the stirrups and foot rope are rigged together wetting the stirrups with diluted white glue or matte medium and adding a little piece of weight to pull it down until the glue or medium dries works very nicely. Just a thought....
Allan
View attachment 506232
Hi Allan. Many kits use a metal stirrup. While it is not 100% accurate it is much easier and often better visually as the weight of the scale ropes makes it difficult to set nicely even with using the PVA glue trick you mentioned. e.g. Mantua used the metal stirrups on my Victory and Billings for the Bounty. Cheers Grant
 
Hello Allan,
I completely agree with Grant. In fact I was just going to write the same thing. They (brass stirrups) are of the brand Amati and coincidentally the same length as prescribed on the drawings.
 
They (brass stirrups) are of the brand Amati and coincidentally the same length as prescribed on the drawings.
Thanks guys, I get it, it was just something I had never seen before. Out of curiosity, what is the length?
Thanks again.
Allan
 
Back
Top