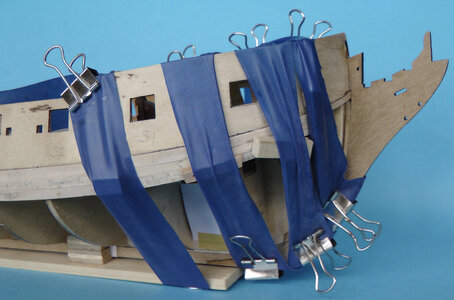
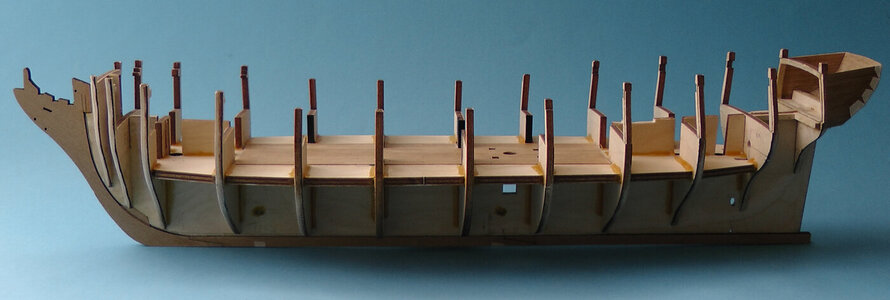
HMS Fly 1:64 - Amati/Victory Models by CaptainsCabin

The vertical fins on the side of the capstan shaft were called whelps. The pawls prevented the capstan from turning backwards (like the pawls on a clock winding gear). They would be arranged aroumd the base of the capstan and are not included on this model.

Thank you for the nice detailing of its construction.

Fair winds...
Fair winds .....

Thank you for the information regarding the vertical fins; always learning something new!

Lloyd
 
Last edited:

Master and Commander - The Far Side of the World​

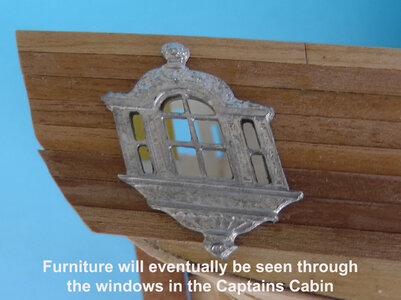
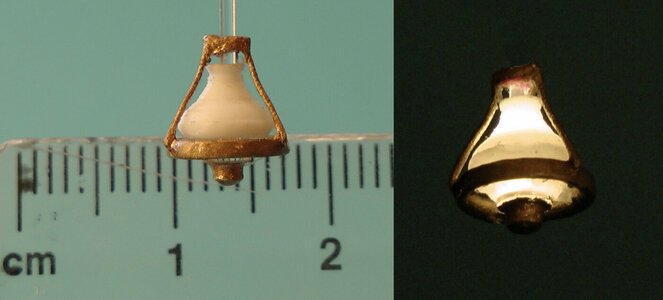
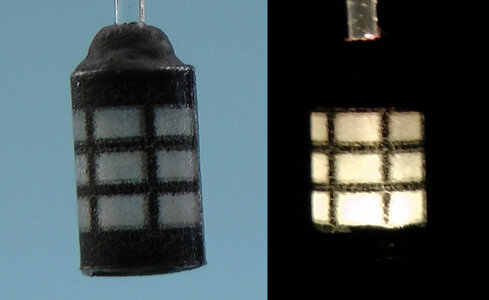
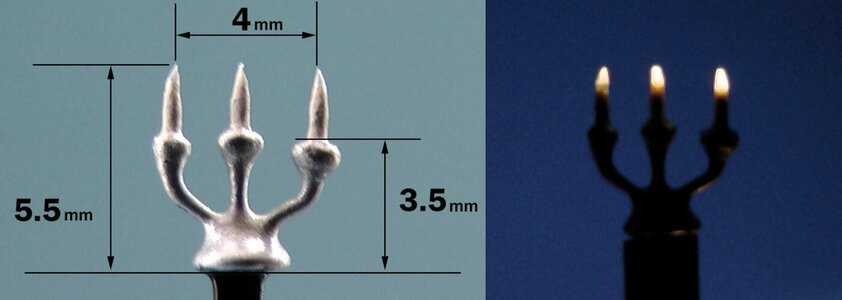
During my HMS Fly build, I have endeavored to include as much detail as is realistically achievable. When doing research at the National Maritime Museum, Greenwich it was recommended I watch the film “MASTER and COMMANDER – The Far Side of the World”, as a reference for my build. As a result of this, I included a Lantern above the Captain's Table, two candle lanterns, and a three-candle stand which will all be in The Great Cabin.

These were quite a challenge to make, as they had to be 1:64 scale and able to be lit. The lightening of the items was resolved using Fibre Optic Cable, but the construction of them required a little more thought and is explained in the attached documents.

65 - Oil Lantern.jpg66 - Candle Lantern.jpg67 - Three Candle Stand.jpg


Attachments

  • 62 - Lantern Above Captain's Table.pdf
    606.3 KB · Views: 17
  • 63 - Candle Lantern.pdf
    1.1 MB · Views: 16
  • 64 - Candle Stand.pdf
    2.9 MB · Views: 8

First Planking incorporating Fibre Optic Cables and Cannon Carriages​


Incorporating Fibre Optic Cables and my non-traditional method of securing the Cannon Carriages into the model has meant the traditional sequence of construction has had to be modified.

I have divided the next stage of my build into ten different steps, with the first three now complete; these I have attached and are self-explanatory.

For many model makers the first hull planking is a challenge, and this was the same for me. Whilst I have researched much of what is available on the Internet, I have only explained my approach to the first planking of HMS Fly as a novice, and currently, I have only completed the first three plank rows port and starboard below the Gun Port Patterns. The reason why only three rows have been completed is explained in the attached notes.

69 - Figure AU80.jpg
 

Attachments

  • 70 - Hull Planking and Fibre Optics 1-3.pdf
    6 MB · Views: 65

Start of 2nd Planking & 'row-ports'​


This is the first time I have attempted 2nd planking, and did not realise it would be quite so involved. As a beginner, I have made mistakes, but hopefully, they have been identified, corrected, and written about. Doing this I hope will make it easier for other first time ‘model planners!

To try and make these notes easier to understand they have been broken down into six sections: -

Section A – Planking of Stern Counter Pattern –Page 6
Section B– First planking run – Page 10
Section C
– Planking runs above first planking run – Page 27
Section D – Preparation for creating ‘rabbet’ for 2nd planking – Page 37
Section E – Discussing the fitting of Cabin Partitions – Page 46
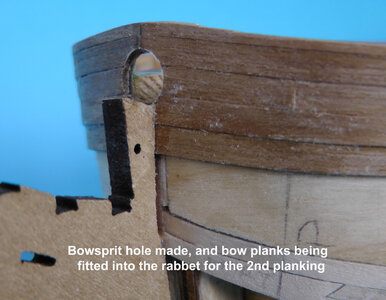
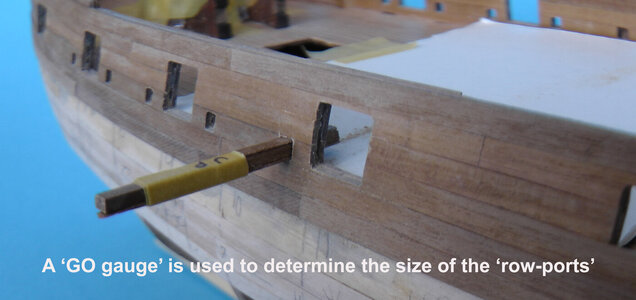
Section F – Five planking runs below first planking run, preparation of Bowsprit Hole, Gun Port openings and row-ports – Page 47

In Section F, there are six small square openings on either side of the Gun Port openings on the main gundeck, both port, and starboard. It was not known what these were for, but research discovered they were called ‘row-ports.’ Note 1

Note 1: -
Row-ports are for the oars (sweeps) that would be deployed in light or no wind. The ships were designed to cope with the inconsistent airs of the Mediterranean in this respect, as it saved deploying the boats to tow the ship behind (‘Correspondence with Historic Photographs & Ships Section, National Maritime Museum’, May 2022)

There are 125 photographs so there is much to see; several are shown below which may be of interest to members.
71 - Figure AW102.jpg71 - Figure AW123.jpg71 - Figure AW125.jpg
 

Attachments

  • 31 - Hull Planking and Fibre Optics Step 4 of 10.pdf
    8 MB · Views: 78
dear Lloyd Matthews alias @CaptainsCabin
what a great and detailed working log in your attachment
It is showing very much, that you are on a very good way - with very good result
 
BELATED START TO THIS BUILD LOG!

This build log had a rather chaotic start several days ago; I joined SOS in June 2021 and started posting articles I had written on HMS Fly to the ‘Super Detailing Static Models’ forum. They were chosen on the basis of what I thought would be of interest in detail and not according to the sequence of my build. Donald and Zoltan kindly merged all my posts into this build log for which I thank them.

I will now attempt to bring some order to this log and start with the "Preparing of the Hull" which is attached below. This was done with the stern being modified, and having had no experience of what I was doing way back in 2013!!.

G44.jpg
 

Attachments

  • 06 - Preparing the Hull.pdf
    2.3 MB · Views: 15
So glad you’ve started your log. This way I can find the build info online using SOS. Great job
I am now 'vaguely' finding my way around Will! I will now start posting what I have written, but if there is anything I can send in the meantime to help, please do let me know - Lloyd
 

Forecastle Bulkhead​


Whenever it is practical, features of the original HMS Fly are incorporated into my build. For references I use a copy of the Admiralty Plans dated Friday, 27th September 1776 for HMS Fly. The Forecastle Bulkhead constructed is shown; click for a video of the doors opening and closing (19 seconds). The two four pane windows for the bulkhead were made from Pt. No 262 grating as shown, from the kit. How the bulkhead was built is in the attached ‘Forecastle Bulkhead.pdf’


View attachment 241632View attachment 241633
Just.browse red through the bulkhead description and the window frames are great. I might borrow your method for my next endiver
 
Just.browse red through the bulkhead description and the window frames are great. I might borrow your method for my next endiver
Yes, the use of the gratings as a material is very useful. Tomorrow Will, I will send you a link for how I made the partitions for the stern cabins - Lloyd
 
Just.browse red through the bulkhead description and the window frames are great. I might borrow your method for my next endiver
Will, I was going to post these two topics during the sequence of my build log, but perhaps they may be of interest to yourself now considering you were looking at the Forecastle Bulkhead. You may get some ideas - Lloyd

(Click Links)

Making of Stateroom, Coach and Great Cabin Partitions

Fixing of Stateroom, Coach and Great Cabin Partitions
 
Back
Top