HMS Fly Build (Amati) 1:64 by Nomad

Hi,

The ship is coming along very nicely. Interesting discussion on the bending of ply laminates. After some experiments I found the best and safest way is to just use a hair dryer with medium/hot setting depending on how thick the ply is (thin ply only needs medium heat) fitted with a narrow nozel without any wetting. Just fix one end with clamps and then gently warm the ply and bending it with a little pressure by hand running the hair dryer along the bit that you want to bend. The resin will soften and you can form the laminate with no risk of scorching or the laminates coming apart (if the hair dryer has a cold air button you can just blow some cold air over it and it will fix to shape in seconds). works a treat.

If you didn't see the little cutting/drilling/grinding pen that I mentioned in my log, I can really recommend this little tool. I have more or less been using it for everything since I bought it - cutting and trimming wood/brass, shaping and also drilling. It is so small and easy to use it has become my go to tool and I have hardly used any of my other tools. Bought off ebay model Ant-Xin D1. There are a few not so good generic versions but this one is pretty good and only cost £20 and I have bought a set of additional bits and cutting heads for it
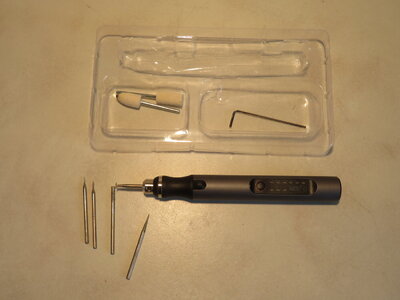
IMG_4568.JPG
 
Well done Nomad. Thanks for these experiment with the blower. I was not aware that ply can be plied without soaking. This will eliminate the risk of delamination when to much wetted.
 
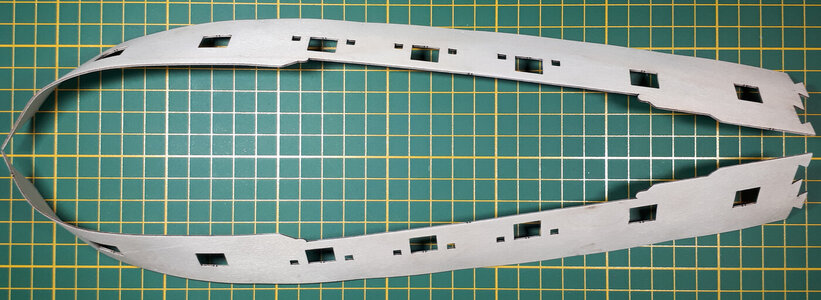
I gave the gun port patterns a day or so to dry completely and was relieved to see them maintain their shape after removing them from the hull. However, a small kink at the foremost bulkhead had me soaking them a second time to correct the error. This seemed to do the trick, and happily the second dunking did not incur any noticable damage to the wood :)

0350_20220701_hms_fly.jpg

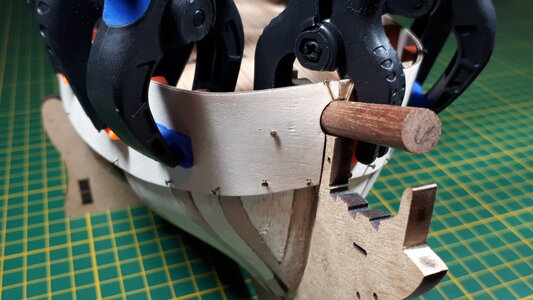
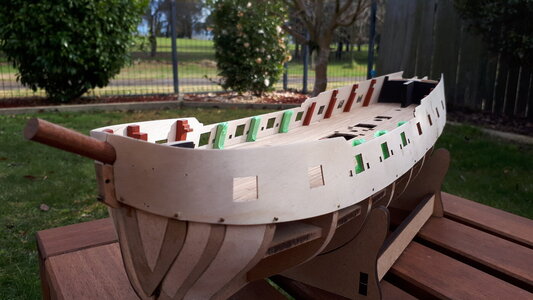
The gunport patterns were then glued to the hull in much the same way as they were first fitted for shape, using clamps and pins to hold everything in place. The temporary bowsprit worked well as a termination point for the ends of the bulwark strips.

0355_20220701_hms_fly.jpg

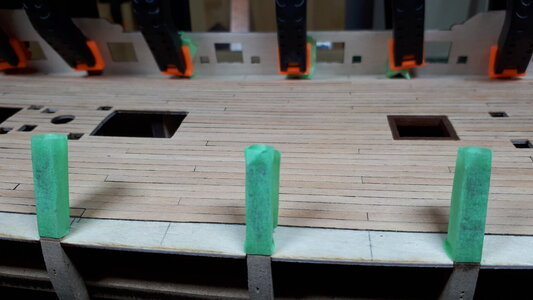
I remembered just in time to wrap the temporary bulkhead extensions with tape before glueing down the gun port patterns. These extensions will be removed later on and it wouldn't help much if they were stuck fast to the inner side of the bulwarks.

0360_20220701_hms_fly.jpg

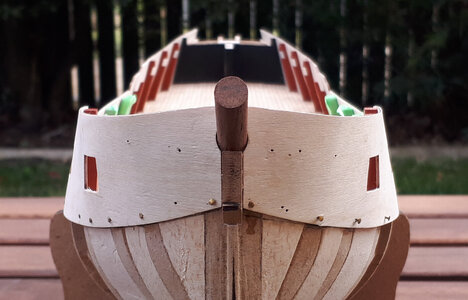
Symmetry was everything for this exercise. The litmus test was to ensure, for both port and starboard sides, that the top edges of the bulwarks lined up with the tops of the bulkhead frames, the gun port openings were equidistant from the surface of the gun deck, and the forward ends of the bulwarks met at the prow with some degree of uniformity.

0365_20220701_hms_fly.jpg

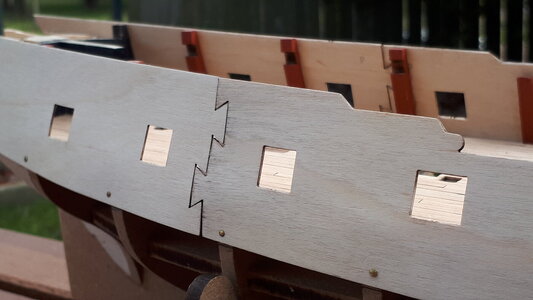
The zig-zag join of the gun port pattern drew a fair bit of my attention. It is situated just aft of the ninth bulkhead frame for no apparent reason with nothing but open air for support. At first I reinforced the entire join on the inside with a strip of ply but soon realised that this would likely interfere with the inner bulwark planking later on. Removing it did not seem to make any real difference to the strength of the connection, but I did leave the part of the strip below the deck in place as some measure of reinforcement, and to facilitate the slight lateral bend of the lower bulwark at that point.

0370_20220701_hms_fly.jpg

And that's the gun port patterns fitted. I don't think I got it entirely right, but I don't think I got it entirely wrong either. The top edges of the patterns are not all exactly flush with the bulkhead frames, and I am yet to learn whether the wavy lateral nature of the bulwarks will sit well with the first layer of planking. Those are challenges for another day though :)

0375_20220701_hms_fly.jpg
 
I gave the gun port patterns a day or so to dry completely and was relieved to see them maintain their shape after removing them from the hull. However, a small kink at the foremost bulkhead had me soaking them a second time to correct the error. This seemed to do the trick, and happily the second dunking did not incur any noticable damage to the wood :)

View attachment 316640

The gunport patterns were then glued to the hull in much the same way as they were first fitted for shape, using clamps and pins to hold everything in place. The temporary bowsprit worked well as a termination point for the ends of the bulwark strips.

View attachment 316641

I remembered just in time to wrap the temporary bulkhead extensions with tape before glueing down the gun port patterns. These extensions will be removed later on and it wouldn't help much if they were stuck fast to the inner side of the bulwarks.

View attachment 316642

Symmetry was everything for this exercise. The litmus test was to ensure, for both port and starboard sides, that the top edges of the bulwarks lined up with the tops of the bulkhead frames, the gun port openings were equidistant from the surface of the gun deck, and the forward ends of the bulwarks met at the prow with some degree of uniformity.

View attachment 316643

The zig-zag join of the gun port pattern drew a fair bit of my attention. It is situated just aft of the ninth bulkhead frame for no apparent reason with nothing but open air for support. At first I reinforced the entire join on the inside with a strip of ply but soon realised that this would likely interfere with the inner bulwark planking later on. Removing it did not seem to make any real difference to the strength of the connection, but I did leave the part of the strip below the deck in place as some measure of reinforcement, and to facilitate the slight lateral bend of the lower bulwark at that point.

View attachment 316644

And that's the gun port patterns fitted. I don't think I got it entirely right, but I don't think I got it entirely wrong either. The top edges of the patterns are not all exactly flush with the bulkhead frames, and I am yet to learn whether the wavy lateral nature of the bulwarks will sit well with the first layer of planking. Those are challenges for another day though :)

View attachment 316645
Good morning Mark. Good thinking re taping the temporary bulkhead extensions. I remember using a dremel and exacto blade you remove and a hassle you prefer not to have.

I do think you got the gun port fitting spot on. No errors I can see. Your process is beautifully explained for any future Fly builders- Nice Mark.

Cheers Grant
 
Hi Nomad,
You convinced me to purchased one from Cornwall....UK. Thanks for all the explaination gived. And well, I will use your log to help me for this next step after my Belem and before the Bounty.
That's awesome! Now I'll have another Fly modeller whose brain I can pick. If you work anything as quickly as Robert (@Robertd) does then I'll be able to get into your slip-stream and follow your lead as well :). Good luck Michel, and I'll keep be an eye out for your new  Fly build log Thumbsup

Mark
 
Hi,

The ship is coming along very nicely. Interesting discussion on the bending of ply laminates. After some experiments I found the best and safest way is to just use a hair dryer with medium/hot setting depending on how thick the ply is (thin ply only needs medium heat) fitted with a narrow nozel without any wetting. Just fix one end with clamps and then gently warm the ply and bending it with a little pressure by hand running the hair dryer along the bit that you want to bend. The resin will soften and you can form the laminate with no risk of scorching or the laminates coming apart (if the hair dryer has a cold air button you can just blow some cold air over it and it will fix to shape in seconds). works a treat.

If you didn't see the little cutting/drilling/grinding pen that I mentioned in my log, I can really recommend this little tool. I have more or less been using it for everything since I bought it - cutting and trimming wood/brass, shaping and also drilling. It is so small and easy to use it has become my go to tool and I have hardly used any of my other tools. Bought off ebay model Ant-Xin D1. There are a few not so good generic versions but this one is pretty good and only cost £20 and I have bought a set of additional bits and cutting heads for it

View attachment 316485
Thanks for that advice DomCee, much appreciated. I'm a rank amateur with all things related to bending wood, and even now approach my first-layer planking with no small amount of trepidation. Good to know you don't really need to soak laminated wood. I am following a YouTube video series of a  Fly build, and the author bends his planks into shape within seconds by holding them over the spout of a boiling kettle and twisting them where necessary. I used a heating iron on the Bluenose but wasn't altogether comfortable with the process, so I may try the kettle trick this time around. And I'll have a look into the Ant-Xin D1 tool that you mentioned, it sounds like a very useful tool indeed :)
 
Last edited:
Bonjour et merci pour l'info ! cet outil a l'air d'être bien pratique ! ;)
Merci beaucoup Bosco45! I wish I could reply to you in French but I've already reached my limit. As it is I had to get the Admiral to translate, her mother was French speaking and she herself still remembers the French she learnt at school. Anyway, I'm glad that what little I've put together in my  Fly build log so far has been useful in some way. Just don't look too carefully at the photos otherwise you'll start to notice all the mistakes!
 
That sure is looking good Mark. I don't see anything untoward in these pics - well done!
Thank you Heinrich! I feel you guys are being too kind. Mind you, after those pictures of Piet's flawless hull planking that you sent me I am certainly starting to feel the pressure ROTF
 
Good morning Mark. Good thinking re taping the temporary bulkhead extensions. I remember using a dremel and exacto blade you remove and a hassle you prefer not to have.

I do think you got the gun port fitting spot on. No errors I can see. Your process is beautifully explained for any future Fly builders- Nice Mark.

Cheers Grant
Thanks Grant, kind words. Yes, so easy to miss a step or not foresee another one. I think model ship building was sent to test us. And you with a model of  Victory straight up are probably being tested more than most ROTF
 
Looking good Mark , glad you didn’t glue the extended bulkhead bits that will have to be removed before inner planking
Thanks Robert! I find myself continually looking at your build log to see what I need to do next ROTF. On that note though, I notice that you've started the inner bulwark planking. Will you plank all the way back to the stern or only as far as is 'visible'?
 
Well done Nomad. Thanks for these experiment with the blower. I was not aware that ply can be plied without soaking. This will eliminate the risk of delamination when to much wetted.
Hi Michel, I'd love to take credit but it was actually @DomCee that did the heavy lifting on that one :p. But I agree with you, good to know that there are other ways to bend laminated wood other than by soaking Thumbsup
 
Thanks Robert! I find myself continually looking at your build log to see what I need to do next ROTF. On that note though, I notice that you've started the inner bulwark planking. Will you plank all the way back to the stern or only as far as is 'visible'?
Yes and No , I like the gun port opening similar to the exposed ones , I paint the planks before cutting and installation , however I won’t paint non exposed bits , up to you
 
Back
Top