HMS Fly Build (Amati) 1:64 by Nomad

With my first build Bluenose II under the belt I thought I'd go for broke and have a crack at Amati's HMS Fly, a 1:64 scale model of the sixth-rate Swan Class ship rigged sloop that was originally built in 1776. It is a magnificent looking ship and it was a picture of the HMS Fly that drew me into the world of ship modelling in the first place.

We'll see how it goes. But I'll start off this build the easy way, by unloading the contents of the box in a series of photos below. There is a YouTube video called First Impressions, Victory models HMS Fly that presents Amati's HMS Fly in a far more professional manner than I could muster, and well worth watching if you are interested in this model.

View attachment 306379

View attachment 306380

View attachment 306381

View attachment 306382

View attachment 306383

View attachment 306384

View attachment 306385

View attachment 306386
Hallo @Nomad
We wish you all the Best and a HAPPY BIRTHDAY
 
Good Morning Mark. I so wanted the admiralty paint kit but it was just insane expensive getting from UK to here and of course our import duties etc. My sister in law mixed some paint for me - she is an artist (lives in Kommetjie- you know those crazy artistic mountain peopleROTF- seriously cool lady tho). I am enjoying it. Frank knows his stuff for sure, it’s like every ship he knows every detail (insane knowledge), however I agree sometimes we have to go with the kit.Awesome close up pic of your capstan. Cheers Grant
Ha ha, they're a good lot those crazies up in the mountains behind Kommetjie - I'm sure your home-brewed paint was spot on! Thumbsup
 
Happy Birthday Mark- Father’s Day here in SA so a double present for you. I hope you had the best day. Birthday-Cake. I’m having a braai here so I’ll have a Castle or 3 BeerBeerBeerto celebrate your birthday. Cheers Grant.
Thanks Bru, much appreciated :). For some or other reason Father's Day is only celebrated in September here in Oz, so I'm kinda missing out on that double-whammy that used to come around in mid-June every year. Thanks for celebrating the occasion with beers, I'll remember to do the same when your turn comes around ROTFThumbsup
 
ship_modelling_tshirt.jpgThank you everyone for the birthday wishes, much appreciated indeed :)

There were no big celebrations this time around, but the admiral and I did spend a very pleasant weekend at the coast and she made me wear this t-shirt all day ROTF

Happy modelling everyone Thumbsup

Mark
 
Great work Mark, at the moment reading through the plans and instructions , received the kit yesterday , I tried to order base and pedestals through Amati Italy , to no avail and managed an Amati base and pedestals sourced through eBay in the UK , a must before any planking in place for a right fit.
Great news Robert! Always nice to receive a package in the post that isn't a bill or tax return. I bet you're itching to get going and I hope the base and pedestals doesn't take too long to arrive. Looking forward to following your new Fly build log, good luck Thumbsup
 
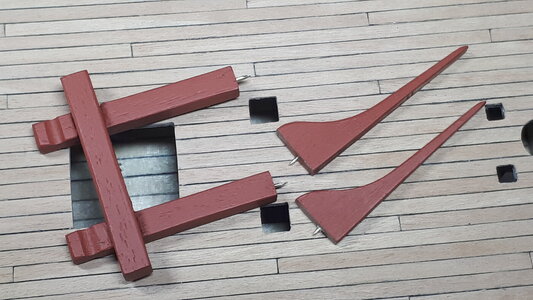
There were just a couple more things to take care of on the gun deck. I added pins to the riding bit assembly for increased stability, particularly on the lower deck which does not have a receiving cut-out for the feet.

0280_20220620_hms_fly.jpg

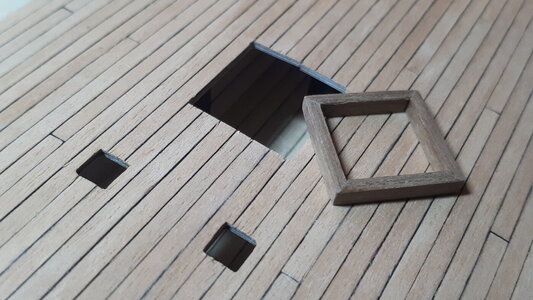
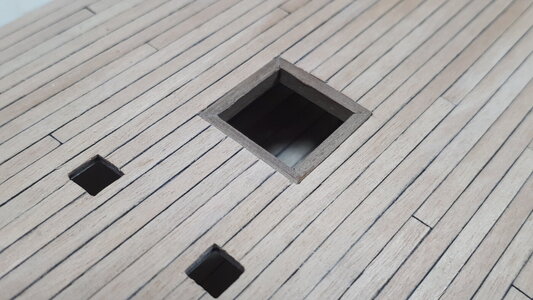
The forward hatchway will remain open (no gratings) so I lined its borders with strips of walnut. This had the effect of closing off the deck plank-ends, gave the deck a greater depth perception, and obscured parts of the lower deck that needed to be obscured.

0285_20220620_hms_fly.jpg

0290_20220620_hms_fly.jpg

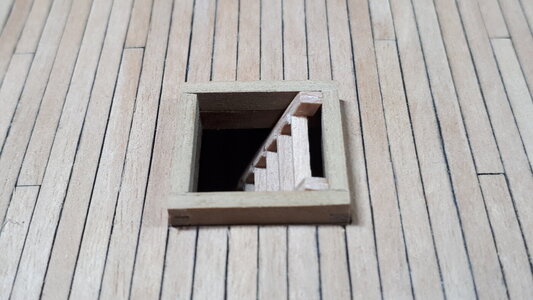
I assembled hatch coamings without the grating and placed it over the walnut lining. The first of several ladders was then assembled to the width of the hatchway and positioned to lead to the deck below.

0295_20220620_hms_fly.jpg

At this stage everything is still dry fit. The gun deck and all its fittings are yet to be treated to a light sanding and varnish, and I am in two minds whether to glue them onto the deck just yet. The instructions advise to glue them, but I wonder if they might be vulnerable to the violence of my hull planking effort yet to come. Or do I glue them while I still have access to the lower deck where I can monitor their stability. Ah who knows, maybe I'll just flip a coin :)
 
Last edited:
That hatchway looks so good - everything you said it would do, it does perfectly - depth perception is also high on my agenda for Build #2. The pins as extra means of securing parts to the deck is exactly what I do as well.
 
There were just a couple more things to take care of on the gun deck. I added pins to the riding bit assembly for increased stability, particularly on the lower deck which does not have a receiving cut-out for the feet.

View attachment 314857

The forward hatchway will remain open (no gratings) so I lined its borders with strips of walnut. This had the effect of closing off the deck plank ends, gave the deck greater depth perspective, and obscured parts of the lower deck that needed to be obscured.

View attachment 314858

View attachment 314859

I assembled hatch coamings without the grating and placed it over the walnut lining. The first of several ladders was then assembled to the width of the hatchway and positioned to lead to the deck below.

View attachment 314860

At this stage everything is still dry fit. The gun deck and all its fittings are yet to be treated to a light sanding and varnish, and I am in two minds whether to glue them onto the deck just yet. The instructions advise to glue them, but I wonder if they might be vulnerable to the violence of my hull planking effort yet to come. Or do I glue them while I still have access to the lower deck where I can monitor their stability. Ah who knows, maybe I'll just flip a coin :)
Mooi Mark, baie Mooi- Thumbsup
 
Happy B-Day Mark! Therapy is good for us all. Yours is working great, clearly evident from your very clean work. KUDOS!
 
Back
Top