HMS Fly Build (Amati) 1:64 by Nomad

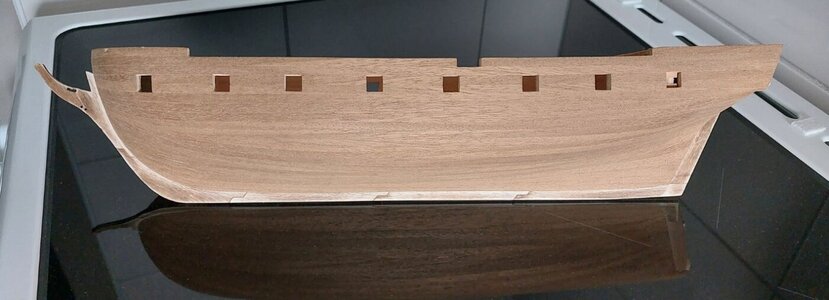
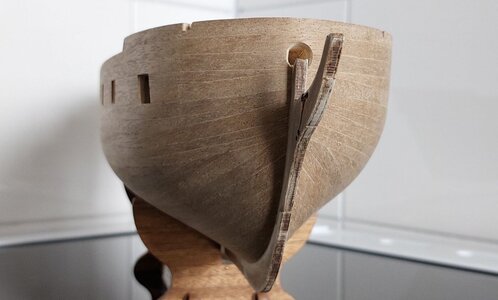
Installing the bulwarks and gunport patterns is the next logical step of my Fly's hull assembly. Eack bulwark is represented by two separate pieces that join together just aft of bulkhead nine. This will be a new challenge for me. Not only do the bulwarks bend at near right angles at the stem but they also mould into an 'S' shape laterally against the bulkhead frames.

0300_20220627_hms_fly.jpg

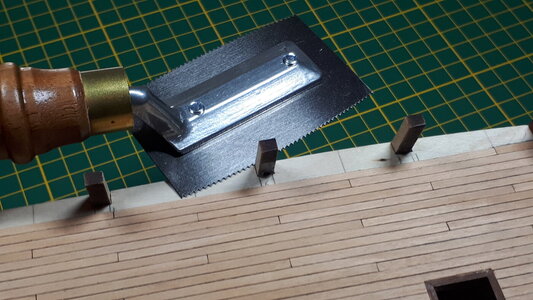
There is some preparation work before soaking the bulwarks and clamping them in place. Six amidships bulkheads will be reduced to gun deck level after the hull planking is complete, and a partial outboard cut at this point should make it easier to remove them completely later on. A veneer saw is a very useful tool for this exercise, particularly for the full removal process when access to the bulkheads will be severely restricted by the bulwarks.
0305_20220627_hms_fly.jpg

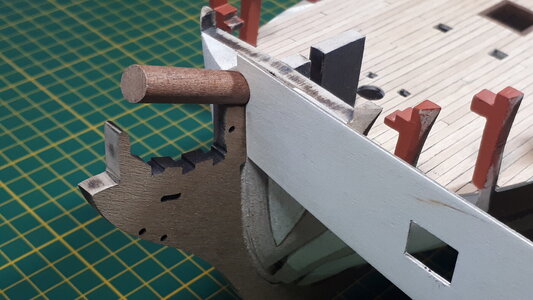
A short length of 10mm-diameter dowel serves to emulate the bowsprit and will provide the key-hole shape of the combined bulwarks with a starting point to position the gun port patterns.
0310_20220627_hms_fly.jpg

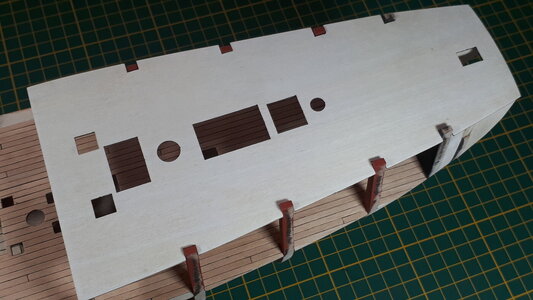
With the upper decks fitted temporarily in place a final sanding is applied to give the bulkhead frames and deck edges a flush contour to receive the gunport patterns.
0315_20220627_hms_fly.jpg

A single gun is assembled to use as a barrel trajectory test of the gun ports. I am using Amati's upgrade pack of wooden carriages that will presumably accomodate rigging better than the kit's original cast metal guns.
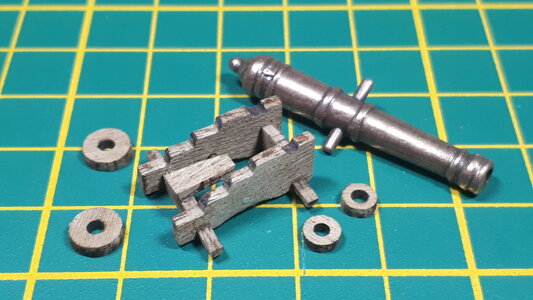
0320_20220627_hms_fly.jpg

There is more work to be done on the gun of course, but that will come later. Although it did make sense to apply paint before gluing the carriage parts together, especially as more than one colour is being used.
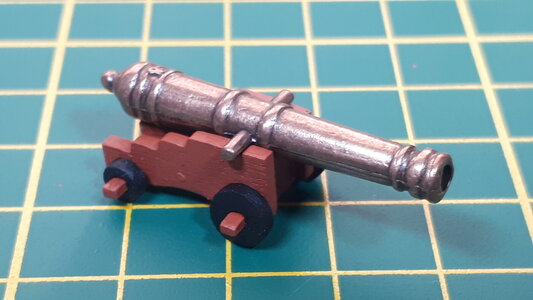
0325_20220627_hms_fly.jpg

With the top of the bulwarks aligned with the top of the bulkhead frames as advised, the gun ports all passed the barrel trajectory test and I now have no more excuses to delay the dreaded bending, clamping and glueing of the gun port patterns.
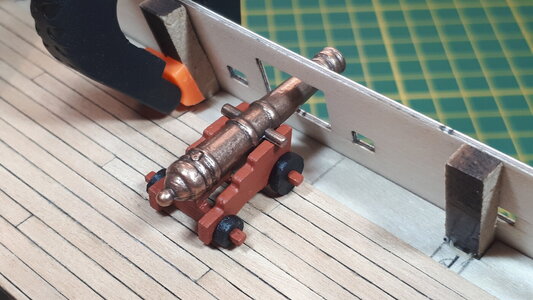
0330_20220627_hms_fly.jpg
 
Last edited:
Installing the bulwarks and gunport patterns is the next logical step of my Fly's hull assembly. Eack bulwark is represented by two separate pieces that join together just aft of bulkhead nine. This will be a new challenge for me. Not only do the bulwarks bend at near right angles at the stem but they also mould into an 'S' shape laterally against the bulkhead frames.

View attachment 315703

There is some preparation work before soaking the bulwarks and clamping them in place. Six amidships bulkheads will be reduced to gun deck level after the hull planking is complete, and a partial outboard cut at this point should make it easier to remove them completely later on. A veneer saw is a very useful tool for this exercise, particularly for the full removal process when access to the bulkheads will be severely restricted by the bulwarks.

View attachment 315704

A short length of 10mm-diameter dowel serves to emulate the bowsprit and will provide the key-hole shape of the combined bulwarks with a starting point to position the gun port patterns.

View attachment 315705

With the upper decks fitted temporarily in place a final sanding is applied to give the bulkhead frames and deck edges a flush contour to receive the gunport patterns.

View attachment 315706

A single gun is assembled to use as a barrel trajectory test of the gun ports. I am using Amati's upgrade pack of wooden carriages that will presumably accomodate rigging better than the kit's original cast metal guns.

View attachment 315707

There is more work to be done on the gun of course, but that will come later. Although it did make sense to apply paint before gluing the carriage parts together, especially as more than one colour is being used.

View attachment 315708

With the top of the bulwarks aligned with the top of the bulkhead frames as advised, the gun ports all passed the barrel trajectory test and I now have no more excuses to delay the dreaded bending, clamping and glueing of the gun port patterns.

View attachment 315709
You are getting there Mark , yes bending the Bulwark , I used pins to secure them on the Bulkheads after glueing , ensure the bow section is well rounded ,I like your veneer saw ! I used my Dremel round saw , I mean there are other ways to remove those extended bits , I left them in place after placing the bulwarks just to allow for extra support (No glue) ,works okay too, just what you fancy
 
Last edited:
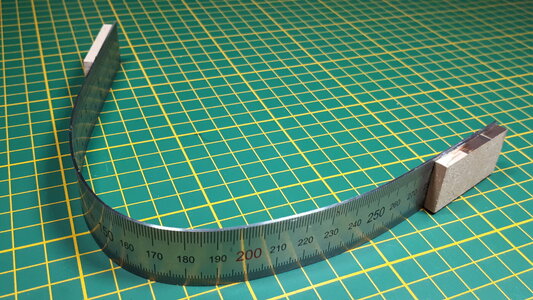
I have to believe that there is a science to bending bulwark strips at obscure angles without suffering undue anxiety. It was everything as freaky as I expected it to be. I started with just the port side bulwark, and while it stewed to a reasonable degree of malleability in warm water I tried to design a clamping regime that would hold the bulwark firmly around the steep curvature of the bow. Nothing seemed to work though, and I even sacrificed an old metal rule under the illusion that it was just the ticket for the job.

0335_20220627_hms_fly.jpg

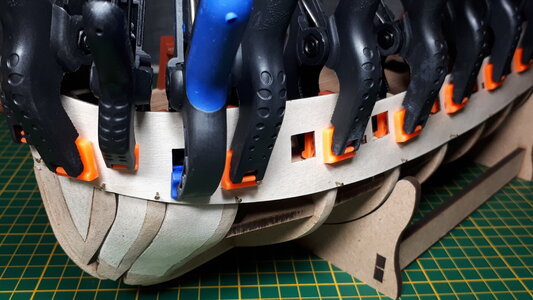
In the end I was obliged to simply play it by ear. Which in any other language means holding the damp bulwark strip more or less in position with one hand, desperately grabbing and applying clamps with another, lining the tops of the bulwark strip and bulkhead frames with a third and pinning the lower end of the strip to the bulkheads with a fourth :oops:

0340_20220627_hms_fly.jpg

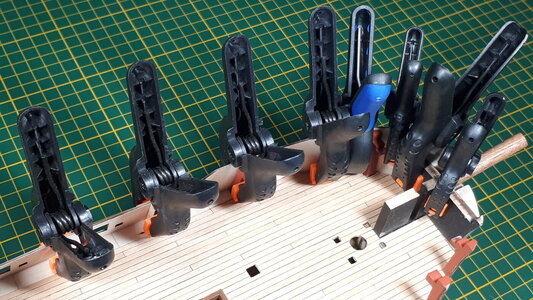
Nothing broke at least, but I will wait a full day or two before removing and examining the bulwark shape. I must admit that the spring clamps were probably best suited to the job all along; the variety of sizes and strengths, combined with an ease of adjustment is what helped me over the line. Still, I will withhold my final verdict until these gun port patterns are well and truly fixed into position :)

0345_20220627_hms_fly.jpg
 
Last edited:
And the best part is that if you have a perfect fit now and you apply glue, that perfectly shaped piece takes on a whole new mind of its own - almost like a wedding ring.
 
You are getting there Mark , yes bending the Bulwark , I used pins to secure them on the Bulkheads after glueing , ensure the bow section is well rounded ,I like your veneer saw ! I used my Dremel round saw , I mean there are other ways to remove those extended bits , I left them in place after placing the bulwarks just to allow for extra support (No glue) ,works okay too, just what you fancy
Slowly but surely, I hope :p. I agree, there doesn't seem to be any reason to knock off the six bulkhead extensions until you absolutely need to and I'm sure the extra support will be worth the wait. As for rounding the bow section, I'm hoping that using the hull shape to form the bulwarks will do the trick. I think a heating iron might have been an easier option for creating the sharp bends, although I'm not sure how an iron would take care of the lateral 'S' shape contours of the bulkheads. Trial and error, trial and error :)
 
And the best part is that if you have a perfect fit now and you apply glue, that perfectly shaped piece takes on a whole new mind of its own - almost like a wedding ring.
Hmmm, my better half already thinks I'm married to my model ship so that isn't a good omen Heinrich. A quick question while I have you on the line - do you think it is okay to re-soak the bulwark strips even after it has fully dried out in its new shape? I've a feeling I'm going to need another pass or two to get the shape just right but I'm not sure whether multiple iterations of soaking, shaping and drying will weaken the wood fibres? Asking for a friend :)
 
Hmmm, my better half already thinks I'm married to my model ship so that isn't a good omen Heinrich. A quick question while I have you on the line - do you think it is okay to re-soak the bulwark strips even after it has fully dried out in its new shape? I've a feeling I'm going to need another pass or two to get the shape just right but I'm not sure whether multiple iterations of soaking, shaping and drying will weaken the wood fibres? Asking for a friend :)
Mark I would not soak it because I am not sure if it is laminated. I am just scared that the laminations may pull loose. I would lay it between two hot and very damp towels before attempting a re-bending. This is courtesy of @pietsan Piet Sanders.
 
Without hijacking your log, I can show you Piet's results on the HMS Beagle. Just look at that planking and how the planks and bulwarks become one.
Please hijack away, Heinrich, how else will I get my build log over twenty pages long ROTF

But seriously ... Piet's planking effort is next-level stuff that I can only dream of at this point, and I will certainly refer back to these pictures later on. My only planking experience with the Bluenose II was relatively scant - there was no real need to taper any of the planks and I did not account for shrinkage that left a few gaps between strakes. In short, I did not learn much from that effort and I am hoping to produce a more reliable and solid hull with the Fly this time round, like the one above, or your own WB which looks like it could handle any kind of violence at sea :)
 
Mark I would not soak it because I am not sure if it is laminated. I am just scared that the laminations may pull loose. I would lay it between two hot and very damp towels before attempting a re-bending. This is courtesy of @pietsan Piet Sanders.

I would support this too. Resoaking will fragilise the structure by creating more crystalline layer after drying again at hot temperature then leading to more laminations. The hemicellulose can reorganised with soaking and redrying but we still want a degree of disorganisation inside the structure to keep flexibility and H- - - OH bonds (H-bridge bond) between fibers instead of new covalent bonding by hydrolysis due to the heat. If you don't heat again, the problem is less present, but hysterisis will occured and I cannot explain the effect produced after this. These are my hypothesis.

Michel
Thanks for all that information Michel :). My grasp of wood physics is at a much lower level than your high tech explanation, but I get the gist that continually re-soaking and re-drying the wood is not altogether a good thing and can possibly cause damage to the properties of the wood. I am glad that I asked the question - like dipping into a wishing well of knowledge - and will now be cautious how I proceed with any re-shaping of my bulwarks. Thanks again Thumbsup
 
Thanks,
II answer with some double due to lack of memory. It is a long time ago that I had played With these concepts But it is a good approx.

Hysterisis is like this : removed 20% of water by drying, the put again 20% water and the wood will never be able to incorporate it. Invert this action and it will still be true . This applied when changing ATM. Humidité, but with soaking it is not realy the same phenomenon for purist but the result is similar for others reasons.
 
Last edited:
Slowly but surely, I hope :p. I agree, there doesn't seem to be any reason to knock off the six bulkhead extensions until you absolutely need to and I'm sure the extra support will be worth the wait. As for rounding the bow section, I'm hoping that using the hull shape to form the bulwarks will do the trick. I think a heating iron might have been an easier option for creating the sharp bends, although I'm not sure how an iron would take care of the lateral 'S' shape contours of the bulkheads. Trial and error, trial and error :)
Good morning Morning- you got this. More trial than error I see. Cheers Grant
 
Hi Nomad,
You convinced me to purchased one from Cornwall....UK. Thanks for all the explaination gived. And well, I will use your log to help me for this next step after my Belem and before the Bounty.
 
Back
Top