HMS Fly Build (Amati) 1:64 by Nomad

Wow. Thanks for all the well wishes and compliments, you clearly have more confidence in me than I do. Especially those times where my hull planking output was seriously inefficient, averaging just a plank or two with each session in the shipyard and even then wondering what new hull-lining surprises lay in store for me.

Or maybe you're all just a really nice bunch of guys :)

Johan, I also seem to have that notification issue. I've checked my settings and should receive an email every time you nice bunch of guys update your build logs, but it seems to work quite randomly. Especially with planking Jedi Heinrich; you think he hasn't done much after a few days of no notifications, then you go to his log and find that you're anywhere between thirteen and fifteen web pages behind ROTF

Again, thanks for the thumbs up, it does make a difference. And Paul, I wish you were had been one of my teachers at school, I don't ever recall getting an 'outstanding' on my report card ROTF
 
Last edited:
Hi Nomad, Just catching up with the build. Great job on the 1st planking. Small dips or high spots will show up later if you are painting the hull which can be really annoying so it is well worth the extra time and effort to get the planking right. It will look superb with the 2nd plankingThumbsup.
 
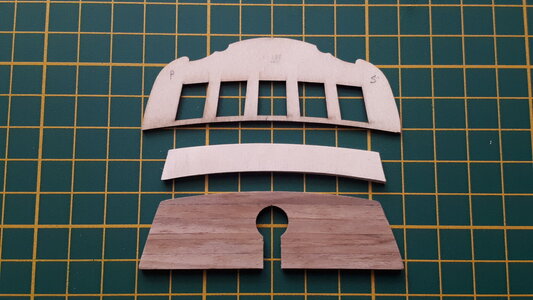
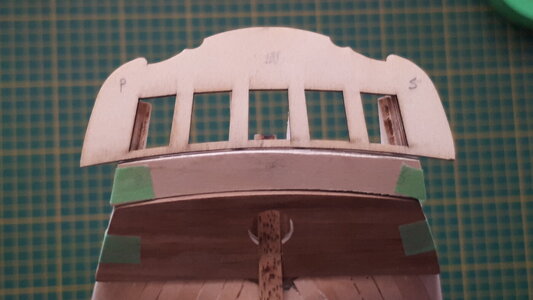
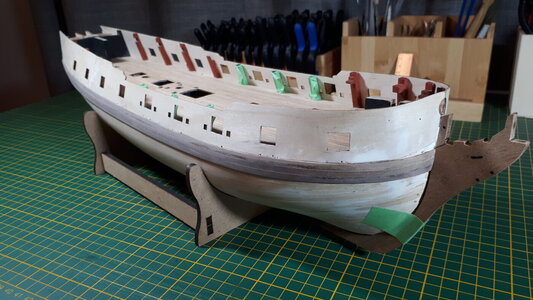
The wales and stern counters were the next logical step in the progression of my HMS Fly. The aft end of the wales blend in with the lower stern counter so it seemed prudent to develop them at the same time. The stern is made up of three parts, the lower stern counter, the upper stern counter (for lack of a better name) and the stern gallery with the window frames. Only the lower and upper stern counter pieces will be attached at this stage. The stern gallery will be installed later although it was useful to understand its purpose in the assembly to correctly shape and install the counter pieces below.

0435_20220814_hms_fly.jpg

The lower stern counter is planked over with walnut strips and the key-hole shape maintained to accommodate the stern post and rudder. The instructions suggest that the upper counter is made up with walnut planks alone, but I opted to use some spare wood to craft the desired shape instead. It will all be painted black eventually anyway, but the single piece gave me better control over the joins it made with the stern counter below and the gallery piece above. These joins overlap slightly, and will eventually house thin moulded wood strips to demarcate the three pieces.

0440_20220814_hms_fly.jpg

The wales are made up of three walnut strips on either side, heat-iron bent at the bow and steam-twisted at the stern and applied with CA glue alone. The position of the wales were mapped very carefully from the ship plans using the distance from the bottom of the gunport holes as a guide. I also found it useful to verify the position of the quarter badges at the stern as they appear to fit very neatly between the wales and the top of the gunport patterns.

0445_20220814_hms_fly.jpg

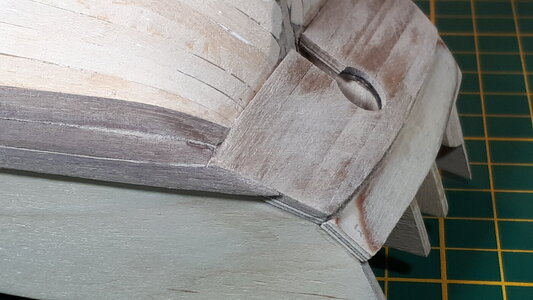
The only real tricky bit to installing the first wale planks was at the stern area where the wale sweeps up to meet the lower stern counter, right on the curvy edge between the gunport pattern and the first planking strake. I found it handy to persist with the steam twisting until the plank was bent to the right shape before applying any glue. Once the glue had set, a mild sanding ensured that the planks blended in smoothly with the lower stern counter piece.

0450_20220814_hms_fly.jpg

The rabbet line at the prow served its purpose well to house the wale planks as they came around the bow. I was careful not to rely of the rabbet to physically hold them in place - the heat bending took care of that - but rather to provide the space they need to sit flush with the prow section of the keel.

0455_20220814_hms_fly.jpg

This is only half the job as far as the wales are concerned. A second layer of walnut strips will be attached on top of the first layer of the wale, although this layer will not go all the way to the stern counter pattern as the first one did. The wales and stern counter pieces will then be painted black before work on the second layer of hull planking can begin in earnest.
 
Last edited:
Hi Mark. It's good to see another update. Just last night I was wondering what you and @Robertd Robert have been up to, so it's great to see your posting. I can well imagine that planking the wales at the stern kept your attention, but it all turned out very well! Thumbsup
 
Mark, great tuck on your wales into the lower counter. That bend with thicker plank stock can be very trying. Yours look great!
 
The wales and stern counters were the next logical step in the progression of my HMS Fly. The aft end of the wales blend in with the lower stern counter so it seemed prudent to develop them at the same time. The stern is made up of three parts, the lower stern counter, the upper stern counter (for lack of a better name) and the stern gallery with the window frames. Only the lower and upper stern counter pieces will be attached at this stage. The stern gallery will be installed later although it was useful to understand its purpose in the assembly to correctly shape and install the counter pieces below.

View attachment 323495

The lower stern counter is planked over with walnut strips and the key-hole shape maintained to accommodate the stern post and rudder. The instructions suggest that the upper counter is made up with walnut planks alone, but I opted to use some spare wood to craft the desired shape instead. It will all be painted black eventually anyway, but the single piece gave me better control over the joins it made with the stern counter below and the gallery piece above. These joins overlap slightly, and will eventually house thin moulded wood strips to demarcate the three pieces.

View attachment 323496

The wales are made up of three walnut strips on either side, heat-iron bent at the bow and steam-twisted at the stern and applied with CA glue alone. The position of the wales were mapped very carefully from the ship plans using the distance from the bottom of the gunport holes as a guide. I also found it useful to verify the position of the quarter badges at the stern as they appear to fit very neatly between the wales and the top of the gunport patterns.

View attachment 323497

The only real tricky bit to installing the first wale planks was at the stern area where the wale sweeps up to meet the lower stern counter, right on the curvy edge between the gunport pattern and the first planking strake. I found it handy to persist with the steam twisting until the plank was bent to the right shape before applying any glue. Once the glue had set, a mild sanding ensured that the planks blended in smoothly with the lower stern counter piece.

View attachment 323498

The rabbet line at the prow served its purpose well to house the wale planks as they came around the bow. I was careful not to rely of the rabbet to physically hold them in place - the heat bending took care of that - but rather to provide the space they need to sit flush with the prow section of the keel.

View attachment 323499

This is only half the job as far as the wales are concerned. A second layer of walnut strips will be attached on top of the first layer, although this layer will not go all the way to the stern counter pattern as the first one did. The wales and stern counter pieces will then be painted black before work on the second layer of hull planking can begin in earnest.
Good evening Mark. Excellent. This Fly is going to be a beauty. I am confused? Not hard to do ROTF . Your second planking layer does not go all the way to the stern counter....does this apply to above the wales only? Cheers Grant
 
Hi Mark. It's good to see another update. Just last night I was wondering what you and @Robertd Robert have been up to, so it's great to see your posting. I can well imagine that planking the wales at the stern kept your attention, but it all turned out very well! Thumbsup
Thanks Heinrich, appreciated. Yes the stern area had my undivided attention during much of this process, especially with the design calling for a nasty twist and bend at the very end of the wale strips :oops:
 
Good evening Mark. Excellent. This Fly is going to be a beauty. I am confused? Not hard to do ROTF . Your second planking layer does not go all the way to the stern counter....does this apply to above the wales only? Cheers Grant
1660516893897.pngHowzit Grant :)

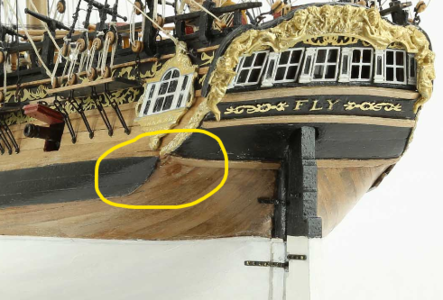
Yes, I meant the second layer of planking on the wales only. The wale itself is made up of two layers of planks so the second layer is essentially a third layer of planking on the hull if that makes sense. This second layer on the wale does not extend all the way to the stern counter like it's first layer does, and ends in a hand-made curve as circled in the picture.

I'm glad you didn't make any reference to the Springbok/All Black match :confused:
Mind you, nothing compared to what the Pumas did to the Wallabies :oops:
 
Last edited:
View attachment 323592Howzit Grant :)

Yes, I meant the second layer of planking on the wales only. The wale itself is made up of two layers of planks so the second layer is essentially a third layer of planking on the hull if that makes sense. This second layer on the wale does not extend all the way to the stern counter like it's first layer does, and ends in in a hand-made curve as circled in the picture.

I'm glad you didn't make any reference to the Springbok/All Black match :confused:
Mind you, nothing compared to what the Pumas did to the Wallabies :oops:
Good morning Mark- ok I get it. I was a tad concerned for you with my previous understanding. Excellent. Yep we were all at Fireman’s arms and with 8min to go, the AB down to 14 men we thought we had it wrapped...and then the AB did what they do- scored 2 tries - Eish. I do eat humble pie and post on my log tho;). Cheers Grant
 
I have been snowed under with work recently and have had little time to attend to the infinitely more important tasks that await me in the shipyard, not to mention keeping up with my fellow modeller's build logs. But the inconvenience of my profession has, if nothing else, taught me to appreciate the brief moments I am able to nip into the yard and further the progress my HMS Fly, even if it is by just an inch or two :)

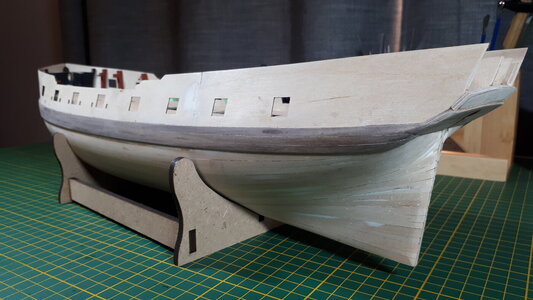
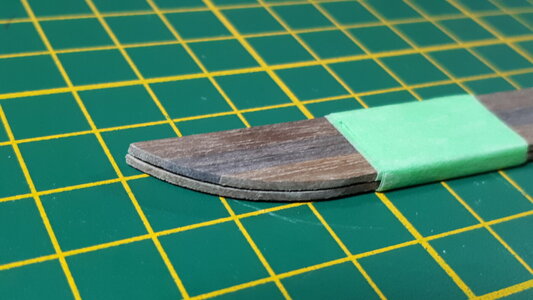
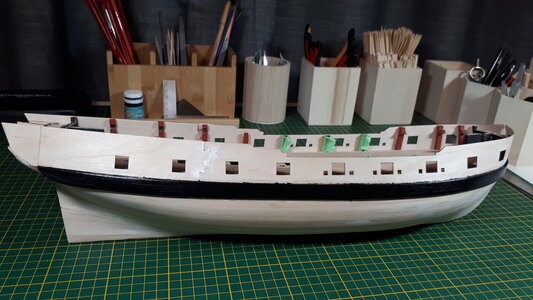
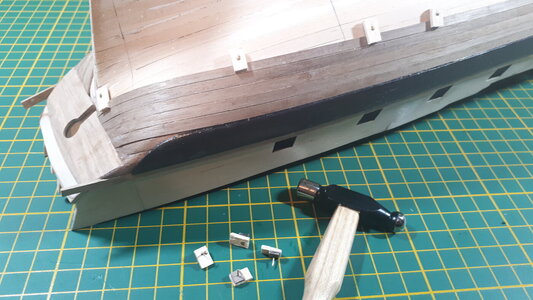
I have at least managed to complete and paint the wales on either side of the ship. The decision to install them prior to the second layer of planking was to avoid the potential (for me, very likely) spill of black paint that could occur by painting the wales afterwards. The second planking of the wales followed the same twists and bends as the first layer, with the exception of the end bit aft which swings up in a curve. I shaped the curve across all six planks (three either side) in advance for the sake of uniformity, although it also served well as a starting guide as each plank was applied to the hull.

0460_20220822_hms_fly.jpg

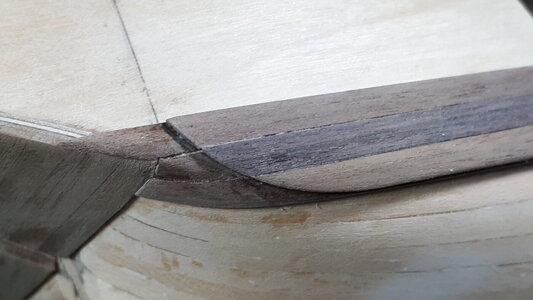
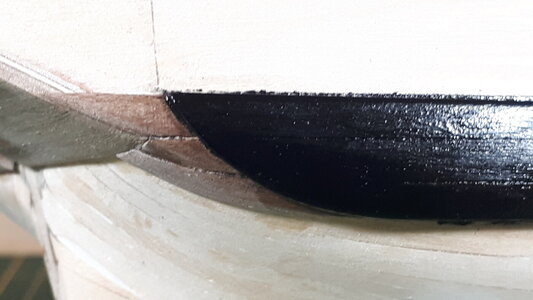
The wale's curve ends just short of the stern counter piece, but the real trick to this exercise was to ensure that each plank was mapped precisely above its counterpart below.

0465_20220822_hms_fly.jpg

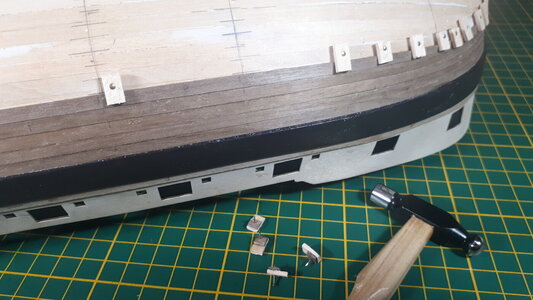
The wale is made up of 1 mm walnut strips which, although thin, are quite resistant to bending and it took the usual dose of heat and steam to bend them into shape and work them around the Fly's curvaceous bow.

0470_20220822_hms_fly.jpg

Two layers of Admiralty's Dull Black paint gave a decent finish to the wales, followed by a two applications of clear varnish to lock it all in.

0475_20220822_hms_fly.jpg

I have not painted the first layer of wale strips beyond the point where the second layer terminates in a curve. Not yet anyway. I had some misgivings about painting this lovely walnut wood at all, and will wait to see how my second layer of hull planking plays out before making that decision.

0480_20220822_hms_fly.jpg
 
Hi Mark. I am going to be in exactly the same boat from now on with regards to work and available build time. We will just have to do what we can.
 
I have been snowed under with work recently and have had little time to attend to the infinitely more important tasks that await me in the shipyard, not to mention keeping up with my fellow modeller's build logs. But the inconvenience of my profession has, if nothing else, taught me to appreciate the brief moments I am able to nip into the yard and further the progress my HMS Fly, even if it is by just an inch or two :)

I have at least managed to complete and paint the wales on either side of the ship. The decision to install them prior to the second layer of planking was to avoid the potential (for me, very likely) spill of black paint that could occur by painting the wales afterwards. The second planking of the wales followed the same twists and bends as the first layer, with the exception of the end bit aft which swings up in a curve. I shaped the curve across all six planks (three either side) in advance for the sake of uniformity, although it also served well as a starting guide as each plank was applied to the hull.

View attachment 324791

The wale's curve ends just short of the stern counter piece, but the real trick to this exercise was to ensure that each plank was mapped precisely above its counterpart below.

View attachment 324792

The wale is made up of 1 mm walnut strips which, although thin, are quite resistant to bending and it took the usual dose of heat and steam to bend them into shape and work them around the Fly's curvaceous bow.

View attachment 324793

Two layers of Admiralty's Dull Black paint gave a decent finish to the wales, followed by a two applications of clear varnish to lock it all in.

View attachment 324794

I have not painted the first layer of wale strips beyond the point where the second layer terminates in a curve. Not yet anyway. I had some misgivings about painting this lovely walnut wood at all, and will wait to see how my second layer of hull planking plays out before making that decision.

View attachment 324795
Good Morning Mark. Excellent. My approach to painting the wales is similar to yours. Admiralty paint are perfect for British ships - great choice. You will have no issues getting the colors just right. Quick question. The clear varnish you use is it a Matt base. I know photos especially with like give it a glossy sheen, however I know a Matt look is more correct? Cheers Grant
 
Good Morning Mark. Excellent. My approach to painting the wales is similar to yours. Admiralty paint are perfect for British ships - great choice. You will have no issues getting the colors just right. Quick question. The clear varnish you use is it a Matt base. I know photos especially with like give it a glossy sheen, however I know a Matt look is more correct? Cheers Grant
Howzit Grant! The varnish I used was a Satin, which I'm guessing is somewhere between Matt and Gloss although I'm not entirely sure. The photos I took were under two rather bright lamps at night time, hence the shine. In the daylight the wales looks quite dull really. I was tempted to simply varnish them and give the paint a skip but all the Fly examples I've seen have their wales painted black so I followed suit. I am happy that the texture and lines of planking still show through the paint and give the wales that 'woody' sort of look.

Apologies for not keeping up with your Victory lately. I'm snowed under with work at the moment with little time left for ship building and browsing build logs. Heinrich tells me he'll be in a similar position soon. Work is so inconvenient. For all I know your Victory may already have been launched! I'll catch up soon :)
 
Last edited:
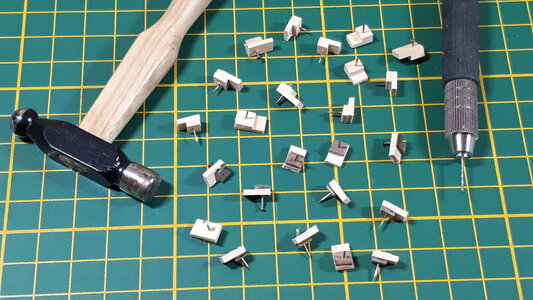
Onwards and upwards. My sales pitch to claim remuneration for model ship building from my workplace fell on deaf ears so I have been obliged to open the shipyard at home again and sneak in occasionally to progress my HMS Fly. Next on the task list is the second layer of planking. These are walnut planks 1mm x 4mm in a variety of shades and colours. First off though, I stole an idea for planking clamps from Olha (@shipphotographer.com) who is a wizard at this sort of thing and used them to good effect on her Pegasus build.

0485_20221006_hms_fly.jpg

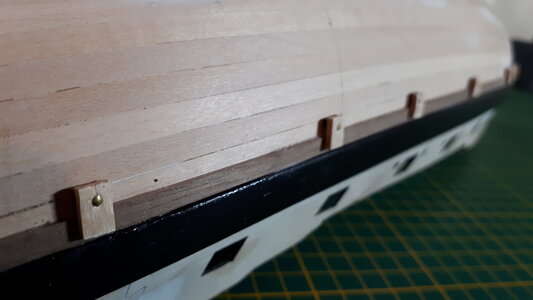
I started with the first strake below the wale and worked my way downwards towards the keel. Or rather upwards towards the keel with the hull flipped upside down. Twenty one strakes are required on either side of the hull although the calculation was complicated somewhat by each plank being a smidgen over 4mm in width.

0490_20221006_hms_fly.jpg

As with the first layer of planking strips, I used steam to twist, and a heated iron to bend the planks into shape. Pre-shaping the plank removes all the stress and tension when the strake is eventually fixed and left to dry on the hull. i.e. No sprung planks :)

0495_20221006_hms_fly.jpg

I began the tapering towards the bow earlier than I had with the first layer of planking, which I think I had left too late. The clamps worked a treat by applying pressure in two directions, downwards against the surface of the hull and laterally against the edge of the previously installed strake.

0500_20221006_hms_fly.jpg

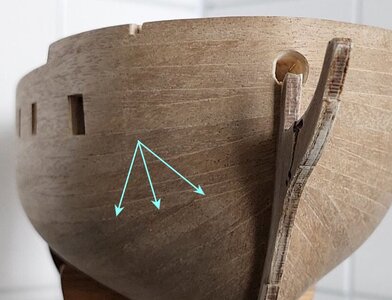
For all my care and attempts at precision I continue to find the planking process something of an enigma. I hoped the second layer would be easier than the first, having learnt from my mistakes and also having a solid area to plank against. But I found the second layer every bit as complicated, if not more so, being constantly aware that this was the presentation layer and had to be done properly. My tapering at the bow fell short of expectations, again, but I was able to recover handsomely by ending the strake short of its full length as shown below in a photo that Heinrich sent me a short while ago :)

strakes.jpg

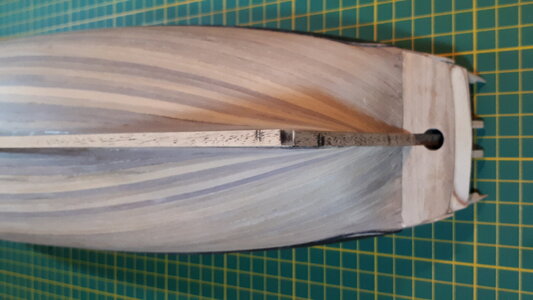
I can console myself with the fact that most of the hull will be painted over in a brilliant white eventually, but it is nice to know that, perhaps one day, I too can plank away like the best of them. I found the stern area a bit easier to plank, although with the Fly's curvy hull it still took a combination of tapering and well-placed stealers to get me over the line.

0505_20221006_hms_fly.jpg

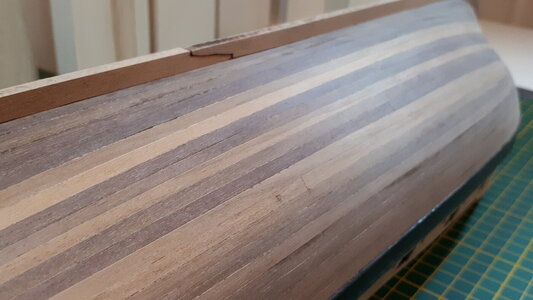
I can see why some Fly modellers prefer to leave their hull in its natural state. With some sanding and finishing I think that I too will be hard-pressed to hide all that beautiful walnut with white paint. We'll see.

0510_20221006_hms_fly.jpg

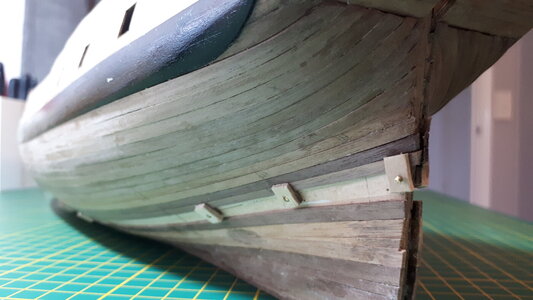
In case you do leave the second layer of walnut unpainted, it probably pays to install two strakes of a similar shade and colour on either side of the hull at the same time.

0515_20221006_hms_fly.jpg

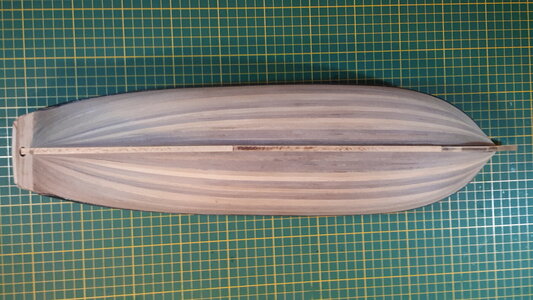
Well that's as good as my planking gets at this stage. The planking below the wale is now complete and only requires a bit more sanding and then a decision on whether or not to paint it below the waterline :)

0520_20221006_hms_fly.jpg
 
Last edited:
Onwards and upwards. My sales pitch to claim remuneration for model ship building from my workplace fell on deaf ears so I have been obliged to open the shipyard at home again and sneak in occasionally to progress my HMS Fly. Next on the task list is the second layer of planking. These are walnut planks 1mm x 4mm in a variety of shades and colours. First off though, I stole an idea for planking clamps from Olga (@shipphotographer.com) who is a wizard at this sort of thing and used them to good effect on her Pegasus build.

View attachment 332489

I started with the first strake below the wale and worked my way downwards towards the keel. Or rather upwards towards the keel with the hull flipped upside down. Twenty one strakes are required on either side of the hull although the calculation was complicated somewhat by each plank being a smidgen over 4mm in width.

View attachment 332490

As with the first layer of planking strips, I used steam to twist, and a heated iron to bend the planks into shape. Pre-forming the plank removes all the stress and tension when the strake is eventually fixed and left to dry on the hull. i.e. No sprung planks :)

View attachment 332491

I began the tapering towards the bow earlier than I had with the first layer of planking, which I think I had left too late. The clamps worked a treat by applying pressure in two directions, downwards against the surface of the hull and laterally against the edge of the previously installed strake.

View attachment 332492

For all my care and attempts at precision I continue to find the planking process something of an enigma. I was led to believe that the second layer would be a lot easier than the first, having learnt from the mistakes of the first layer and also having a solid area to plank against. But I found it every bit as complicated as I had the first layer, if not more so, being constantly aware that this was the presentation layer and had to be done properly. For instance, my tapering at the bow was never going to be good enough and, rather than using drop planks, I opted for ending the strake short of its full length as shown below in a photo that Heinrich sent me a little while ago. This worked quite well, but my version was nowhere near the perfection of this example :oops:

View attachment 332493

I can console myself with the fact that most of the hull will be painted over in a brilliant white eventually, but it is nice to know that, perhaps one day, I too can plank away like the best of them. I found the stern area a bit easier to plank, although with the Fly's curvy hull it still took a combination of tapering and stealers to get me over the line.

View attachment 332494

I can see why some Fly modellers prefer to leave their hull in its natural state. With some sanding and finishing I think that I too will be hard-pressed to hide all that beautiful walnut with white paint. We'll see.

View attachment 332495

In case you do leave the second layer of walnut unpainted, it pays to install two strakes of a similar shade and colour on either side of the hull at the same time.

View attachment 332496

Well that's as good as my planking gets at this stage. The planking below the wale is now complete and only requires a bit more sanding and then a decision on whether or not to paint it below the waterline :)

View attachment 332497
That is excellent planking, Mark - you can be well pleased with that! I am glad that the planking picture I sent you, gave you some ideas - that was the whole idea. As to painting the hull or not - after I had painted WB#2 and left WB#1 unpainted, I would honestly recommend you to the paint the hull. The white offsets the wood tones beautifully.
 
Back
Top