HMS Fly Build (Amati) 1:64 by Nomad

Returning to the shipyard after a six-week break is at least easier than returning to the workplace after a six-week break, although the level of bewilderment and disorientation are more or less the same. The admiral and I had a thoroughly enjoyable holiday in KwaZulu-Natal, doing many things quite unrelated to ship building such as sitting on dodgy rocks and ledges in strange and high-up places, so when I re-opened the shipyard it took a fair amount of time to find my sea legs again and pick up where I'd left off with my HMS Fly ...

20221103_leopards_rock.jpg
 
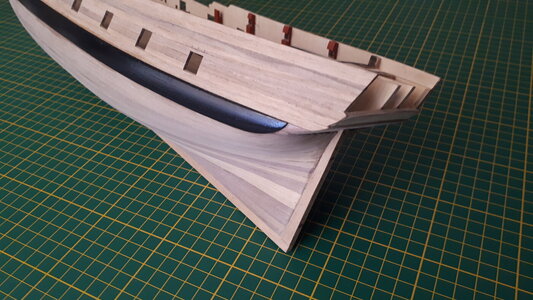
Planking the inner bulwarks was my intended pickup point after the break, but I first attended to the repainting and varnishing of the wales which had suffered some scuffing during the second planking phase. I then went about installing the false keel and sternpost to the hull as there was no apparent reason why I shouldn't, and it would also go a long way to provide stability when housed in the cradle supplied by the kit.

0555_20221216_hms_fly.jpg

I had to tweak the nibbed scarf joints that lock the various sections of the false keel together to ensure a smooth and comfortable fit.

0560_20221216_hms_fly.jpg

All the earlier sanding and narrowing of the stern now paid dividends. The original stern area and the first and second layers of planking had to be reduced to a breadth of 5mm in order to accommodate the sternpost correctly.

0565_20221216_hms_fly.jpg
 
Returning to the shipyard after a six-week break is at least easier than returning to the workplace after a six-week break, although the level of bewilderment and disorientation are more or less the same. The admiral and I had a thoroughly enjoyable holiday in KwaZulu-Natal, doing many things quite unrelated to ship building such as sitting on dodgy rocks and ledges in strange and high-up places, so when I re-opened the shipyard it took a fair amount of time to find my sea legs again and pick up where I'd left off with my HMS Fly ...

View attachment 345860
It's not the fall that will kill you - it's the landing...
 
Returning to the shipyard after a six-week break is at least easier than returning to the workplace after a six-week break, although the level of bewilderment and disorientation are more or less the same. The admiral and I had a thoroughly enjoyable holiday in KwaZulu-Natal, doing many things quite unrelated to ship building such as sitting on dodgy rocks and ledges in strange and high-up places, so when I re-opened the shipyard it took a fair amount of time to find my sea legs again and pick up where I'd left off with my HMS Fly ...

View attachment 345860
Good morning Mark. Excellent photo. Is that near Orbi Gorge. Takes me back to my teen years- spent many hours there rafting in the Mzimkulu river. Awesome. Cheers Grant
 
Planking the inner bulwarks was my intended pickup point after the break, but I first attended to the repainting and varnishing of the wales which had suffered some scuffing during the second planking phase. I then went about installing the false keel and sternpost to the hull as there was no apparent reason why I shouldn't, and it would also go a long way to provide stability when housed in the cradle supplied by the kit.

View attachment 345861

I had to tweak the nibbed scarf joints that lock the various sections of the false keel together to ensure a smooth and comfortable fit.

View attachment 345862

All the earlier sanding and narrowing of the stern now paid dividends. The original stern area and the first and second layers of planking had to be reduced to a breadth of 5mm in order to accommodate the sternpost correctly.

View attachment 345863
Mark that is stunning. The scarf joint and the sternpost fit is well done my friend. I know a lot of modelers don’t like the difference shades of walnut planks, but I do. Are you going to paint the lower hull white - I see most Fly guys do? Tricky to get white spot on although you will own that too. Cheers Grant
 
Hi Mark. It is great to see you back at the bench. Clearly the Fly has been missing you as she is responding beautifully to your touches. The black wales look brilliant!
 
Mark that is stunning. The scarf joint and the sternpost fit is well done my friend. I know a lot of modelers don’t like the difference shades of walnut planks, but I do. Are you going to paint the lower hull white - I see most Fly guys do? Tricky to get white spot on although you will own that too. Cheers Grant
Thanks Grant! Seriously can't decide on the whether to cover the hull in white at this point. I also very much like a woody hull and all the various walnut colours. I'm leaving it as late as possible in the hope that something will come up to cement the decision one way or the other :)
 
Hi Mark. It is great to see you back at the bench. Clearly the Fly has been missing you as she is responding beautifully to your touches. The black wales look brilliant!
Thanks Heinrich! It is good to be back again and I must admit (to myself, not the admiral) that despite an enjoyable break and holiday I did miss tinkering about with my model ship. Now I need to find the time to catch up with all your guys' models as well ;)
 
Good morning Mark. Excellent photo. Is that near Orbi Gorge. Takes me back to my teen years- spent many hours there rafting in the Mzimkulu river. Awesome. Cheers Grant
It was indeed the Oribi Gorge Grant. The juxtaposition of the hanging rock with the drop of the gorge makes it look far more intimidating than it actually is. Rafting the Mzimkulu River must've been a great experience. I did a bit of white-water rafting somewhere along the Garden Route many moons ago. It's one of those things that you have to do at least once, like building a model wooden ship :p And just so you know, I have always wanted to use 'juxtaposition' in a sentence but had to look it up first to make sure it made sense and I wasn't trying to use a swanky word just for fun ROTF
 
Last edited:
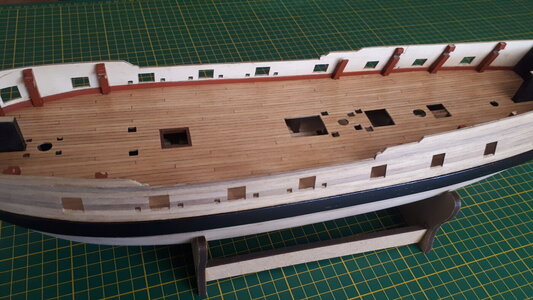
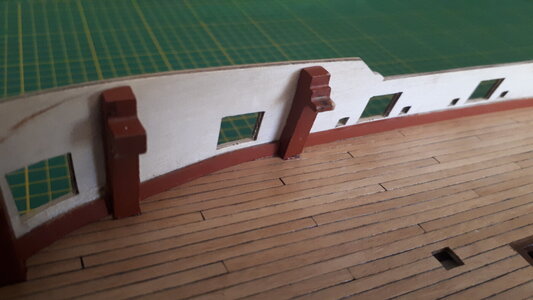
After scraping the gun deck smooth with a single-edged razor blade and giving it a sealing coat of clear varnish, I began the inner bulwark planking process with the same 4mm walnut planks that were used for the second planking layer. The first plank above the deck, which I understand to be the spirketing plank, was painted in red ochre prior to installation to avoid potential paint spill on the deck.

0570_20221219_hms_fly.jpg

A couple of planks required a bit of heat-bending to conform to the more severe curve at the bow. The spirketing plank, thus installed, can now serve as a platform to stack the remainder of the planks to the top edge of the bulwarks.

0575_20221219_hms_fly.jpg
 
Last edited:
After scraping the gun deck smooth with a single-edged razor blade and giving it a sealing coat of clear varnish, I began the inner bulwark planking process with the same 4mm walnut planks that were used for the second planking layer. The first plank above the deck, which I understand to be the spirketing plank, was painted in red ochre prior to installation to avoid potential paint spill on the deck had the painting been left for last.

View attachment 346406

A couple of planks required a bit of heat-bending to conform to the more severe curve at the bow. The spirketing plank, thus installed, can now serve as a platform to stack the remainder of the planks to the top edge of the bulwarks.

View attachment 346407
Good morning Mark. Lovely work. Now I have learnt two new words - juxtaposition and spirketing. ;). Admiralty paints are so good - your red is perfect. Cheers Grant
 
After scraping the gun deck smooth with a single-edged razor blade and giving it a sealing coat of clear varnish, I began the inner bulwark planking process with the same 4mm walnut planks that were used for the second planking layer. The first plank above the deck, which I understand to be the spirketing plank, was painted in red ochre prior to installation to avoid potential paint spill on the deck had the painting been left for last.

View attachment 346406

A couple of planks required a bit of heat-bending to conform to the more severe curve at the bow. The spirketing plank, thus installed, can now serve as a platform to stack the remainder of the planks to the top edge of the bulwarks.

View attachment 346407
Your work is outstanding Mark ! And that’s an under statement , perfection to the extreme well done
 
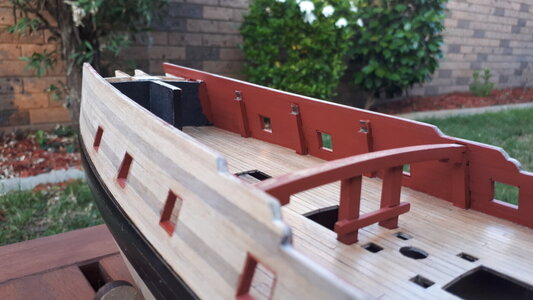
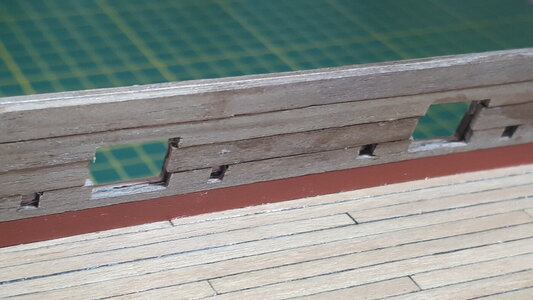
There was more to the inner bulwark planking than met the eye. Well my eye at least. The first bit was relatively straightforward, especially in the waist, stacking the 'quickwork' planks between the oar and portholes towards the top edge of the bulwarks.
0580_20230109_hms_fly.jpg

Then I had to decide how high up the bulwarks to plank. Most examples I saw only went as far as the upper deck beam supports, and continued again after the upper decks had been installed. I opted to complete all the inner bulwark planking up front, although this required the bulkhead extensions to be trimmed to deck level in order to lay uninterrupted planks along the stern and bow sections.
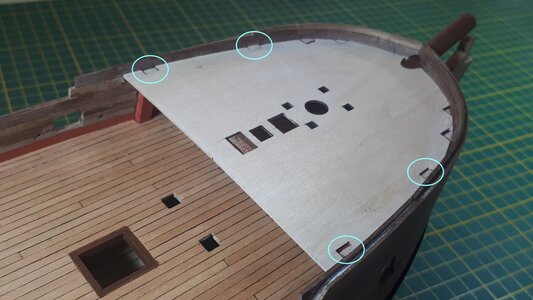
0585_20230109_hms_fly.jpg

Also, the support beam that marks the edge of the quarterdeck needed to be installed prior to planking all the way to the top. This beam is different from the others in that it extends into the bulwark planking, and would be awkward to fit with the planking already in place. Not to mention the rear main mast bit assembly which sits directly beneath the support beam. This, in turn, needed to be fixed in position before the beam could be installed.
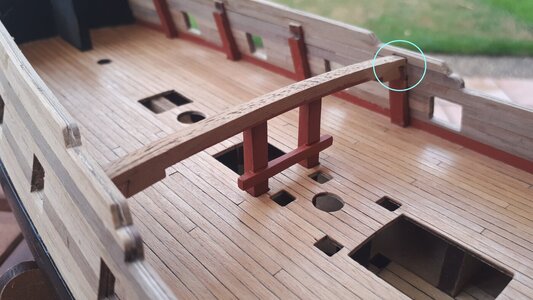
0590_20230109_hms_fly.jpg

I couldn't think of any other deck parts that might be compromised by this process and continued planking to the top of the bulwarks, using a needle file to clean out and make as square as possible all of the oar and portholes.
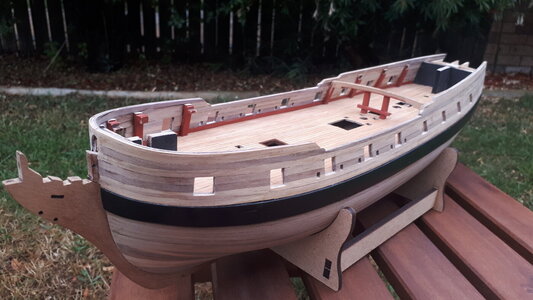
0595_20230109_hms_fly.jpg

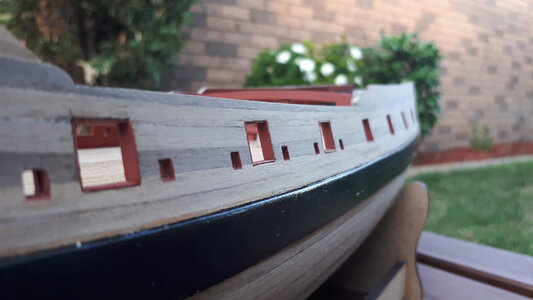
Painting the inner bulwarks in red ochre was a relatively straightforward process, but lining the gun ports was not. The instructions did not call for the explicit lining of the gun ports, but I did notice it in many of the HMS Fly and Pegasus builds and thought I'd give it a go using strips of the Tanganyika deck planking wood, sanded, and pre-painted in red ochre.
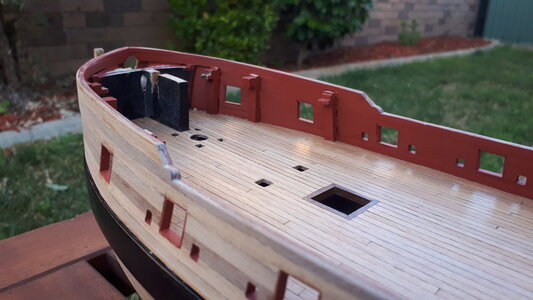
0600_20230109_hms_fly.jpg

The gun port linings, I discovered, are only as good as the extent to which the gun ports are made square, and the edges of the lining invariably had to be cut at an angle to accommodate the shape of the gun port in an undulating bulwark. I don't think I got it exactly right but it was a bit of fun all the same :p

0605_20230109_hms_fly.jpg

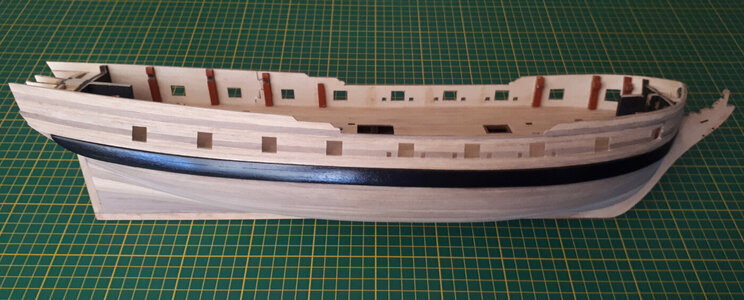
So that's the inner bulwark planking done and dusted. With the outer and inner planking now complete the hull as a whole feels far more a solid and robust than it did previously. I find it interesting that with each separate phase of building a model ship you tend to develop a system for the task at hand, especially repetitive tasks such as the lining of 18 gun ports. And just when you have it down pat, which in my case is when there are only two or three left to go, the phase ends and you move on to the next one, which again requires a whole new system and modus operandi. Wash, rinse, repeat... ROTF

0610_20230109_hms_fly.jpg
 
Last edited:
I like the red color you chose. And the gun port linings look great to me!
Thanks Paul :). For the gun port linings at least. I can't claim credit for the colour choice as it was prescribed for me when I purchased the set of paints that were appropriate to this model. Ah ... now why didn't I keep my gob shut and claim credit for that as well? :p
 
Thanks Paul :). For the gun port linings at least. I can't claim credit for the colour choice as it was prescribed for me when I purchased the set of paints that were appropriate to this model. Ah ... now why didn't I keep my gob shut and claim credit for that as well? :p
You were smart enough to take good advice...still creditable.
 
Very good progress, Mark. I agree with Paul. Intelligence also means to know not to reinvent the wheel all the time!
 
Back
Top