- Joined
- Oct 23, 2018
- Messages
- 886
- Points
- 403

Thanks for sharing, Uwe. Perhaps I will try this way of presentation also in the future.
 |
As a way to introduce our brass coins to the community, we will raffle off a free coin during the month of August. Follow link ABOVE for instructions for entering. |
 |
 |
The beloved Ships in Scale Magazine is back and charting a new course for 2026! Discover new skills, new techniques, and new inspirations in every issue. NOTE THAT OUR FIRST ISSUE WILL BE JAN/FEB 2026 |
 |

Fantastic work Uwe,Many Many Thanks for all your positive feedback and all the likes received. - Great that you all felt with me - the step to make the cut was not easy, but I am very happy, that I have made it - it is a new way (for me) of representation of a model - completely new perspectives and views are now possible.
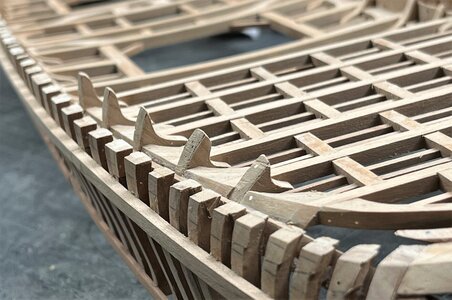
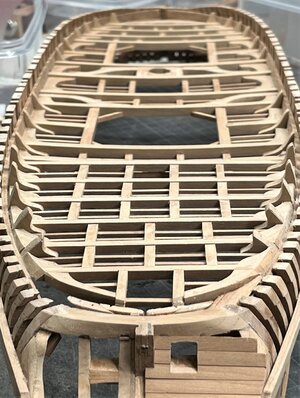
Here some more photos which I made directly after the cut, so no cleaning or whatsoever made - I show you these, so that somebody else who wants to make once such a cut knows, what he / she can expect.
The tools I used - for the first frame I used the smaller one, which was passing between two neighbouring frames - afterwards I used the wider one
View attachment 344058
View attachment 344059
The two parts are still fitting - off course, there is only 0,5mm in height missing
View attachment 344051
View attachment 344052
View attachment 344060
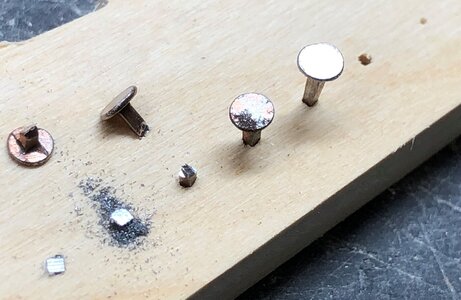
also bolts were cut
View attachment 344061
View attachment 344062
View attachment 344048
View attachment 344049
View attachment 344050
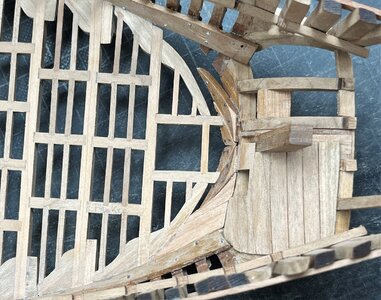
complete new perspective - the undersight of the deck structure with beams, carlings etc.
View attachment 344044
View attachment 344045
one of the next works will be the cleaning of the undersight, in order to remove rests of glue (especially under the carlings and ledges)
View attachment 344063
The stern (lower part of the hull)
View attachment 344055
the stern (upper part)
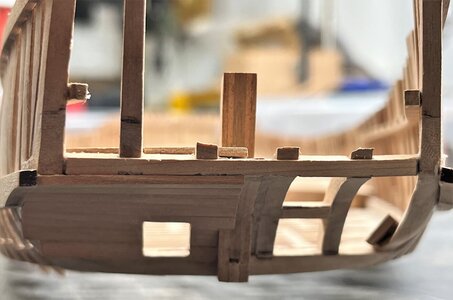
View attachment 344054
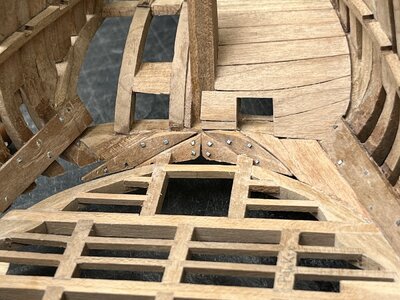
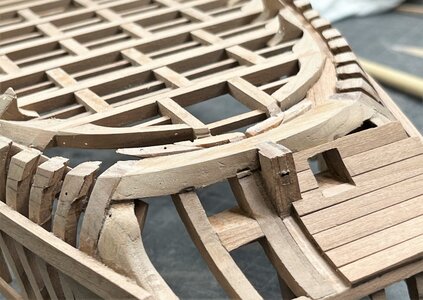
the stern (upper part view from undersight) - btw on the right side you can see that one joint opened, but it will be easy to repair
View attachment 344053
The bow
View attachment 344056
View attachment 344057
with some sanding blocks as distancers - this will be appr. the height of final presentation
View attachment 344046
View attachment 344047
Many Thanks for the interest in my building log - great to have so much friends following this log
Good morning Uwek. Way above my pay grade. Brilliant. This is an amazing way to display a model and you owned the separation. Cheers GrantMany Many Thanks for all your positive feedback and all the likes received. - Great that you all felt with me - the step to make the cut was not easy, but I am very happy, that I have made it - it is a new way (for me) of representation of a model - completely new perspectives and views are now possible.
Here some more photos which I made directly after the cut, so no cleaning or whatsoever made - I show you these, so that somebody else who wants to make once such a cut knows, what he / she can expect.
The tools I used - for the first frame I used the smaller one, which was passing between two neighbouring frames - afterwards I used the wider one
View attachment 344058
View attachment 344059
The two parts are still fitting - off course, there is only 0,5mm in height missing
View attachment 344051
View attachment 344052
View attachment 344060
also bolts were cut
View attachment 344061
View attachment 344062
View attachment 344048
View attachment 344049
View attachment 344050
complete new perspective - the undersight of the deck structure with beams, carlings etc.
View attachment 344044
View attachment 344045
one of the next works will be the cleaning of the undersight, in order to remove rests of glue (especially under the carlings and ledges)
View attachment 344063
The stern (lower part of the hull)
View attachment 344055
the stern (upper part)
View attachment 344054
the stern (upper part view from undersight) - btw on the right side you can see that one joint opened, but it will be easy to repair
View attachment 344053
The bow
View attachment 344056
View attachment 344057
with some sanding blocks as distancers - this will be appr. the height of final presentation
View attachment 344046
View attachment 344047
Many Thanks for the interest in my building log - great to have so much friends following this log
That is quite an accomplishment! There is some sanding in your future? Looking forward to your progress for sure!Many Many Thanks for all your positive feedback and all the likes received. - Great that you all felt with me - the step to make the cut was not easy, but I am very happy, that I have made it - it is a new way (for me) of representation of a model - completely new perspectives and views are now possible.
Here some more photos which I made directly after the cut, so no cleaning or whatsoever made - I show you these, so that somebody else who wants to make once such a cut knows, what he / she can expect.
The tools I used - for the first frame I used the smaller one, which was passing between two neighbouring frames - afterwards I used the wider one
View attachment 344058
View attachment 344059
The two parts are still fitting - off course, there is only 0,5mm in height missing
View attachment 344051
View attachment 344052
View attachment 344060
also bolts were cut
View attachment 344061
View attachment 344062
View attachment 344048
View attachment 344049
View attachment 344050
complete new perspective - the undersight of the deck structure with beams, carlings etc.
View attachment 344044
View attachment 344045
one of the next works will be the cleaning of the undersight, in order to remove rests of glue (especially under the carlings and ledges)
View attachment 344063
The stern (lower part of the hull)
View attachment 344055
the stern (upper part)
View attachment 344054
the stern (upper part view from undersight) - btw on the right side you can see that one joint opened, but it will be easy to repair
View attachment 344053
The bow
View attachment 344056
View attachment 344057
with some sanding blocks as distancers - this will be appr. the height of final presentation
View attachment 344046
View attachment 344047
Many Thanks for the interest in my building log - great to have so much friends following this log
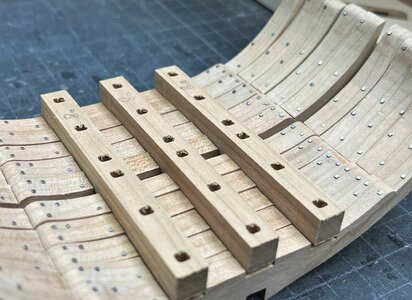
If you mean the square bolts please take a look at this post describing more in detail the "making of"Nicely done!! Uwe what do you use to simulate the bolt heads? Thx, Paul
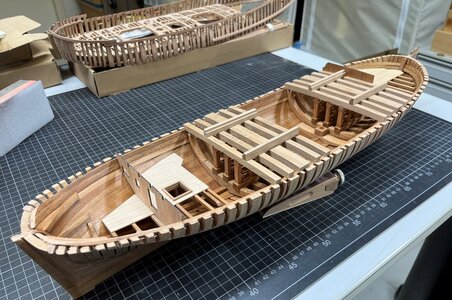
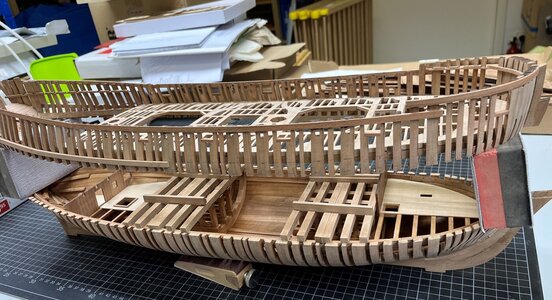
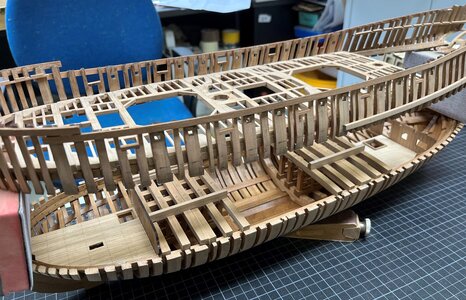
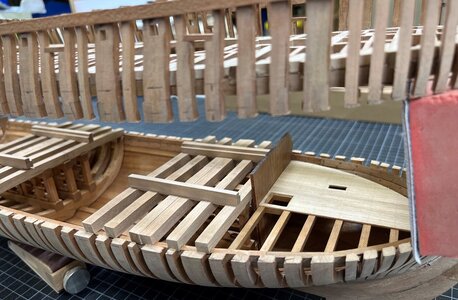
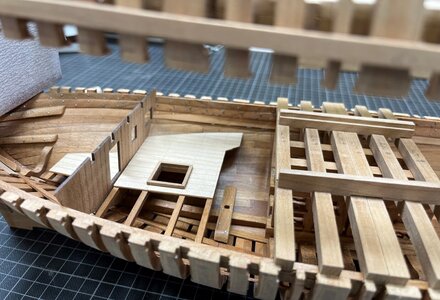
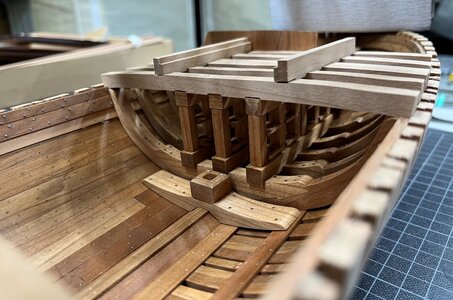
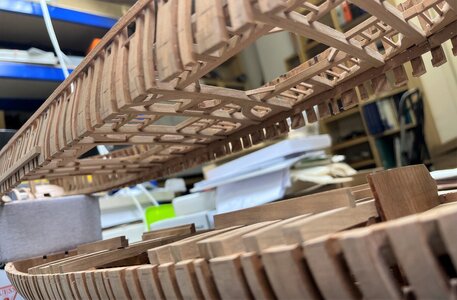
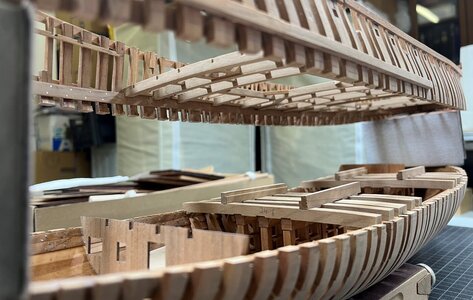
It’s looking very nice, Uwe. With the cut a whole new “world / ship” (*) appears with a lot of possibilities.Many Thanks once more for all the interest in my project - great to have you "on board"
Some more impressions - I had to dry-install shortly the until now prepared interior to get an impression of how it will look like
first without the upper part of the hull
View attachment 344393
View attachment 344394
View attachment 344396
View attachment 344399
View attachment 344400
View attachment 344401
View attachment 344397
View attachment 344398
I am very happy with the result - There will be a lot of new possibilities to see the interior of such a model
Remember maybe my Le Coureur model, also built with complete interior, but barely visible - more or less not visible
Maybe I should build another Coureur and make a cut ?!?!
The next post wuill include once more work and progress and not only impressions .... so stay tuned (as I am)

If you mean the square bolts please take a look at this post describing more in detail the "making of"
View attachment 344391
HMS GRANADO - full hull - POF kit by CAF in 1:48 - by Uwe
That looks really impressive. Now I can see why Maarten also loves the CLOU.shipsofscale.com
for example also used on the mortar base
View attachment 344392
HMS GRANADO - full hull - POF kit by CAF in 1:48 - by Uwe
That looks really impressive. Now I can see why Maarten also loves the CLOU.shipsofscale.com
HMS GRANADO (1742) - midship section - POF by CAF in 1:48 - by Uwe
The frames are prepared with all the visible nails now we have to make the riders for the mortar base. These heavy stiffeners were necessary to take over the weight of the shell room with mortar and also the extreme forces of the bomb during firing all together 5 riders are under the mortar -...shipsofscale.com

As beautiful and daring as this is, a staggered section would also have been very nice...Many Thanks once more for all the interest in my project - great to have you "on board"
Some more impressions - I had to dry-install shortly the until now prepared interior to get an impression of how it will look like
first without the upper part of the hull
View attachment 344393
View attachment 344394
View attachment 344396
View attachment 344399
View attachment 344400
View attachment 344401
View attachment 344397
View attachment 344398
I am very happy with the result - There will be a lot of new possibilities to see the interior of such a model
Remember maybe my Le Coureur model, also built with complete interior, but barely visible - more or less not visible
Maybe I should build another Coureur and make a cut ?!?!
The next post wuill include once more work and progress and not only impressions .... so stay tuned (as I am)

Remember maybe my Le Coureur model, also built with complete interior, but barely visible - more or less not visible
Maybe I should build another Coureur and make a cut ?!?!


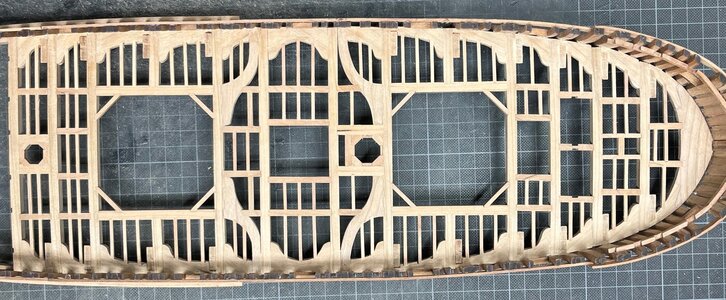
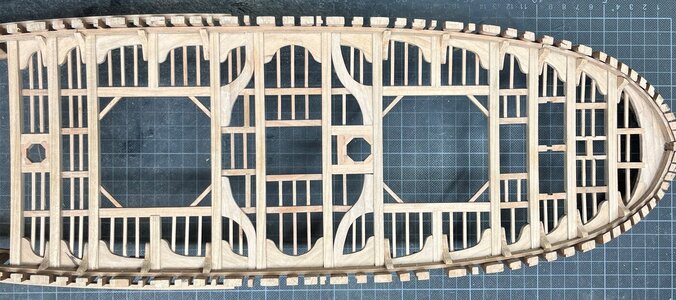
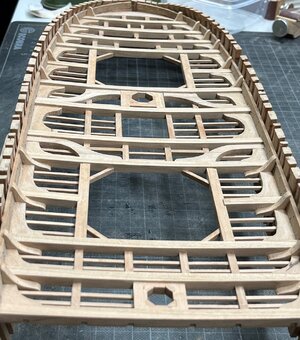
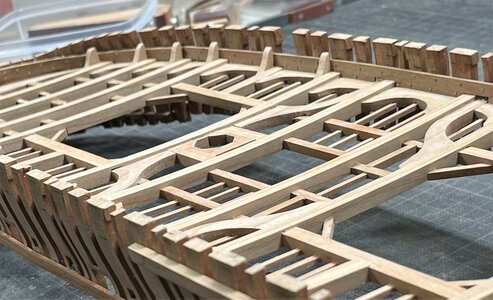
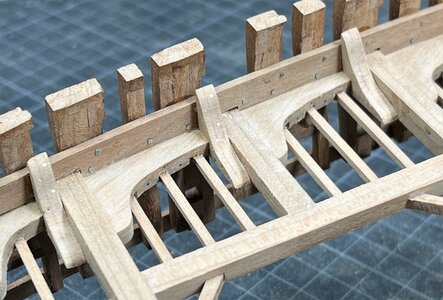
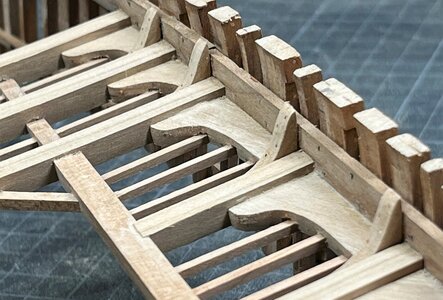
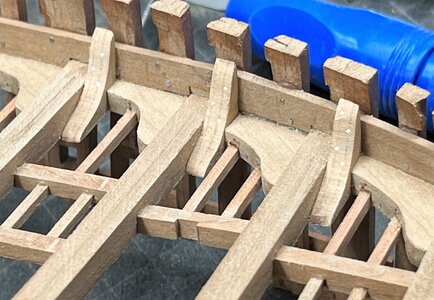
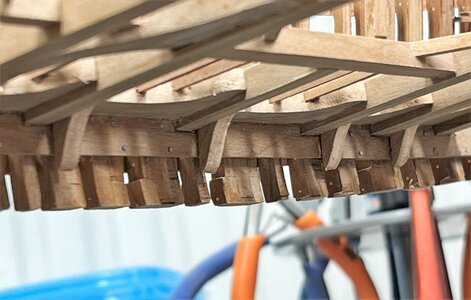
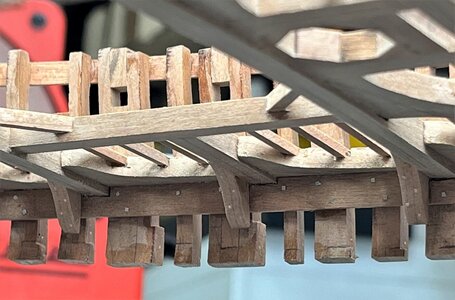
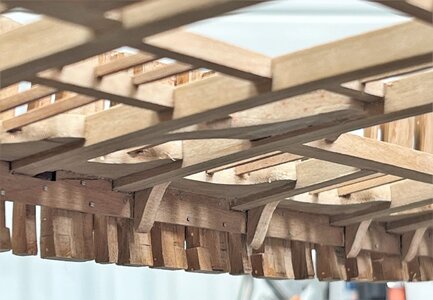
Good afternoon Uwek. I don’t have the knowledge or expertise to give constructive comments, however I am in awe of your build , processes and presentation. I do hope one day I can build something like this. This is incredible work. Cheers GrantBut I promised last week some more progress on the model
The hanging knees are now installed - each "fixed" with 6 copper nail "bolts"
view from the top
View attachment 345504
and view from the other undersight
View attachment 345505
View attachment 345507
View attachment 345506
some close up photo
View attachment 345498
View attachment 345499
View attachment 345500
and the view, how they will be visible later on
View attachment 345501
View attachment 345502
View attachment 345503
Many Thanks for your interest - to be continued ......

Die Katze denkt: Bist du komplett bescheuert, das Schiff in zwei Hälften zu zerlegen, das wollte ich auch machen, wenn alles zu Ende ist. Du Spaßverderber.I am not sure, if this means good, ok, or please change it


