Very good to have you back - I am looking forward to your next working steps ...
-

Win a Free Custom Engraved Brass Coin!!!
As a way to introduce our brass coins to the community, we will raffle off a free coin during the month of August. Follow link ABOVE for instructions for entering.
-

PRE-ORDER SHIPS IN SCALE TODAY!
The beloved Ships in Scale Magazine is back and charting a new course for 2026!
Discover new skills, new techniques, and new inspirations in every issue.
NOTE THAT OUR FIRST ISSUE WILL BE JAN/FEB 2026
You are using an out of date browser. It may not display this or other websites correctly.
You should upgrade or use an alternative browser.
You should upgrade or use an alternative browser.
HMS Victory Cross Section, POF ,Scale 1:48 by Raymond Deliz
- Joined
- Jul 22, 2017
- Messages
- 331
- Points
- 268

Hello everyone,
I want to thank everyone who has looked upon me and my posts as a relative that has been away for awhile and not look at me like a stranger. The Admiral is always in charge and if a lowly deckhand as myself can keep her happy with the starting and completion of her honey-do list, then she will grant me access back to my shipyard.
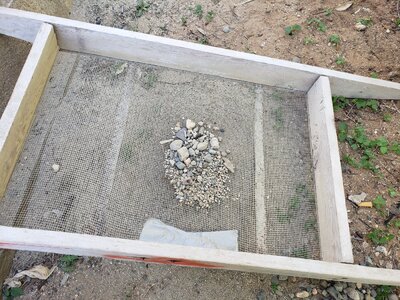
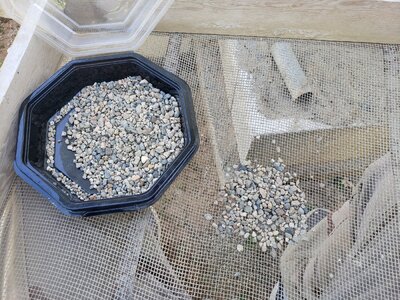
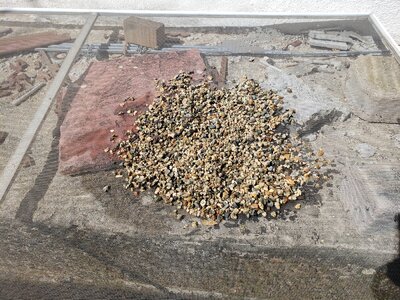
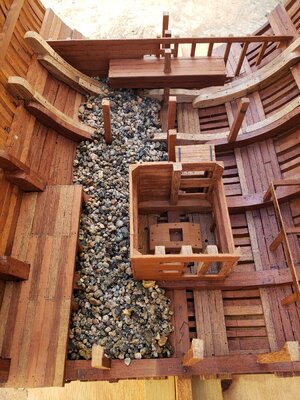
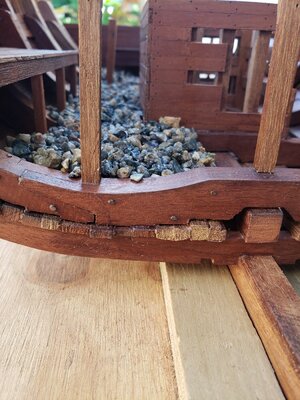
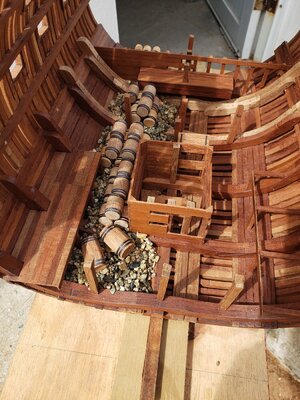
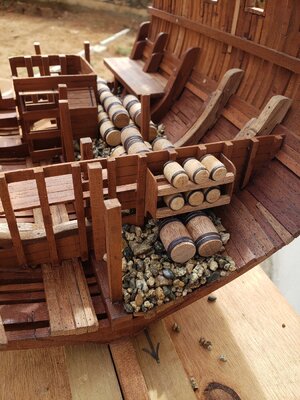
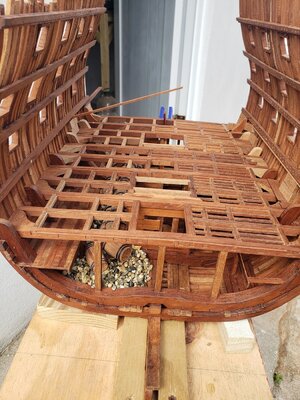
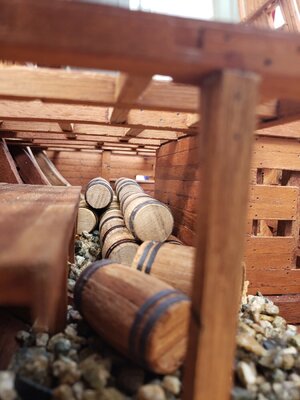
After completing the hold with columns, I turned my attention to the ballast. I could have bought fish tank gravel but decided to find my own material. Luckily I had a lot of left over river sand I bought for filling in the front porch. I went ahead and sifted the sand until there was only small pebbles. I had to take my time and get rid of the larger pebbles and kept pebbles that were roughly between 3.5 to 2 mm in size. After sifting and picking like what felt like forever, I had enough ballast material (approximately 1/2 kilo) to fill in the hold. I rinsed off the pebbles to get rid of all the loose dust and foreign material (small twigs an/or leaves). I placed it on a screen I had left over and let it sun dry. Afterwards, I mixed a solution of glue and water, placed it in a small plastic bowl and shook the crap out of it (very similar to how you'd add and mix your salad dressing in those to-go salad trays you get at a fast food restaurant).
I finally started adding the ballast ensuring that I did not make too much of a mess and leveling off as I went along. Once the gravel was dry enough, I started adding my barrels to the hold. I made sure to keep two of the larger barrels for the spirit room along with the six smaller ones. I laid the two large barrels on the ballast but was hesitant on how to incorporate the smaller ones. It then came to mind that I would treat the larger barrels as if they contained rum which a cheaper spirit compared to what the smaller barrels had, a much more costly spirit in the form of fine brandy. In order to ensure that the brandy barrels were well protected for the sea, I made a special shelf for the storage and protection of this fine spirit. I incorporated the shelf to the forward spirit room bulkhead and glued it in place. Once everything was to my liking, I permanently add the orlop deck in place.
Here are a few photos showing how it looks so far.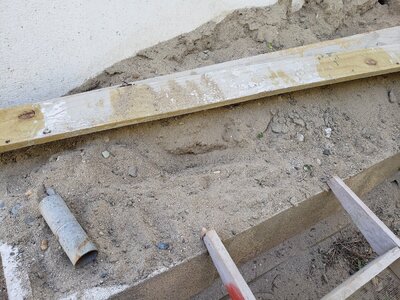


Your self made ballast stones are looking very good - I like your model very much 
Looks very magnificent! Can't wait until it is done!
- Joined
- Jul 22, 2017
- Messages
- 331
- Points
- 268

Hello everyone,
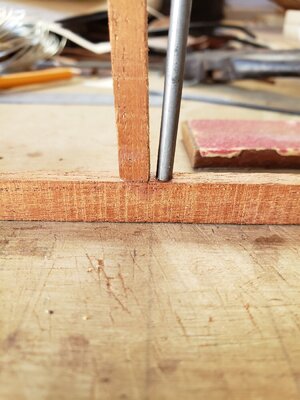
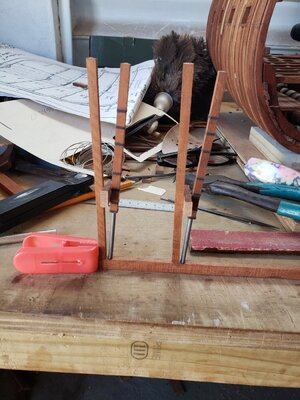
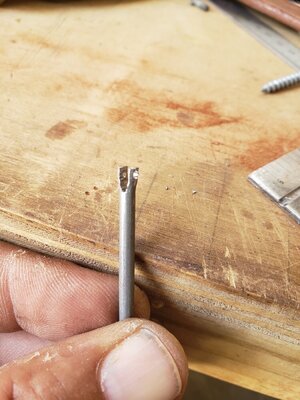
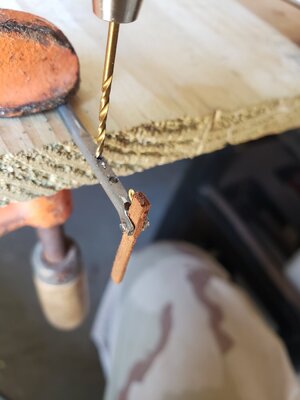
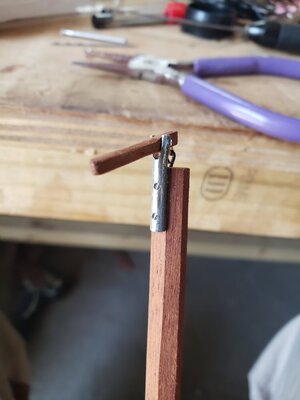
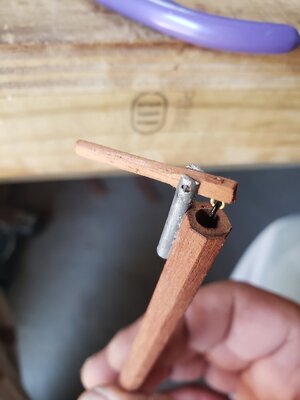
Here is another small update to my Victory. Since I am now on the the orlop deck, I have to keep into consideration all aspects of the lower gun deck. Examples of said items are the chain pumps and elm tree pump. What I did was work on these pumps and the chain pumps were pretty straightforward. The elm tree pumps were a different matter altogether. The chain pumps are square but he elm tree pumps are octagonal. I had to use a small jig that would hold square stock in an angle. Once I had octagonal stock, I went to work on the construction of the pumping handle. I had to first decide how to attach the handle and also what material to use to support the handle. I used a 5 gallon paint can's handle which was approximately 3.5 mm in diameter. I cut a slot on top, spread the ears, and drill a hole that would use a pivot for the handle. After the handle was finished I added it to the elm tree with pins. I finished off the whole pump with two bands made from card stock. The elm tree pump is a little longer than what I need but once the lower gundeck beams are I. Placed I will give them there final dimensions. Here is what I have so far.
Raymond
p.s. please be kind and don't make fun of my fingernails. I know I am in desperate need of a manicure.
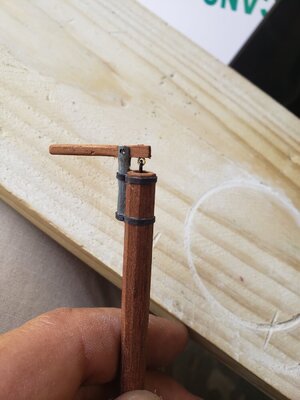
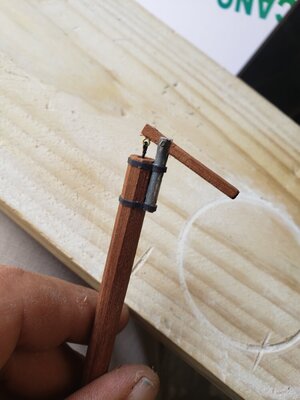
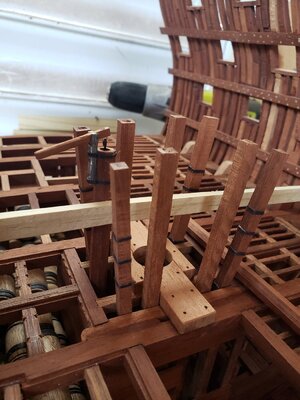


p.s. please be kind and don't make fun of my fingernails. I know I am in desperate need of a manicure.
Hallo Raymond,
first of all - very good step by step work
second: these are typical modelers fingers and nails - a little bit of everything -> 99% of us have similar ones
- Joined
- Jul 22, 2017
- Messages
- 331
- Points
- 268

Thank you for your kindness Uwe. I believe that you are correct. You can't really enjoy this hobby if you're worried about your fingernails.Hallo Raymond,
first of all - very good step by step work
second: these are typical modelers fingers and nails - a little bit of everything -> 99% of us have similar ones
- Joined
- Jul 22, 2017
- Messages
- 331
- Points
- 268

Hello everyone,
After completing the elm tree pumps I thought they were finished. During the night as I was smoking a cigarette on the front porch with the Admiral, I explained what I had accomplished in regards to the chain pumps and elm tree pump. She asked me what the difference was between the two of them and I informed her that the chain pumps were for the removal of water below decks and the elm tree pumps were for drawing sea water for cleaning and/or fire fighting when it hit me like a ton of bricks. Yes, I made the elm tree pumps but realized that I had forgotten to also add the spigot/tap. A person can spend a lifetime pumping away on the elm tree pump i made but wouldn't get an ounce of water from it. So the following day that was the first thing I had to address. After boring holes and fitting the first spigot I started on the second one. After dry fitting it into place, I tried to remove it in order to add glue when it got crushed between my fingers. I remade the spigot and with great care, glued into place.
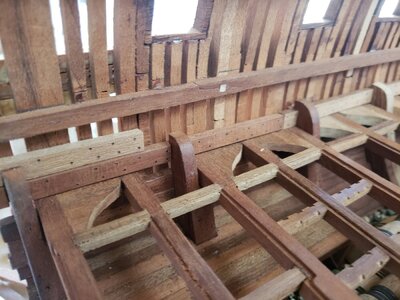
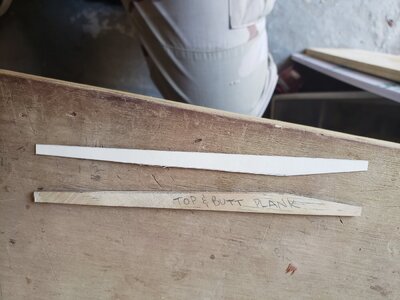
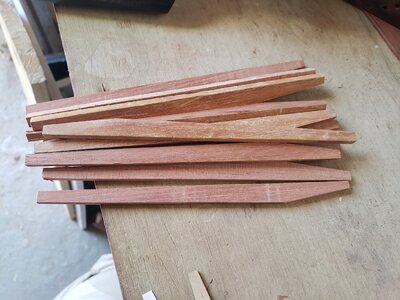
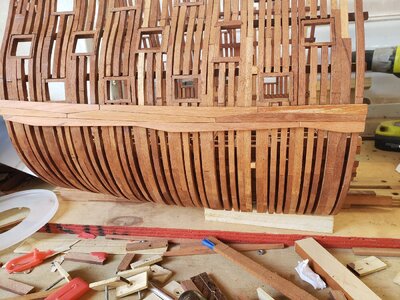
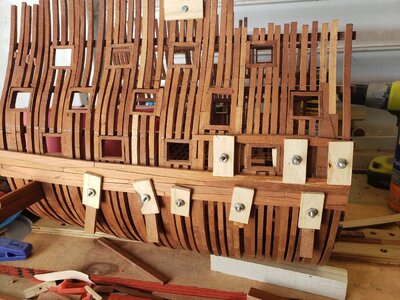
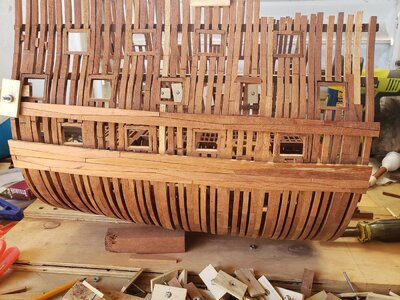
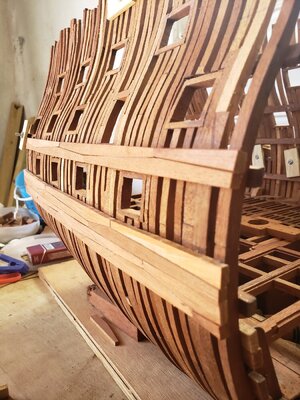
I also decided that I would go ahead and start adding the internal walls along the starboard side when I realized that it would be much easier if I worked on the external hull seeing as I had access between the frames to use my clamps. I decided that I would start with the wales and used the plans to make a template of the top & butt joints since I had to make multiple boards, I used the card stock template and made a wooden one that could be used many times without having to worry about distortion. After cutting boards and sanding them to shape, I started adding them on the hull and securing them with my clamps. Once the wales along the waterline were secure, I turned my attention to the next set of wales that also had a different shaped top & butt joint design. I repeated the same process as before and also added this section of the wales into place.
Now that the starboard side has its first part of wales in place I will start on the port side. I want to finish the top & butt joints on either side of my Victory due to everything else being straight and relatively easy to do.
Here are the photos depicting what I have so far.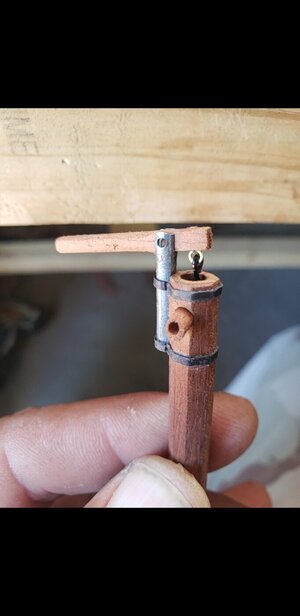


- Joined
- Jul 22, 2017
- Messages
- 331
- Points
- 268

Hello everyone,
I am just writing a quick update on my Victory. Since my brother Danny came to visit (and soon my sister Betty) I have not had too much time in the shipyard. I however try to do something on my Victory even if it is only half to one hour at a time. I filled in the area between the wales on the starboard side of my Victory thus enclosing the area around the gunports of the lower deck. I have decided that I will continue to plank the external hull. I will complete the starboard side fully and the port side will be planked from the waterline going up. Once I have the outer hull planked, I will continue working on the orlop deck.
Here are a few photos of what I have so far.
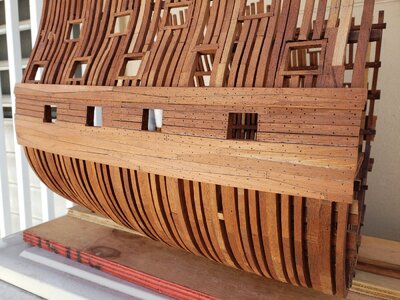
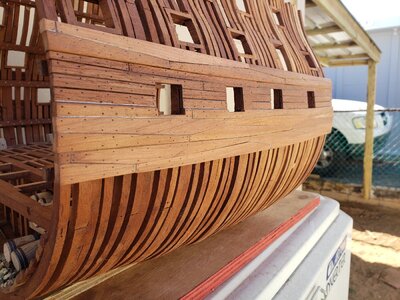
In the photo below you can start to appreciate the Victory's profile.
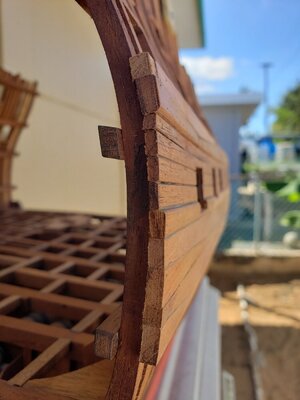
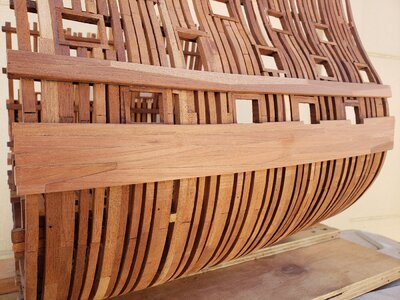
I am just writing a quick update on my Victory. Since my brother Danny came to visit (and soon my sister Betty) I have not had too much time in the shipyard. I however try to do something on my Victory even if it is only half to one hour at a time. I filled in the area between the wales on the starboard side of my Victory thus enclosing the area around the gunports of the lower deck. I have decided that I will continue to plank the external hull. I will complete the starboard side fully and the port side will be planked from the waterline going up. Once I have the outer hull planked, I will continue working on the orlop deck.
Here are a few photos of what I have so far.


In the photo below you can start to appreciate the Victory's profile.


- Joined
- Apr 20, 2020
- Messages
- 6,239
- Points
- 738

it's looks very impressive and beautiful progress, well doneHello everyone,
I am just writing a quick update on my Victory. Since my brother Danny came to visit (and soon my sister Betty) I have not had too much time in the shipyard. I however try to do something on my Victory even if it is only half to one hour at a time. I filled in the area between the wales on the starboard side of my Victory thus enclosing the area around the gunports of the lower deck. I have decided that I will continue to plank the external hull. I will complete the starboard side fully and the port side will be planked from the waterline going up. Once I have the outer hull planked, I will continue working on the orlop deck.
Here are a few photos of what I have so far.
View attachment 209021View attachment 209022
In the photo below you can start to appreciate the Victory's profile.
View attachment 209023View attachment 209024

Good Job Raymond. I like the pumps solution they look really good. This scale allows very good details and you are talking advantage of that. It will be a wonderful model. You should be thinking about the display already
Last edited:
- Joined
- Jul 22, 2017
- Messages
- 331
- Points
- 268

Hello Hellmuht,Good Job Raymond. I like the pumps solution they look really good. This scale allows very good details and you are talking advantage of that. It will be a wonderful model. You should be thinking about the display already
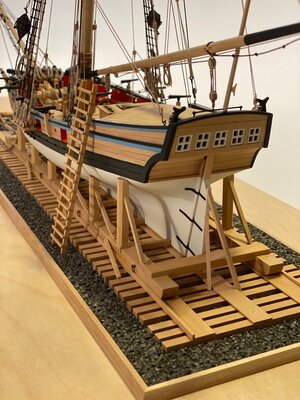
I have already been thinking about how it will be displayed. I am thinking of having it propped up the way they were when in a drydock and/or shipyard. Something similar to the attached photo.
Si señor!! It sound like a really good idea!!
- Joined
- Jul 22, 2017
- Messages
- 331
- Points
- 268

Hello everyone,
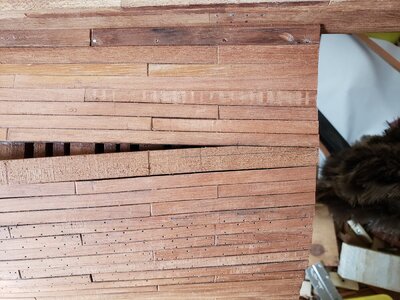
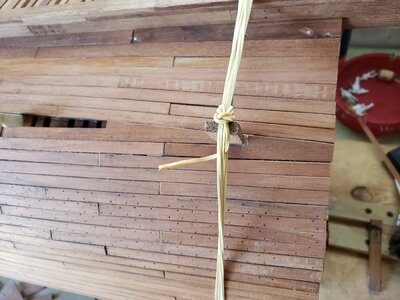
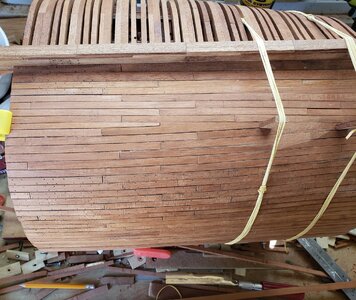
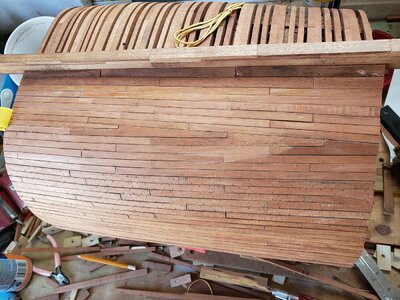
As you all know, I decided to work on the exterior planking, below the wales, on the starboard side. Once started below the wales, I took a slight deviation and also started working from the garboard strake as well. Wouldn't you know it that when these sides started to meet, I was left with a large gap of four boards forward dwindling to a little less than two boards aft. This is where the dilemma hit me big time. While most people fill in this void with planks that end in a sharp point, I am not a big fan of this process. It works well if a person decides to paint and/or add copper plates.
The Admiral and I decided that we would not paint but instead use satin varnish to really appreciate the beauty of the wood used on my build. What I decided to do in order to remedy this situation was to use a variation of stealer planks. While there is a total of three stealer planks, a feel better with this result compared to having dagger boards. I still have to sand the external hull but here are a few photos of what I did to solve my problem. I hope this helps anyone who may come across this sometime in there modeling lives.
Raymond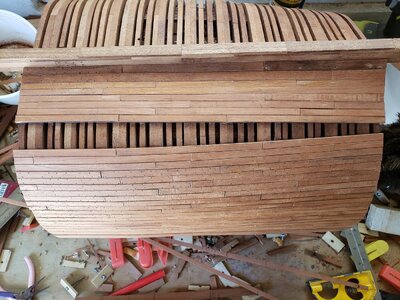


- Joined
- Jul 22, 2017
- Messages
- 331
- Points
- 268

Hello everyone,
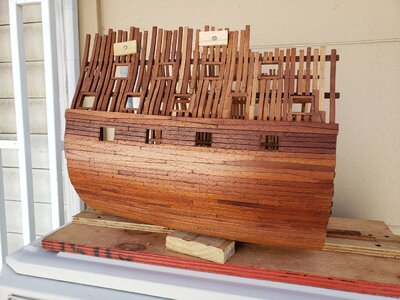
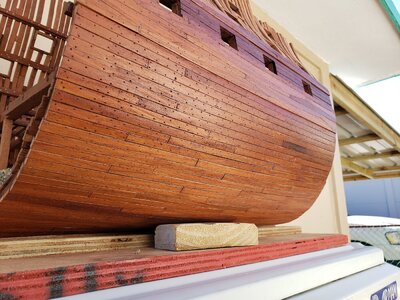
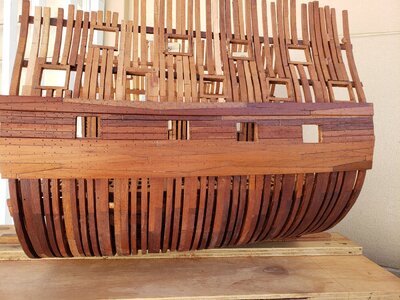
After completing the planking on the starboard side, I sanded everything down ensuring it was smooth. Once smooth, I simulated treenails with an awl and darkened them in with a pencil.
Afterwards,I purchased a quart of sanding sealer and gave the planks its first coat and it gave life to the mahogany. This is where I must confess to everyone that I will not paint my Victory. I am sure everyone has seen Karl's work. Many might know him as Jeronimo. I love the way he let's the natural beauty of the woods he uses on his builds show through. I have been to Germany twice, for a total of five years and have enjoyed the Christmas festivals where a person can enjoy a warm mug of gluhwein and appreciate the artisans woodworking skills. These artisans favored the use of varnish and/or shellac so that a person would be able to see the beauty of the woods used.
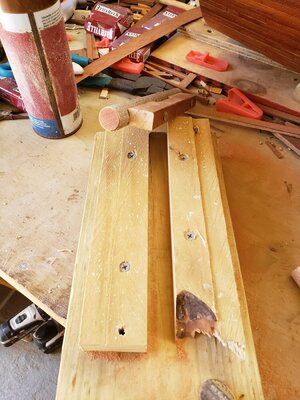
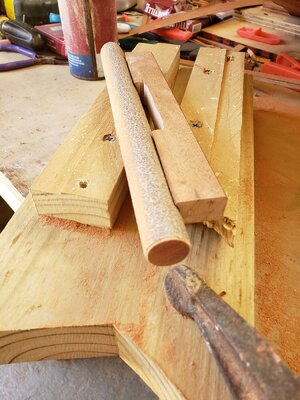
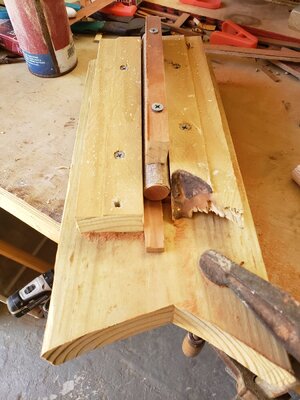
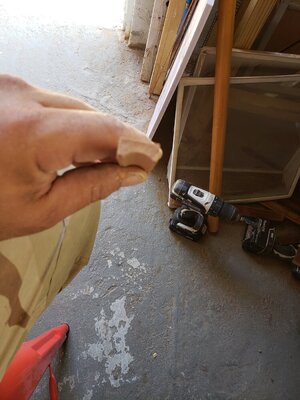
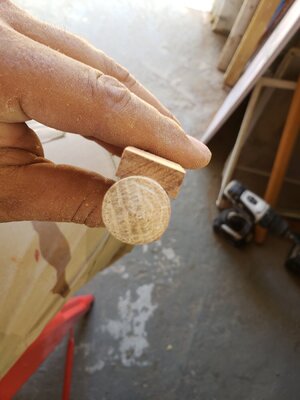
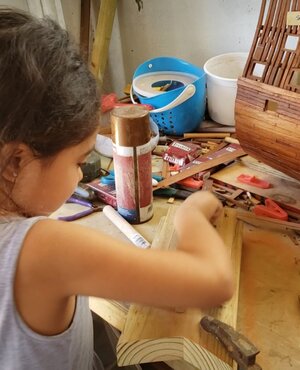
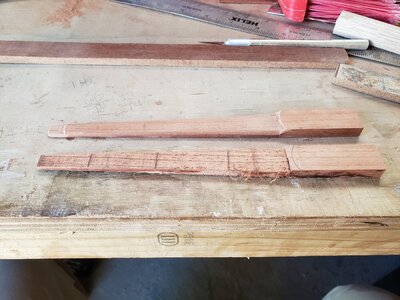
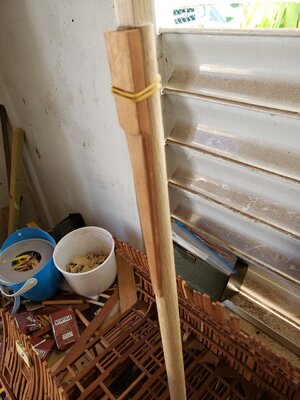
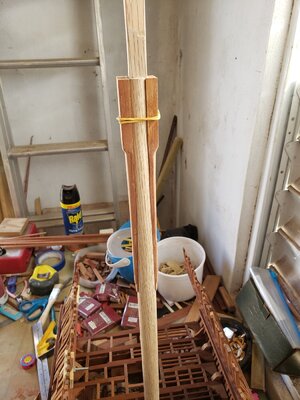
I have also jumped onto the main lower mast. It is still a work in progress and there is still much to do. One aspect I tackled today where the hounds. It was a little difficult to figure out how to make the concave section that rests against the mast. What I did was make a simple jig to hold my board inplace and used a 3/4 inch dowel cover with sandpaper and proceeded to sand the shape. It was so easy that my 7 year old granddaughter helped me out. Once both hounds were completed, I used two rubberbands to hold them in place. I still need to add mast bands before I can secure them in place. Here are a few photos of what I have so far.
Raymond


Last edited:
- Joined
- Jul 22, 2017
- Messages
- 331
- Points
- 268

Hello everyone,
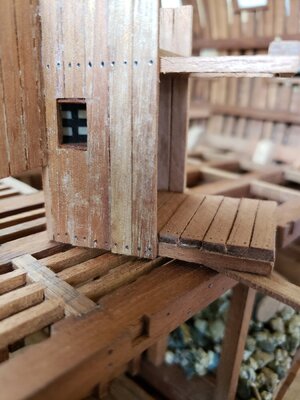
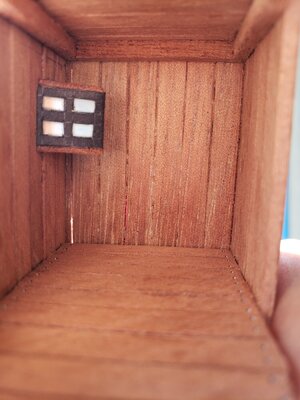
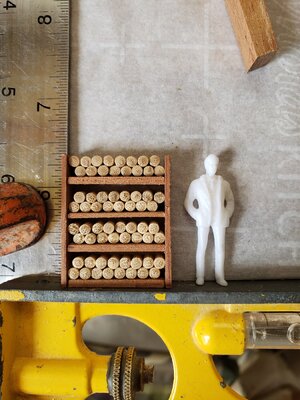
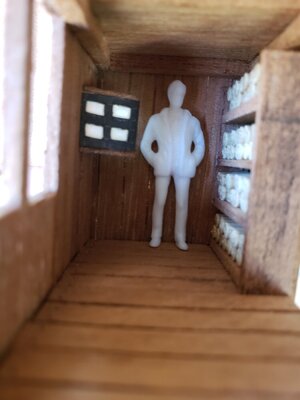
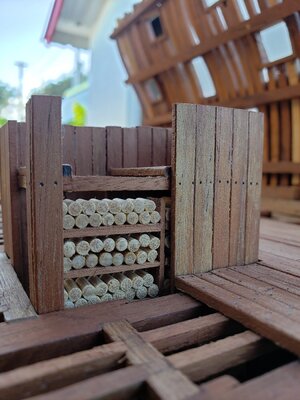
I can't help but think that you guys might think me crazy but what can I do? In my last post I mentioned that I was working on the mast an you would think that I was close to finishing it. Nope. I decided to work on the hanging magazine. I figured that since I am now on the orlop deck I should just continue with the fixtures on this deck so that I can start work on the lower gun deck beams. At first, the hanging magazine seems a little daunting but if you treat it like a small room then it becomes a little more manageable. I took into account the spacing that was left on the orlop deck beams for the hanging magazine and got my measurements. Once I had this, I reviewed three separate plan sheets and also referenced my books and got to work. I started out with the floor and ceiling, followed by walls. There was no true height for the light box so I used my judgment and spaced it somewhat evenly between the light box room and the hanging magazine's floors. Once that was complete, I worked on the shelves that hold the gun powder cartridges. Once again, I used my judgment for these dimensions. I found a bamboo skewer that fit well in the barrel of my 32 pound cannons and used that to make the cartridges. I cut them to 6mm in length while the shelves are 7mm in depth. There are a total of 4 shelves per rack and each rack holds 16 cartridges for a total of 64 cartridges per rack. I only have one rack completed and must work on the second one. I decided to take a small break and give you guys an update before getting back to work.
Raymond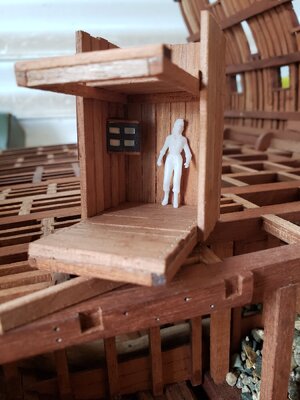


- Joined
- Jul 22, 2017
- Messages
- 331
- Points
- 268

Hello everyone,
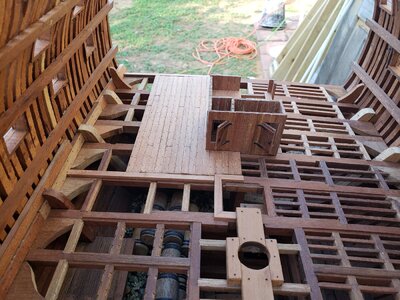
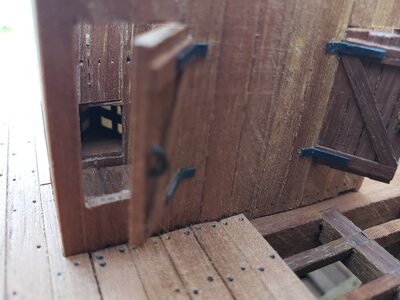
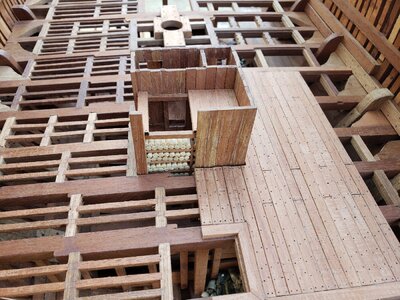
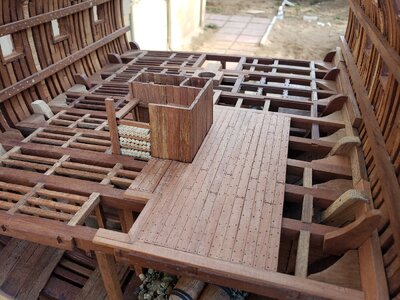
I finished the hanging magazine and started working on the orlop deck. I first had to frame out the areas around the spirit room hatch and the grating over the shot locker. Once this was complete, I started on the decking behind the shot locker hatch working aft. I have not finished this task yet but will continue tomorrow if allowed by the Admiral. Here are a few photos of what I have so far.
Raymond


Very good looking - I like your style (if it is allowed to say in this way) very much.
Are the treenails filled with some wooden sticks, or are these "only" holes with a pin and marked dark gray with a pencil ? They are looking very realistic, especially for inside lower decks and the interior walls.
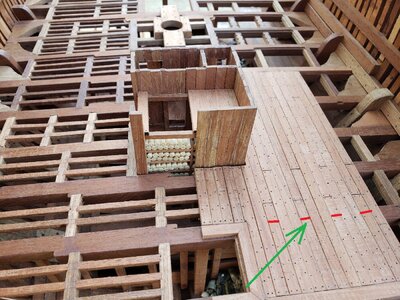
I Have one small comment to the deck planking...... If it is not glued and fixed until now, maybe you can change the four butt joints of the deck planking directly on a beam and not a carling or a ledge - I think the shipwrights would have put them on more stabile parts of the structure

- Joined
- Jul 22, 2017
- Messages
- 331
- Points
- 268

Hello Uwe,Very good looking - I like your style (if it is allowed to say in this way) very much.
Are the treenails filled with some wooden sticks, or are these "only" holes with a pin and marked dark gray with a pencil ? They are looking very realistic, especially for inside lower decks and the interior walls.
I Have one small comment to the deck planking...... If it is not glued and fixed until now, maybe you can change the four butt joints of the deck planking directly on a beam and not a carling or a ledge - I think the shipwrights would have put them on more stabile parts of the structure
View attachment 213514
I really appreciate your feedback. This is how we, as modellers improve on our craft. Sadly the planks are already glued in place and truly, it was a hindsight on my part for not considering joining boards on actual beams. The treenails are actually depressions with an awl and then darkened with a pencil. Many thanks.
Raymond
- Joined
- Jul 22, 2017
- Messages
- 331
- Points
- 268

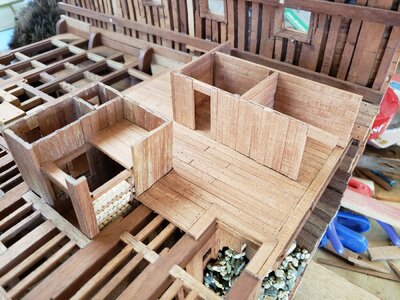
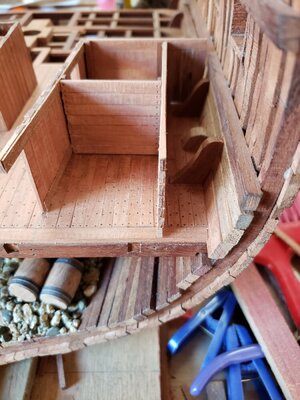
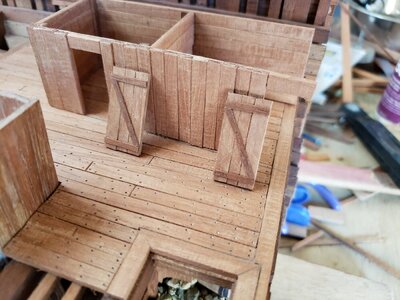
Hello everyone,
Today, work consisted of the lieutenant's and captain's storeroom plus the carpenter's walk. I cut timber down to size and proceeded to glue them together. It was a little time consuming, especially getting the correct profile for the bulkhead along the carpenter's walk. Once this bulkhead was complete I added the door to include handle and door hinges.
All bulkheads and walls are now complete but are not yet glued in place. Once I work on the lower gundeck beams, I'll have to cut out the areas along the bulkheads to allow access for the beams. Once this step is done, I can go ahead and glue the storeroom in place.
Raymond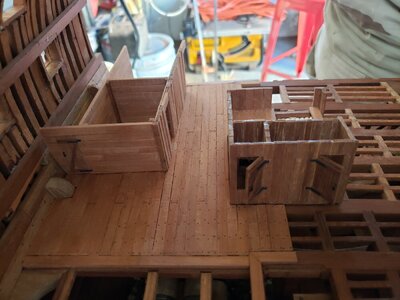


