Good afternoon Bertie. It has been a fun journey and those 120 pages are full of bouncing around a loads of banter and fun. Thanks for looking in, I have learnt loads from the guys here. Cheers GrantThose three sentences have hooked me. I will now have to read all 120+ pages of this build to find out how you won through all of the difficulties. I cheated and looked at the last pages and it's clear that you have been 'Victory-ous'
I'm building the OcCre Beagle which is very similar. It is built down to a price and has some inaccuracies to correct. I am loving my Beagle too. I don't think it will look perfect when I have finished but I will have learned a lot and most importantly will have had a lot of fun.
This is another reason for me to read all of your thread. I will learn more from your mistakes than I would from the 'perfect' builds of the experts, who are just too advanced for me to copy at this point in my shipbuilding. It also encourages me to write about my mistakes without embarrassment so that other beginners can learn from me (and maybe I'll come up with something for the experts too).
I like the way your planking improved from the first layer to the second.
So many gun ports, so many guns! This would drive me crazy so I salute your persistence, Grant. How do you keep your concentration doing the same operations over and over again?
It looks like the varnish you used was water based? Maybe that was the problem. I've been using 'sanding sealer' which is shellac dissolved in alcohol with some additional filling material. It soaks into the wood and really makes the grain figure GLOW, but the alcohol evaporates out quickly and doesn't seem to cause any problems with shrinkage or swelling.
I like this risk taking approach, which we might not be doing if we were working on those top level expensive kits...
I thought the salmon pink had been confirmed as the true colour of the Victory in Nelson's day. Didn't they find traces of it during restoration work? Anyway, it doesn't really matter when we are trying to make a great looking model rather than a perfect replica (which is impossible anyway). Delegating the decision to the ladies was a brilliant idea. Keep them involved and they will give us more time to build!
I don't know yet what you did with those balustrades but to my eye, they look fine in the contrasting colour. It adds interest.
I'm a messy builder too and should accept the fact instead of blaming myself so much.
By this stage the hull looks superb. Not messy now!
Grant, you gave yourself the licence to play - well done.
How often we talk about 'working' on our 'project' as though we were getting paid to do something we really would prefer not to be doing. I'm retired and try to avoid work as much as possible (though I still have to wash the dishes). I prefer to think of my time at the bench as playing with my toys.
I realise that this is a big reply to that first big post of yours. I'll try not to flood your thread with comments on stuff from the distant past as I work my way through the rest of it.
-

Win a Free Custom Engraved Brass Coin!!!
As a way to introduce our brass coins to the community, we will raffle off a free coin during the month of August. Follow link ABOVE for instructions for entering.
You are using an out of date browser. It may not display this or other websites correctly.
You should upgrade or use an alternative browser.
You should upgrade or use an alternative browser.
HMS Victory Mantua 1:78 (first build) by Grant Tyler [COMPLETED BUILD]
- Thread starter GrantTyler
- Start date
- Watchers 102
Good afternoon. I am sure you are correct and I appreciate your expertise. No need to debate this matter further. This Victory is no way intended to be nautically or historically accurate. That why I call it “Grants Victory” as I gave myself license to play a bit. I include aspects I wanted to and did some research to make this reasonable. I know Peter was merely supporting my build choice. Thanks for your input. Cheers GrantI don't WANTS TO GO INTO A FIGHT HERE( IN FACT I HAME BEEN a MEMBER 4 YEARS PLUS, AND HAVE BUILS MORE THAN 30 MODELS ONER MY 50 YEARS OF BUILBING ) APART FROM SAILOR AND NAVY LIFE. BORN ON THE NORTHWEST COAST OF DENMARK. I HAVE HAD SHIPS AROUND ME MY. TO . ONE THE NEARLY 80 YEARS OF LIFE
TO MY THERE ARE TWO VERY DIFFERNTS RUNNING RIGGEN_ONE WHICH ARE ONLY MOWING -UP OR DOWN-SIDEWARDS THE YARDS
THE OTHER ONE IS THE ONE WHICH MOWE, SET FAST AND MANY OTHER THINGS- BUT NOT MIXED DIRECTLY WITH THE YARDS. WILL ADD -IN THIS CASE, THE BOWSPRIT -THE ONE MOWING THE YARDS "RED COLOUR AND THE MOWING THE SAILS IS IN BLUE. IN A FEW DAYS I WILL HAVE THE REST. THERE ABOUT 35 PIC ENDING UP WITH THE FASTING POINT ACCORDING TO THE COLOUR.
View attachment 344194
View attachment 344195
View attachment 344196
View attachment 344197
Good afternoon Peter. No worries. Some debate is always good. I agree with you we can all draw a line (excuse the punOooooooo, please don't do that in Grants build log, Poul Eric!!! Unless Grant appreciates it. (I don't need them.)
I am deeply sorry that I was stepping on ............. well, my excuses that this happens in your build-log, Grant.
Regards, Peter
Hello Mark. True storyHowzit Grant, I've been away for six weeks on the KwaZulu-Natal South Coast, and hence very much out of the loop with everyone's build logs, but as I was about to depart South Africa again I noticed this shop in Joburg airport which reminded me of you, can't imagine why, and I felt compelled to post it on the forum ...
View attachment 344193
 Good to see you are alive and kicking. Hope you had some good times with your Mom in KZN. Cheers Grant
NO NO-it is Grants build. he is the captain and therefore he take decisions. I did not want to criticize his or your build. just to inform you all.when you stats a new build, so for miOVER AND OUT.Oooooooo, please don't do that in Grants build log, Poul Eric!!! Unless Grant appreciates it. (I don't need them.)
I am deeply sorry that I was stepping on ............. well, my excuses that this happens in your build-log, Grant.
Regards, Peter
Good morning. The sun comes up early here in December and my modeling time is no longer. So little progress. Been riding in the mountains and playing Padel Tennis.
If you guys have not tried this new “craze” Padel Tennis (well here in SA) it is so much fun. Basically a combination of Tennis and squash on a smaller tennis court with squash walls at the back. Fast, flows, good rally’s and loads of banter.
Ok back to rigging : The span of blocks for the Clueline, tack and sheet for SB fore yard.
1. My strop (no monkey fist I used Thomas knot he sent earlier)
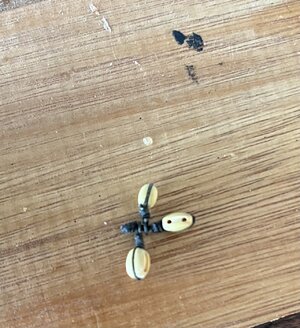
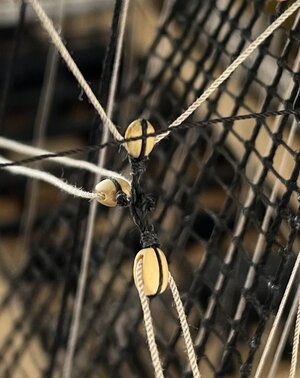
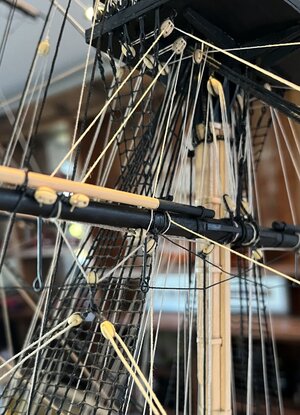
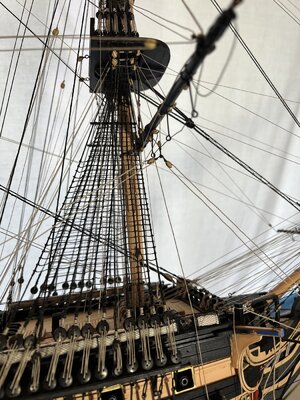
The clue line is made fast to the yard, runs through the clue block in the strop, back up to a block on the yard and belays to the fore pin rack.
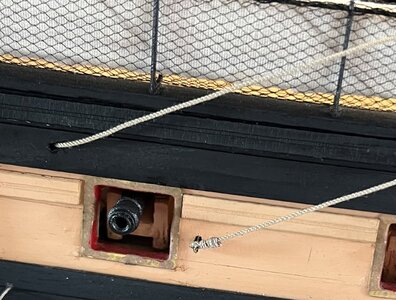
The sheet : I made a faux sheave in the side of the hull just above and aft of the 7th gunport. The standing end of the sheet is attached to an eyelet just in front of the 7th gunport .It runs up through the sheet block in the strop and back through the sheave. It belays to a cleat on the upper gundeck. (I will not be doing this cleat as I will never get in there and it will not be seen.)
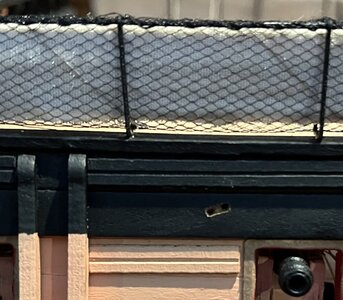
Those terrible gunport frames from Mantua are discolouring and it’s not a bad thing as it takes the brass shine away.
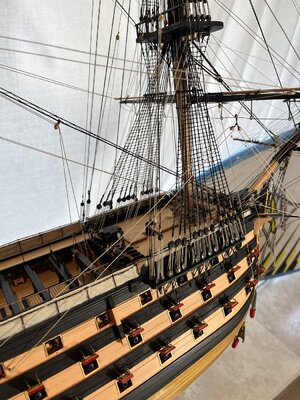
The tack is made fast to the boomkin and runs through the tack block in the strop and back to a block on the outermost part of the boomkin. It belays to the outer knighthead .
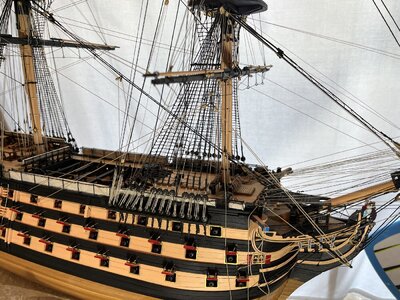
I have not tied these off as will do all 4 and then finish them off. I am super happy how these look on Grants Victory.
Cheers Grant
If you guys have not tried this new “craze” Padel Tennis (well here in SA) it is so much fun. Basically a combination of Tennis and squash on a smaller tennis court with squash walls at the back. Fast, flows, good rally’s and loads of banter.
Ok back to rigging : The span of blocks for the Clueline, tack and sheet for SB fore yard.
1. My strop (no monkey fist I used Thomas knot he sent earlier)


The clue line is made fast to the yard, runs through the clue block in the strop, back up to a block on the yard and belays to the fore pin rack.

The sheet : I made a faux sheave in the side of the hull just above and aft of the 7th gunport. The standing end of the sheet is attached to an eyelet just in front of the 7th gunport .It runs up through the sheet block in the strop and back through the sheave. It belays to a cleat on the upper gundeck. (I will not be doing this cleat as I will never get in there and it will not be seen.)


Those terrible gunport frames from Mantua are discolouring and it’s not a bad thing as it takes the brass shine away.

The tack is made fast to the boomkin and runs through the tack block in the strop and back to a block on the outermost part of the boomkin. It belays to the outer knighthead .

I have not tied these off as will do all 4 and then finish them off. I am super happy how these look on Grants Victory.
Cheers Grant

PS- I had to make a small deviation- the Clueline should run more vertical up and down on the yard - see Longridge diagram below.
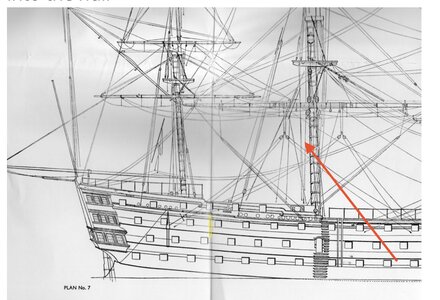
When I did this the sheet line was pulling hard against my back stays. I reverted back to the Mantua plan of doing this line. Something in the Mantua design of the channel I guess. Mantua way :
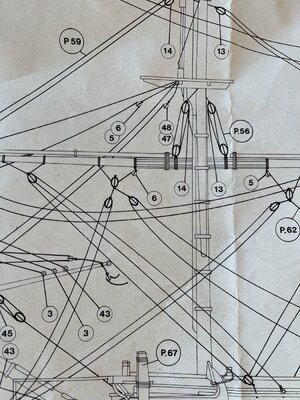

When I did this the sheet line was pulling hard against my back stays. I reverted back to the Mantua plan of doing this line. Something in the Mantua design of the channel I guess. Mantua way :

Brilliant. Nailed it!
Excellent work Grant.Good morning. The sun comes up early here in December and my modeling time is no longer. So little progress. Been riding in the mountains and playing Padel Tennis.
If you guys have not tried this new “craze” Padel Tennis (well here in SA) it is so much fun. Basically a combination of Tennis and squash on a smaller tennis court with squash walls at the back. Fast, flows, good rally’s and loads of banter.
Ok back to rigging : The span of blocks for the Clueline, tack and sheet for SB fore yard.
1. My strop (no monkey fist I used Thomas knot he sent earlier)
View attachment 344341View attachment 344345
The clue line is made fast to the yard, runs through the clue block in the strop, back up to a block on the yard and belays to the fore pin rack.
View attachment 344349
The sheet : I made a faux sheave in the side of the hull just above and aft of the 7th gunport. The standing end of the sheet is attached to an eyelet just in front of the 7th gunport .It runs up through the sheet block in the strop and back through the sheave. It belays to a cleat on the upper gundeck. (I will not be doing this cleat as I will never get in there and it will not be seen.)
View attachment 344342
View attachment 344347
Those terrible gunport frames from Mantua are discolouring and it’s not a bad thing as it takes the brass shine away.
View attachment 344344
The tack is made fast to the boomkin and runs through the tack block in the strop and back to a block on the outermost part of the boomkin. It belays to the outer knighthead .
View attachment 344348
I have not tied these off as will do all 4 and then finish them off. I am super happy how these look on Grants Victory.
Cheers Grant
View attachment 344346
- Joined
- Dec 3, 2022
- Messages
- 1,547
- Points
- 488

Hi Grant. forgive me if you have already discovered this (I'm still on page 16) but those shuttered windows of yours are actually gun ports. They are fitted with vertically hinged port lids because the regular ones would foul the shrouds, or the anchor cable in the case of the ones in the bow.
I've been trying to find a reference to support my assertion but without success. I'm pretty sure I'm right but I don't know where I learned it!
Ship looks beautiful Grant! Will rigging end soon? You’re going to have more rope than wood! 
Hi Grant! You have every reason to be super-pleased with your strop (Monkey's fist or not). It looks fantastic!
Brilliant. Nailed it!
Excellent work Grant.
Ship looks beautiful Grant! Will rigging end soon? You’re going to have more rope than wood!
Good morning. Thank you Heinrich, Paul , Kurt ,Dean and Martin. Been a fun ride doing the rigging. Coming near the end. I have had fun doing my “own thing” so to speak. The references I used : a modified Heller plan sent to me by an Sos member, The art of rigging, Gil Middleton’s build (a Caldercraft build on MSW) and at times the Mantua plan where the line was particular to this design as references. I did have some of Longridges plans as well especially for the bowsprit and standing rigging.
There are so many interpretations of the Victory’s rigging plan. No doubt I think the best would have been to buy “The Anatomy of the Victory “ and start with this. Well Grants Victory it is

Still loads to do, Boats,
 s, Davits, finish stern cabins, add some detail and plenty of touch up. Maybe on or two redos to add some detail as well.
Cheers Grant
Good morning Bertie. Thank you. The last three “ports” are actually cabins in the victory. The configuration I went with was ; Two of the cabins having cannons inside (including Nelson’s) which were rolled out when needed. The Victory has many configurations during its time with regard to its cannons. I built this according to the Mantua plans at that time. I see most of the model manufacturers went for this. It gives one a large licence to play here. Cheers GrantHi Grant. forgive me if you have already discovered this (I'm still on page 16) but those shuttered windows of yours are actually gun ports. They are fitted with vertically hinged port lids because the regular ones would foul the shrouds, or the anchor cable in the case of the ones in the bow.
I've been trying to find a reference to support my assertion but without success. I'm pretty sure I'm right but I don't know where I learned it!
That’s luck for us: More posts to come! And to see how you are going to brew all this through all the rope work.Still loads to do, Boats,s, Davits, finish stern cabins, add some detail and plenty of touch up. Maybe on or two redos to add some detail as well.
Regards, Peter
- Joined
- Dec 3, 2022
- Messages
- 1,547
- Points
- 488

You are absolutely right. I meant to add that I love the way you have made interesting windows out of relatively dull historical trivia.a large licence to play here
You are doing a great job on your rigging Grant, i love the way you handled this, Grant's Victory looks beautifull
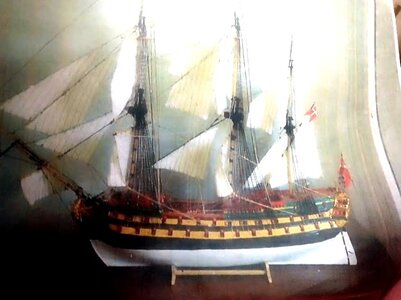
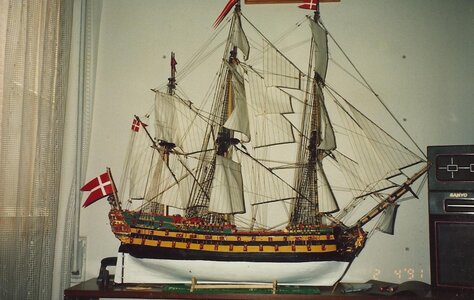
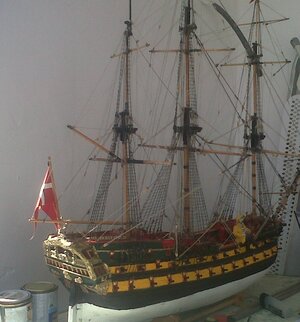
the images below are from my first build late 60 early 70. the first image was my first big build -1973-75- of the danish warship NORSKE LOVE with a lot of mistakes, as at that time there was NO INFO available, more than what came with a bow, but it took my heart with all is a failure. I Has to be mentioned, that the kit WAS not LASER CUT, all by and. SAme ship, build 5 years later, but now laser cut, and with KEEL, FALSE KEEL, BOW, AND STERN PARST CUT IN ONE part. to make the different measure between keel and falls kell, a 1,5mm list was glued to the keel part, as well bow and stern, so it was easy to make a Gardbord. both she had only one layer of planking- no second planking was used.. the third image were 45 years -after having been exposed in the top fish restaurant in front of the Midditiranien cost (without protection )so after 15 years I tooke them both back in their bad health, so out of the two i made this the third one with some modification. with 50 years she went out on her las voyageThat’s luck for us: More posts to come! And to see how you are going to brew all this through all the rope work.With just a few lines on my BN, I was the day before yesterday 2x hanging behind a rope.
I need a other mindset during the rigging.
Regards, Peter
