-

Win a Free Custom Engraved Brass Coin!!!
As a way to introduce our brass coins to the community, we will raffle off a free coin during the month of August. Follow link ABOVE for instructions for entering.
-

PRE-ORDER SHIPS IN SCALE TODAY!
The beloved Ships in Scale Magazine is back and charting a new course for 2026!
Discover new skills, new techniques, and new inspirations in every issue.
NOTE THAT OUR FIRST ISSUE WILL BE JAN/FEB 2026
You are using an out of date browser. It may not display this or other websites correctly.
You should upgrade or use an alternative browser.
You should upgrade or use an alternative browser.
Hohenzollernmodell 1660-1670 Scale 1/75 POF build by Stephan Kertész (Steef66)
- Thread starter Steef66
- Start date
- Watchers 57
-
- Tags
- 1:75 dutch two-decker pof
I really do admire your patience and determination Stephan. I freely admit if I was to build shell first, I would cheat and make a timber buck to work around
What was the reasoning for the shipwrights to adopt this method of construction as opposed to frame first?
Kind Regards
Nigel

What was the reasoning for the shipwrights to adopt this method of construction as opposed to frame first?
Kind Regards
Nigel
- Joined
- Aug 8, 2019
- Messages
- 5,569
- Points
- 738

I really do admire your patience and determination Stephan. I freely admit if I was to build shell first, I would cheat and make a timber buck to work around
Thanks for residents dering but at this moment I wish I cheated.

 I'm just landed at a stage that it is almost imposible to get the planking correct on the part of the stern. I have to go from vertical to horizontal. Maybe I take a distance for a while and create tools again to get the job done or make for that part a timber buck and cheat. It looks again like a redo.
 I really don't know. The only thing I know is that the build goes faster, less lost of timber, just fill up with all the pieces on the yard when the floorplanking is ready.What was the reasoning for the shipwrights to adopt this method of construction as opposed to frame first?
- Joined
- Aug 8, 2019
- Messages
- 5,569
- Points
- 738

Thanks for the likes and comments to this log. Like I said to Nigel, I didn't cheat but sometimes I wish I had.
It goes very slow, and sometimes there come tensions on the planks. The floor planking came loose from the garboard strake on one side in the middle.
Lucky I could repair that, by carefully remove the old glue with a X-acto knife and glue it together again.
here the part in the clamps after re- glued
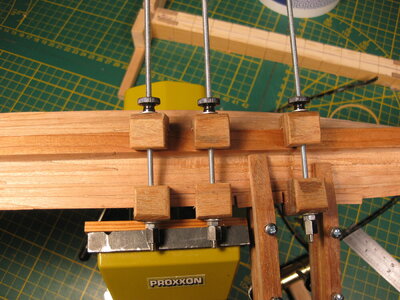
and after repairing, sorry no pictures taken before gluing, just forgot.
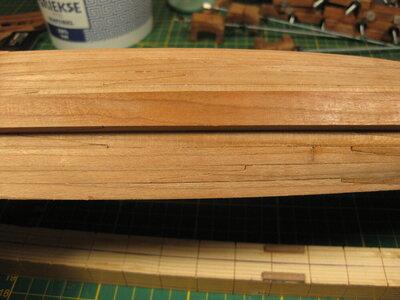
I come on a stage it is very difficult to go one and I take a lot of breaks to re think the planning how to...
On the stern part I need to go wide now and that is difficult because every plank is under a slight angle of the other plank. Clamping with the boeiclamps need some adjustments with pieces of wood to make sure the angle stays on.
A few pictures of this stage in the progress
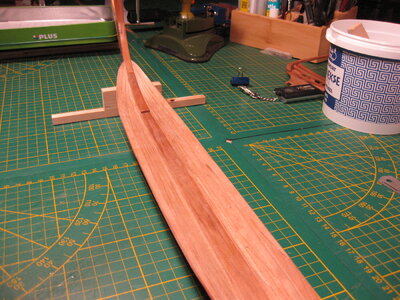
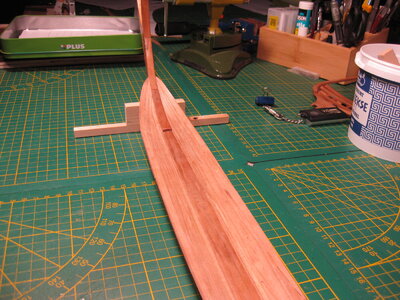
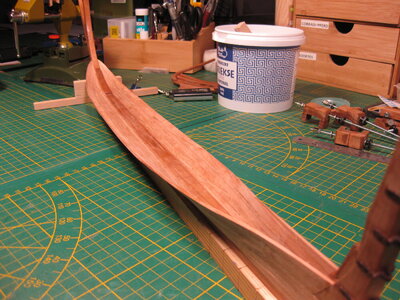
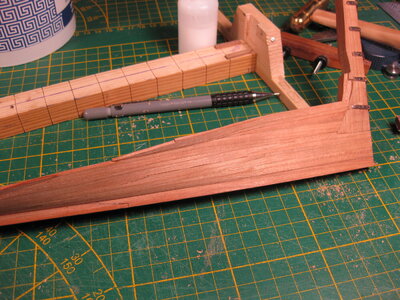
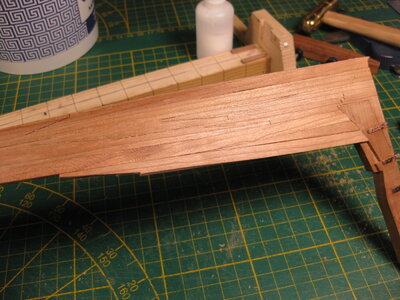
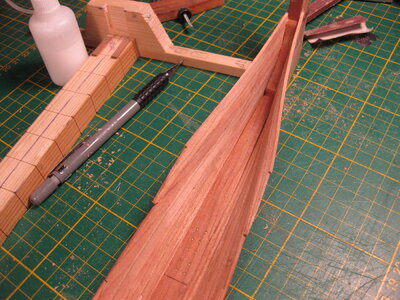
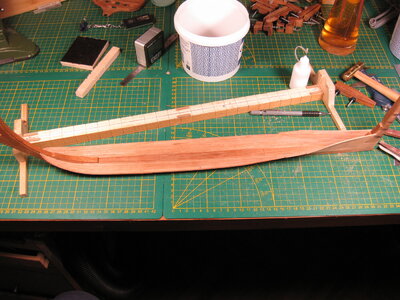
In the last picture somewhere on number 20 of the cutting mat is the place where I have to go wide. And Where I think of the use of a timber buck like Nigel mentioned.
Another thing in this build is that you must not care of equal dimensions between starboard or port. It is almost impossible to make both side equal in this way. I try but........
Thanks for the visit, there are still many hurdles to be overcome.
It goes very slow, and sometimes there come tensions on the planks. The floor planking came loose from the garboard strake on one side in the middle.
Lucky I could repair that, by carefully remove the old glue with a X-acto knife and glue it together again.
here the part in the clamps after re- glued

and after repairing, sorry no pictures taken before gluing, just forgot.

I come on a stage it is very difficult to go one and I take a lot of breaks to re think the planning how to...
On the stern part I need to go wide now and that is difficult because every plank is under a slight angle of the other plank. Clamping with the boeiclamps need some adjustments with pieces of wood to make sure the angle stays on.
A few pictures of this stage in the progress


In the last picture somewhere on number 20 of the cutting mat is the place where I have to go wide. And Where I think of the use of a timber buck like Nigel mentioned.
Another thing in this build is that you must not care of equal dimensions between starboard or port. It is almost impossible to make both side equal in this way. I try but........
Thanks for the visit, there are still many hurdles to be overcome.
I keep looking at your build Stephan and scratching my head. Not because of your work, but because can't help but think there is an element in the original construction missing. Did the Dutch builders not have a full size pattern at say three or four positions to use as a guide?
I have built some very large and complex structures in my day job but there is an element of guesswork to this that doesn't seem to ring true. No advanced 3D modelling or digital Theodolites back then.
Kind Regards
Nigel
I have built some very large and complex structures in my day job but there is an element of guesswork to this that doesn't seem to ring true. No advanced 3D modelling or digital Theodolites back then.
Kind Regards
Nigel
- Joined
- Aug 8, 2019
- Messages
- 5,569
- Points
- 738

On page 12 post #229 I put some pictures of the book 'the ships of Abel Tasman' of Ab Hoving and Cor Emke. There you can see that when I'm ready with this Layer I can start with the floor timber and the futtock bilge at some places to get the shape of the ship. But before that there is nothing that says how the planking of the floor should look like. I have the plans of Winter where I can hold on. That is all.Did the Dutch builders not have a full size pattern at say three or four positions to use as a guide?
All I can do is go on, step by step.
Last edited:
Hi Stephan, I have a similar situation as Nigel. I'm just puffed at this great architecture, hats off.
- Joined
- Aug 8, 2019
- Messages
- 5,569
- Points
- 738

Thanks, it's total something else in the building method we are used too. I just measured the planks to the lining plan. And i need to complete this layer plus 2 before I can start with the floor timber. Looks like I'm on the right way at this moment. But thanks both for the support. Sometimes you need to write down your problems to understand them.Hi Stephan, I have a similar situation as Nigel. I'm just puffed at this great architecture, hats off.
I just clamped 2 wet planks on the ship to shape. Time to relax and step away.
- Joined
- Aug 8, 2019
- Messages
- 5,569
- Points
- 738

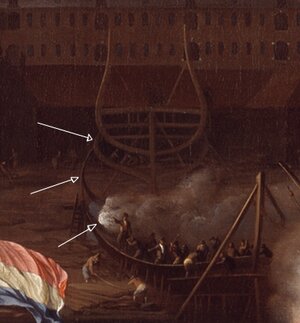
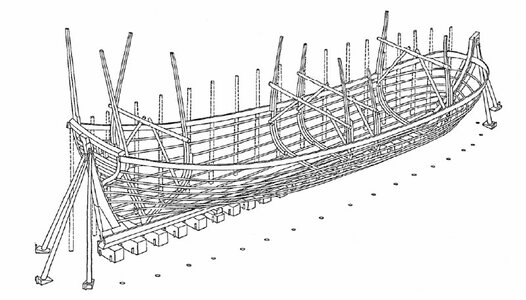
Looks to me that the planking of the floor is done and then this is the next stage. The other explanation could be the other building method. There are 2. The 'Zaanse bouwmethode'(shell first) and the 'Maze methode'.Here (Amsterdam 1699) we see 3 templates already in place, before the bottom ist completed. Could be,
that shipwrights sometimes used such devices for forming the shape.
View attachment 368614
I'm following the shell first.
Hello Stephan. I am watching your construction carefully and I would not dare to lay the boards freely in the space. Even finished wood still flexes if not in a frame. I would also prefer to place this type of construction in a shaped bed. I would be afraid of repeating the hard work.. 
I'm really crossing my fingers. Ondras

I'm really crossing my fingers.
 Ondras
- Joined
- Aug 8, 2019
- Messages
- 5,569
- Points
- 738

Thanks Ondras, sometimes we need some luckI'm really crossing my fingers.
Maze methode
View attachment 368615
This is the construction that has been at the back of my mind
Kind Regards
Nigel
Thanks for the likes and comments to this log. Like I said to Nigel, I didn't cheat but sometimes I wish I had.
It goes very slow, and sometimes there come tensions on the planks. The floor planking came loose from the garboard strake on one side in the middle.
Lucky I could repair that, by carefully remove the old glue with a X-acto knife and glue it together again.
here the part in the clamps after re- glued
View attachment 368597
and after repairing, sorry no pictures taken before gluing, just forgot.
View attachment 368600
I come on a stage it is very difficult to go one and I take a lot of breaks to re think the planning how to...
On the stern part I need to go wide now and that is difficult because every plank is under a slight angle of the other plank. Clamping with the boeiclamps need some adjustments with pieces of wood to make sure the angle stays on.
A few pictures of this stage in the progress
View attachment 368598View attachment 368599View attachment 368601View attachment 368602View attachment 368603View attachment 368604View attachment 368605
In the last picture somewhere on number 20 of the cutting mat is the place where I have to go wide. And Where I think of the use of a timber buck like Nigel mentioned.
Another thing in this build is that you must not care of equal dimensions between starboard or port. It is almost impossible to make both side equal in this way. I try but........
Thanks for the visit, there are still many hurdles to be overcome.
Looks really good, real Dutch shipbuilding in miniature. Absolutely impressive.
wow - hope everything works well or can be adjusted when necessary
amazing work my friend
amazing work my friend
- Joined
- Nov 28, 2020
- Messages
- 160
- Points
- 88

Cada vez que leo tu registro de compilación, niego con la cabeza con asombro, Stephan. Esta es la primera vez que veo a alguien instalar una traca de cartón sin marcos ni mamparos en su lugar. Además, tu doblador de madera Frankenstein es prueba de tu imaginación infinita. Estoy empezando a pensar que podrías hacer un reactor nuclear con partes en el garaje de alguien.
- Joined
- Oct 23, 2018
- Messages
- 886
- Points
- 403

Hi Stephan,
I hope to see you and your model during the exhibition in Amsterdam end of September. It is really interesting to follow the dutch method of shipbuilding
I hope to see you and your model during the exhibition in Amsterdam end of September. It is really interesting to follow the dutch method of shipbuilding


