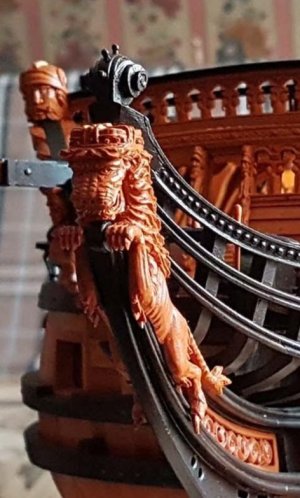
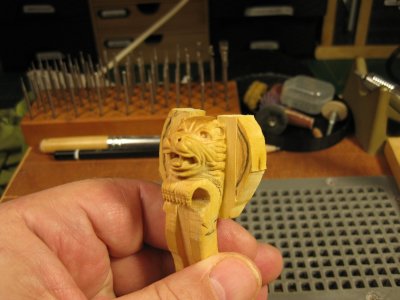
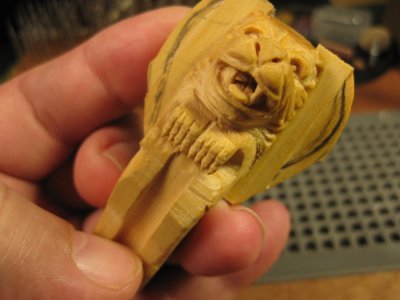
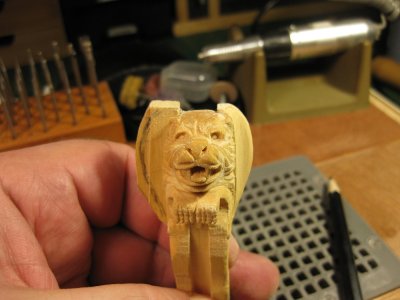
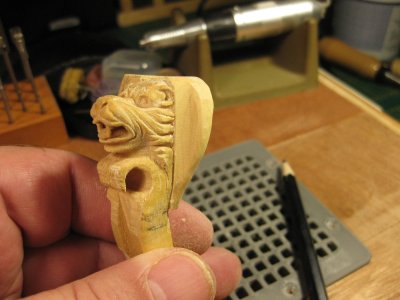
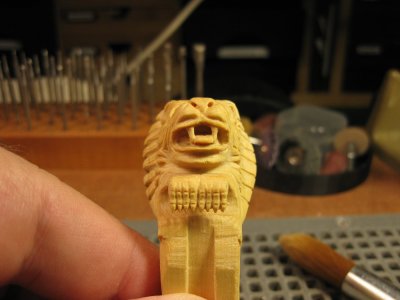
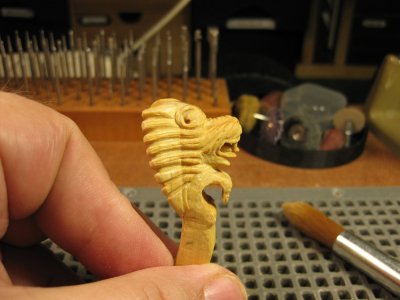
Hohenzollernmodell 1660-1670 Scale 1/75 POF build by Stephan Kertész (Steef66)

Kullandığınız mikro motorun markası nedir?
Ciro ayısı nedir?
 
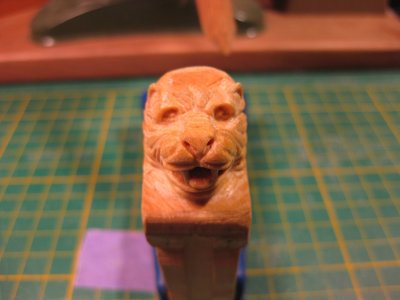
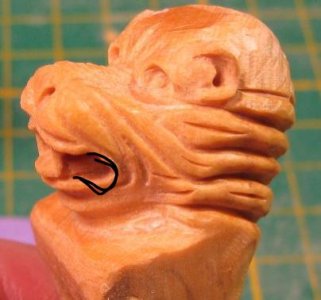
Really wonderful carving. But your lion is always looking very friendly.
It has a little bit from a dog. I could not carve, so it’s impossible for me to give you a hint, what you can modify to optimize the result.
 
Really wonderful carving. But your lion is always looking very friendly.
It has a little bit from a dog. I could not carve, so it’s impossible for me to give you a hint, what you can modify to optimize the result.
You make exactly the point that still bothers me too, I don't know why I can't get this changed there either. Perhaps I need to bring up the corners of the upper jaw. I still have that space to do. After that, it belongs on and there is a shortage of wood. There is already more or less a shortage of wood at the mane. The former is not impossible to solve. I can always add a piece of boxwood against it. This was also done in real life. Carving wood is no longer a problem for me. It's quite difficult to get the proportions right.

20250129_130848.jpg
 
Last edited:
In the Netherlands we have a song called: "John De Bever - Jij Krijgt Die Lach Niet Van Mijn Gezicht" translated in English "You won't get that smile off my face"
And when I'm try to get that smile of the lion, I keep hearing that song. Whatever I do, I don't get that smile off. So let us just call it a friendly lion carved by a happy man.
I warn you, listening to this song is dangerous. You keep hearing it the rest of the day.


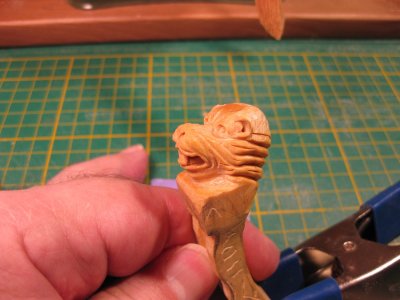
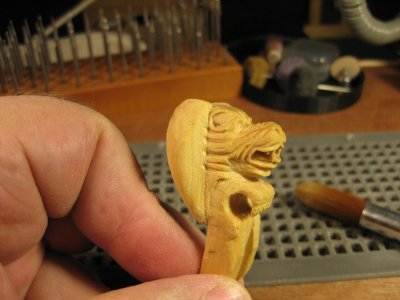
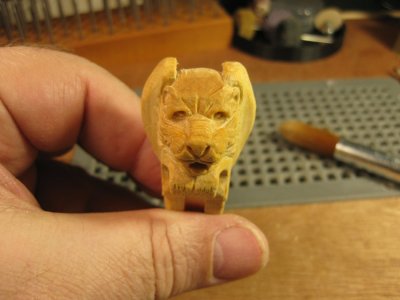
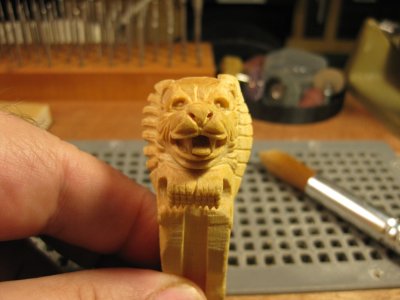
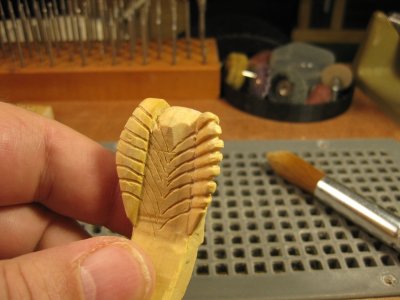
My latest try to get him angry. I lifted the corners of the mouth slightly and inserted the eyes deeper. Also shaped the top of the head to start making the hair.
The result of 2 hours carving this morning. The eyes are difficult, because a mistake is done quickly what can ruin the whole thing.

IMG_4970.JPGIMG_4971.JPGIMG_4972.JPGIMG_4973.JPGIMG_4974.JPGIMG_4975.JPG

These are macro pictures, a lot different then the real view.
 
Last edited:
Thanks @Bela for your comment, we will see how far it will come. For the moment I leave it how it is.

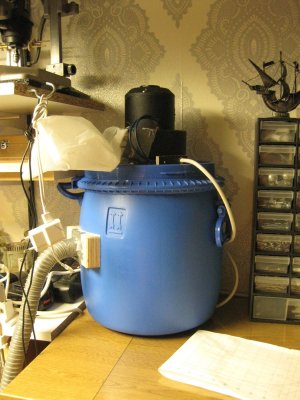
Thanks @All for the visit and Likes. I didn't carve for a few days. I was working on the front feet of the lion and the dust was killing me. Even with the room dust collector and my home-made small shop vac.
IMG_3728.JPG

That last one is working good but the suction is because of the small opening not strong enough. So I needed something to work on and what takes the dust from below. Because the boxwood dust is lying around everywhere. This looks like flour, so you can imagine what's going on. And living in an apartment with an admiral who wants things to be clean..............
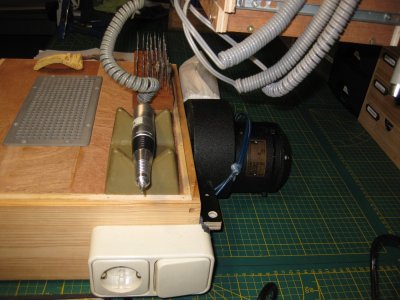
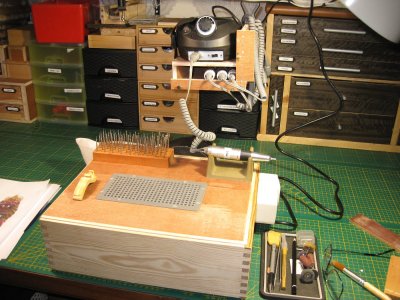
You see them sometimes on YouTube like sanding table/box or something similar. I rebuild my shop vac to a working table with dust sction. I wanted also something to higher up the workspace because of the working attitude and combined this to the machine below.

IMG_4976.JPGIMG_4977.JPGIMG_4978.JPG

That works perfect, the motor is low noise and low energy consumption. And the grid is made with my 3D printer. I used a dust bag from a nail-stylish dust machine.
And an old wine box
(I got a lot of them, all empty and we all know who is responsible. He is on holiday now, drinking a lot of wine on the beach I think ROTF Pirate Flag).

It works perfect, I sit and work in a more upright position and the dust is suck away in the box. So I can get on with my rotary carving of the lion again.
 
Thanks @Bela for your comment, we will see how far it will come. For the moment I leave it how it is.

Thanks @All for the visit and Likes. I didn't carve for a few days. I was working on the front feet of the lion and the dust was killing me. Even with the room dust collector and my home-made small shop vac.
View attachment 499440

That last one is working good but the suction is because of the small opening not strong enough. So I needed something to work on and what takes the dust from below. Because the boxwood dust is lying around everywhere. This looks like flour, so you can imagine what's going on. And living in an apartment with an admiral who wants things to be clean..............
You see them sometimes on YouTube like sanding table/box or something similar. I rebuild my shop vac to a working table with dust sction. I wanted also something to higher up the workspace because of the working attitude and combined this to the machine below.

View attachment 499441View attachment 499442View attachment 499443

That works perfect, the motor is low noise and low energy consumption. And the grid is made with my 3D printer. I used a dust bag from a nail-stylish dust machine.
And an old wine box
(I got a lot of them, all empty and we all know who is responsible. He is on holiday now, drinking a lot of wine on the beach I think ROTF Pirate Flag).

It works perfect, I sit and work in a more upright position and the dust is suck away in the box. So I can get on with my rotary carving of the lion again.
Hi Stephan,

You can always start carving with chisels, no dust, no noise, happy Bernice :-)
 
I'm happy with my anti-dust-workbench-leveler. It works great, maybe a little to noisy, just a little.

And I'm happy with the likes, jokes, comments and visit here, some kind of vitamin to go on.

In an early stage I was talking about the manes and that they are not wide enough. So I decided to ad some wood. Yes it is possible to ad wood. And is you do it right even nearly vissible. First I cut out a square part where I can glue a piece of wood in. Sorry I was so enthusiast I forgot to take pictures. But I must ad the crown in the same way and will show you that part. I used my Proxxon MF70 mill for the job. I'd clamped the lion in the vice and used pieces of balsa to keep the lion in the right spot and to keep it safe for markings the vice could make in the lion.
Then with a straight bur cut out a straight piece and later glued in a new piece from the same wood (the same piece I used before).
After that when the glue dried I started to work on the shape. The last picture is still the rough shape but almost there to get a better result on the wider manes.
The second picture shows the beginning of the claws.

IMG_4979.JPGIMG_4980.JPGIMG_4981.JPGIMG_4982.JPGIMG_4983.JPGIMG_4984.JPGIMG_4985.JPGIMG_4986.JPGIMG_4987.JPG

Thanks for the visit.
 
Hope one day, hopefully in this world, I will carve similar... Great job! Your carvings become a lion!
I seen your work Jim, I do believe when you practise rotary carving and you're not afraid to learn from the mistakes and start over. You will carve in a way what is yours. When I look back to all the time I spent in carving, it will be somewhere around the 500 hours to get to this point. And I'm still learning. I can't build that accurate like you do or like Paul (I do model building as long as he does).

Very nice, Stephen!
Thanks Paul
 
She looks great Stephan and the rotary carving gives a very smooth surface, even at macro pictures.
Thanks Maarten, yes the surface is real smooth, different to carving. But you also need a more steady hand to achieve that. And sometimes you can make a better detail with a chisel. So I use both on some parts.

At all thanks for the likes visit and interest of how I carve this little lion. And it is little, when I've carved for let say an hour and step away from it. My eyes need to adjust again. Reading or typing is not possible for a few minutes.
The result of today carving, I think a total of 5 hours, just 1 side in shape. The back is not ready, there will come parts of the bow, what I still have to figure out.

IMG_4988.JPGIMG_4989.JPGIMG_4990.JPGIMG_4991.JPGIMG_4992.JPGIMG_4993.JPG

Thanks again for your visit.
 
Back
Top