To me it is a magnificent carved Lion. Were it me at this stage I would have been minus a couple of fingers and a multitude of severe finger cuts. Awesome work Steef66. Cheers.I'm happy with my anti-dust-workbench-leveler. It works great, maybe a little to noisy, just a little.
And I'm happy with the likes, jokes, comments and visit here, some kind of vitamin to go on.
In an early stage I was talking about the manes and that they are not wide enough. So I decided to ad some wood. Yes it is possible to ad wood. And is you do it right even nearly vissible. First I cut out a square part where I can glue a piece of wood in. Sorry I was so enthusiast I forgot to take pictures. But I must ad the crown in the same way and will show you that part. I used my Proxxon MF70 mill for the job. I'd clamped the lion in the vice and used pieces of balsa to keep the lion in the right spot and to keep it safe for markings the vice could make in the lion.
Then with a straight bur cut out a straight piece and later glued in a new piece from the same wood (the same piece I used before).
After that when the glue dried I started to work on the shape. The last picture is still the rough shape but almost there to get a better result on the wider manes.
The second picture shows the beginning of the claws.
View attachment 499632View attachment 499633View attachment 499634View attachment 499635View attachment 499636View attachment 499637View attachment 499638View attachment 499639View attachment 499640
Thanks for the visit.
-

Win a Free Custom Engraved Brass Coin!!!
As a way to introduce our brass coins to the community, we will raffle off a free coin during the month of August. Follow link ABOVE for instructions for entering.
-

PRE-ORDER SHIPS IN SCALE TODAY!
The beloved Ships in Scale Magazine is back and charting a new course for 2026!
Discover new skills, new techniques, and new inspirations in every issue.
NOTE THAT OUR FIRST ISSUE WILL BE JAN/FEB 2026
You are using an out of date browser. It may not display this or other websites correctly.
You should upgrade or use an alternative browser.
You should upgrade or use an alternative browser.
Hohenzollernmodell 1660-1670 Scale 1/75 POF build by Stephan Kertész (Steef66)
- Thread starter Steef66
- Start date
- Watchers 57
-
- Tags
- 1:75 dutch two-decker pof
- Joined
- Aug 8, 2019
- Messages
- 5,568
- Points
- 738

Thanks Stephen for your kind words.Hi Stephan,
Wonderful work and instruction.
Cheers,
Stephen.
To me it is a magnificent carved Lion. Were it me at this stage I would have been minus a couple of fingers and a multitude of severe finger cuts. Awesome work Steef66. Cheers.
 nooo,, no cuts in your fingers, these burs don't cut immediately in your skin. It takes a while to do that if it is possible at all. But anyway thanks for the compliment, words of appreciation keep me going on.
Absolutely fantastic to see how your lion has changed. I also think that a lion doesn't always have to look grim. I'm glad that you're sharing your steps and experiences with us because I'll have to start carving at some point, I can't even think about it yet.
- Joined
- Aug 8, 2019
- Messages
- 5,568
- Points
- 738

Thanks Tobias. The only thing I can say, just start, be patience and let the lion grow under your hands. Step by step would Peter Voogd say.Absolutely fantastic to see how your lion has changed. I also think that a lion doesn't always have to look grim. I'm glad that you're sharing your steps and experiences with us because I'll have to start carving at some point, I can't even think about it yet.
And I was afraid to start of it too...
Stephan, you're absolutely right, just do it. It's not fear but respect. I'm not there yet but when I am I'll remember your report.
As you quote me ........ 'step by step' you Lion is getting more impressive, Stephan. You can almost hear him roaring .........Thanks Maarten, yes the surface is real smooth, different to carving. But you also need a more steady hand to achieve that. And sometimes you can make a better detail with a chisel. So I use both on some parts.
At all thanks for the likes visit and interest of how I carve this little lion. And it is little, when I've carved for let say an hour and step away from it. My eyes need to adjust again. Reading or typing is not possible for a few minutes.
The result of today carving, I think a total of 5 hours, just 1 side in shape. The back is not ready, there will come parts of the bow, what I still have to figure out.
View attachment 499794View attachment 499795View attachment 499796View attachment 499797View attachment 499798View attachment 499799
Thanks again for your visit.
Perhaps he can do a duet with Dean @Dean62 Lion?
Regards, Peter
- Joined
- Aug 8, 2019
- Messages
- 5,568
- Points
- 738

Thanks all again for following me, likes and nice comments. That Lion keep me awake in the night, the roar is terrible to hear 
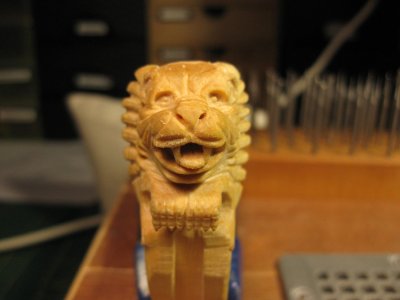
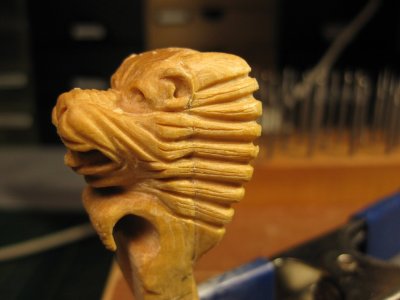
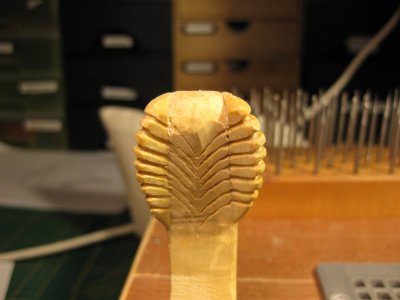
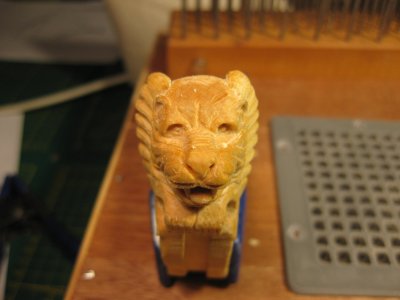
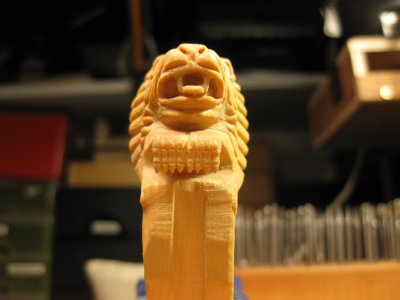
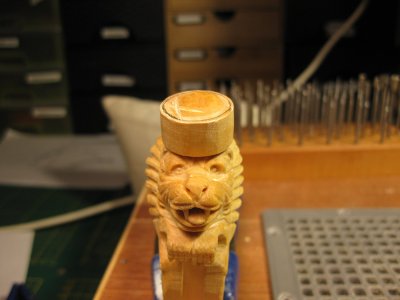
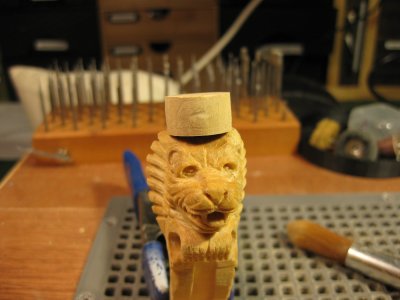
the update from yesterday, I did the other side of the manes and started with a piece of wood for the ceown. Still way to big, but I learned not to start to small. And it need to fit in the head. A lot of work and a lot of paste, cut, past, cut, paste, etc...... We will see if I succeed in this..
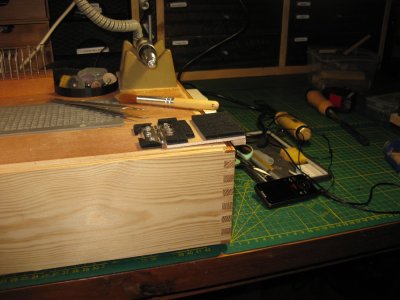
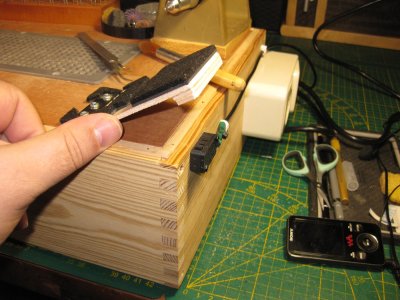
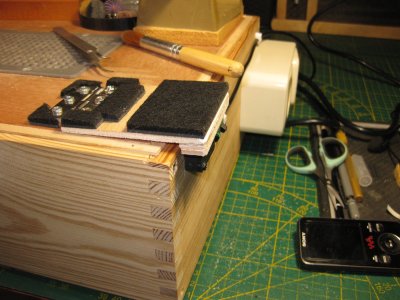
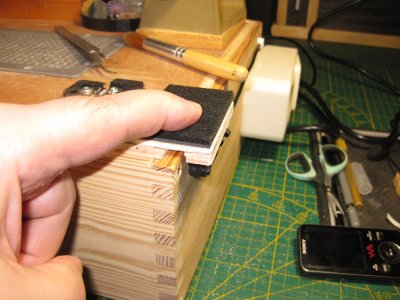
There was another thing I wanted to make for my sanding desk. I needed a switch on/of for my drill. The foot pedal is always lost under the table, so I don't use that. I decided to make something from the foot pedal to rest my arm against to activate the drill. And it works perfect. I only used the microswitch from the foot pedal and a hinge and some pieces of wood. Thickened with anti scratch stickers. Works perfect.
Thanks for watching

the update from yesterday, I did the other side of the manes and started with a piece of wood for the ceown. Still way to big, but I learned not to start to small. And it need to fit in the head. A lot of work and a lot of paste, cut, past, cut, paste, etc...... We will see if I succeed in this..


There was another thing I wanted to make for my sanding desk. I needed a switch on/of for my drill. The foot pedal is always lost under the table, so I don't use that. I decided to make something from the foot pedal to rest my arm against to activate the drill. And it works perfect. I only used the microswitch from the foot pedal and a hinge and some pieces of wood. Thickened with anti scratch stickers. Works perfect.


Thanks for watching
Hi Stephan,
Did you choose specifically to make the manes of the lion in a straight line instead of a curvy wavy pattern?
Did you choose specifically to make the manes of the lion in a straight line instead of a curvy wavy pattern?
That lion carving is terrific Stephan. Also, a clever idea with the switch.
- Joined
- Aug 8, 2019
- Messages
- 5,568
- Points
- 738

Hi Stephan,
Did you choose specifically to make the manes of the lion in a straight line instead of a curvy wavy pattern?
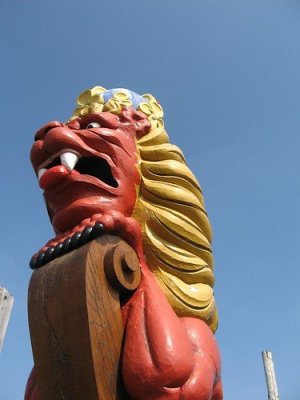
Also not very curving. But if I'm ready with the manes? Who knows, because I show the process, that could always change during time. I'm not totally happy with the width of the manes when looking from the front. First the crown to see what happens.
Thanks Roger, the switch is a welcome idea. Works perfect. Now the motor of the handpiece can cool a little down when I look to my workpiece to see how far I am.That lion carving is terrific Stephan. Also, a clever idea with the switch.
I also made a tutorial about how I make these precise sanding drums
Tutorial - An easy introduction to making wood ornaments by Stephan Kertész (Steef66)
Make sure that the part with the 2 small guidance wheels is corectly installed. There is a difference on the top and bottom. Make sure that the part with the extra edge on the side of the spring not on the side of the elektro motor. It works in both was, but if it is in the wrong way, you can't...
shipsofscale.com
Thanks for the tutorial link.
Clever idea, Stephan. ‘Ff lekker leunen …’Thanks all again for following me, likes and nice comments. That Lion keep me awake in the night, the roar is terrible to hear
the update from yesterday, I did the other side of the manes and started with a piece of wood for the ceown. Still way to big, but I learned not to start to small. And it need to fit in the head. A lot of work and a lot of paste, cut, past, cut, paste, etc...... We will see if I succeed in this..
View attachment 500301View attachment 500302View attachment 500303View attachment 500304View attachment 500305View attachment 500306View attachment 500311
There was another thing I wanted to make for my sanding desk. I needed a switch on/of for my drill. The foot pedal is always lost under the table, so I don't use that. I decided to make something from the foot pedal to rest my arm against to activate the drill. And it works perfect. I only used the microswitch from the foot pedal and a hinge and some pieces of wood. Thickened with anti scratch stickers. Works perfect.
View attachment 500307View attachment 500308View attachment 500309View attachment 500310
Thanks for watching
Gr. Peter
- Joined
- Aug 8, 2019
- Messages
- 5,568
- Points
- 738

Thanks, sometimes you get short in the amount of hands and this is really a good solution.Clever idea, Stephan. ‘Ff lekker leunen …’
Gr. Peter
The next thing I have to invent is a heated cupholder for my coffee. Heated, because time files with this part of the hobby and I had already a lot of cold coffee.
- Joined
- Aug 8, 2019
- Messages
- 5,568
- Points
- 738

Thanks Johann, for the great compliment and visit.Hello Stephan,
You did a great job with the lion. It looks great. It goes perfectly with the wonderful model.
The switch is a very clever idea.
- Joined
- Aug 8, 2019
- Messages
- 5,568
- Points
- 738

The piece of wood for the crown is attached and almost in rough shape. Now I can see how much the manes are sticking out to much and there is a lot of adjustment needed. I marked with pencil the shape.
Also on a picture you see other things that need to be adjusted.
Tomorrow I will start shaping that part again and see the outcome.
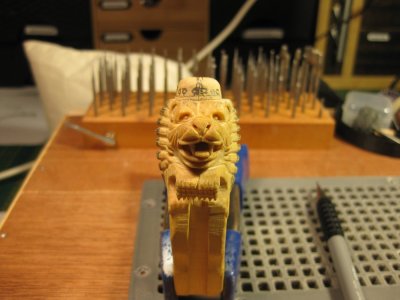
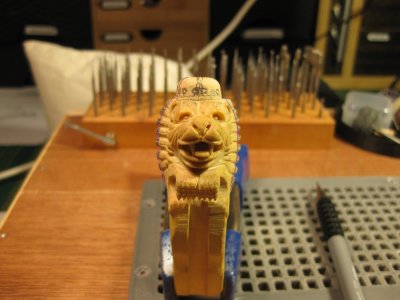
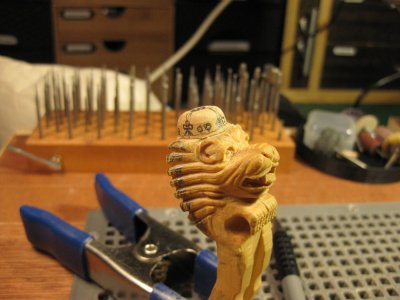
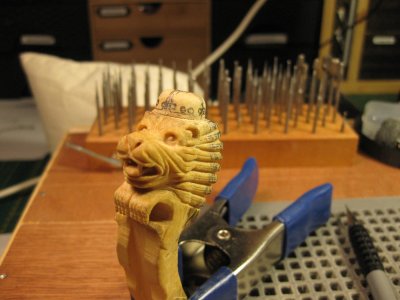
Shaping that crown will be a challenge
Also on a picture you see other things that need to be adjusted.
Tomorrow I will start shaping that part again and see the outcome.


Shaping that crown will be a challenge
We have a saying that you become handsome from cold coffee, I would skipp the heated cup holderThanks, sometimes you get short in the amount of hands and this is really a good solution.
The next thing I have to invent is a heated cupholder for my coffee. Heated, because time files with this part of the hobby and I had already a lot of cold coffee.

- Joined
- Aug 8, 2019
- Messages
- 5,568
- Points
- 738

become? Man I must already had a lot of cold coffeeyou become handsome from cold coffee
- Joined
- Aug 8, 2019
- Messages
- 5,568
- Points
- 738

Halfway done with the crown. A little on the back and then fine tuning what is possible. I'm working with my smallest burs I got. 0,3 to 0,6 mm and sometimes a 0,9 for the somewhat bigger parts.
I was afraid of the amount of work of this and I got it right. This took me 7 hours in total. and maybe 5 to go.
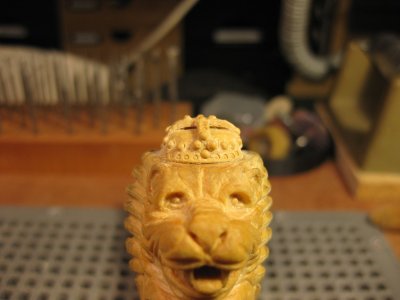
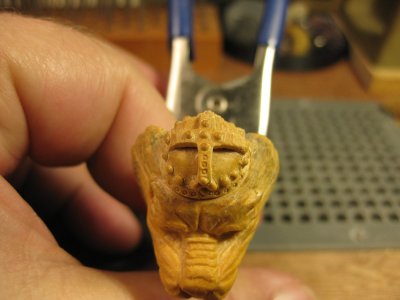

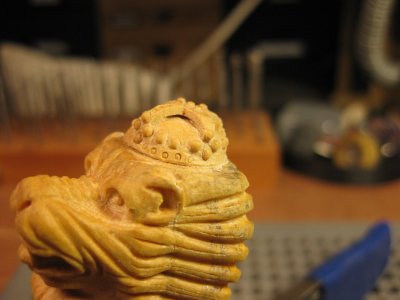
the beads are 1 mm in diameter
I was afraid of the amount of work of this and I got it right. This took me 7 hours in total. and maybe 5 to go.


the beads are 1 mm in diameter
Wow, great result, Stephan. How did you get the round pearls? They look flawless.


