-

Win a Free Custom Engraved Brass Coin!!!
As a way to introduce our brass coins to the community, we will raffle off a free coin during the month of August. Follow link ABOVE for instructions for entering.
-

PRE-ORDER SHIPS IN SCALE TODAY!
The beloved Ships in Scale Magazine is back and charting a new course for 2026!
Discover new skills, new techniques, and new inspirations in every issue.
NOTE THAT OUR FIRST ISSUE WILL BE JAN/FEB 2026
You are using an out of date browser. It may not display this or other websites correctly.
You should upgrade or use an alternative browser.
You should upgrade or use an alternative browser.
Hohenzollernmodell 1660-1670 Scale 1/75 POF build by Stephan Kertész (Steef66)
- Thread starter Steef66
- Start date
- Watchers 57
-
- Tags
- 1:75 dutch two-decker pof
I like it! Learn and make it. This is the perfect routine.
Thats looking great. 
Very nice result, Stephen. Very interesting manufacture of your rudder hanger fittings. Good work
Thank you for that tutorial. I always learn much from you and your excellent and ingenious work. Cheers@Peter Voogt Thanks, nice to see you around here. No nothing to stop me.
And everybody else thanks for the likes and visit.
Today the rabbet.
Little tutorial how I do it.
First, I mark the rabbet line with pencil and for that I use a piece of wood along a board. The piece of wood indicates where the pencil line will be.
Note! This is a keel of a Dutch ship. It is not straightforward. So to make a construction in my Proxxon milling machine is not possible. It has to be done by hand and this is also a nice tutorial for those who do not have a milling machine.
So back to the line, see picture how this looks.
View attachment 360598
After applying the pencil line, I go over this pencil line to cut one in with a knife. Sometimes I can use a ruler, but in the curves I have to do this freehand.
View attachment 360599
View attachment 360600
Do not cut too deep, it is only meant as a mark and as a guide for the cutter.
In my handdril I use this cutter. That I can hold along the keel with my finger and cut a small line in the keel on the place of the line I cut before.
View attachment 360601
View attachment 360602
View attachment 360603
When this is done, I take another cutter, a cone shape.
View attachment 360605
View attachment 360604
I use this to go deeper in the rabbet line.
BUT TAKE ATTENTION
Only move the cutter in forward movement. Don't pull it back in the wood. And don't let the tip go in the wood. Only thit way makes a smooth slot. Pulling it back it will change direction and don't follow the line you make first.
Here a picture with an arrow how to move
View attachment 360608
I always start with the smallest cutters I have. 0,9 mm tip is the best for this job. On a high speed it won't catch in the wood. And keep in mind, don't use force, just let the cutter do the job.
0,9 mm is some times to small for the rabbet, if you need a wider rabbet you take the next cone shape cutter. like a 1,2 mm.
View attachment 360607
Take small steps with the cutters till you get the width you need on your rabbet. After that is done you go for the max. depth and smoothing the cut. I use the drop shape cutter for this. Note use the thickness of the last use cone for this job. In my case a 1,2 mm. drop shape cutter.
View attachment 360609
And this one is one of my favourite cutters, you can move this one for and backwards in the rabbet line.
Finish of with a piece of sandpaper to smooth it out.
End result:
View attachment 360610View attachment 360611View attachment 360612View attachment 360613
When I'm done on both sides I show you the end result.
Thanks for visiting my build report.
View attachment 360606
- Joined
- Aug 8, 2019
- Messages
- 5,569
- Points
- 738

Thanks Jim.I like it! Learn and make it. This is the perfect routine.
Like a few others around here I started modeling 4 years ago, with just a few tools. I remember cutting parts out of plywood with a Stanley knife. Everyday I learn something new about wood and metal. How to use it.
Thanks Bryan, nice to see you around here.Thats looking great.
- Joined
- Aug 8, 2019
- Messages
- 5,569
- Points
- 738

Thanks Tobias, we learn from eachother. Always nice when someone shows how it was done. I don't have much money to spend, so always searching to cheap sources. I could buy a brass pipe and make the irons out of them. But this was in my drawer lying around.Very nice result, Stephen. Very interesting manufacture of your rudder hanger fittings. Good work
Thanks ConstNZ for visiting and your kind words. I'm Glad, I could share my findings here and be helpfull to improve ourselfs.Thank you for that tutorial. I always learn much from you and your excellent and ingenious work. Cheers
Hi Stephan,
It looks great. I was already suprized you put on the lower pintle already. This as you still have to add the planking first and the lower pintle will be positioned on top of this.
I see you removed it again.
It looks great. I was already suprized you put on the lower pintle already. This as you still have to add the planking first and the lower pintle will be positioned on top of this.
I see you removed it again.
- Joined
- Aug 8, 2019
- Messages
- 5,569
- Points
- 738

Pintle! Nice word.Hi Stephan,
It looks great. I was already suprized you put on the lower pintle already. This as you still have to add the planking first and the lower pintle will be positioned on top of this.
I see you removed it again.
Was dry fit, building in this way it is almost playing chess. You have to think a few moves in front.
This moment I'm working on the stern frame. Difficult level 9...
And I'm planning the strake board and tingle. Also level 9.
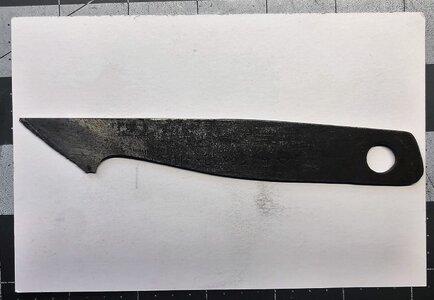
Ouch...this should hurt unless the plywood is really relatively thin. I also remember all the tools I was using since I started my hobby. The knife I made myself from a commercial hacksaw, is still with me. I don't use it those days. In Russia, we called that type of knife - kosyachock. I removed the electric tape used as the handle, it was very old and sticky.I remember cutting parts out of plywood with a Stanley knife.
Guess today, you have a plethora of knives to choose from, styles, and sizes. Below is my 'Kosyachok'
- Joined
- Aug 8, 2019
- Messages
- 5,569
- Points
- 738

Looks like a kiridashi. I like this one.Ouch...this should hurt unless the plywood is really relatively thin. I also remember all the tools I was using since I started my hobby. The knife I made myself from a commercial hacksaw, is still with me. I don't use it those days. In Russia, we called that type of knife - kosyachock. I removed the electric tape used as the handle, it was very old and sticky.
Guess today, you have a plethora of knives to choose from, styles, and sizes. Below is my 'Kosyachok'
View attachment 362417
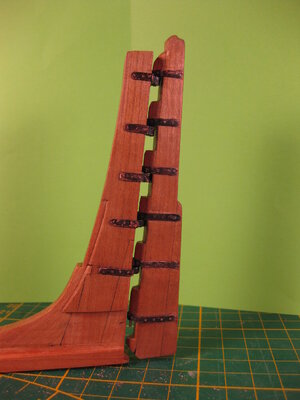
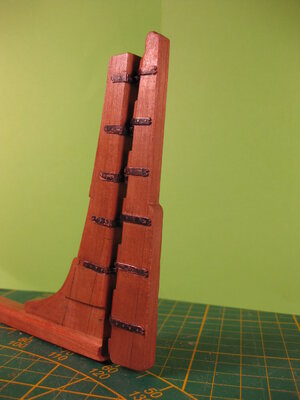
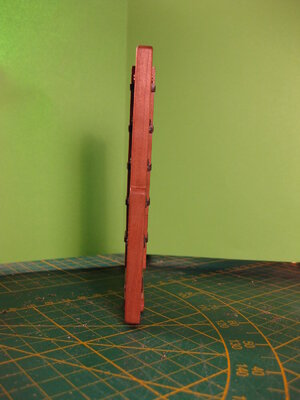
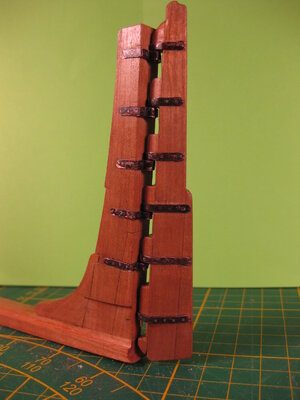
That a nice beautiful fully functional rudder, Stephan. After cutting and carving, you are now also a metal-worker!Thanks for the nice comments, likes and visit to my build log
At one moment you succeeded to hang the rudder on the keel. This was a lot of work, precise and educating to do. And fun...
Enjoy the pictures
View attachment 362150View attachment 362151View attachment 362152View attachment 362153
Regards, Peter.
Very,very nice work Stephan !
Being unfamiliar with Dutch ship design, I have one question. On the horizontal keel Scarphs, are the three horizontal bolts in the join designed to act in the same way a hooked Scarph would work? By that, I mean reduce sheer stress on the joints vertical bolts
Kind Regards
Nigel
Being unfamiliar with Dutch ship design, I have one question. On the horizontal keel Scarphs, are the three horizontal bolts in the join designed to act in the same way a hooked Scarph would work? By that, I mean reduce sheer stress on the joints vertical bolts
Kind Regards
Nigel
- Joined
- Aug 8, 2019
- Messages
- 5,569
- Points
- 738

Thanks Nigel for your visit, all the likes and nice comment.Very,very nice work Stephan !
Being unfamiliar with Dutch ship design, I have one question. On the horizontal keel Scarphs, are the three horizontal bolts in the join designed to act in the same way a hooked Scarph would work? By that, I mean reduce sheer stress on the joints vertical bolts
Kind Regards
Nigel
To your question, these are made in the joint to avoid leaking water through the joint from below the keel. Something to do with movement in the joint on rough sea.
- Joined
- Aug 8, 2019
- Messages
- 5,569
- Points
- 738

I work since yesterday on the stern. In POF build one of the difficult things to make. Especially on a Dutch 2-decker. Lots of different angles and rounded parts. Nothing is straight on.
This is the part I'm constructing
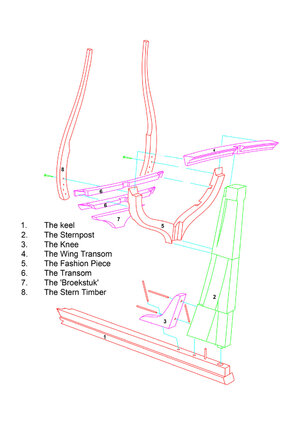
I'm making the drawings in AutoCAD and print them with acrobat reader.
I use my Thickness sander a lot at the moment. Love this tool. I can make a piece of wood with a thickness of 0,01 accuracy.
First cut all the parts out
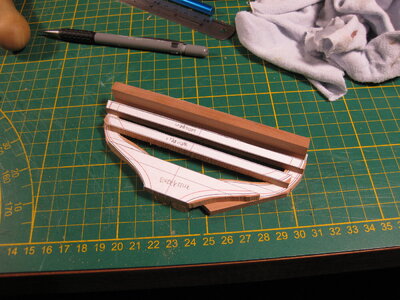
Then I glued the Fashion piece and the 'Broekstuk' (no English name for this one) together. And paste it to the right position on the stern post. After that I sanded the angle of the hull in it. After that I started to make the first Transom on it.
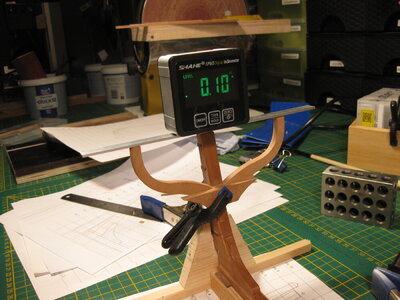
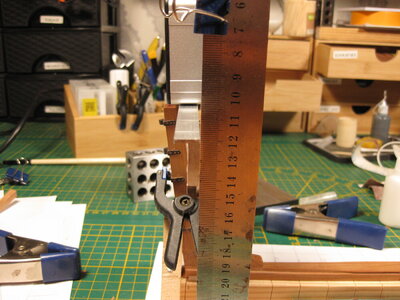
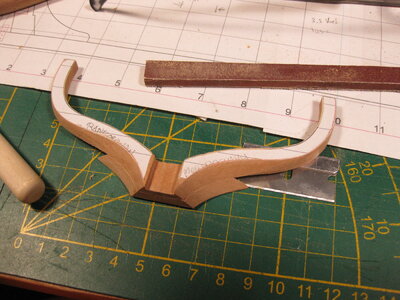
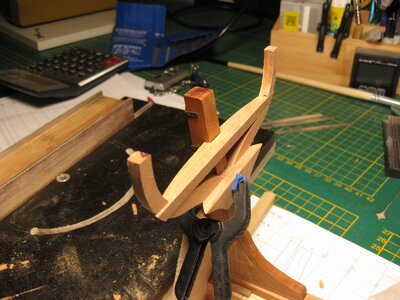
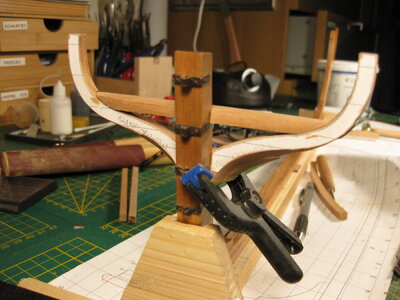
Short update of an immense lot of work. sometimes I use machinery to saw or sand, but most of it is done by hand, sanding, cutting and with a Japanese handsaw (spoiler alert.... no, no, not cutting ships in half)
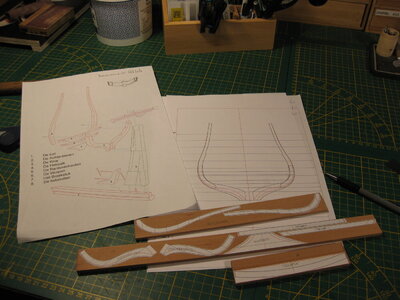
This is the part I'm constructing

I'm making the drawings in AutoCAD and print them with acrobat reader.
I use my Thickness sander a lot at the moment. Love this tool. I can make a piece of wood with a thickness of 0,01 accuracy.
First cut all the parts out

Then I glued the Fashion piece and the 'Broekstuk' (no English name for this one) together. And paste it to the right position on the stern post. After that I sanded the angle of the hull in it. After that I started to make the first Transom on it.


Short update of an immense lot of work. sometimes I use machinery to saw or sand, but most of it is done by hand, sanding, cutting and with a Japanese handsaw (spoiler alert.... no, no, not cutting ships in half)

- Joined
- Aug 8, 2019
- Messages
- 5,569
- Points
- 738

Hi Johann, thanks for visiting my build report and the kind words. To receive a compliment from a talented builder like you is always a great moment. Which only strengthens the motivation to continue.Hi Stephan,
a very interesting and instructive construction report.
Also a very precise and neat work.
Thanks for sharing.
Hi Nigel,Very,very nice work Stephan !
Being unfamiliar with Dutch ship design, I have one question. On the horizontal keel Scarphs, are the three horizontal bolts in the join designed to act in the same way a hooked Scarph would work? By that, I mean reduce sheer stress on the joints vertical bolts
Kind Regards
Nigel
These are not bolts or treenails but plugs.
As Stephan said these are used to close the scarph joint from water seeping in.
In the scraph joint holes were drilled, these were stuffed with moss. Then the holes were plugged with small round kegs. The moss expanded and the scarph joint is closed avoinding seepage through the joints.
Hi Nigel,
These are not bolts or treenails but plugs.
As Stephan said these are used to close the scarph joint from water seeping in.
In the scraph joint holes were drilled, these were stuffed with moss. Then the holes were plugged with small round kegs. The moss expanded and the scarph joint is closed avoinding seepage through the joints.
Hi Maarten
Moss, well I learn something new every day
Kind Regards
Nigel

