Hi Oliver. Good news your surgery went well. We’re getting old unfortunately ! Just wanted to stop in and check on your project. Hopefully in another couple months I’ll be back in the shop working on my La Belle ! Warm weather pursuits prevail !
-

Win a Free Custom Engraved Brass Coin!!!
As a way to introduce our brass coins to the community, we will raffle off a free coin during the month of August. Follow link ABOVE for instructions for entering.
-

PRE-ORDER SHIPS IN SCALE TODAY!
The beloved Ships in Scale Magazine is back and charting a new course for 2026!
Discover new skills, new techniques, and new inspirations in every issue.
NOTE THAT OUR FIRST ISSUE WILL BE JAN/FEB 2026
You are using an out of date browser. It may not display this or other websites correctly.
You should upgrade or use an alternative browser.
You should upgrade or use an alternative browser.
Le Rochefort build log by OlivierF
- Thread starter OlivierF
- Start date
- Watchers 39
-
- Tags
- ancre group build le rochefort
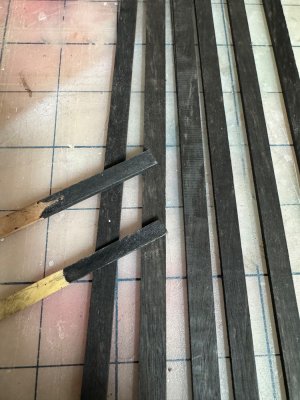
I found a small piece of ebony in my stash so I was able to mill enough pieces to make the main wale.
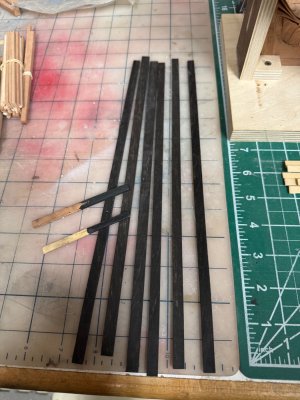
It looks like the black India ink matches the real stuff well enough to make the remainder of the strakes below the wale.
I’ll see if I can find some more ebony in my scrap pile though…
I’m only able work in short periods before my shoulder aches so be patient it may take awhile.

It looks like the black India ink matches the real stuff well enough to make the remainder of the strakes below the wale.

I’ll see if I can find some more ebony in my scrap pile though…
I’m only able work in short periods before my shoulder aches so be patient it may take awhile.
As they used to say on “Myth Busters” TV show, “Failure is always an option”!
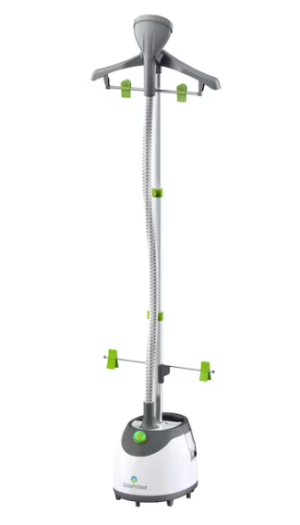
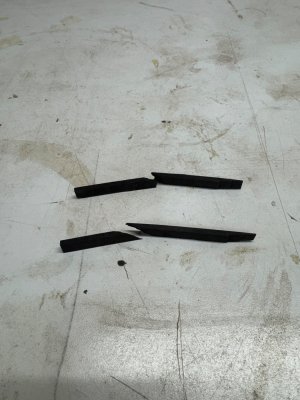
The ebony wood I have I very brittle and breaks easily if bent. So I cobbled together a small steam chamber with what I had laying around.
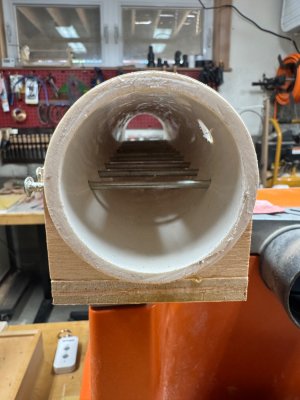
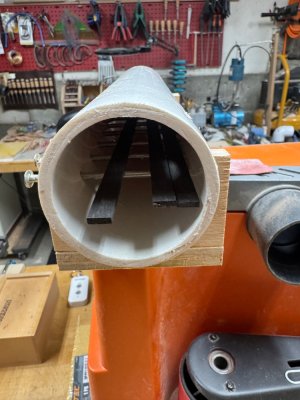
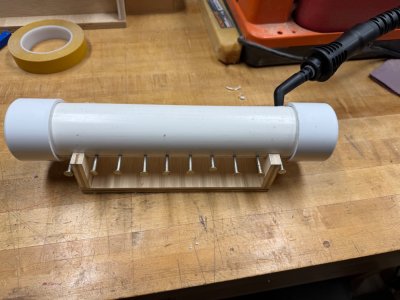
I have a small steamer we use for cleaning tile grout and other things so I thought to use it for the steam generator.
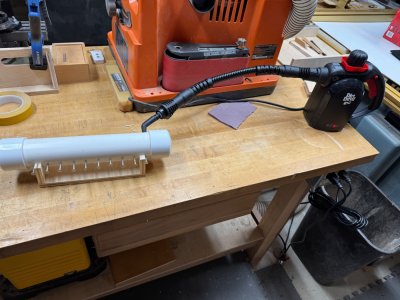
It does produce enough steam it just doesn’t not have enough volume in the tank (only 250ml) for more than a few minutes of constant use.
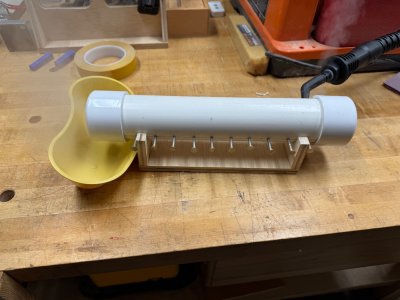
I need to rethink what the best way to generate steam will be…
Back to the drawing board!
The ebony wood I have I very brittle and breaks easily if bent. So I cobbled together a small steam chamber with what I had laying around.


I have a small steamer we use for cleaning tile grout and other things so I thought to use it for the steam generator.

It does produce enough steam it just doesn’t not have enough volume in the tank (only 250ml) for more than a few minutes of constant use.

I need to rethink what the best way to generate steam will be…

Back to the drawing board!
- Joined
- Sep 10, 2024
- Messages
- 1,022
- Points
- 393

|
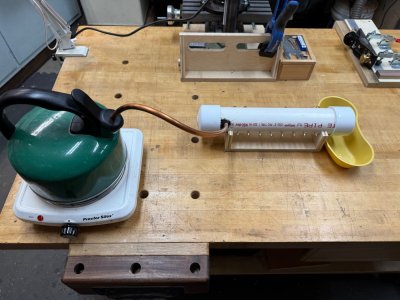
This Version 2.0 definitely has a large enough water reservoir although I did have to sacrifice an old kettle (don’t tell my wife…
 ) to cobble this together. Also, this hot plate is old and anemic so will need an upgrade. Stay tuned for version 2.5 coming soon!
Cheers All!
thanks for the inspiration Stephan! This seems to work better.Maybe a a big kettle on a stoof with a lid and pipe. But I like your idea.

This Version 2.0 definitely has a large enough water reservoir although I did have to sacrifice an old kettle (don’t tell my wife…

 ) to cobble this together. Also, this hot plate is old and anemic so will need an upgrade. Stay tuned for version 2.5 coming soon!
Cheers All!
- Joined
- Aug 8, 2019
- Messages
- 5,571
- Points
- 738

No I will not tell her, I'm used not telling everything to wifes.don’t tell my wife
I’ve bee on hiatus from this project for a little while but I’m back in the shipyard and working on the wales.
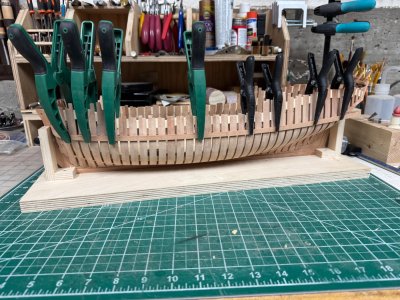
First I shaped and dry fit the wales
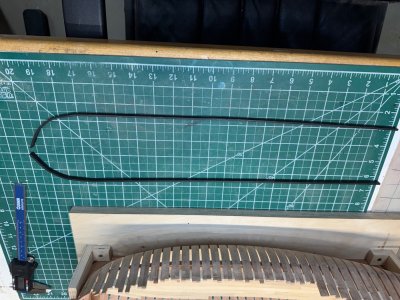
Then I dyed them using India ink
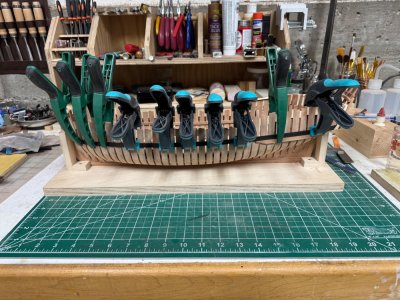
I’ve glued the port side wale and now must wait for the glue to dry as I don’t have enough clamps to do the other side.
It’s true what is said, “you never have as many clamps as you need!”


First I shaped and dry fit the wales

Then I dyed them using India ink

I’ve glued the port side wale and now must wait for the glue to dry as I don’t have enough clamps to do the other side.
It’s true what is said, “you never have as many clamps as you need!”

- Joined
- Aug 8, 2019
- Messages
- 5,571
- Points
- 738

Everytime I see clamps in a store I have to buy them. You too?It’s true what is said, “you never have as many clamps as you need!”

Stephen, I absolutely do! Unfortunately I have to order most from on-line sources and most of those come from Europe like Wolfcraft and Bessey. And the current shipping situation makes it difficult
I’m working on the planks that fit below the wales. These are technically not part of the wales but are still the same thickness and width as the wale boards. These lower planks wrap around the stern and fit into the transom rabbet. Adrien and other seem to be able to make them by cutting and shaping a curved piece of wood. Well, I tried many times and now have quite a bit of kindling for the fire place.
So, plan B…
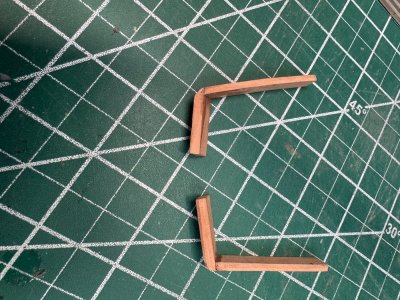
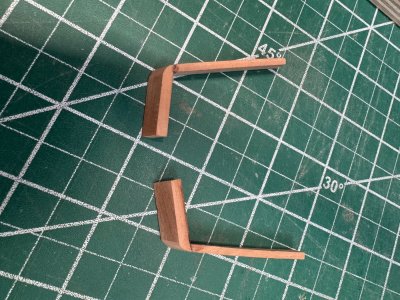
I clamped a piece of wood against the transom and shaped the appropriate angle on the side piece and glued them together. Like magic this worked for me!
Before gluing up the assembly I soaked the side piece in water and then molded it to the ship and applied a little heat with a heat gun so it bends to the hull correctly.
Next step is to attach all these pieces to the hull once I free up some clamps.
So, plan B…


I clamped a piece of wood against the transom and shaped the appropriate angle on the side piece and glued them together. Like magic this worked for me!
Before gluing up the assembly I soaked the side piece in water and then molded it to the ship and applied a little heat with a heat gun so it bends to the hull correctly.
Next step is to attach all these pieces to the hull once I free up some clamps.
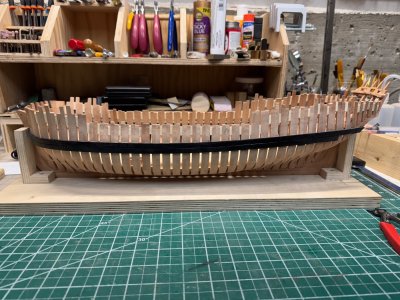
I completed attaching the wales and the boards underneath.
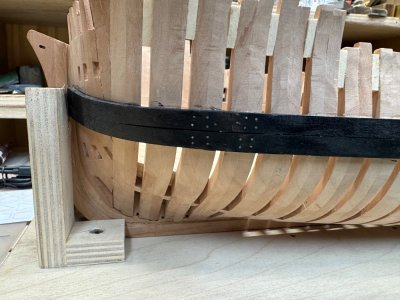
And have started adding the nails
I realized that there was no way I could drill all the needed holes free-hand with any accuracy or consistency
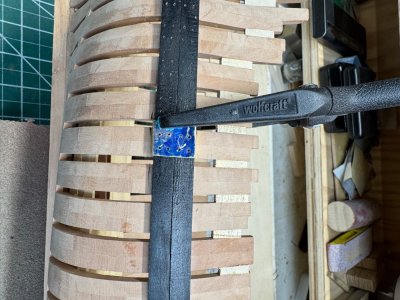
So, I made a little template with a piece of bras plate.
Now, back to drilling.
Fair winds to all…

And have started adding the nails

I realized that there was no way I could drill all the needed holes free-hand with any accuracy or consistency

So, I made a little template with a piece of bras plate.
Now, back to drilling.
Fair winds to all…
- Joined
- Sep 10, 2024
- Messages
- 1,022
- Points
- 393

Those really come in handy, but you didn't get nearly enough, my friend!

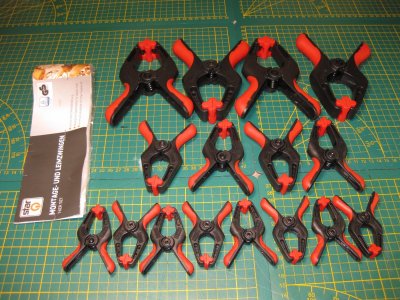
We have a chain here called Harbor Freight with inexpensive tools. I picked up a package of 22 clamps (18 - 1" and 4 - 2") for about the equivalent of €5,50. Ran out while building Oseberg and went back to get two more packages.
Not real high quality, but they do the job - and they are very pretty!

I have a set of these someplace. Personally, I don’t like them as the little orange ends never stayed where I wanted them. Maybe it was just the set I got but those ends are really loose and just flop around making it hard to use. So they’ve been retired to the back of a closet.Not real high quality, but they do the job - and they are very pretty!

I have a set of these someplace. Personally, I don’t like them as the little orange ends never stayed where I wanted them. Maybe it was just the set I got but those ends are really loose and just flop around making it hard to use. So they’ve been retired to the back of a closet.Not real high quality, but they do the job - and they are very pretty!
- Joined
- Aug 8, 2019
- Messages
- 5,571
- Points
- 738

Glue a piece of sandpaper on it. Grid 240-400 will help.the little orange ends never stayed where I wanted them
If I need to use them (if I can find them) that’s a good idea, thanks!


