LE ROCHEFORT

Hi Don,

You can build frames also, so give it a try.
If you have some plywood, what do you have to loose?
 
HAVE HEARD FROM KRIS, HE IS MAKING MY JIG, I AM SCOURING AROUND ALL MY PLACE I MAY HAVE SOME BEECH THAT IS NOT WARPED, STILL CONTINUING IN REDUCING THE FRAMES WILL USE UP EVERYTHING THAT I HAVE AND THEN I WILL KNOW WHAT TO DO TO CONTINUE, a really big, big difference in the frames from the earlier ones to the latest, when the patterns were done haphazardly problems with the sanding of the frames after i started to mark out the patterens WHAT A DIFFERENCE, WHAT DO YOU KNOW I AM SCRATCH BUILDING. Don
 
WELL BACK TO DOING FRAMES AGAIN, do not have many more prints available maybe 3 frames, until FED-X re opens,so i will continue as long as I can, QUESTION FOR ANY ONE FRAME No.5 HAS THE EXTENDED TOP TIMBER i posted in the picture the oriantation, JUST TO VERIFY THAT I AM RIGHT20200426_235631.jpg20200426_235741.jpg
 
Assuming that you are asking where the extended top timber is supposed to be.... layer 1 or 2?
Not sure if anyone else here has the plans and the photos may not be self-explanatory.

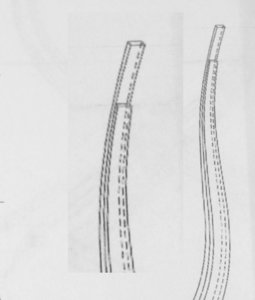
Here is the close-up view of the top timbers of frame 5 (from the plan) showing where the dotted lines are, thus confirming what layer contains what part:

_DSC0662 aa copy copy.jpg

Knowing that, when you are looking at the plan-sheet, you are standing at frame 6 looking at frame 5 and beyond towards the stem/bow.
Knowing that layer 1 of the frame (5 in this case) is closest to the stem/bow.... meaning that it is the layer furthest away from you (standing at frame 6)....

If not sure, you can also check plate # 4 showing a side view of the framing.

G
 
HI GILLES, YES I ALWAYS CHECK PLATE 4 IT GIVES A MUCH CLEARER PICTURE THEN THE FRAME DRAWINGS, and I ALWAYS CALL LAYER ONE AS THE ONE WITH THE LONGER FLOOR TIMBER BOW OR STERN AND IT IS ALWAYS OUTLINED IN BLUE THE SECOND LAYER IS ALWAYS OUTLINED IN RED. THANKS AGAIN FOR ALL THE HELP, right now i am running out of prints may 2 or 3 more as we are on total lockdown can not GET NTO FED-X for prints hopefully soon but not me my DAUGHTER OR SON-IN-LAW WILL GET THEM PRINTED ALSO MATERIAL. THANKS GREATLY GOD BLESS STAY SAFE. Don
 
LAYER ONE IS ALWAYS OUTLINED IN BLUE THE SECOND LAYER IS ALWAYS OUTLINED IN RED.

Thumbsup That is good if you follow this process for all your frames.


_____________________________________________________________
And just to make sure...
I ALWAYS CALL LAYER ONE AS THE ONE WITH THE LONGER FLOOR TIMBER BOW OR STERN

???
I hope you are only talking about frame 5.
And you remember that frame 4 (for example) is reversed, as far as the top timber extension is concerned: the extension is on layer 2 (your red layer).

G.
 
I am happy that you found a way to build your frames.Thumbsup Every advice is as good as it can help you to finde your own way in doing things.
If you have the possibilitie put your keel assembly in the jig and place the finished frames there (without glueing). In this position the frames storages of the frames is good and it's helping to motivate you in this very long process of preparing frames.
 
THANK YOU CHRISTIAN, the only advice i did not consider and am sorry now was your advice to put a scrap piece at the top with the center line marked another point of reference as soon as the jig comes in that is exactly what i intend to do, right now i have prints for only 3 or 4 frames to get sanded, we are in total lock down here FED-X is closed, so my daughter can not get the rest of the prints and I STILL HAVE 7 more frames to build, hopefully i will find material to get those finished, thank you for your help and i am sure i will be needing it some more. GOD BLESS STAY SAFE Don
 
Hi Don,

I should do the keel notch by hand with a file, this is a slow but safe process as you have full control of the small amount to be removed. Filing square is easiest with a triangular file, not a square file.
As you come close to the size needed you can dry fit on the keel until it snug fits on the keel.
 
YES I AGREE WHEN I REACHED FRAME No.23 GOING AFT THAT IS WHAT I HAVE DONE, AND ALSO 7 THRU 1 FORE THE SAME THE OTHER FRAMES DONE WITH MILL I DO NO THERE IS GOING TO BE A LOT OF FITTING TO BE DONE. THANKS GOD BLESS STAY SAFE Don
 
JUS TO POST THAT I HAVE NOT BEEN IDEL FINISHING UP FRAMES AND FINAL SANDING WILL PRBALLY BE 2 FRAME FOR SANDING SHORT WAITING FOR FED-X- to open so i can get prints, so now guys until my jig arrieves neecto procede, any ideas whatb to do next, MAARTEN, GILLES OTHERS WHAT DO YOU THINK. Don
 
Hi MAARTEN, yep i do want to start that but can not do it without the jig the jig will be ready at the end of month will post frame pictures of the lateset frame complete tomorrow. GOD BLESS THANKS STAY SAFE
 
Hi All, Have not needed help in a while down to my last 4 frames starting with frame No.32 stern and ending with frame No.1 bow, i can not understand the detail of these frames at the floor timbers, can anyone help on this20200507_212626.jpg20200507_213208.jpg20200507_212747.jpg
 
Hi Don,
Frames at the stern:
For frame 31 and 32, you need to look at plate 2, find part g1. The drawing should answer your question(s). From there, you can see how the frames are are fitted to the sternpost knee. Note the elevation, which explains why sometime the stern frames are called rising frames.
Also, in the text portion of the monograph, and in particular, the description of individual plates, look for the explanation under plate 2, part g1: there could be useful written info. Also look for the description on plate 3 and 4, the frame templates and more: there should be written info as to how the frames are fitted to part g1.
If you still have to make frame 30, same idea, except that this frame is sitting on part e1: the aft portion of the rising wood, which is installed on top of the last keel portion. The same is also true for frame 29 and 28: just not as high as the frames further back.

As for the forward frame (#1): similar idea: except that you have to look for part f2 (again on plate 2), which should be labeled as the lower part of the apron.

Hope this helps.
Regards.
G
 
OK, THIS WILL TAKE SOME TIME FOR ME TO GO OVER THIS TO MAKE SURE I UNDERSTAND HAVE YOU LOOKED AT MY FRAME No.29, see above do I have that right, i see in these frames that they are fastened to the keel by treenails does this mean no keel notch if not I CAN USE FILLER ON FRAME No.29 if neccessary, THANKS AS ALWAYS BTW do not know if I told you i found someone to do a jig for me at what i consider a really great price MEMBER HERE ON SOS GOES BY SZKUTNIK or by KRIS DUE IN BY END OF MONTH,,,, ALSO AS MY AGE AND HEALTH CONCERNS MAKE ME VULNERABLE MY DAUGHTER-IN-LAW WHO IS A NURSE ON THE FRONT LINES IN NEW ORLEANS, SHE TOLD ME WEAR YOUR HAIR IN A PONY TAIL, GET LOADS OF PROJECTS GOING AND LOTS OF TOOLS BUT STAY INSIDE GOOD ADVICE FOR ME INTEND TO DO THAT. GOD BLESS STAY SAFE PS IF I HAVE ANY MORE QUESTIONS WITCH I PROBALLY WILL I WILL POST THEM. Don
 
Back
Top