LE ROCHEFORT

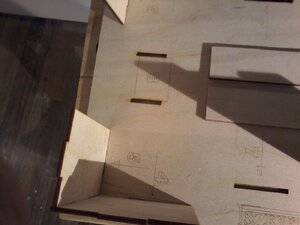
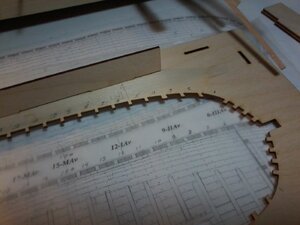
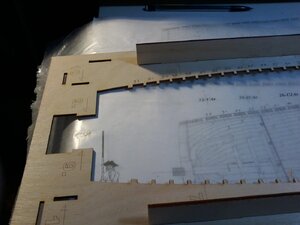
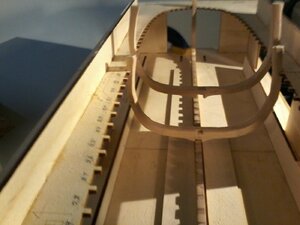
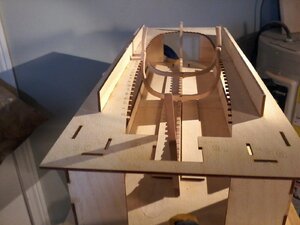
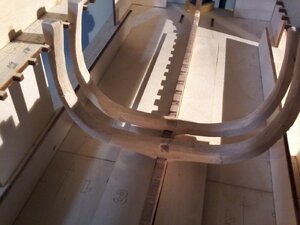
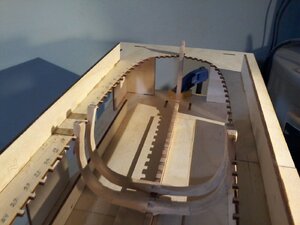
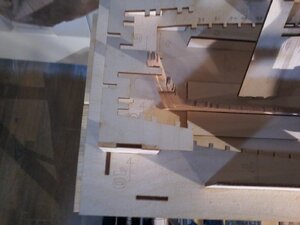
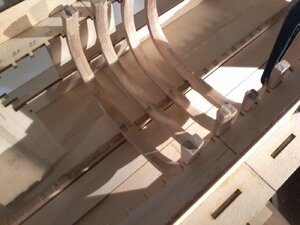
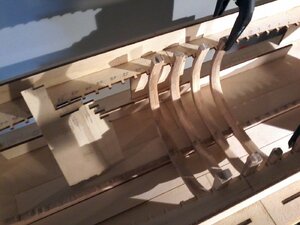
HI ALL SMALL UPDATE, AND SHOWING THE JIG THAT KRIS DID FOR ME, FIRST IT IS DONE SUPERB, THE LASSER CUTTING IS VERY, VERY ACCURATE, PARTS FIT VERY WELL, I AM SHOWING DRY FITTING OF VERTICALS WILL GLUE THEM TODAY, THINKING ABOUT NOT GLUING THE TOP PART OF JIG TO VERTICALS AS I MAY NEED TO DO SOME WORK THAT NEEDS IT TO BE REMOVED, THOUGHTS ON THIS PLEASE, ALSO NEED SOME BUILDING HELP PLEASE (GILLES, MARRTEN, PLEASE, QUESTIONS ARE I SHOW MY NUMBERING OF FRAME NOS. ON THE JIG, WANT TO VERIFY ARE THEY CORRECT, AND ALSO VERY IMPORTANT TO ME AS I HAVE DRY FITTED A COUPLE OFFRAMES SO FAR THE THICKNESS OF FRAMES (10MM) FITS OK BUT VERY TIGHT, I NEED TO REMOVE PATTERNS FOR PROPER FIT AND FINISHING, IT I LOOSE THE PATTERENS I WILL LOOSE THE LINES, SO HERE GOES20200719_032413.jpg20200719_032546.jpg20200719_032717.jpg20200719_032717.jpg20200719_032738.jpg20200719_032738.jpg20200719_032738.jpg
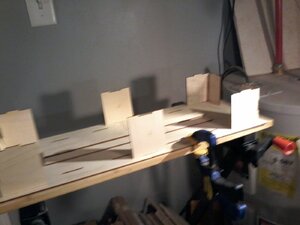
 
THANKS ALL, JIG IS FINISHED, EXCEPT FOR THE STERN, WILL DO THAT TOMORROW, 2 FRAMES DRY FITTED, MIDSHIP NO. 15 AND FRAME NO 17 I THINK FOR A START I WILL DO EVERY OTHER ONE THE FITTING TOOK A LONG TIME IT WAS SAND AND FIT, SAND AND FIT ETC, I DO NOT KNOW ANY OTHER WAY TO DO THIS, I WILL SHOW PICTURES TOMORROW. GOD BLESS ALL STAY SAFE DON
 
@donfarr

Thanks, i am all but not a master. My La Belle is my second ship, my first scratch. I have do learn a lot. Everything. Every day there is a new mistake on my way. There´s a lot of techniques that i don´t know how to handle it. Carving, canons, the metal parts....the list has no end. But we will climb the rock !
Years ago when beginning my apprenticeship in architecture an older architect admonished me thtat it is more important to remember the list of "things not to do" than the much longer list of "do this"! The results for each are very different and can be massive when the "don't do this' are violated. Same in model buiding I am learning so that I don't have to go back, cut apart, and redo; which I am willing to do but wastes time and possibly the end product.
 
One way you can test fit (dry fit) the frames is to begin with your station frames.
The station frames are marked on your plan as (for example) M-Av-15 or 2Ar-23 or 2Av-9. I am not at home at the moment , so I do not have the plate #, but it is the one showing the keel.

the same reference is given on the individual/frame pattern plates, except that they are marked slighly differently: for example 29-IVar which means:
frame #29 - the roman /number indicates that it is station frame IV (4 in this case) - Ar for aft.
A forward station frame will be marked the same way: frame number - roman number - "av" for forward.

The frames without roman numbers and either "Av" or "Ar" are filling frames and marked with only the frame number (28 for example). There are usually 2 frames sandwiched between 2 station frames: except for your centre frames marked M where only 1 frame separates them: Mav-15 or Mar-17 the filling frame is #16.

If you were building POB the station frames would likely be you bulkheads.

G.
 
HI ALL HERE ARE PICTURES OF THE FIRST 2 FRAMES DRY FITTED (MID SHIP FRAME NO. 15 AND FRAME NO. 17, I THINK I AM GOING TO START WITH EVERY OTHER FRAME TO START WITH, THE FRAMES SEEM TO BE BETTER THEN I THOUGHT THEY WERE GOING TO BE, IT DOES TAKE ME A WHILE TO DRY FIT THEM, ABOUT 3 OR 4 HOURS EACH, HOPE IT WILL GO FASTER AS I PROGRESS WITH THE DRY FITTING, AS ALWAYS COMMENTS ARE WELCOME AND NEEDED, SO HOW DO THEY LOOK SO FAR AND YES THEY STILL HAVE SOME WORK TO BE DONE ON THE FLOOR TIMBERS TO EVEN THEM OUT, ALSO THE FRAMES NEED SOME MORE WORK AS PROOFING THEM, AND LOCATING THE TOP OF FRAMES, AND SOME OTHER MINOR ITEMS, GILLES MAARATEN CHIP IN. GOD BLESS STAY SAFE DON
 
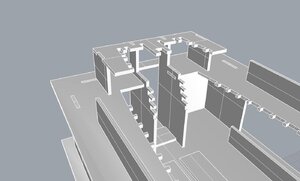
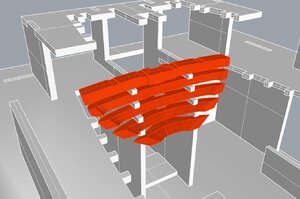
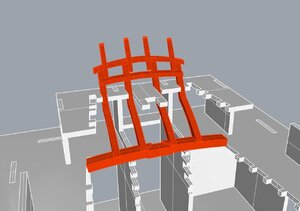
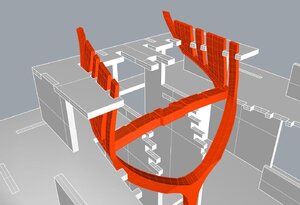
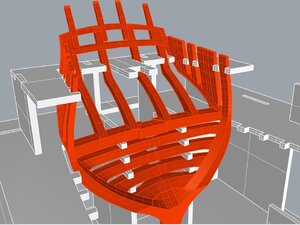
PROGRESS DRY FITTING FRAMES ONE FRAME NO 13 I DID WHAT I WAS HOPPING NOT TO DO THAT IS TAKE OFF TO MUCH AT THE TOP MUST BE MORE CAREFUL WITH THIS MAY HAVE TO RED THIS ONE HOPE NOT SUGGESTIONS HELP TO SEE IF I AM ON THE RIGHT TRACK WITH THIS BEFORE GOING TO FAR, ALSO AGAIN THANKS TO KRIS THE JIG IS A MARVEL IN FACT THE STERN PART OF THE JIG IS A JIG IN ITSELF, HAD SOM PROBLEMS FIGURING OUT HOW IT GOES TOGETHER AND HOW THE STERN TIMBERS FIT IN THE JIG, MAYBE KRIS CAN HELP HERE20200723_184914.jpg20200723_185128.jpg20200723_185213.jpg
 
AMAZING KRIS, THE 3-DS HELP IN MORE WAYS THEN JUST THE JIG, I HAVE BEEN STRUGLING WITH SOME DETAILS ON THE STERN AND IT CLARIFYS IT, IT REMINDS ME OF THE TIME ABOUT 8 YEARS AGO WITH DAVE STEVENS AND MY CAUSTIC BUILD, CLEARED UP PROBLEM THAT WAS GOING ON FOR DAYS IN 5 MINUTES THE I BECAME A ADVOCATE FOR 3-D INSTRUCTIONS. GOD BLESS ALL STAY SAFE DON
 
Ahoy!
DON@ - probably we will have to think about 3D instructions to our models. I see that for many modelers the 3D drawing (render) is more readable form than traditional drawings. Specially the rigging and masting oof sailing ships.
 
Congratulations on building jig, Don, it looks very good and will certainly be of great help, wish I also had one like that for Rattlesnake.
But I'm going to use the Hahn build style, good luck, regards-
.
.
 
Back
Top