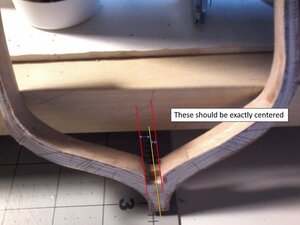
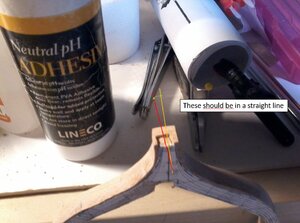
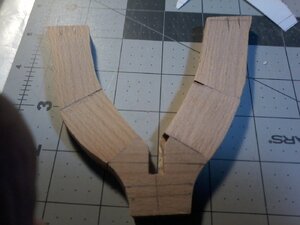
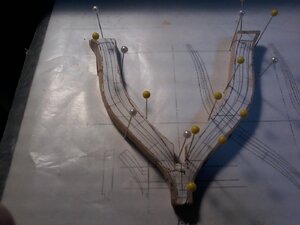
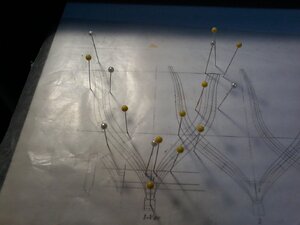
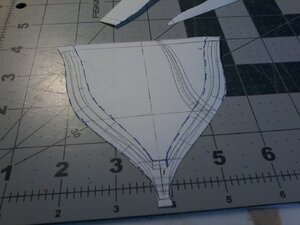
note to keep consistent all frames with BLUE ARE LAYER ONE, ALL FRAMES WITH RED LINES IS LAYER TWO,(BOW OR STERN). GOD BLESS STAY SAFE Dojn
-

Win a Free Custom Engraved Brass Coin!!!
As a way to introduce our brass coins to the community, we will raffle off a free coin during the month of August. Follow link ABOVE for instructions for entering.
-

PRE-ORDER SHIPS IN SCALE TODAY!
The beloved Ships in Scale Magazine is back and charting a new course for 2026!
Discover new skills, new techniques, and new inspirations in every issue.
NOTE THAT OUR FIRST ISSUE WILL BE JAN/FEB 2026
You are using an out of date browser. It may not display this or other websites correctly.
You should upgrade or use an alternative browser.
You should upgrade or use an alternative browser.
LE ROCHEFORT
- Thread starter donfarr
- Start date
- Watchers 37
-
- Tags
- ancre le rochefort
I think for Don in this stage most important are the joint between the frame sections and not the total shape of the frame as there is plenty of wood left around the frame sections to still create the proper frame. Don I guess you are still glueing a new paper template on the frame before sanding these back to shape?@donfarr
Before the question gets answered, let us address some problems:
Frame 30
I can tell you that this frame is not going to fit.
You will have a major problem.
This frame will need to be redone.
Please look at the image below and write down what you see when you compare your frame and the inserted pattern.
View attachment 153905
Frame 1
I am not posting an image but, to a lesser extent, you will have a similar problem.
G
OH YES most certain, the reason not done yet is i have no more PRINTS LEFT TO MAKE PATTERNS, need to go to PRINTERS, WHEN IT IS SAFER OUTSIDE MY DAUGHTER OR SON-IN-LAW WILL GO AS I AM NOT ALLOWED TO GO OUT EXCEPT FOR A DRIVE, when i have the prints, for FRAME No.1 do i take it to the BLUE AND RED LINES OR TO THE SOLID OUTSIDE LINES, THANKS ALL. GOD BLESS STAY SAFE Don
OOPS BTW there are 3 FRAMES THAT NEED FINAL PATTERN THEY ARE FRAME Nos. 1, 26,,,and 30,, hope this explains it better. GOD BLESS STAY SAFE Don
- Joined
- Feb 18, 2019
- Messages
- 717
- Points
- 353

You guys must be joking....
Yes the joints are all important at any stage, but from the time someone picks up a saw to cut the parts, that someone must work while visualizing what the fame will look like at the end of the process: any process. Whatever number of steps one uses to make a frame, the extra material left around the frame is there to compensate for minor errors, which are expected, it should not be there to allow fixing parts that are assembled backward or whatever else. This is going to cause problems getting Rochefort to actually end up with the shape of the vessel that is shown in the plans.
The reason every step should be done with the overall final shape of the frame in mind is quite simple, one frame alone does not make the shape of the hull. All frames must work together to end up with the ships framing and ultimately the shape of the ship... and frankly, that is the goal, is it not.
Yes frame 1 is important because the hawse-timbers are connected to it, well at least #5, but somehow, so is frame 2, and 3 is somehow connected to frame 2 and so on, all the way to frame 32.
Furthermore, other parts are going to be assembled to the frames.
How is this going to get fixed?
Or which is right on this frame, the cut notch or the lines from the pattern? and what about the next frame.
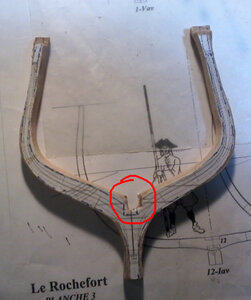
The difference between a kit and scratch building is simple, the modeler fabricate the parts.
How would you guys feel if a POF kit manufacturer included parts that were not cut taking into account the final shape of the frame before the lumber is sent to the cutting laser or CNC, and parts that were so far off that it would cause nothing but trouble when time comes to assemble stuff.
Anyway, just my 1 cent.
G.
Yes the joints are all important at any stage, but from the time someone picks up a saw to cut the parts, that someone must work while visualizing what the fame will look like at the end of the process: any process. Whatever number of steps one uses to make a frame, the extra material left around the frame is there to compensate for minor errors, which are expected, it should not be there to allow fixing parts that are assembled backward or whatever else. This is going to cause problems getting Rochefort to actually end up with the shape of the vessel that is shown in the plans.
The reason every step should be done with the overall final shape of the frame in mind is quite simple, one frame alone does not make the shape of the hull. All frames must work together to end up with the ships framing and ultimately the shape of the ship... and frankly, that is the goal, is it not.
Yes frame 1 is important because the hawse-timbers are connected to it, well at least #5, but somehow, so is frame 2, and 3 is somehow connected to frame 2 and so on, all the way to frame 32.
Furthermore, other parts are going to be assembled to the frames.
How is this going to get fixed?
Or which is right on this frame, the cut notch or the lines from the pattern? and what about the next frame.

The difference between a kit and scratch building is simple, the modeler fabricate the parts.
How would you guys feel if a POF kit manufacturer included parts that were not cut taking into account the final shape of the frame before the lumber is sent to the cutting laser or CNC, and parts that were so far off that it would cause nothing but trouble when time comes to assemble stuff.
Anyway, just my 1 cent.
G.
Last edited:
THIS ONE IS NOT COMPLETE GILLES CHECK OUT FRAME No2, THAT IS HOW IT WILL BE FINISHED I WILL SHOW IT COMPLETE how does FRAME No2 look i also ned to sand the bottom to where it belongs by the tenon as you showed above, IT IS MY FAULT FOR SHOWING THINGS BEFORE THEY ARE FINISHED. GOD BLESS STAY SAFE
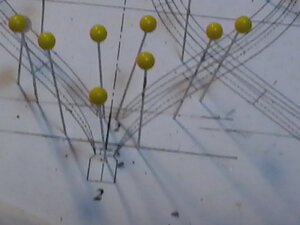
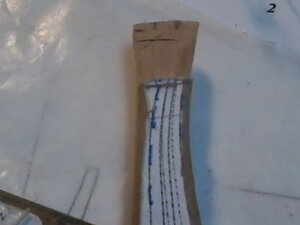
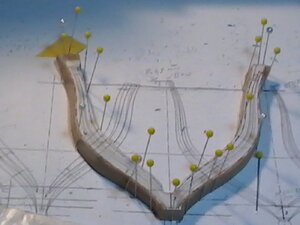
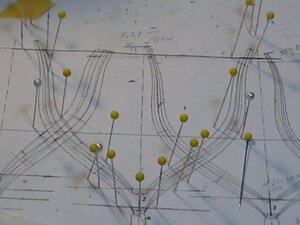
OK fraNo.2 i have taken it to very near completion, leaving a slight bit at tenon cut off and also at the top timber extension just cut one side off, leaving the other one not cut, also proof FRAME No.2 both first layer(BLUE) and 2nd layer(RED) sorry for the pins but as explained many times have to do it that way as i can not stand up very well unsuported so have to due it that wayb regardless as youn can see both layers line up at the joint lines and thye horizantal lines as another point of reference and i still need to now if i have done the top notch corectly need help in getting this right if someone maybe can draw it in the proper way would be GREAT, i will proof frame No.32 tomorrow along with other frames, COMMENTS ALWAYS NEEDED AND APRECIATED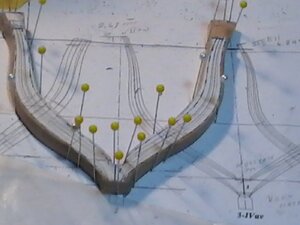
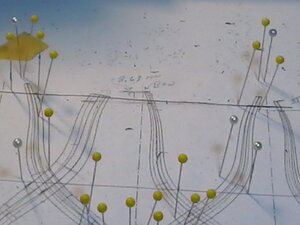
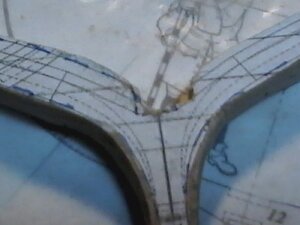


GILLES ON FRAME 32 TO YOUR QUESTION TO THE LINES ON THE PATTERN HAVE NOT SHAPED THAT ONE YET BUT DID SO ON FRAME 2. GOD BLESS STAY SAFE Don
- Joined
- Feb 18, 2019
- Messages
- 717
- Points
- 353

OK fraNo.2 i have taken it to very near completion, leaving a slight bit at tenon cut off and also at the top timber extension just cut one side off, leaving the other one not cut, also proof FRAME No.2 both first layer(BLUE) and 2nd layer(RED) sorry for the pins but as explained many times have to do it that way as i can not stand up very well unsuported so have to due it that wayb regardless as youn can see both layers line up at the joint lines and thye horizantal lines as another point of reference and i still need to now if i have done the top notch corectly need help in getting this right if someone maybe can draw it in the proper way would be GREAT, i will proof frame No.32 tomorrow along with other frames, COMMENTS ALWAYS NEEDED AND APRECIATED
1) Frame 2
I am assuming your question relates to the keelson notch?
If that is so:
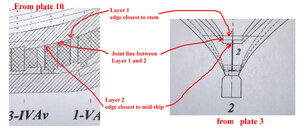
Plate 3 shows you the frame pattern seen from mid ship.
Plate 10 shows you the framing including the keelson. You can see that the frame 2 and 1 are different from the other frames as far as the keelson notches are concerned.
Here are the parts of these 2 plates in regards to frame 2 so that you can visualize the fit with 2 different views.
2) Not sure what you mean about the top-timber extension: this subject was explained long ago. If you have any doubts, refer to plate 4.
3) As for the tenon at the foot of frame 2: see image above where you can clearly see where it is to clarify what you see in the pattern from plate 3.
4) I do believe that you will have issues with the majority of the keelson notches cut into your frames. It seems that very few of them are cut accurately, mostly offset to either sides of the frames center line. I have been talking a lot about some measure of accuracy: the center line of the keel, should match the center line at the foot of the frames and the keelson center line. Short of that, it will not fit: yes you can make it fit by making wide notches but you will end up with severe gaps.
For example: the last photo you posted...
Just my 1 cent worth.
Hope this helps.
G
Last edited:
YES IT HELPS, NO QUESTIONS ON TOP EXTENSION, OR with tenon placing FRAMES No.1 and 2, just showing them that is all,i am going to finishn up the proofing of frames will post JUST FOR SHOWING NO QUESTIONS BUTN IF YOU SEE SOMETHING WRONG JUST LET ME KNOW, waiting for jig to come in so i can start fitting theb frames in, and i may start to do the stern assembly as have all -pieces cut for vquitev some time. GOD BLESS STAY SAFE Don
HI ALL, BEEN AWAY FOR AWHILE, FINALLY MY SON TOOK ME TO FED-X 9 I DID NOT GET OUT OF OR OPEN WINDOW BUT HE GOT THE PRINTS THAT I WAS MISSING TO FINISH UP THE REMAINING 3 FRAMES FOR COMPLETION 9 FRAME NOs 1, 26 and 30 will be finishing them this week hopefully, then decision time do i do the stern while waiting for my jig from KRIS, or just let it rest, many projects on my plate it probally will be almost a year till i am out, taking no chances with this virus i am vunerable greatly so.GOD BLESS STAY SAFE DON
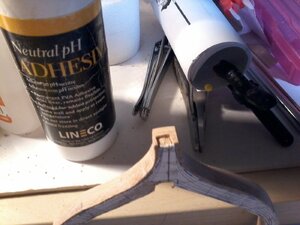
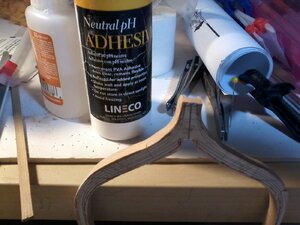
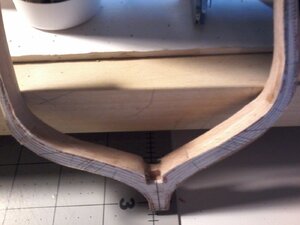
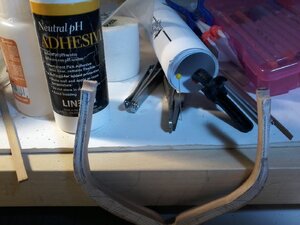
OK, FRAMES COMPLETED MISSING FRAMES NO. 26 AND 30, NO.1 TOMORROW, PICKED FRAME NO 30 TO GET IT COMPLETE INCLUDING THE EXTENDED TIMBER, ( HAD A CHOICE ON THESE TO DO THEM BEFORE THE 2 LAYERS GLUED TOGETHER OR AFTER CHOOSE AFTER THOUGH HARDER TO DO BUT MORE ACCURATE) JUST NEED TO KNOW IF ON THE RIGHT TRACK WITH THESE, JIG WILL BE IN SOON, DOING AS MUCH WORK ON THE FRAMES UNTIL WENSDAY WHEN I WILL KET IT REST FOR A LITTLE BIT, AND START ON THE CANOE LOOKING FORWARD TO THAT ONE BRAVO GILLES, REALLY NICE TO DO SOMETHING DIFFERENT, AS ALWAYS COMMENTS, CRTISIMS WELCOMED, ONLY WAY TO LEARN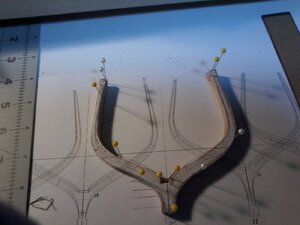
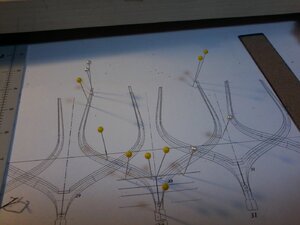



Looks like you have been busy in the workshop Don.
- Joined
- Feb 18, 2019
- Messages
- 717
- Points
- 353

As also mentioned previously be aware of working precise, especially with the notches in the frames for the mounting on the keel. These look to be off the centre line which will result in your frame not to be square on your keel.

Hi Don,
Besides that, the frame look good.
G
OK GUYS THANKS, HELPS GREATLY, AS SAID BEFORE KRIS SHOULD HAVE THE JIG IN THE MAIL THIS COMING WEEK AND I WILL CONTINUE TO PREPARE THE FRAMES FOR THE JIG, AND TAKING A BREAK TO DO THE CANOE GROUP BUILD, LOOKING FORWARD TO THAT. GOD BLESS STAY SAFE YOU AND YOURS. DON
Kurt Konrath
Kurt Konrath
GOOD LOOKING FRAME WORK DON,
KEEP IT UP AND YOU WILL BE READY FOR BUILD UP WHEN THE JIG ARRIVES!
KEEP IT UP AND YOU WILL BE READY FOR BUILD UP WHEN THE JIG ARRIVES!
HI BRIAN, YES AND EVEN MORE SO, I EXPECT TO BE INSIDE FOR ALMOST A YEAR EXCEPT FOR OCCASINAL RIDES, I AM VERY VUNERABLE AGE AND HEALTH SO TO AVOID TO MUCH HAPPY PILLS THIS IS WHAT I AM GOING TO BE DOING IN MY NEW MODEL ROOM HAVE SPACE FOR 4 MODELS AT ONE TIME. GOD BLESS STAY SAFE YOU AND YOURS DON
HI ALL HAVE NOT POSTED ON THE LE ROCHEFORT FOR A WHILE HAVE NOT FOREGOOTEN IT BY ANY MEANS MY JIG FOR THE LE ROCHEFORT AS WELL AS DECORATIONS FOR ARMED LONG BOAT ARE ON THE WAY TO ME FROM KRIS WHO I THANK PROFSULY, HE IS SUPER GREAT SO I AM GETTING READY WITH SOME CONCERNS AND A SLIGHT DRED. GOD BLESS EVERY ONE STAY SAFE ALL DON


