Model Airways Sopwith Camel 1/16 scale [COMPLETED BUILD]

Hi Dean, my comments weren't meant to be a downer on the kit or your choice. Of course you are right about the convenience a kit provides. More, I was indicating another way.

The prices I saw were nearly double what you paid so good for you.

Will the engine be cowled? That will hide a multitude of sins.
Will you be attempting the internal wire bracing, including turn buckles etc?
There is no cowl provided in the kit, however I may CAD one up and print it. ;)
Yes I will add all of the internal wire bracing, including the turnbuckles.
I will most likely make modifications and improvements along the way as I see fit.
 
Last edited:
There is no cowl provided in the kit, however I may CAD one up and print it. ;)
Yes I will add all of the internal wire bracing, including the turn buckles.
I will most likely make modifications and improvements along the way as I see fit.
Dean,
You probably know already but if you’re looking for scale fittings such as turnbuckles, rigging etc. you can’t beat Proctor-Enterprises for scale components.
Several years ago I built one of their Curtis Jenny museum quality kits. Now there was a project :)
 
Dean,
You probably know already but if you’re looking for scale fittings such as turnbuckles, rigging etc. you can’t beat Proctor-Enterprises for scale components.
Several years ago I built one of their Curtis Jenny museum quality kits. Now there was a project :)
Thank you for the advice. The Jenny has a lot of rigging! ;)
 
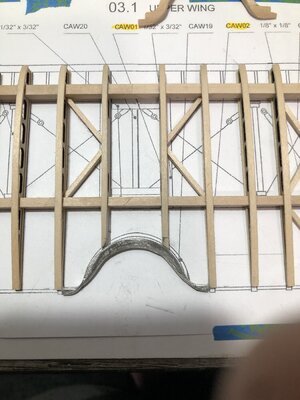
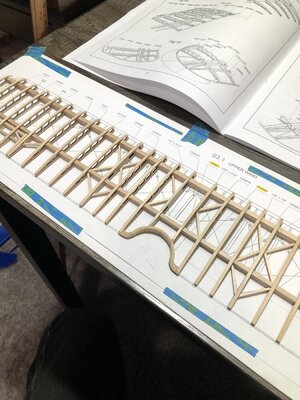
After dealing with the cast piece for the cutaway on the upper wing, I decided it had to go. First of all, the size doesn’t match the provided ribs. So I had to extend the ribs…
22BE6664-619A-4DB4-97FF-FB66DE908E9E.jpeg
This looks horrible and I can’t live with it…even when painted black and straps added across the ribs at the trailing edge, it doesn’t have a smooth transition to the trailing edge. It looks twisted to me.
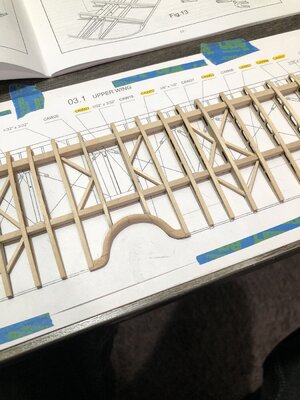
So I scratch built one out of wood. It will still be painted black. But now fits properly and has a nice transition to the trailing edge.
0AF77C5C-3DB9-43C4-A674-4195DDCB7FAD.jpegE8C353E0-CB40-4B27-B1F4-72CAF20731F7.jpegF76174C5-9D1C-4009-AC70-E010649AA875.jpeg
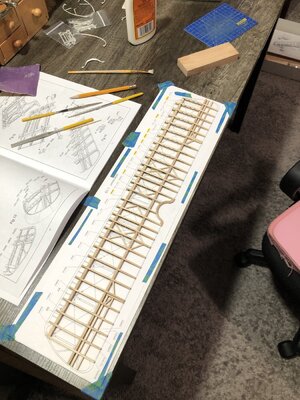
That’s how I spent this evening! Oh well, on to the leading edge and wing tips…but first I have to add more ribs between the main spar and leading edge, and also drill holes for the control line pulleys that mount to the main spar. Can’t drill them with leading edge on. ;)
 
Last edited:
Hi Dean,

It was time that I had intended to make a model of a wooden plane with everything in sight, and seeing your Sopwith I got the desire again!!!
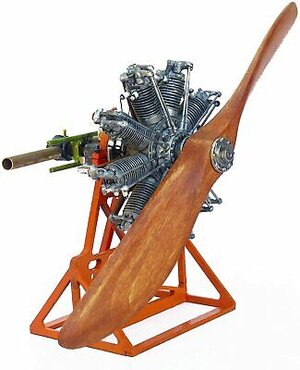
I found it from an Italian ModelExpo Model Airways dealer for € 187 (including shipping) and the interesting thing is that they also have an engine and propeller (Model Airways) for € 50. Do you think it is the same as the kit?

Again, great work Dean!

PS: having seen your BN there was no doubt !!!

s-l400.jpg
 
Hi Dean,

It was time that I had intended to make a model of a wooden plane with everything in sight, and seeing your Sopwith I got the desire again!!!
I found it from an Italian ModelExpo Model Airways dealer for € 187 (including shipping) and the interesting thing is that they also have an engine and propeller (Model Airways) for € 50. Do you think it is the same as the kit?

Again, great work Dean!

PS: having seen your BN there was no doubt !!!

View attachment 291439
Thank you Piero! Welcome to my build log.
Yes, that engine is the same one from the kit.
Congrats on your Airplane purchase! I just love these museum style kits that showcase the airframe and all of the details. ;)
 
Thank you Piero! Welcome to my build log.
Yes, that engine is the same one from the kit.
Congrats on your Airplane purchase! I just love these museum style kits that showcase the airframe and all of the details. ;)
Thanks for replay Dean!
About the propeller, did you buy another one or you modified the same of the kit? Seems to be a new one ...
 
Thanks for replay Dean!
About the propeller, did you buy another one or you modified the same of the kit? Seems to be a new one ...
Originally I made the one in the kit, then I decided to make a different one. So then I just used the same profile as the kit provided propeller and used my own wood. I got the profile by using the leftover lazer cut sheet for the propeller as a template. ;)
 
After dealing with the cast piece for the cutaway on the upper wing, I decided it had to go. First of all, the size doesn’t match the provided ribs. So I had to extend the ribs…
View attachment 291432
This looks horrible and I can’t live with it…even when painted black and straps added across the ribs, it doesn’t have a smooth transition to the trailing edge. It looks twisted to me.
So I scratch built one out of wood. It will still be painted black. But now fits properly and has a nice transition to the trailing edge.
View attachment 291433View attachment 291434View attachment 291435
That’s how I spent this evening! Oh well, on to the leading edge and wing tips…but first I have to add more ribs between the main spar and leading edge, and also drill holes for the control line pulleys that mount to the main spar. Can’t drill them with leading edge on. ;)
A good decision to scratch your own, Dean. Always listen to that little voice in you head! Looking forward to the extra’s you will make.
Regards, Peter
 
After dealing with the cast piece for the cutaway on the upper wing, I decided it had to go. First of all, the size doesn’t match the provided ribs. So I had to extend the ribs…
View attachment 291432
This looks horrible and I can’t live with it…even when painted black and straps added across the ribs, it doesn’t have a smooth transition to the trailing edge. It looks twisted to me.
So I scratch built one out of wood. It will still be painted black. But now fits properly and has a nice transition to the trailing edge.
View attachment 291433View attachment 291434View attachment 291435
That’s how I spent this evening! Oh well, on to the leading edge and wing tips…but first I have to add more ribs between the main spar and leading edge, and also drill holes for the control line pulleys that mount to the main spar. Can’t drill them with leading edge on. ;)
Very nice workaround on the cast metal part Dean!
Now I too am starting to think about acquiring an airplane model, oh boy, so many choices to pick from!!
 
My enthusiasm is increasing, Dean.
I'll be following your progress daily.
A 'bin of doom' would be interesting to see which components don't cut the mustard.
Lol…true! Good idea! I will keep track of that and we will see what all I trash by the time the model is done! ;)
I won’t be using the metal cabane struts, those should be wood. And if the main struts are metal, those need to be made of wood too! I think I can use the wing tips, since they are supposed to be metal, however they are questionable! The compression braces are another thing I need to decide on. They are metal, some say they should be wood, however I have seen them in metal. So…piece by piece we will address what needs changing, or what goes in the “bin of doom”. :p
 
Last edited:
Very nice workaround on the cast metal part Dean!
Now I too am starting to think about acquiring an airplane model, oh boy, so many choices to pick from!!
Thank you Daniel! I have always loved airplanes, so it was just a matter of time before I built one of these museum type kits. When I saw these, I knew eventually I would build one…or more! ;)
 
Back
Top