Thank you Adi, I appreciate it!Hallo Dean, a great Job. It looks very, very good.
-

Win a Free Custom Engraved Brass Coin!!!
As a way to introduce our brass coins to the community, we will raffle off a free coin during the month of August. Follow link ABOVE for instructions for entering.
-

PRE-ORDER SHIPS IN SCALE TODAY!
The beloved Ships in Scale Magazine is back and charting a new course for 2026!
Discover new skills, new techniques, and new inspirations in every issue.
NOTE THAT OUR FIRST ISSUE WILL BE JAN/FEB 2026
- Home
- Forums
- Ships of Scale Build Logs
- Super Detailing Static Models / Other Genres
- Historical Trailways, Guns, Aircraft, and Cars
You are using an out of date browser. It may not display this or other websites correctly.
You should upgrade or use an alternative browser.
You should upgrade or use an alternative browser.
Model Airways Sopwith Camel 1/16 scale [COMPLETED BUILD]
You did a great job bending the Al tubing without crimping it. Bending tubes can be challenging but your finished wing tip looks precision made. Rich (PT-2)Today I have been working on one side… adding the trailing edge and straps, and making a wing tip. Wing tip cast pieces (Britannia metal) didn’t fit well and one was broken. I tried to glue it 3 times, kept breaking. Then I contemplated soldering it together. But decided it was going in the bin!
So I had some nice aluminum tubing that is the right size. So first I bent it to the correct shape…
View attachment 291873
Then I added the trailing edge, and the straps (copper tape) that have to be cut to size…
View attachment 291874
Then I installed the wing tip, and made the struts for it, and the angle brackets. This will be painted black later…
View attachment 291875
Cast piece shown to the right for comparison.
Then I sanding the leading edge and transitioned it into the wing tip…
View attachment 291876
Then I decided to do a little painting and add some bolts to the straps…
View attachment 291877View attachment 291878View attachment 291879
Already thinking ahead to the next step after finishing wing tips and trailing edges. I will have to cut the ailerons loose and sand, then clear coat or add a light stain to the whole assembly! Decisions ahead on stain or clear coat!
After that the ailerons will be put on with hinges, control horns added to them, and then all of the wing compression bars and mounting brackets are added along with the turnbuckles and wire for bracing. So a lot of work ahead to finish this wing.
Then I get to do it again for the lower wing! But it is cut in half and the dihedral is set.
Thank you Rich! It was a little challenging, but I used my bending tool. So the biggest challenge was matching the radii at the appropriate locations.You did a great job bending the Al tubing without crimping it. Bending tubes can be challenging but your finished wing tip looks precision made. Rich (PT-2)
Nice scratch builded parts for the wing, Dean. And the painting is detailing the shape very well.
Regards, Peter
Regards, Peter
Thank you Peter!Nice scratch builded parts for the wing, Dean. And the painting is detailing the shape very well.
Regards, Peter
Once again, it’s more work, and I would have used the provided castings if they were acceptable.
This kit has so much potential, they really should revisit the existing parts and consider new castings. However the small detailed parts that are painted could be resin. That would be better IMO. Anyway, I work with what I have and will change what is not acceptable.
Wow Dean, you execute so well the improvements to the kits you build! That wing is so much better than the kit parts - you really need to make a cowl from spun aluminum and when you perfect it, send me one!  Beautiful modeling man, knew you would nail it!!
Thanks Lou, I appreciate it!Wow Dean, you execute so well the improvements to the kits you build! That wing is so much better than the kit parts - you really need to make a cowl from spun aluminum and when you perfect it, send me one!Beautiful modeling man, knew you would nail it!!
I may model a cowl and print it. Will see when I get that far. Still a long way off! I haven’t even finished one wing…lol
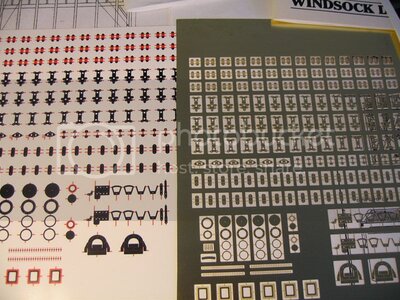
I saw that build, and I believe he paid to have the scaled parts printed. Anyway, I just look at the components as I build, then I decide if they are acceptable or if they need to be changed. So first thing will be parts for the wings. I’m not even thinking fuselage yet…lol.Do you have a 3d printer? There is a guy on Britmodeller that made a bunch of scale fittings, some really nice improvements for the fuselage fittings that terminate the cables and turnbuckles, but he had them made in PE brass, wonder if it could work in plastic?
View attachment 292077
View attachment 292078
But I have no intention of replacing all the parts in this kit, because you can go down the rabbit hole real quick! Then I only end up using the wood frame…lol. I’m trying to use as much of the kit as is feasible without sacrificing quality.
I don’t own a printer, but I have a friend who does. So anything I model in 3D, I can give him export files to print.
I appreciate it Lou, and your input is good!I get it, but the way you are blazing through this build I thought I’d give you a heads up, but you have already been there so I’ll just watch it get better and better….
But I feel like these wings are going to take me a solid month to build! There is so much to them! I still have a lot to do on the top wing alone! And many decisions ahead on both of them.
Once I start building a model, I just take it one step at a time. You know me, I wing it…pun intended!
I have so many ideas, but when I get to a specific part of the build, I concentrate on that area. I test fit kit components, and think of what I would like to see, and if those components are going to work with my vision.
It seems like every time I plan ahead on a build, when I get there I end up doing something different…ha ha!
So now I just concentrate on the task I’m doing. I do think ahead all the time, but I don’t commit to anything. Because I always end up going where the build takes me and put my personal spin on it. That’s when I start making decisions, on the fly…there I go again…lol.
- Joined
- Dec 11, 2021
- Messages
- 287
- Points
- 238

Hi Dean,I appreciate it Lou, and your input is good!
But I feel like these wings are going to take me a solid month to build! There is so much to them! I still have a lot to do on the top wing alone! And many decisions ahead on both of them.
Once I start building a model, I just take it one step at a time. You know me, I wing it…pun intended!
I have so many ideas, but when I get to a specific part of the build, I concentrate on that area. I test fit kit components, and think of what I would like to see, and if those components are going to work with my vision.
It seems like every time I plan ahead on a build, when I get there I end up doing something different…ha ha!
So now I just concentrate on the task I’m doing. I do think ahead all the time, but I don’t commit to anything. Because I always end up going where the build takes me and put my personal spin on it. That’s when I start making decisions, on the fly…there I go again…lol.
from your words it gave me the impression that I was talking !! Same exact view of the build when I start a job, after an accurate historical analysis of the real subject.
I am following you assiduously before my Sopwith arrives, to make those variations that should also suit me.
Now, though, it's time to rest, right?
Hi Piero, I don’t know about rest…lol.Hi Dean,
from your words it gave me the impression that I was talking !! Same exact view of the build when I start a job, after an accurate historical analysis of the real subject.
I am following you assiduously before my Sopwith arrives, to make those variations that should also suit me.
Now, though, it's time to rest, right?
I try to work an hour or two every day.
- Joined
- Dec 11, 2021
- Messages
- 287
- Points
- 238

I can see your "one or two hour per day" .... And I was intended not rest-room but bed-room
Last edited:
Dean, you’ve probably already seen this but I was pretty disappointed with the kit’s turnbuckles and this shows a pretty cool method for scratching some that look a lot better…. Hopefully I’m not bugging you with stuff that I just clogs up your build log. Let me know if I am 
http://www.wwi-models.org/misc/Make_Turnbuckle.jpg
http://www.wwi-models.org/misc/Make_Turnbuckle.jpg
No worries, your input is always welcome! I am always looking at ways to do things. I have not looked at the turnbuckles yet, however I had already envisioned making them, with tubing and eyes, if the need arises. There are so many, I hate the thought of making all of them!Dean, you’ve probably already seen this but I was pretty disappointed with the kit’s turnbuckles and this shows a pretty cool method for scratching some that look a lot better…. Hopefully I’m not bugging you with stuff that I just clogs up your build log. Let me know if I am
http://www.wwi-models.org/misc/Make_Turnbuckle.jpg
I finished the left side wing tip and trailing edges…
Then I painted everything and added the bolt heads to the straps…
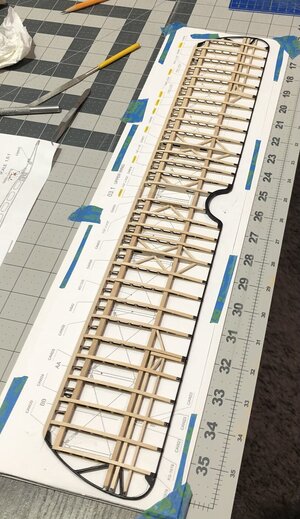
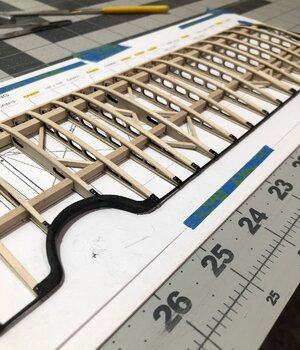
Then it was time to cut the ailerons loose from the frame. Kind of scary, as one slip and you are going to ruin a lot of previous hard work! So with a cutting wheel, I carefully made cuts to free them.
Afterwards I had to sand everything flush.
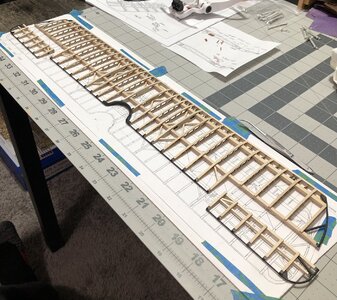
Then it was time to touch up the paint and paint the cut edges.

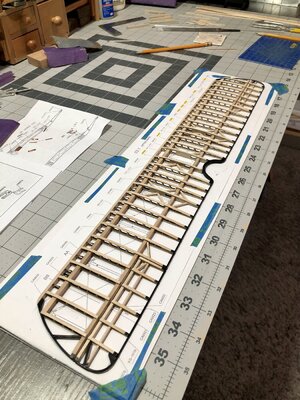
Now is the time to decide if I am using clear or a light stain on the wood. It will take a while to coat all of the surfaces.
After that I will attached the ailerons with hinges, and add the control horns to them.
Then will be compression braces and turnbuckles and tension cables. Only then will the wing be completed!
Then I painted everything and added the bolt heads to the straps…


Then it was time to cut the ailerons loose from the frame. Kind of scary, as one slip and you are going to ruin a lot of previous hard work! So with a cutting wheel, I carefully made cuts to free them.
Afterwards I had to sand everything flush.

Then it was time to touch up the paint and paint the cut edges.


Now is the time to decide if I am using clear or a light stain on the wood. It will take a while to coat all of the surfaces.
After that I will attached the ailerons with hinges, and add the control horns to them.
Then will be compression braces and turnbuckles and tension cables. Only then will the wing be completed!
Last edited:
Excellent, the careful fine detail work is extraordinary. Nicely done.
Jan
Jan
Thank you Jan!Excellent, the careful fine detail work is extraordinary. Nicely done.
Jan


